Search the Community
Showing results for tags 'modular'.
Found 885 results
-
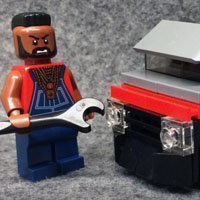
My brother built this two-story building originally for his town hall on a whim. He never liked it and was going to scrap it, until I convinced him to sell it to me for $30 instead. When my brother owned it, it was completely empty and without any real roof like it now has. However, it originally did have a huge 6x6 clock dish where the dollar sign now is. (He kept that part, but I don't mind) I've turned it into a neo-classical style bank, styled after the town hall from the Back to the Future films. The dollar sign piece was reverse-engineered from Brick City Depot pictures of their bank. The building is replacing my 2011-vintage Gringotts bank MOD, based on part of set 10217. (Diagon Alley) The blank rear wall. There are supposed to be 13,800 "dollars" in the vault in 100 dollar notes. As to what's in the chest: it might be the Holy Grail... or Jimmy Hoffa's body. No-body knows! The printed vault door from "the Incredibles" series of sets is in there, but not visible in this shot. I have four teller windows (two on left, two on right) to the model's first floor. There is also a Bank truck coming eventually. Comments, questions, or suggestions welcome!
-
This project is based on the house of Ole Kirk Kristiansen, the founder of the LEGO group that celebrates its 90th anniversary this year. I made several rooms in the house. The workroom contains various details such as his typewriter and various blueprints. If you want you can support this project https://ideas.lego.com/s/p:ddb75bfdf7644f8386cb25501c7a685e
- 6 replies
-
- building
- 90th anniversary
- (and 9 more)
-
Hey guys, Here's the third skyscraper in Wasabi District: Corporate Plaza! At just over 3 feet tall and over 5000 pieces, this 10-storey building is the first office skyscraper in Wasabi District! Yes, it's smaller than my previous buildings, but I finished it in 3 months, a record time for me finishing anything larger than a car! Granted, it's also a pretty basic design, one expected of modern, run-of-the-mill office skyscrapers. Interior shots should be coming up soon. Please, let me know what you guys think! In the meantime, you know what to do if you want to see more pics, check My flickr account for more shots. Check my Instagram account for more WIP pics of the skyscraper, as well as the general WIP status of Wasabi District. Thanks for looking!
- 22 replies
-
- moc
- skyscraper
-
(and 7 more)
Tagged with:
-
The Magnolias on 10th --- The newest luxury development at Wasabi District! Some facts: -Over 10,000 pieces (I stopped counting at 10k) -6 32x32 baseplates -12 modules, including roofs. 9 out of 12 modules fully detailed (interior) -3 Stores: Five Guys, Godiva, 7-Eleven -The most difficult Wasabi District project ever! Check out the rest of my Flickr account for more pics! and follow @wooootles on Instagram to find some WIP/under construction pics! Thanks for checking it out!
- 24 replies
-
Hi folks! It would be very nice and source of inspirational for some of us, I think, to have here collected all the MOCs and attempts of modularization of standard sets. What do you think about?
-

[MOC] Ionos Sports Sedan (Free Instructions)
Thirdwigg posted a topic in LEGO Technic, Mindstorms, Model Team and Scale Modeling
Finished MOC at rebrickable.com for both AWD and RWD. My employment can often be intense during the fall, and this past fall was no exception. After an intense period, I turned to LEGO to rest well over the holidays. I wanted to start a comprehensive project during this time to let my mind wander down a creative outlet. I seem to cycle through tractors, cars, and Unimogs, so this time I was ready to try another car. I am a proponent of the sports sedan, in life and in builds, so that was an easy decision. It has been some time since I have built a 1:10 car, and since then the new 42110 wheels are now available. This would be a center feature of the build to see if I could take advantage of the new offset in both suspension and steering. I hope the blue sports sedan will look somewhat sporty, but not like the current BMW faux sporty. When I build I always set the dimensions first, based on the wanted features. The car will be 50-52 studs long with a 33 stud wheelbase. Body width is 23 studs, with a fender width of 25 at the front and 27 studs at the rear. "System Builds" have become a recent theme of my builds in that a center build can easily accommodate changes or additions easily. I wanted this to be the central theme of the sedan; more than a modular build the system will allow for flexibility and interchangeability. Thus, there are two categories of features to the sedan. System Modules Transmission/Rear Suspension Front Suspension/Steering Engines Floorpan Unibody Seats Doors/Hood/Trunk Features (Options) Independent Suspension Steering: HOG/Wheel Working Fake Motor (V8, I6, F6, Hybrid) Working Transmission (4S Manual, 4S Sequential) (RWD/AWD) Removable Body Seating for Four Opening Hood, Trunk, Doors After setting some hard points, I had a general idea. I had hoped that I could have a front suspension module and a rear suspension module, but already at the above stage, it was becoming clear that separating the transmission from the rear suspension would result in too many structural compromises. Above you can see the general idea for the front suspension "bathtub" that will connect to the rear suspension/transmission module. The engine will drop in, and the lock in between the two modules. The HOG is placed above the dashboard with steering controls traveling under the engine. This bathtub will hold a V-8, an I-4, and an I-6. I very much want to have the I-6 engine be part of the final build, but it is causing a lot of problems. It's just soooooo long. In fact it and the supporting structure come within 2 studs of the front of the car. I may have to go all Audi, and change it to a I-5 which may be just the right amount of weird. Above you can see, generally, how it will come together. This version includes the sequential transmission module, and the AWD front module. The AWD module is the hybrid version. This "bathtub" is locked in that the engine is chosen for you: you get the Flat 6 engine with two fake electric motors, one for each side of the front axle, that function as an electric assist. More is coming... Next I'll work on the structural floorpan, and a unibody that will drop on to all modules and give additional structural support. My builds are taking too long these days, so I am going to put a due day of May 22, 2021 for this project. Maybe that will incentivize it's timely completion. -
1920s Art Deco modular "Ironwood Union Depot" - train station real world MOC
Murdoch17 posted a topic in LEGO Train Tech
This modular station was inspired by a long since expired Cuusso / Ideas project, (not mine), and set 2150 Train Station from 1996 while the clock tower is inspired by Big Bentley Bust-Out (from Cars 2 set 8639) from 2011. I added a removable six track long platform and put a luggage ramp from the street side for use by the wheelchair pieces LEGO recently made. By the way: the logo right below the clock is the official LEGO trains logo built in bricks, while the words in the center (just between the middle pillars) reads "Ironwood Union Depot" in printed 1 x 1 tiles. The street side of the station has been extended towards the edge of the base-plate, allowing for a more room (and more details!) inside the building. The year of the stations completion, 1928, is right above the main entryway. The lower floor has the central ticket desk, plus pizza restaurant (complete with opening oven!) on the right side with seating available on the left wing. These wings also allow for access to the platform under the twin canopies. The second floor has the switching control room and station managers office which floats inside the exterior walls on some tile-topped pillars. This assembly is barely connected to the build by two studs. (NOTE: No stairs to the upper floor were made because that's how the official CITY sets are, so I didn't include any as I was going for an official LEGO set feel.) This a closeup of the four-sided clock tower and brick-built LEGO Trains logo. The modular station features two platform sections, two lower roof sections, one upper roof section, and the removable second floor on top of a cafe (with seating) on the lower level. The station platforms fit via Technic pins while the other sections attach via a few studs. The station building shown above has been built since 2018. I've been trying to add a good looking canopy and passenger stairs to it since about late 2019, but gave up and added one that is solid in roof panels to my Disney-lookalike instead in early-to-mid 2021. Then, in early October I saw 76183 (Riddler face off from the new "The Batman" line) and knew I had found a solution to the pedestrian staircase between both platforms. I hashed out a better, more see-through version of the canopy on the MOD Disney station which should work... it has a half stud gap right now, but it most likely is an LDD problem instead of a design one. (I hope!) The stairs are a color changed MOD of the ones in the set with more space between the tracks and a bit more height in the middle section by way of bumping the whole structure up a brick or two. There is eleven bricks of clearance from the railhead to the bottom part of the arches, meaning the twin staircase's fit most of my trains through with room to spare. However, the pantograph's on electric loco's and a caboose cupola for a freight train won't fit under the bridges. This view also showcases the neat little hanging lights used under the canopy area itself. The bridges are missing eight black candlestick parts for the lights on the part of the walkway, where the stairs have their landings. I'll also have to cut the two 48 x 48's down by eight studs on one side per baseplate to better fit the footprint of the canopy. EDIT 11/9/21: This canopy project would would cost around three hundred US dollars (or more) if I didn't have 850 of the more expensive parts already found from my own collection and with serious help from my brother. Sadly, the Disney Station MOD's canopy has been sacrificed to make this project work as well. (Using those parts knocked it down to about $160 for what you see above.) Thoughts on new development or the original station? Comments, questions and complaints are always welcome! -
Hi everyone! I've been a long time lurker here, and I am very proud to share my first ever MOC! This is a modular building inspired by Mexican and Italian architecture. I was originally inspired by the architecture from my home town in Mexico and I wanted to represent that here. Eventually, I mixed in a bit of Italian elements in the facade as well. I initially started with the water fountains (hence the name) incorporating the shell pieces. Next I designed the duomo using the hot air balloon panels which, thankfully, exist in dark orange. The color scheme is a very traditional Mexican palette. My absolute favourite part of this build, however, is the extremely rare Technic 12-tooth gear in green which is the perfect piece for a cactus. That was also the most expensive element in this model! So without further ado... As this is my first full MOC, I am completely open to suggestions. I can also answer any questions about the build. I am currently working on the interior, I have not yet decided on whether I want to make this into a cathedral or a library. I will update this when I have completed the interior. Cheers!
-
Hello Everyone. I present you my first ever modular building... It is my version of a town house with inner parking space. I got the inspiration of the Creator 3 in 1 - 4954 - Town House. It is a really simple build, without any extreme building techniques and a small range of parts. I tried to use only existing colors for the parts. I am not very pleased with the back of the building, where the door to the garden is, but I didn't give it much thought, since it is on the back of the building. The house went through so many change for this couple of days, but this is the final product. You can see more images in the link below Darin Doychev | Flickr I would like to hear your thoughts. Thank you.
-

[MOC] The LEGO Houses of Amsterdam (with free building instructions)
paupadros posted a topic in LEGO Town
The LEGO Houses of Amsterdam I'm doing something a bit different this time! =================================================================================== Instructions: Delft Blue Shop Amsterdam Internet Café Flower Shop Prinsengracht 2 Spuistraat 334 Prinsengracht 211 Singel 2 Herengracht 152 =================================================================================== 1. Delft Blue Shop 2. Amsterdam Internet Café 3. Flower Shop 4. Prinsengracht 2 5. Spuistraat 334 6. Prinsengracht 211 7. Singel 2 8. Herengracht 152 -
Hi! a mini part of a big city...New York..now on LEGO Ideas LEGO IDEAS - New York Corner
-
Hi, the Mediterranean Villa is now on LEGO Ideas, hope you like it and vote for it!! thanks!! LEGO IDEAS - Mediterranean Villa
- 3 replies
-
- lego ideas
- modular
-
(and 3 more)
Tagged with:
-
Here is a modular Bike shop I've added to my modular collection! Started it off as a 32x32 building but felt the style I had worked better as a 16x16. First floor with wall of bikes. There's a small studio apartment upstairs. With the Pet Shop and my Toy Store modular.
-
LDD MOC: Modular Railroad Tunnels - now with re-uploaded pictures as of 2021
Murdoch17 posted a topic in LEGO Train Tech
The single track tunnel was made by my father back in 2000. I updated / extended it, made a two-track version, took off the baseplates, and put the pins in. Here are the pictures: The two tunnels. These are the basics, and you can modify them however you want, such as hiding them under green plates or BURPs & LURPs. Double track, with the connecting pins. Single track, also with some pins. NOTE: Connecting the tunnels will only work in this way or some variation of this type. For example, here is a picture of what can be done. Notice the one track section in front of the tunnels? (In the case of single to double tunnels , four should be used.) That is to make sure if your engine overhangs, it will swing clear. EDITED 9/5/21: added photos back to the post. I finally found them on my Flickr from 2012.. The file, however, is lost to time.- 15 replies
-
I was 8 years old when I got my first Lego Classic Space set LL918. I remember I spent hours with catalogs looking at LL924 and the Galaxy Explorer LL928. When I got LL928 from my grandma I was thrilled and couldn't let go. I even took it with me on holidays. Galaxy Explorer Dropship by Giorgio Chronas, auf Flickr A few years later I saw the Galaxy Commander in the store. At the time, due to my father's job, I was living in an a developing country in Africa, where Legos were very rare. I was gazing at the store window, nearly paralyzed and probably with a wide open mouth. I had just past my birthday and for Christmas time I would have to wait a long time. As quickly as I could I ran back home broke that piggy bank into pieces, took everything I had and ran back to the store. I still remember the feelings I had when building this spaceship and looking at every new part as if it were yesterday. Galaxy Commander Dropship_1 by Giorgio Chronas, auf Flickr Now, decades later, being an AFOL I still love space topics, specially neo classic space models from other Afols. A few years ago I remember seeing Wolf Leews modernized version of LL928 (and 924 and 918) in LegoIdeas and having exactly the same feelings. I tried to push it in LegoIdeas but unfortunately it did not make it to the threshold. Wolf Leews, if you see this post, thanks for sharing the instructions. I have your models in my showcase ever since. The idea of an own classic space model did not let go of me. It took me again years of thinking how to approach this topic. My problem was I wanted everything. I wanted to have a command centre, several spaceships, some robots some cool versatile and functional vehicles, a garage where the vehicles would go for repair, a habitat, a repair bay for the robots. And I wanted the antagonists as well: Blacktrons! And I wanted everybody to build up his own space station. Uff! Galaxy Explorer Commander Dropship I knew this was impossible. Then my Lego Pueblo came to mind. It was a 4in1 set proposal at LegoIdeas that you could buy multiple times and stack to each other building up your own Pueblo village. My Lego Pueblo did not make it to the threshold but if I did such a concept once, maybe I could do it again. Many months of thinking and planning what to do, which bricks to use, color scheme, how to combine classic space with Blacktron, drawing and doing research followed. Then I started building. The target was a 3in1 space creator set with three different scenarios that you could combine forming a big space centre. Each scenario should have its own theme and its own playability concept. At the same time some models of one scenario should connect to models of other scenarios, so at the end you have one big unity. I also needed a story. As I love sci-fi and astronomy this part was the easiest one for me. What came out was space station "Antares", a 3in1 space creator set, where New Classic Space searches for Legonit ressources and Blacktrons trying to steal it from them. One alternate build is the Mining Outpost, the other one is the Bot Repair Bay and one is the Galaxy Dropship. 9 Antares Classic Space3x by Giorgio Chronas, auf Flickr With the Galaxy Dropship I combined the features of the Galaxy Explorer and the Galaxy Commander and built a mashup that had its own look. Like the Galaxy Commander the dropship can be split into a space fighter and the cargo bay. Like the Commander it may hold a space lab. But it also may hold a space buggy like the Galaxy Explorer. Since the space buggy is from scenario Mining Outpost, I decided it may also hold the truck from its own scenario. Then I continued. The Galaxy Dropship may hold the trailer the fuel or plasma tanks or even a small space fighter which actually is the cockpit of the robot of scenario Bot Repair Bay. The set seems to be huge, too big, but actually it is only big when the set is acquired multiple times. As a single set it has less bricks than the biggest official LegoIdeas set. I hope you like it and support it at LegoIdeas. It is another attempt to bring back some space without StarWars. 5 Antares Galaxy Dropship by Giorgio Chronas, auf Flickr 6 Galaxy Dropship Hangar by Giorgio Chronas, auf Flickr Guys I do not want to bore you too much. Please take a look for yourself at LegoIdeas. Check out the three different video animations (search for "Legocionado" at YouTube) and take a look at the pics of the updates at LegoIdeas (I have made some animated gifs explaining the concept). Here are the direct links: To LegoIdeas "Antares": https://ideas.lego.com/projects/447bf8bd-a7e8-4c0d-9918-59c668b23018 2 Antares Classic Space by Giorgio Chronas, auf Flickr To YouTube animated video for the "Galaxy Dropship":
- 4 replies
-
- galaxy explorer
- galaxy commander
- (and 24 more)
-
1920's Village Post Office (76388 style MOD) - with Ford model AA mail delivery truck
Murdoch17 posted a topic in LEGO Town
I've been staring at Hogsmeade Village Visit (set 76388) for a while now (ever since pictures leaked!), trying to figure out how to fit it into my vintage city... I think I may have figured out how to do so now with the added rear halves and removed Winter snow parts. This model's front half was originally from the Honeydukes sweet shop portion of Hogsmeade Village Visit. I added a look-alike back to it, changed the color to red, and turned it into a small post office with inside details on both floors. I also added a truck I built in real life way back in 2011 - modeled after the official Winter Village Post Office truck from set 10222 - which is now back to being used for a postal truck. (I have determined said truck is styled like a Ford Model AA (wiki link) just based on the front end alone.) Yes, the model is missing nine parts not in LDD. This includes four each of parts 48208 and 48205, and one of 35563, all in black for the roof. Inside features are as such: - Ground floor has the public area, with pay counter and several boxes / crates waiting to be shipped. - Upstairs (even though there is no stairs!) is the sorting area with plenty of mail being gone through to be delivered to it's destination. Everyone may have heard of the Ford Model T and maybe it's successor, the Model A. But here is something you may not know: The Model T and later Model A both had trucks made from the basic principles of those cars. They were called the Model TT & Model AA, which is where this Lego model comes in, as it's based off a Ford Model AA truck. (or at least that's what I think it it is - the model was originally from set 10222, Winter Village Post Office.) The rear of the truck has two tail-lights and a license plate. MODEL NOTES: The building can only open 90 degrees due to interference from the roof and building footprint. (The post office will be built shortly after the Polar Express house, and then the heavily-modified 76388 tavern early next year.) Thoughts? -
Hi everyone. I'm new here, and I really, really wanted to show you my latest MOC... the legendary Scrooge McDuck's Moneybin. The project is also available on Lego Ideas (link at the end of the post), but first let me give you a tour, so you can check with your eyes if it's worth your vote . Be sure to scrool the pictures till the very bottom. I promise you won't regret it. LEGO SCROOGE MCDUCK'S MONEYBIN by Matteo Sperati, on Flickr This is the front, with the iconic huge dollar sign. The armored door is the first element of playability: it can be opened and closed pulling the two bars attacched at the side of each half. Also, it is not very clear from the picture, but the small stairway has two lion heads at the bottom, to give the entrance an imposing and intimidating touch As you can see is quite a tall building (33,3 cm, or if you prefer 34 bricks, from the baseplate to the top of the dome). On the roof we have the famous dome, that here I adapted into an helicopter landing pad. I couldn't not include the cannon to shoot at the evil Beagle Boys and a telescope to read the newspapers for free. Ok, now the interior. I wanted this set to be fun for adults to build and extremely fun for kids to play with, so it had to be easy to access every feature. The easiest way was to put the front wall on a separeted baseplate, so all you have to do to 'get in' is to push it away. As for the floors, they can be easily removed thanks to the trail design: they slide in the groove bricks inside the external walls, so it's easy to get into action And now the ground floor. I designed to be the most intimidating possible. Imagine: you are a business man and you have a meeting with the richest and toughest duck in the world. As soon as you enter, you don't have the time to enjoy the nice floor with dollar mosaic because you notice that a security camera is pointing at you. The frame with "TIME IS MONEY" also is not very welcoming, you wait your turn on the green sofa... and then you realize that is placed right in front of a giant anti theft protection cannon. As if it this wasn't enough, you also have a Scrooge McDuck's painting that seems look at you. AND IT IS, because that wall hides a secret passage, with an hole to spy from behind the painting... but what's so important that Scrooge wants to hide? Treasures, of course. What else do you expect from the richest and most adventurous duck in the world? Notice also the black lever to turn back the secret passage ;) Here you can enjoy the anti-theft protecion cannon in action... "Say hello to my little friend" And now the first floor, with the private rooms of Scrooge. On the corridor, a picture of him from when he was to work as gold prospector in Klondike, but most of all, the frame that says "There is no such a thing as talent, only inspiration and ambition". But let's see better the others room... Have you ever tried sleeping on a canopy bed made of 100 dollar bills? Trust Scrooge, you will sleep like a baby Sleep well, but get up early: Scrooge knows it well, he even has a frame in front of his bed to remember it. On the bedside table, a nice family picture from great comic writer Don Rosa. SALON 1 by Matteo Sperati, on Flickr And now the salon, or is it better to call it "Worry Room" ? Why do you think that carpet is threadbare that way? Scrooge's nervous walking, of course. What a shame, it was only 60 years old . We also have a library, a pendulum clock and a marble bust with laurel leaves (I can easily Scrooge get inspired by great leaders from the past). Here is Scrooge, literally showering in money, happy as a baby. He even has the shower curtain made of dollars And finally the second floor, with his big office. This is definitely my favorite floor, I made sure to put EVERY SINGLE DETAIL that I remember from the comics: EVERY SINGLE ONE. There is the giant vault door, the display case with his beloved number 1 dime, the earth globe, the weelbarrow full of coins, the pyramid of coins with Donald polishing them, the money bags, the graphic wih his profits skyrocketing, the gun on the wall, the desk with multiple phones and an old crank calculator... but wait, what's that lever under his desk? This is my favorite feature. I didn't like the classic way to make the trapdoors work, with the stick to be removed and then manually put back. No, I wanted it to feel real, so I designed the mechanism in a way that opens the trapdoor when you push the lever forward, and automatically closes it when you pull it back. What do you think about? Please let me know Ok... now the moment you were all waiting for...what it would be the MoneyBin without the giant money pool with his 3 cubic acres of cash? Let me explain how it works: sure, you could open the vault hatch, but to access the money pool, we actually have to go to the back. The back wall can be removed (it's easy to pull thanks to four bricks that stick out). With the back wall removed, we can admire the money pool thanks to the 9 big transparent panels . We have the trampoline, the giant meter to measure the level of cash... and not a single coin. why? Maybe the Beagle Boys stole it all? No, it's empty because you are the one going to fill the MoneyBin. The MoneyBin is in fact a giant piggy bank, that you can fill through the apposite coin slot on the back of the roof. Once filled, this is the final result AND NOW THE IMPORTANT PART... Guys, this project is available on Lego Ideas at the following link --> https://ideas.lego.com/projects/a633c276-5b5b-40fe-badd-217263dc37a8? Probably you all know what Lego Ideas is, but in case you don't, here is how it works: 1) users (in this case me) upload their creations 2) other users vote them clicking the yellow button support (you need to have a Lego account, it's free to create one) 3) When a project reaches 10.000 supporters, Lego's experts will take it in exham to evaluate if produce it as an official Lego Set. Very simple. Thanks to all the ones who will help this project become real
-
1870's modular Wild West railroad depot - 7594-style MOC with free LDD file
Murdoch17 posted a topic in LEGO Train Tech
This 1870's-style modular Western railroad station was originally inspired by set the Sheriff's office in 7594 (Woody's Roundup!) which I have re-named "Gold City", after set 6765 (Gold City Junction) from the Wild West theme of the mid-1990's. If this model looks familiar, your are not suffering from Deja-Vu... this model was designed and built in early 2016 for use as my original Fort Legoredo passenger station, but in a different color scheme more reminiscent of the Toy Story set that inspired it. It lasted in it's as built condition until mid-2018 when it was dismantled. (Being built of mostly reddish-brown at that time, it sadly shattered upon attempting to take it apart. ) In June 2021, I found the old LDD file and began working on it again, adding new windows, revising the roof sections and changing the overall color scheme. The street side of the station. There is a freight ramp at either end of the platform for hauling heavy items into the station proper. The main floor features the twin waiting rooms and ticket office, with a staircase to the employee's-only top floor. Upstairs is the stationmaster's office, complete with Telegraph key, opening safe, and scale for measuring silver nuggets weight / worth. Outside on this floor are two identical station signs (one on the front and on on back) along with the standard twin station clocks. The modularity of the station means the roof, second floor, main floor, and the two platform extensions are removable from each other as shown. NOTES: Here is the original model in 2016 as seen in the only photo series ever taken of it. This is not one of the best of that series, but it IS all in the shot! Also, I don't think it's going to get the newer one built in real life anytime soon... though it is 100% buildable according to BrickLink. (too many projects to build already, and it would be my fourth RR station at this current time.) The free LDD file can be downloaded from Bricksafe here.-
- woodys roundup
- modular
- (and 10 more)
-
I wanted to make a small modular filler, to nicely fit between buildings. As i was tied with time and pieces available, the result is a bit of fusion from different cultures. I was inspired by pagodas, japanese gardens and eastern culture. for minifigures it start with a small stairways, with a flowers around them, i found out that LEGO flowers are too big, and when i will rework it, i most likely make there some smaller plants. When citizens of my LEGO city, will pass the stairs, they will find two paths, golden and silver ones for them to follow. Gold one is leading to small covered rotating prayer wheel. Silver road will lead to people to calm near the small buddha like statue and mini lake with fish. If you look carefully, you can see a couple of fish swimming in the lake, small tree is standing over the lake, and lake is enclosed in stone border. You can see the small guide of this park from Benny: And some more photos of the build: There are many ways for reworking it, make smaller plants on the forward part, add some trees at the back Replace golden statues on border with just bricks of desired colour. But in generally i pretty like the first try on adding something inspired by eastern culture in my city. It is very slightly inspired but anyway, for me it was pretty fun build.
-
Dear all, here follows my latest MOC. Lately I do not have so much time to dedicate to Lego, so that I guess this would be the only moc for this year. There's a new baby in the family: Carlo. Therefore I had to dedicate this modular to him, of course! It's Carlo Art Musee for Rava Town. The building is 32x32 with three floors. It's an old building reminescent of some arabesque style. Lately converted to an art museum/gallery. The facade is based on symmetrical elements on the tewo sides, with columns and arches all around to give armony to the structure. On the top there'a small and elegant tower and decoration in marble all around the top. On the first floor we find the ticket office on the left and the entrance to the museum on the right. Below the arch there's a beautiful gate leading to the internal courtyard. On the back there is a small bar for the visitors of the muesum for some relax and a nice colonnade with some interesting pictures. The most beautiful pictures are in the main gallery at the firs floor. Everybody is free to make photos, no problem! Here some shots with the details and the inside of the floors. This painter above is looking for some inspiration from ancient mastery. The balcony at the first floor is blooming all around. Other details. Hope you like it! See you nex year! Flickr photos: https://www.flickr.com/photos/132864555@N03/
-
Hello! I'm opening a new topic. I'm slowly running out of ideas for my microcity. Now a new direction - is the modular micro castle. The base is still the same - 16x16 plate. Thanks for attention! I will be glad to receive your comments :) Fortress wall with a main gate, a rising bridge and a traditional moat :)
-
Hi everyone I'm happy to share my second MOC which I have been working on over the last 5 months. I build the MOC with BrickLink Studio 2.0 and used the new Eyesight Render for my images. The MoMA - Museum of Modern Art is a MOC modular building inspired by modern architecture. The MOC has several highlights like a staircase fully made of glass bricks or a full-functional elevator on the backside. The MOC includes many of advanced building techniques and has a high level of details on each floor. It’s built on two standard 32 x 32 base plate and includes 18 minifigures, 28 paintings and 8 sculptures. The dimensions of building are 10.2x20.6x18.2 inches (width x length x height) or 26 x 52.3x46.2 cm. Level 1 - Entrance – Museum Store – Art Gallery The first floor contains the main entrance of the museum with a cash desk and a small design store for gifts and souvenir. The art gallery on the ground floor contains 6 paintings and 3 sculptures. Minifigures Older couple interested in modern art Museum employee operates the cash desk Store seller serves a customer Art-hipster buys a souvenir Security guard enjoying his coffee break Art Student looks at the sculpture Tourist interested in art Level 2 – Restroom – Art Gallery On the second floor there is a toilet for visitors and a gallery with a view into the ground floor. The art gallery on the second floor contains 11 paintings and 1 sculpture. Minifigures Artist looking for new inspiration Art interested friends couple Level 3 – Security Control Room – Art Gallery – Art Terrace On the third floor there is a security control room to monitor the valuable paintings and sculptures. A highlight in the art gallery in this floor is the large flower sculpture. A small outdoor area offers further space for abstract sculptures. The art gallery on the second floor contains 5 paintings and 3 sculptures. Minifigures Security guard what happens in the museum Father inspires his daughter for art Art lecturer during his lunch break Level 4 – Viewing platform – Art Café On the fourth floor there is a small Viewing platform on the top of the building. In the cozy art café, visitors can enjoy a piece of cake and coffee while enjoying the view through the large panorama window. Minifigures Barista conjures a work of art from every coffee. Visitor enjoys her coffee after an exciting museum visit Visitor treats herself to a cool drink and a slice of pizza Thanks very much for reading and I hope you like my second MOC. There are more pictures on Bricksafe and feel free to support my MOC on Rebrickable and let me know what you think about. At the moment I am building my MOC with real Lego bricks. As soon as possible I will post any photos of the real lego building.
-
Emmet's modular suburban 1950's modular house with vintage Plymouth Fury
Murdoch17 posted a topic in LEGO Town
Following the events of The LEGO Movie 2, Emmet Brickowski got to work on building Lucy and himself their dreamhouse again. He made it a bit bigger, a little better, and a lot stronger... just in case of any future Duplo attacks. It also features an attic for extra storage space, on top of the already-new second story. It is a modular style building, with removable floors and connection pins. The furniture (and house colors) were partially inspired by set 70831: Emmet's Dream House/Rescue Rocket, and a few of the official modular buildings. The car was modeled after the 1957 Plymouth Fury, made famous by the Stephen King book "Christine". (It's also a 1983 horror movie of the same name.) I took the original model of the Christine car made by user @hachiroku, which I would link to but can't seem to find anymore... The rear of the house has the entry point to the Duplo Fallout shelter. Why a fallout shelter? Well, the house is from the late 1950's after all... plus, the Duplo creatures are bit rougher in their attitudes and might go about doing something drastic if they don't get their way. Upstairs is the only bedroom, which is plenty big enough for Lucy & Emmett with their respective pictures on the wall above the bed. (They are stickers, sadly) Downstairs is the living and dining rooms, plus the kitchen. It also has the connection pins to hook into the modular building standard. I don't have any real world pictures of the vehicle (yet), but it's been built in real life for some years now... I just have to photograph it. Instead, here are the screenshots I took of the model in 2017 below: The car was modeled after a certain red '57 Plymouth Fury. I made the car black instead of red and took off the parts which I thought would be unstable. This meant taking off the rear wheel covers, revising the front bumper, adding different wheels and a few other small things. The rear of the car features a very ingenious set of taillights. Kudos to Hachiroku for this simple, elegant design! I've already started parts finding for the house part of this project (and I've made quite a dent in the price), so keep your eyes peeled for more pictures coming soon! (Also, I know the parts are kind of dusty, they've been sitting on my desk a while.) As usual, thoughts, complaints, comments and questions always welcome!- 1 reply
-
- lucy wyldstyle
- suburbia
- (and 13 more)
-
New building for Pick a Brick City. I think it looks like a fancy store. We got the new curved window piece in LUG Bulk, and that was the seed part for this build!

