Search the Community
Showing results for tags 'lights'.
Found 45 results
-
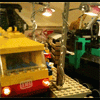
Merry Christmas to all of you! Enjoy the Holidays with the follwing lightshow of my Lego City! 🎅
-
Finally, the 2022 LEGO 10300 Back to the Future Time Machine the DeLorean - motorized with powered up ★ Building Instructions on Rebrickable (klick) ★ Features remote controlled motorization - fast driving, 40° steering angle - No scratching gears or rubbing tires Cockpit untouched not flying, but you can still modify it for Back to the future I, II and III version easy to reach Battery box for charging and switching on Off Battery box, Motors and Cable well hidden to not change the looks LED light kit fits in (discount code included) will add Instructions to make your own adapter to power the light kit from the buwizz instead of a seperate battery polygons very close to the movie (not flat as LEGO did it) Multi language instructions: ►english ►deutsch ►italiano ►française ►español ►čeština ►русский The Partfinder: An Inventory of left over parts in all bags to find the without scrubbing through all bags while buildingfor building from scratch Buwizz Profile - my programming for the buwizz included. ★ Details 40° of steering angle with virtual pivot point to not rub against that narrow frame Driven by upgeared large motor No Batteries in the interior, it is still there. Hood is still opening. switch the car on and off and charge from below I added a fix for the gull wing doors to stay up. Also I took the liberty to change the colors of some red/orange/tan bricks that you could see when opening the doors. I will put the bricks needed into the spare parts of the inventory. No instructions for the lights included, but they come with the Light kit. AND: I bought all my light set from Game of Bricks. And (after talking to them) I can give you a discount for a light kit for any of my motorizations. The code is included in the downloads.
-
I had a whole stack of broken 12v light bricks where the bulb had gone. In particular they don't last that long when set in lamp posts. Sick of buying more so needed a way of replacing the bulb with a longer lasting LED. The first difficultly was finding the right LED with a built in resistor so they can run straight off the 12v power supply. I hadn't found 3mm white/clear LEDs before, just coloured ones, but found a supplier here for what I needed. These should also work fine for 9v. Then the other tricky bit was to open up the light brick without breaking it. This wasn't as difficult as I first thought, so here is the guide - no soldering and no glue! The tools used (almost common household items!) excluding the light brick and LED are : 1. A micro-screwdriver. 2. A bent curtain hook. 3. Some sharp nail scissors. Step 1. Using the screwdriver scrape off the plastic tab that helps hold into place the inner part of the light brick : Step 2. Using the holes for the plug as an anchor lever out the inner part of the light brick with the sharp end of the bent curtain hook until you can get under it : Step 3. If the inner part is still not loose rotate the other end of the curtain hook in the space made at the bottom : Step 4. Take out the inner part : Step 5. Use the micro srewdriver to remove the old bulb and contacts until the inner part is clear : Step 6. Throw away the old bulb and wiring and Insert the LED : Step 7. Bend the LED wires around the light brick making sure the LED is centred : Step 8. With the screwdriver continue to bend the LED wires into the plug contact holes : Step 9. Re-insert the metal contacts. This may take some force, but it will be this additional friction which means the removal of the plastic tab earlier doesn't matter : Step 10. Trim off the excess LED wires with the scissors : Step 11. Re-join the central part of the light brick with the cover (remember which way is up!) : Complete! Remember as it's an LED it won't work plugged in either way to the power supply, but that doesn't bother me in the slightest as you just turn the plug around / swap the pins if it doesn't work For train lights where the power will be reversed when you reverse the train I can recommend Janco's light bricks which are superb
-
Hi, I have created a little demo reel about what has happened in the past 5 years in my illuminated Lego city and on my channel in general. I hope you will enjoy it :)
-
Hi everyone, My latest build has finally had its first public appearance - Octan Raceway - Top Fuel edition.. I built this last year to be shown at Brisbricks Chandler Show - but due to COVID it was cancelled the day before the event happened. So it sat in plastic tubs until this weekend just gone when it had its first public appearance. Its 7 baseplates long by 3 baseplates deep sitting on 1 table. I modified a version of the Speed Champions Top Fuel car to have a cage (more popular here in Australia then the dome lid) and also added flashing lights and flames to the cars. (There's a video on TikTok if you want to see it all flashing - search Octan Raceway or StewBricks) I incorporated an iPad as a video screen to show what Top Fuel is for the kids and it was running loops of the 2019 and 2020 Winternats which is the biggest drag racing event in the world outside of America. It will get displayed again this weekend before being dismantled for my next build. Thanks Octan Raceway by Stew Costello, on Flickr Octan Raceway Start Line by Stew Costello, on Flickr Octan Raceway with Video Board by Stew Costello, on Flickr Octan Raceway Start line by Stew Costello, on Flickr Octan Raceway by Stew Costello, on Flickr Start line by Stew Costello, on Flickr Start line by Stew Costello, on Flickr Dodge Top Fuel Drag Team by Stew Costello, on Flickr Octan Top Fuel Drag Team by Stew Costello, on Flickr Octan Top Fuel Drag Team by Stew Costello, on Flickr Octan Top Fuel Drag Team by Stew Costello, on Flickr Octan Raceway - crowd turnout by Stew Costello, on Flickr Octan Raceway video board by Stew Costello, on Flickr Octan Raceway control tower by Stew Costello, on Flickr Octan Raceway control tower by Stew Costello, on Flickr Start line crowd by Stew Costello, on Flickr Octan Racing Top Fuel Team by Stew Costello, on Flickr Dodge Top Fuel Team by Stew Costello, on Flickr
-
Hi everyone, out of two Daily Bugle sets I have built a bigger and better one, at least in my opinion. ;-) Here you can see how it turned out: What do you think of this build? Will you also build a Moc / Mod out of it or have you done it already? :)
-
Instructions available NOW for US $7.99: Instructions Explore the depths of the deep sea with the HERMES EX101 Deep Sea ExoSuit. Seat yourself in the double-walled cockpit and use the levers to control the arms and legs. Be careful, though, the oxygen may run out! Attach the hook to rocks so you don't drift away (and watch out for the sharks)! This mech is designed with LEGO bricks that are currently available. However, lights are not included in the package but are only shown in the render. They can be purchased at several third-party retailers including LYGOD, LightMyBricks, Brickloot, and Lightailing. BUILD [url=https://flic.kr/p/2kXsKq8][/url]Deep Sea Suit Lit Drop 1 by [url=https://www.flickr.com/photos/192785398@N07/]Peter Bryant[/url], on Flickr This build is remarkably simple: It's divided into 14 submodels, most of which are repetitive. I incorporated what I believe to be my best SNOT (Studs Not On Top) techniques yet. DESIGN PROCESS As with all of my MOCs, I started by doing a rough sketch of how I wanted it to look. I took heavy inspiration from 76105-1 The Hulkbuster: Ultron Edition. This means that many design elements are taken from that mech. For example, the design of the legs is very similar to, but not a direct copy of, that robot. [url=https://flic.kr/p/2kXunQw][/url]Deep Sea Suit Lit and Released Back by [url=https://www.flickr.com/photos/192785398@N07/]Peter Bryant[/url], on Flickr FINAL PRODUCT Instructions are available now at the link above. Please, consider purchasing as I am trying to gather all of the parts to build in real life. FEATURES Minifigure cockpit (as in, a Minifigure fits inside) Fully posable Instructions bundle includes .xml file for easy upload to BrickLink and full - color instructions (White Background) Sticker Sheet and display stand coming soon!
-

PF lights two studs wide
Rebel_Lego posted a topic in LEGO Technic, Mindstorms, Model Team and Scale Modeling
Hello everyone, I have purchased a lego power functions led light on Bricklink, to light up my 42043 MB Arocs. On real life trucks you often see that the rear lights are ‘double’. I modified the rear bumper of the Arocs to create this ‘double’ lights. But, the Lego LED light has only one light bulb for every side, so it will not shine trough two holes of a technic liftarm. Anyone any ideas how to achieve this? -
Hello! I would like to show you my rendition of the Chez Albert Parisian Restaurant :) There aren't many things in common with the beloved modular, I simply wanted to have my own idea about what a Parisian restaurant may look like. And the one from creator was simply too small.. So without further ado, here it is: It all began in January 2018 when we visited our family and they had this painting on the wall (reproduction of a fragment only): This served as inspiration to my build which of course was not an exact representation of that building, but it was a good start. It took me around 18 months to complete this party due to size, family obligations and some "great" ideas I had like including all interiors and a 9V lighting system for the ground floor and one of the rooms on the first floor. But I like the effect :) You turn the lights on and off by removing part of the awning which gives you access to old style 9V battery box: The building is modular: On the ground floor there is the restaurant together with toilet for the guests and restaurant kitchen. There is also a staircase leading to apartments upstairs: I also thought that including a part of build that no-one will ever see or notice is brillaint idea, here is the restaurant ceiling for you to enjoy ;) You can also see all the lights - 3 for restaurant, 1 for the entry and 1 for kitchen. Then there goes floor number one and first apartment with bathroom, corridor, bedroom and living room with kitchenette. First view from the top: and view of the kitchenette: Second floor has similar layout, just different finish: The attic is a typical place for singles ;) No dedicated bedroom... and a view of the kitchenette (a shot from a WIP): and last but not least - the roof! It was supposed to be flat, but since this is LEGO it bends up like a boat... I plan to complement this building with another one of similar size. Together they will form a small wall of buildings, a mini version of a street. This is already a work in progress that will likely not be finished this year. But who knows ;) I hope you enjoy this one for now :)
-

Building muscle car. Need help.
rm8 posted a topic in LEGO Technic, Mindstorms, Model Team and Scale Modeling
I am building a new car, in style of musclecar from 60's: long and quadrat. I want that car to be agressive and brutal. There are some variants of the front grille and lights, but cant make best decision. Please help me to choose the best. 1. 2. 3. 4. 5. Or may be quadrat lights (right side)? If it is possible, someone make a POLL here. I dont have such rights yet... Thank you. -
Hello everyone, in the near future I would like to show you a little bit of my Lego City, which is still under construction. To begin with, here is a video about the beach area I made yesterday. What do you think? Beach Area - Bricksonville Edit: latest video added (17.07.)
-
This is my own creation of a Mercedes-Benz G550 4x4² SUV. Check out my Rebrickable post for instructions which you can download for free: https://rebrickable.com/mocs/MOC-43865/BrickHugger171/mercedes-benz-g550-4x42/?inventory=1#comments
-
Ultimate video tour about my lit up city - "Welcome to Bricksonville 2.0"
AntiZombie posted a topic in LEGO Town
Hello everybody, I am happy to show you here the recent quite laborious video about my Lego City; it is called "Welcome to Bricksonville 2.0". (Maybe some of you remember the first one?!) It is a kind of promotional / travel video which took me several weeks of work. Hope you enjoy it. :-) And don't take it too seriously... ;-) -
I have a kit of lights for the Lego Christmas Train. The kit comes with a battery box. So the lights are rated at around 4.5v. However this means that the train has to remain stationery (unless I bolt the additional battery box on board - unsightly). Fortunately the Christmas Train has a Lego engine and on board battery box. Can I connect the lights to the secondary connection that the Lego battery box has so that they are on as the the train moves. If so will the higher voltage kill the lights? If not is there a cable for achieving the connection. I welcome some advice.
-
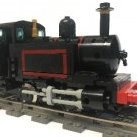
I'd like to present my latest locomotive, loosely based on various British 0-6-0 goods engines. This MOC is a first for me in several ways...it's the first locomotive for which I've attempted to print decals, and the first I've built using BBB wheels. I'd like to thank @ScotNick for graciously granting me permission to use his magnifying glass technique for the front cab windows. Lord Dudley is named after a 15th century politician and its number is an homage to the USS Voyager (NCC-74656). Lord-Dudley-1 by the chestertonian, on Flickr Lord-Dudley-2 by the chestertonian, on Flickr The 3-axle tender holds a 9V motor (the third axle swivels to go around curves) and features the classic BR "lion-on-a-unicycle." I don't have a proper label maker, so I printed out the decal on regular paper and covered it with a slightly larger piece of adhesive laminating sheet. This leaves enough overhang of the adhesive layer to stick to the sides of the tender. Note that only the logo and the red lining are printed; the white lining is brick-built. Lord-Dudley-3 by the chestertonian, on Flickr The tender holds a battery box to power the locomotive lights. The batteries are accessible by removing the coal. Lord-Dudley-4 by the chestertonian, on Flickr Lord-Dudley-5 by the chestertonian, on Flickr Finally, Lord Dudley's driver and fireman pose along the line by their engine: Lord-Dudley-6 by the chestertonian, on Flickr Lord-Dudley-7 by the chestertonian, on Flickr Thanks for looking! Soli Deo Gloria
-
Hi all, this is a MOC of a small church for my continuously changing train layout. Thanks to @LittleJohn and @soccerkid6 for the techniques used for the door, the upper alcove, and the stained glass. These and many other building techniques can be found in their extremely helpful Medieval Tutorials topic. IMG_0910 by the chestertonian, on Flickr The priest is based on Father Brown, the crime-solving title character of G. K. Chesterton's short stories and the current BBC show. I made his signature clerical hat by grinding and painting a crossbowman's helmet. IMG_0911 by the chestertonian, on Flickr The door, using the illustrious brothers' technique: IMG_0912 by the chestertonian, on Flickr The cross is made using a simple combination of Technic pieces: IMG_0913 by the chestertonian, on Flickr I'm sure others have built a rose window the same way before, but I stumbled upon the method almost by accident. IMG_0914 by the chestertonian, on Flickr The hatch above the rose window conceals a secret. Purists be warned: the following photos contain non-Lego electrical components! IMG_0915 by the chestertonian, on Flickr What does the switch control? IMG_0916 by the chestertonian, on Flickr IMG_0917 by the chestertonian, on Flickr IMG_0918 by the chestertonian, on Flickr The battery box is accessible by removing the roof. IMG_0919 by the chestertonian, on Flickr The last picture is a bit of an unintentional allegory in Lego: the mess that is the inner workings of the church still brings light to the darkness outside! Thanks for looking! Soli Deo Gloria
-
Some time ago I posted this topic of a layout using only parts from the 9V era. That layout has since been torn apart to make way for an improved version. Since it's basically a complete new layout (the water tower is the only part that escaped unscathed), I thought a new topic would be justified. This time the layout has working (non-Lego) lights. Many thanks to @LEGO Train 12 Volts, whose engines with working lights inspired me to try it myself. The engine and tender are permanently coupled with a technic beam to protect the wiring. I just happened to find that a battery box for 4 AA cells fits nicely in a 4-stud space. The switch is visible in the coal. IMG_0850 by the chestertonian, on Flickr IMG_0852 by the chestertonian, on Flickr IMG_0851 by the chestertonian, on Flickr The passenger cars are now 30 studs long and have SNOT windows and removable roofs. IMG_0854 by the chestertonian, on Flickr The sleeping car interior: IMG_0855 by the chestertonian, on Flickr The dining car interior: IMG_0856 by the chestertonian, on Flickr An overview of the layout: IMG_0857 by the chestertonian, on Flickr The station includes two passenger platforms, a pedestrian bridge, and a maintenance shop with full interior. IMG_0844 by the chestertonian, on Flickr IMG_0845 by the chestertonian, on Flickr IMG_0846 by the chestertonian, on Flickr The signal tower: IMG_0843 by the chestertonian, on Flickr The freight platform: IMG_0836 by the chestertonian, on Flickr A small farmhouse with a horse-cart: IMG_0847 by the chestertonian, on Flickr Nearby, a shepherd and his faithful sheepdog watch over their flock. Thanks to @soccerkid6 and @LittleJohn for their versatile canine design! The sheep are based on a design I found here. IMG_0848 by the chestertonian, on Flickr A tribute to Ferdinand: IMG_0839 by the chestertonian, on Flickr The crane's hand crank can be locked in place. The piano was reverse-engineered from one I ran across online. IMG_0849 by the chestertonian, on Flickr Finally, I was inspired by the Switch Modification topic to connect a switch to a signal. Thanks for looking! Soli Deo Gloria
-

MOC- Huge Samurai Village-Mountain-Volcano-Lights
Ben Pitchford posted a topic in LEGO Historic Themes
The Samurai Code represents an ancient Japanese village in Feudal Japan. The courtyard on top of the grand stair case has a samurai dojo, shinto shrine, and Japanese bell. Stunning waterfalls, ponds, rivers, caves, rice fields, volcano, and Japanese characters throughout. Play features like power functions and zip line. Illuminates with LED lights. Please support my Idea project! Thanks for viewing! :-) Lego Samurai Code by Ben Pitchford, on Flickr Lego Samurai Code by Ben Pitchford, on Flickr Lego Samurai Code by Ben Pitchford, on Flickr More High Res Pics: https://www.flickr.c...57668066439040/ Time Lapse Video: -
Hey everyone, additionally to my illuminated Lego city "Bricksonville", I started to build an amusement park this year, also completely illuminated and motorized. Here I would like to present you the first part in a video. In the near future there will be a lot going on. :)
-
I bought and assembled 60052 Cargo Train. The holes on the top of the engine bother me so I wanted to cover them up. I ended up making a bunch other modifications along the way: Added Power Function LED ditch lights Changed style of radiator grills Added air intake grills Added dynamic brake grills Moved fan #1 forward for dynamic brakes Moved fans #2 and #3 further back Added exhaust port Covered up unnecessary openings in the roof Changed to smaller sized horns Changed style of fuel tank Switched doors around so they are no longer suicide doors Added dual transclear stud lights to back Changed bley brack in front roof to black I guess it looks a bit like an EMD GP38 now. Please excuse my messy building table. 60052 MOD by dr_spock_888, on Flickr
-
MOC-HUGE Disney Frozen Arendelle Castle Diorama-Custom Lights
Ben Pitchford posted a topic in LEGO Licensed
Hey Eurobricks! So here is my latest build based on the Disney Frozen movie we picked Arendelle Castle cause my daughters are big fans. The castle is surrounded by water and a massive 4 foot tall mountain in a 7x8 baseplate layout. There are 5 waterfalls that light up in addition to the main castle building. Getting ready for Brickworld Chicago in June. Hope you enjoy! LEGO Frozen Arendelle Castle by Ben Pitchford, on Flickr LEGO Frozen Arendelle Castle by Ben Pitchford, on Flickr LEGO Frozen Arendelle Castle by Ben Pitchford, on Flickr LEGO Frozen Arendelle Castle by Ben Pitchford, on Flickr LEGO Frozen Arendelle Castle by Ben Pitchford, on Flickr LEGO Frozen Arendelle Castle by Ben Pitchford, on Flickr LEGO Frozen Arendelle Castle by Ben Pitchford, on Flickr LEGO Frozen Arendelle Castle by Ben Pitchford, on Flickr LEGO Frozen Arendelle Castle by Ben Pitchford, on Flickr Watch Video Here: -
We have a family tradition of creating a Lego Christmas Village with our family. This year we took it to the next level with hundreds of lights from Brickstuff and thousands and thousands of bricks. The only official set we used is the train from the 2016 Holiday Train set to which we added a battery pack, lights and the remote control upgrade. You can visit a detailed video here: https://www.youtube.com/watch?v=lRMYJzjSvjg PC152254 by Nolphi Plays, on Flickr PC152230 by Nolphi Plays, on Flickr PC152260 by Nolphi Plays, on Flickr IMG_2241 by Nolphi Plays, on Flickr IMG_2237 by Nolphi Plays, on Flickr IMG_2238 by Nolphi Plays, on Flickr IMG_2242 by Nolphi Plays, on Flickr PC152238 by Nolphi Plays, on Flickr PC152256 by Nolphi Plays, on Flickr PC152265 by Nolphi Plays, on Flickr
-
Hello! This is our Christmas theme layout, my wife and I started building it a year and two months ago for our RLUG's exhibition: Brickenburg Winter Exhibition. For the next events we were expanding it, making it bigger and bigger, adding more and more MOCs and details. Now it has a mountain, Santa's workshop and house (MOCs), some houses (some of them are Winter Village sets) on a hill, a church, a train station, a post office, the nativity scene, some booths selling seasonal goods and two Christmas trains (the two sets). The older train set runs programmed with RCX Mindstorms brick. It goes one round, then stops at Santa's toy factory with its freight car right at the factory belt, which starts moving, like it produces toys and fills up the wagon, after a few seconds it stops and the train starts again. We used lots of LED lights in lamp posts and especially in light string decorations, where we put 0.6 mm wide LED to 1 x 1 transparent round plates wired together. Happy Holidays! P1240372 by Ambrus Laszlo, on Flickr P1240373 by Ambrus Laszlo, on Flickr P1240374 by Ambrus Laszlo, on Flickr P1240369 by Ambrus Laszlo, on Flickr P1240378 by Ambrus Laszlo, on Flickr P1240389 by Ambrus Laszlo, on Flickr P1240392 by Ambrus Laszlo, on Flickr P1240399 by Ambrus Laszlo, on Flickr P1240401 by Ambrus Laszlo, on Flickr P1240391 by Ambrus Laszlo, on Flickr P1240364 by Ambrus Laszlo, on Flickr P1240367 by Ambrus Laszlo, on Flickr
-
I'm happy to present to you my first modular building. I have put it on Ideas too, so if you like it, please support: https://ideas.lego.com/projects/106103. edit: It is now available on Rebrickable Some time ago my daughter got this Duplo set from her aunt: http://brickset.com/...ative-Ice-Cream That got me thinking I could use one of these cones for my own purposes, especially since my little one was very interested in throwing bricks across the room, instead of proper play (or maybe that was proper play ;) ). Anyway I borrowed four bricks from her (I honestly intend to give those back to her) and thought it would be nice to make a big advert out of this ice cream and make it rotate. Such an Ice Cream Parlor should have nice clientele drawn by this big sign of what's inside :) So power functions was a must. But since I was to integrate PF info a modular, why not go further and add some lights too? When I was young (long time ago...) I always liked things that moved and had lights :P so you can call it late compensation :P Later on I will present it module by module, but if you want to have a quick look at it in action, here's a video: Ok, so let's start with a view of all the modules separately: And now let's talk about the ground floor: As you can see, on the right there is the ice cream parlor with seating available inside and at the back of the building. You can buy ice cream, lemonade, donuts and coffee. The staff is taken from the Ice Cream Machine set :) I'm happy with the bench - it gave me some headache, but I wanted to have something distinctive. The lamp is also different to typical one, but it's nothing special. On the left there is an entrance to the owner's apartment. There is also a small storage room for bike. The top of it is removable for easier access, but you can get the bike in and out through the door (but it's tricky). Ok, now - the heart of the modular - the Power Functions module: All electronic components are here. That is: 1 Rechargeable battery 2 switches 3 sets of PF lights (so 6 sources of lights total) 1 M motor Of course apart from that there are also all the technic components to make it work. The motor is running the Duplo brick with a 1:9 reduction. The lights are provided for the ice cream parlor (4 of them), entrance to the staircase (1) and the apartment (1 for the table lamp seen above). My idea was to be able to control lights and motor separately, that's why I have 2 switches here. Look closely at the picture above. There are two holes for technic axles above. The one on the left is for access to the switch controlling the motor (advert). The hole on the right allows access to the switch controlling all the lights. Those go on/off simultaneously. You can't have just part of them on. That would require even more switches and there is simply no room for that. It's crammed inside already. Now, have a look at the bottom of this module where all the lights can be seen and the front of this module, which allows access to the rechargeable battery in case you need to recharge it (power cord access). Through the holes in the front section you can turn the battery on/off and change the voltage too. Now, the last two modules are the roof and the apartment of the owner. It's not much room inside - the advert required quite some space already, but it's cosy :P As you have seen already this apartment get light from the lamp on the table, which is actually part of the Power Functions module. Yes, I know the TV is kind of useless on that wall, but... hey, he wanted a TV so I gave him one :P So, how do you operate this thing? With a KEY :) and last, but not least - two pictures of it with lights on, and ambient lights off: Full gallery is available on my Bicksafe: http://www.bricksafe...ce_Cream_Parlor I hope you enjoyed this little presentation. Please consider support on Ideas: https://ideas.lego.com/projects/106103
-
HI, This is AT-TE With Motorized & Lights,hope you like.