Search the Community
Showing results for tags 'ideas'.
Found 297 results
-
This model features a winter chalet and ski hill with a working surface lift. It is also full of fun little details and play features, which you can see in the video below. Ski Chalet The chalet is open in the back to allow some playability on the inside. The interior features some comfortable furnishings and a cozy fireplace to relax beside after a long day of skiing. It also has a line for hanging your wet clothes to dry. Outside the chalet is a picnic table, ski rack and snow making machine, and if you're lucky you might even get a glimpse of the elusive Yeti. Some ambitious kids have also set up a toboggan run from the roof. Good thing the paramedics are nearby! Ski Slope The ski lift brings the minifigs to the top of the hill and automatically starts them down the ski run. I also added a working starting gate for those minifigs that are more inclined to race. There is also a design video on JKBrickworks YouTube channel. If you want to see this become an actual set, then cosider supporting this project through the link down below: https://ideas.lego.com/projects/cee772a3-64dc-4707-ba9a-4a431e5297e6
-
Since I've recently picked up two large boxes from my parent's attic containing my old Classic Space sets, I've also started to design models in the spirit of the old Classic Space theme. I started with Classic Space / Star Wars mesh-ups (see here if you're curious), but then I wanted to do an homage to my favourite Classic Space set and here's the result: Unfortunately, my vision contains parts that use colours that Lego doesn't currently have in its inventory. So I had two choices, either to compromise on my design in order to make a regular MOC or to shoot for the stars and enter it on the LEGO Ideas platform...as the title indicates, I opted for the latter: https://ideas.lego.com/projects/2a57e5ea-cf61-4129-b4ac-b09fe3d15107 As you can see, I wanted to modernise the design with more curves, slopes and tiles while keeping the classic look & feel, the clean, sleek appearance and as many features as I could. Also, Classic Space sets usually had dope play features, so it was important for me to also include some kind of gimmick, which is the fully detachable shuttle in the back: Two ships in one! Here are some more pictures: So if you like it, I'd appreciate it if you followed this link and support the entry so that this set can be made into a reality. Cheers.
- 7 replies
-
- ideas
- neo classic space
-
(and 2 more)
Tagged with:
-
Hey everybody, DarthKy and I worked together to make this high end non-ship set concept for LEGO Ideas. (Please note this submission has expired) We also tried to re-imagine Redbeard, Anne, Rummy, and "Steve" from the classic LEGO Sets. We certainly hope you will check it out. Skull Cove: Redbeard’s Return. Captain Roger Redbeard once terrified the seas with his crew aboard the The Black Seas Barracuda but he has not been seen on the high seas for over a decade. Nobody knows exactly what happened to him, many assumed he finally met a bitter end, perhaps finally caught by the Imperials...some claim he retired and lives quietly on his untold riches. His closest friends and allies however know the truth. Redbeard, surrounded by his loyal crew, still rules the great pirate fleet, a shadow empire, from the security of his stronghold, Skull Cove. This set seeks to create a top of the line pirate stronghold operated by a cadre of pirates inspired by classic LEGO pirates. The re-imagined pirates includes the classic figures: Captain Roger Redbeard, Rummy, Anne, and “Steve.” The Crew Captain Rodger Redbeard. In the passing years the Captain's beard has grown and streaks of white have crept into it. He may not be as spry as he once was, but he is as cunning and quick witted as ever, coordinating strikes against the merchant lanes while continuing to foil the Imperials. First Mate Rummy. Rummy has long been Redbeard's right hand man. Now he operates the ingenious communication network that keeps Redbeard's pirate armada working in concert. Rummy is also a legendary spotter and look out. He can count the number of cannons on a ship before most of the crew can even see its sails. Anne. Anne has served as Redbeards Quartermaster, leading countless boarding actions upon ships beset by the Black Seas Barracuda. She is an expert marksman and sword fighter, equally at home on the deck or in the ropes. "Steve" Steve is a bit of a mysterious wild card, coming and going as he pleases. The crew is not even certain if "Steve" is his real name. His unequaled skill as an artillerist however has earned him a permanent opening as the master gunner in Redbeard's ranks. On many occasions the astounding accuracy of his cannons has spelled the difference between victory and defeat. Note: This project has expired so voting is no longer available.
-
LEGO Spaceballs! Spaceballs is a classic film and it has an ideas project on 8000 supporters with 598 days left to get to 10k! I made this set out of love for the film. Even though I'm pretty sure they would never make it, the ip is allowed so why not give it a go! Please support the project and share it with your friends. I would love to be able to hit 10k supporters as soon as I can! Support it here- Spaceballs Feel free to reply with any questions or feedback.
-
So, I love Phineas and Ferb. Growing up with it I'm sure has something to do with that, but the show has good writing and is quite clever. Below, I have listed my ideas for the first year of a Phineas and Ferb theme, including a CMF series. Please give me feedback and your ideas for how you would do things for a Phineas and Ferb theme. Wave 1: Releasing January 1st: Phineas and Ferb's Chariot Race: $15: Details: The Chariot Race and chariots featured in the Season 1 episode "Greece Lightning". Figures: Phineas (Chariot Race), Ferb (Chariot Race), Candace (Chariot Race), Baljeet (Chariot Race), and Buford (Chariot Race) S'Winter Snowboard Race: $15: Details: Snowboards for Phineas, Ferb, Candace, and Perry to race down a small snowy hill. Would also include a small build for the snow cone machine and the red and blue dye. Figures: Perry the Platypus (with printed on scarf), Phineas (snow gear), Ferb (snow gear), and Candace (snow gear) Phineas and Ferb's Time Machine: $20: Details: The time machine featured in the Season 1 episode: "It's About Time!" The Fast and the Phineas: $25: Details: The set would be the Flynn-Fletcher car that Phineas and Ferb use to race in the Swamp Oil 500 n the Season 1 episode "The Fast and the Phineas". You would be able to transform it from the regular car into the race car. Minifigures: Phineas (racing gear), Ferb (racing gear), and Candace Mom's Birthday: $40: Details: The concert stage with a big screen (that, in the set, is a big printed piece of Candace singing) that Candace sings to her mom on her birthday. Figures: Phineas, Ferb, Candace, Linda Flynn, Iseballa, Perry the Platapus, and Mrs. Garcia-Shapiro Doofensmirtz Evil Incorperated Building: $100: Details: The Doof Inc Building. The little porch area has an inator on it and the roof can retract. Figures: Agent P, Dr. Doofensmirtz, and a minifigure version of Norm Phineas and Ferb and Candace's Ultimate Tree houses: $150: Details: The Tree house robots featured in the Season 1 episode "Tree to Get Ready". The builds can transform into regular treehouses. Minifigures: Phineas, Ferb, Candace, and Stacy. The Coolest Coaster Ever!: Price: $200: Details: A slightly condensed version of the Coolest Coaster Ever that appeared in the first episode called "Rollercoaster". CMF Series: Phineas Ferb Agent P Baljeet Buford Lawrence Fletcher Heinz Doofensmirtz Jeremy Johnson Major Monogram Carl Max Modem Lindana Linda Danny (of Love Handel) Bobbi Fablous (of Love Handel) Sherman "Swampy" (of Love Handel) Dan Povenmire Jeff "Swampy" Marsh Wave 2: Releasing June 1st: Portal to Mars: $15: Details: The portal to Mars in the Season 1 episode "Unfair Science Fair". Figures: Baljeet, Phineas, and Ferb Backyard Beach: $30: Details: Phineas and Ferb's Backyard Beach. Minifigures: Phineas (beach), Ferb (beach), Candace, Jeremy Johnson (beach) Got Game?: $50: Details: A giant Foosball-like table in the episode of the same name as the set. Figures: Burford, Baljeet, Isebella, Candace, Phineas, and Ferb Candace Loses Her Head: $100: Details: Mount Rushmore with Candace's face. Minifigures: Candace, Phineas (hard hat), and Ferb (hard hat) Flynn-Fletcher House: $200: Details: About the size of the Simpsons House set, just an inch or two smaller in height. Figures: Phineas, Ferb, Candace, Linda, Lawrence, and Perry The sets would not be in the Juniors style.
-
- lego licenced themes
- ideas
-
(and 1 more)
Tagged with:
-
I wanted to share my experience with you. During the Covid I was forced to stay home a lot more than usual and then I decided to join LEGO Ideas with a project that you can find in my signature. It was well received and I had the push I needed to believe in it and then starting really advertising for it within my friends. But in the meantime I noticed some things that I do not like a lot about the ideas project and I will share them with you so that you may help me with your opinions. 1) Staff Picks. I really do not like Staff Picks. It's nice as the idea per se, but the effect is really surprising. The staff picked projects get a boost in visibility and hence in votes that changes totally the lifespan of the project. Projects that had 10 20 votes per day once picked were insanely boosted up to 400 votes per day. That is too much of a difference, showing that people will vote what they see, not what they really like, because the project has been there all the time, simply it wasn't that visible. 2) Cheating. It's very easy to cheat on the ideas platform. But in a sneaky way. You don't cheat directly on ideas, but you can use bots or programs to upvote your project in social medias like reddit, facebook or the like. When your project is very visible, it will draw a lot of attention and a lot of votes. I will not call names, that's not stylish and fair, but I've seen projects who get an insane amount of "likes/upvotes" on different social media platforms which cannot simply happen because the project is good. I have analyzed similar projects on similar plaftorms in the same time spans and I noticed very suspiscious activities. 3) It's stressful. Believe me, it is. There are days in which you gather 200 votes without doing anything special, those days you say "Yeah! I can do it". There are days in which though you ask friends for, or you have some spotlights somewhere, you will get 0 votes for hours and you say "No. It's over. I will never make 10k". This rollercoaster is really frustrating. I advice people to join LEGO Ideas only if you have a great deal of patience. I wish to read for your opinions.
-
This is my first LEGO Ideas contest submission. Concept: one set to create multiple sports (more than shown here) so you can always build any sport you and your friends like with just one set, and start playing. The field is modular so you can I hope you'll love it, and will vote for it if you like it. Thanks! https://ideas.lego.com/s/ca:68a77abdd25247acb9f590a999774b55
-
[Updated] This bus was not selected to be final 15, but I submitted it to Lego Ideas. Please support it if you like it: https://ideas.lego.com/projects/e9b3598f-db12-4b90-aca9-206872843695 This moc is for LEGO Ideas contest "BUILD A VINTAGE CAR TO CRUISE THE STREETS OF LEGO® MODULAR BUILDINGS!" . I will design several more for this contest :D https://ideas.lego.com/projects/e9b3598f-db12-4b90-aca9-206872843695 In the old days, not many people owned a car. Bus was important transportation for people. So a vintage bus should be included in every Lego city. The vintage bus I designed has many playable features. The engine hood, passenger, driver, and back door can be opened. I also added a luggage rack on the top of the bus. Some passengers' accessories were placed on the rack, including two cute pigs. The vintage bus dimension is 6x18x8 bricks. I hope you will like my bus :D My other MOC models: [MOC] Vintage Stylish Convertible [MOC] Vintage Bus [MOC] Halloween Pumpkin Horse Carriage [MOC] ISUZU NPR Light Duty Truck [MOC] Karsan Jest Mini-Bus [MOC] Ford F150 XLT [MOC] London Double Decker Bus Dennis Enviro 400 [MOC] Lada VAZ-2105 [MOC] Subaru WRX [MOC] Classic Cadillac Convertible [MOC] Toyota 6th Gen. HiAce Van [MOC] James Bond Aston Martin DB5 [MOC] Toytoa HiAce van [MOC] Toyota GT86 [MOC] Office Desk [MOC] Ferrari F355 [MOC] Toyota AE86 Coupe (2018 version) in Initial D Animation [MOC] Police Motorcycle #2 [MOC] Sport Bike Stop Motion Speed Build [MOC] New York City Police (NYPD) Car [MOC] Lego Mini Cooper [MOC] Japan Tokyo Taxi vol.1 東京無線タクシー [MOC] Ice Cream Truck [MOC] LEGO California Highway Patrol [MOC] LEGO Police Car [MOC] Police Motorcycle [MOC] New York City Taxi / Cab [MOC] LEGO NYC News Stand [MOC] New York City Transit Bus [MOC] Newspaper Rack [MOC] Coke/Beverage Cooler Initial D AE86 Racer AC Transit Bus AC Transit Bus Short Version Ice Cream Van
-
Hi guys I recently realized my first lego Ideas project. If you like it, please supports! https://ideas.lego.com/projects/d67899bc-66dc-4c1b-a767-3fbd7140c3d2 Many thanks
-
This is my very own Two and a Half Men MOC built of LEGO bricks: And yes, detailed step-by-step Building Instructions are available --> Instructions for my Two and a Half Men MOC Two and a Half Men is one of my most favorite tv-shows and I invested a lot of time into this build in order to get the scale and details as accurate as possible. To achieve this, I watched the entire series again and used a ton of reference material. This LEGO® Diorama MOC and Two and a Half Men-memento depicts a part of Charlie Harper’s legendary Malibu Mansion where most of the series takes place and contains 2648 pieces! The entire build includes a ton of references to different episodes from season 1 to 8 that only true fans will recognize : The build features the iconic main living room, veranda, and the house entrance Main living room features Charlie’s piano, a sofa, 2 armchairs, a round wooden table, different carpets, a fireplace, the stairway that leads to the 2nd floor, different potted plants, and other details Veranda features 2 deck chairs, different potted plants, a grill, 2 chairs, a table, outdoor lights, a grid with climbing plants, and other details Some of the references to different episodes: Bowl with Butterscotch Candy, Vod Kanockers-hat, Jake’s Goofy Juice, charlieharpersucks.com-computer, Jake’s Gameboy, Alan’s Key, Andy’s cigars, Jake’s Plunger, Berta’s handbag, and a Rose *by Rose* What do you guys think of this build ?
-
Hello everyone ! So I spent 1 month building an entirely functionnal Kit-Cat Clock with Studio. It's not totally finished yet because I would l'll need to buy the parts on Bricklink for making it IRL, but it's theorically viable. I already submitted the project on Ideas and will update the design as soon as I buy the pieces. Do you guys have any tips on the mechanism for making it more reliable ? If you are interested you can support my project here ;)
-
Hello. It's been some time since I last posted in this forum, but I'm back with a new-ish creation. Last spring I was able to snag the LEGO Ideas Pirates of Barracuda Bay set, mostly for the build of the updated Black Seas Barracuda. However, once the Dark Shark is separated from the build, it leaves behind a very sad-looking planks and timbers on a sandbar. So, I got the idea to put together some new structures onto the old shell. The result: The Barracuda Bay Trading Post. The new structures are almost entirely composed of timber facades, but the foliage provided from the original Barracuda Bay set allowed for some variety in the build. A look outside the rebuilt Jose's Inn, with the notorious highwayman Brick Turpin looking for some easy cash. On the other side is Rosie's Supply Shack. Dangling from the roof is a customer who wouldn't pay, and the guy who came before him hanging a little ways away. On top of Jose's is an old field cannon and the Pirate Sheriff (I thought a pirate lawman to be slightly humorous). In the background is the old jail cell and its occupant. A look inside Rosie's Supply shack. She has a small weapons shack and a shelf full of...bottles. Perhaps they're poisons, or medicines, or a jar of dirt (Insert Jack Sparrow meme) A bird's-eye view into Jose's. I had a whole assortment of junk to put inside, but I'm still wondering about what works and doesn't work. I like the bar and the spit-barrel, but I might do some more interior design later on. On top of Rosie's Supply Shack, Rosie's sister tries to catch some much-needed rays. Don't forget your sunscreen, kiddies! That's about it. Feel free to comment below. Sorry if my photos don't exactly scream quality, but I've been experimenting with my camera to get things right. Always entertaining, always inspiring, always:
-
Flaperons [IDEAS]
captainmib posted a topic in LEGO Technic, Mindstorms, Model Team and Scale Modeling
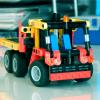
Flaperons are a combination of flaps and ailerons, found on various airplanes. https://en.wikipedia.org/wiki/Flaperon Thanks to @MinusAndy and @Jeroen Ottens for sparking this topic. I've had the following idea for ages, but it can use some perfection. (I think I've borrowed this idea somewhere) Red - Input for flaps Yellow + Turntable - Input for ailerons Combined - Flaperons Please post your ideas, suggestions, or questions in this topic. -
Once upon a time, there were three "Lego" girls who went to the police academy... This MOC depicts Townsend Agency from the hit 1970s television series, Charlie's Angels (specifically season 1). The Angels' 3 iconic Ford cars — the Mustang II Cobra II, Mustang II Ghia and Pinto Runabout — are parked outside the building. Also included are 4 minifigures, one for each Angel (Sabrina, Jill & Kelly) and their trusty co-worker, Bosley. The Townsend Agency building can be either displayed as a brick façade or folded in to form the office interior. There are numerous little details, such as the speakerphone from which the unseen Charlie's voice emanates. Additionally, the office space is scattered with objects pertaining to many season 1 episodes. If you like it, please support it on Lego Ideas so it might become an official Lego set. Hope you enjoy! Support on LEGO Ideas
-
Piano is not my forte. The end. Oh, you're still here. Okay. Let me try again. The statement above is a joke but it is also true. No pun intended. This review is about the Grand Piano set, a LEGO scale model with ornate details inside and out. If you were around back in April, my last review was about the immaculate 1-piece LEGO white baseplate. Today, I am about to review a set with over 3600 pieces. Not much of a difference, really. Now, let's begin with my 32nd RA review, set# 21323 Grand Piano. Overview Name: 21323 - Grand Piano Theme: IDEAS Year: 2020 (2H) Pieces: 3662 Minifigures: 0 Price: USD 349.99 / EUR / GBP 319.99 Introduction I have very fond memories in my childhood wanting to play an upright piano whenever my mom and I visit my aunt's house. In fact, I have a picture of me pretending to play that piano -- it is one of my favourite childhood photo. Sadly, the untapped potential got wasted because I never had any proper training to play a piano, or any musical instrument for that matter. I don't think I could ever read sheet music as that take years of practice too. I only understand music alphabets - those 7 letters A, B, C, D, E, F and G. Regardless, I enjoy music and I am one of those person who could listen from rock music to gospel song, then to jazz, switch to EDM, then back to classical symphonies. I love music and that's why I appreciate this set that celebrates the art of music. With this LEGO set, I could fool you into thinking that I am also an expert musician. I am not kidding. I will be expertly playing Fur Elise like Beethoven himself, towards the end of this review, so keep on reading. Before proceeding, let me thank TLG and Eurobricks for giving me the opportunity to review this remarkable set. All opinion about this set is my own. Front Box Panel The new branding of 18+ looks very premium especially with the gold font used in the grand piano branding. It just exudes class. Side note -- for some reason, the gold and black colour scheme reminds me of a Belgian chocolate brand. Back Box Panel The classiness continues at the back. The back panel shows the dimension of the grand piano, as well as the Powered Up components featured for its auto-play feature. There are minimal text in the packaging so it is not explained how this feature works. More about that later. If you have not bought the set yet, I encourage you to know how the play function works first before making any purchase because it could lead to disappointment if you don't do any homework or research. Now, let's carry on. Carry on, it doesn't even matter... (for the mostly parts) The box is a lift-up type similar to that of the recent Technic sets such as 42115 Lamborghini Sian. While looking premium, the box is so huge that 4 tapes are needed to seal the box. I wonder how long the seals are going to last. What’s inside the box? There is a box within a box. I am not tracking how many such LEGO sets have this kind of packaging -- but when I do see one, it means serious business. Really serious. Below, you can see the contents of the smaller black box laid down. The other half remained inside the bigger box for the time being. There are are so many pieces that I cannot take picture of them all in one go. Instruction Booklet For a set this expensive, I already expected there is no sticker sheet. Indeed, there is no sticker sheet in this set, and I prefer it that way. The instruction book looks very good but I am not keen on using this for building reference. I thought that it would ruin the bindings because the instruction book is too thick and I don’t want to ruin it by flipping it over and over. As you can see from the picture above -- it is 2 bricks tall. I decided that I will be using the LEGO Instructions app for this round. So, looking at my phone, I now have more LEGO games and apps that I could ask for. That’s because in the last 24 hours upon receiving this set, I downloaded 3 more LEGO apps on my phone. I even have The LEGO NINJAGO Movie game on PS4 which my kids and I recently got platinum trophy. These LEGO apps and games just keep on coming. LEGO is everywhere. In the playroom, in the living room, and even in my pocket. Build Starting with the build overview, the screenshot from the instruction app is a very good starting point. From bag 1 until bag 10, the focus is mainly on the frame and body of the piano. From bags 11 to 15, the focus is shifted onto keyboard, while bags 16 and 17 are meant for the fall board, music shelf and desk. Then, bags 18 to 20, are all about the lid only. Finally, bag 21 is meant solely for the chair. Ready for the long read? Adagio. Bag 1 out of 21 The interior of the grand piano is mostly tan. I like this colour and it’s the obvious choice for the frame as the cabinet cavity is mostly made of wood. Dark tan makes sense here as well. Bag #1 progress - cabinet underside and spine The first in-progress picture and it looks odd because I oriented this the wrong way. The tan side should be flat on the ground because it is the bottom of our grand piano. The black flat wall of the piano cabinet is called the spine. While building this, I am curious as to how the ball joints will be used later. More on that soon...ish. Bag 2 out of 21 I was not too familiar with the newer battery unit / smarthub so when I learned I needed 6 AAA batteries, the AA batteries that I prepared were useless. So, I needed to get spares quickly. Bag #2 Progress - Powered Up smarthub, motor and motion sensor I felt that having these electrical components at bag #2 is too early in the build. So much bricks will be added on different directions and it is very likely that these component might be locked inside this build permanently, or until dismantled. Take a good look at the arrangement of these Technic beams. All the colours point in the same direction. Bag 3 out of 21 Bag #3 Progress - Damper wires The dark bluish grey pins are meant to be the damper wire. These damper wires hold the dampers which stop the note once you release the piano keys. Just remember this for now because it is a long way before we even get to the dampers. Bag 4 out of 21 So far, this bag is full of 1x6 tan tiles, and I really like the smoothness of the build so far. Bag #4 Progress - Soundboard At this angle we can confidently say that the studless to studfull ratio is off the charts already. Bag 5 out of 21 At this point, I got confused that I could not see bag #5 from the smaller box that I have unboxed. Then, I realised that it was outside the smaller box, and inside the bigger box. Due to my confusion I almost forgot to take the in-between progress after building bag 5. Bag #5 Progress - tail Bag #5 is essentially the buttocks of the piano. Remember the ball joints earlier? With technic pins connecting the upper parts (soundboard), the job of the ball joints below is to connect the piano tail on its belly. I know it doesn’t sound right but I did not make up the names of the piano anatomy... Just remember that in case you want to take the motor out of the piano’s belly, or perhaps even its motion sensor -- you need to remove the tail cover at the back first and detach the ball joints so you can pull the tail off to have access to the cabinet cavity. Finally, the chubby tail of the piano is completed. Bag 6 out of 21 I am very pleased that there are many tan and dark tan parts in this set up to this point. However, we are mostly done with the interior of the piano, so we will see more black parts from here onwards. Bag #6 Progress - Keybed Part 1 I hope that you are learning the parts of the piano as we go along this building process because surely, I am. This section of the build is part of the keybed. This is literally where the action happens in the piano and where the piano action mechanism is located. Bag 7 out of 21 Bag #7 Progress - Keybed Part 2 Bag 8 out of 21 Bag #8 is essentially the pinblock of the piano where you can find the pins, which are represented by the pearl gold tile 1x1 with open O clip. The pins hold the string securely with the right tension to produce the right frequency for the note. What's not included in the picture are the pearl gold hoses that serves as bass and treble strings. Those are attached to the pins, on top the pinblock, in the subsequent pictures. Bag 9 out of 21 Bag #8 & #9 Progress - pinblock, pins, strings, cheeks and bent side cover At first glance you can see the gap at the bent side part of the piano. At first I was very distracted by it, but as I finished the whole build, I grew used to it.. In case you don't know what are piano cheeks, those are the ends of piano keyboard. It is built with part # 6005 brick, arch 1 x 3 x 2 curved top. At this point, you are instructed to reset the gear by pressing the encircled icon in the Powered Up app. Missing this important step might cause frustration later. The reason is simple - if you don’t reset the gear, the technic beams will be in random position so they would obstruct the keyboard rear end. The gear reset will set the beams in neutral position so you can fully slide the keyboard in. Take my word for it, I learned it the hard way. Bag 10 out of 21 Bag #10 Progress - Legs These legs are chunky, but they look proportional to the chunky grand piano as well. You have to remember, the entire weight of the piano rests on these 3 legs so they need to be strong. Bag 11 out of 21 From bags 11 to 15, it is all about the keyboard. That includes the keyframe, as well as the individual keys, and the action mechanism. Bag #11 Progress - F4 to B4 Provided the middle C in this pretend piano is C4, as it is the widely accepted middle C, then the lowest register in this grand piano build would be C3. That would be the leftmost white key in this build. But let me step back a little bit. I thought initially that the build will start from left to right but it’s not the case. The build starts somewhere in the middle left. If that makes sense. These keys correspond to F4 - B4 range. Just play along for now. The keyframe itself would be the array of plates underneath which hold the keys. Interestingly, the only connection that holds the keyframe and the keys are those conical shaped parts, which is conveniently named “ice cream cone” in Bricklink. Technically, they are not even connected. The key is simply positioned on top of the keyframe, guided by inverted ice cream cone. The gap beneath allows someone to push down the key, and this tilts the key from the top of the dark medium flesh slope like a lever. Bag 12 out of 21 Bag #12 Progress - C4 to E4 + F4 to B4 We have just added 7 more keys. That is 4 white keys and 3 black keys. These 7 keys are added on the left side of bag #11 build. Bag 13 out of 21 Bag #13 Progress - C4 to E4 + F4 to B4 + (middle C) C3 to E3 Bag 14 out of 21 Bag #14 Progress - C4 to E4 + F4 to B4 + (middle C) C3 to E3 + F3 to B3 This is the most repetitive part in the build and it does not help that you need to do different variants of the keys. It is interesting nonetheless because the end result is beautiful. Bag 15 out of 21 The last key (C2) is found in bag #15, which also happens to include the keyslip. This is the part that runs across the front of the piano which protects the keyboard assembly from sliding out. Last look inside the empty keybed. Bag #14 Progress - Complete keyboard, range C4 to C2 For reference, you may compare the keyboard layout to the finished keyboard assembly below. With 15 white keys, this keyboard features 2 octaves and an extra C note at the highest register (rightmost). Attached to the keyframe, the assembly looks like the picture above, just before sliding inside the keybed. Provided you did not skip the crucial step found in Bag #9, sliding the assembly should be easy as pie. With the keyframe fitted in, we now have the keyboard ready for action. Note that the keyslip and the keyboard, are not connected by any studs. They just slide in together. To secure the keyboard, the keyblock is secured using a technic pin that locks the left and right side, underneath the piano cheeks. Since the keyslip is connected to the keyblock, this prevents the keyframe from sliding out, and keeps the keyboard safely intact. Bag 16 out of 21 Bag #16 is the fall board or key cover. The most interesting part for me here is the single inverted tile 2 x 2 with old LEGO logo circa 1934. Bag #16 Progress - Fall board The instruction wants you to slide in the fall board or the key cover while the keys and keyframe assembly are already fitted inside the keybed. However, I find it much easier to remove the keyblock, keyslip and the entire keyboard assembly and just attach the fall board on top just as how it is pictured below. Once the cover is fitted, just slide them back inside, then put back the pin locks underneath again. Now, enjoy the key covers. The cover has a slight friction preventing it from slamming onto your fingers. With the right push, it will stay in position as pictured above. As noted by the fan designer, the fall board is supposed to have a soft close feature. Meaning, it won’t slam on your fingers because closes down gently. Bag 17 out of 21 This bag contain parts for the music shelf and music desk - the one that supports the sheet music as well as your phone if you choose to use it for the auto-play feature. Apart from this, this bag also contains the parts for the dampers. Those are the black convex shaped things that are found on top of the strings. Bags 18, 19 and 20 out of 21 Frankly I am not sure why these parts are broken down into 3 separate bags when these bags are meant for the piano lid only. That includes the main lid, front lid, as well as the hinge which connects at the spine of the piano. The parts are all black. Here they for your viewing pleasure: Bags #18, #19 and #20 Progress - Lid This is the top of the lid. I don’t think you can find a build as straight forward and smooth as this in any LEGO catalogue. The underside is just as interesting, with technic bricks running across the lid that makes the structure rigid. Once attached, the cover does a really good job in holding itself even when fully opened. However, I suggest you don’t do this on purpose because the technic bricks with pins, which connects the hinges on the piano spine, will be stressed so much with the lid’s sheer weight. Now, the moment I am waiting for -- with the lid closed down and the key cover shut, join me in admiring the beauty of the piano case and its sexy body shape. Viewed from the tail, I can appreciate the chubby proportion of the build because it is a toy. If this is a real piano, the rim height is just too high for its body. For what it is, the proportion is very toy-like. Also, can someone please let me know if there is any other set smoother than this? I checked many times. Save the 3 legs which have 4 exposed studs each, I cannot count any exposed stud in this closed-lid grand piano body. There are 2 anti-studs at the spine edge of the lid but they do not count as studs, do they? Bag 21 out of 21 Finally, we came a long way to finally build the last part of the Grand Piano set. The ultra-luxurious looking chair with a lift mechanism. This chair looks more comfortable than the IKEA chair I am sitting on right now. While the piano itself only has 12 exposed studs on its exterior, this time, I could see 2 studs on the chair - one on each side, left and right. I have never been more excited to find exposed studs in a set because it is such a rarity in this build. Viewed from side to side, and top, this set is 14 exposed studs on top only. That is over 99% SNOT perfection. Maybe I am wrong. Let me know, please. Once again, viewed from a different angle, the studs not on top design in this build is topnotch. Overall, those who supported the project in IDEAS will be very pleased. Even though the interior is changed, I don’t mind swapping the strings with rigid hoses -- but I am not sure if there are grand piano with gold strings. Maybe the bass strings could use copper colour instead because those strings are commonly using heavy copper wound strings to generate lower bass notes. As for the treble strings, I think that pearl grey or silver would be more accurate. Not really a big deal as long as the build is sturdy. So, about its sturdiness -- it is strong and well put together even if the case has a hinge at the bent side. I don't fear that it will crumble into pieces at all. Surprisingly, it is very swooshable. It can race with LEGO Speed Champions. Just make sure you race on a smooth surface because a slight bump or level change could nudge or cripple one of its legs. To further support my point on how strong it is, I had no trouble putting the piano on its side or turning it upside down. Enjoy the underside of the piano Let’s talk about play features To begin with, turning the smarthub on feels awkward at first because it opens at the unexpected direction. In my opinion, it would be more natural if opening is on the other side because the green "on" button is further in. So turn the device on, connect the app via bluetooth, select a song (very limited list) and you have yourself an auto-playing piano. I like the novelty idea very much but I don't see myself playing the piano with the Powered Up phone app because I cannot put the app in background to keep it from playing. It is such a big flaw in the app design. That means in order to play the piano songs, you need the app to be running in foreground all the time. You can't do anything else! smh... Playing the keyboard is a good experience. It feels responsive but I can tell that it does not feel like a real piano key at all. For starters, it is very light because it is made of ABS plastic. You don’t need to be a piano expert to know that a real piano key feels substantially heavier. It gets A+ for trying. The GIF above is me, randomly pressing any key to generate the melody of Fur Elise. Just note that the whole key press action is only being processed by a single motion sensor that tracks the red technic beams as illustrated in the instruction below. When you press a key, the full-length of the black technic axle will move, along with the red technic beams, which is then translated as a key press in the app. Therefore, if you press a single key for the entire song, the Powered Up app won’t even know which key you pressed because the information is reduced to an up and down motion only. You may not know it earlier while building but the step shown below is responsible for all the notes you hear on the piano. As I said at the beginning of this review, I will be expertly playing Fur Elise. So, to demo this, I mustered all the courage to record this silly "press any" performance. First part is the app demo, and the the second part is about the performance itself. Enjoy the playlist. I don't think that the oversimplified "play your own" music is an insult to pianists or aspiring musicians. It is a limitation of the tech components included in the set. To be fair, the fan designer himself is a music teacher and piano tuner, while the wife of the LEGO designer who worked on this product is a pianist and piano teacher, too. Insulting or discrediting musicians would be the last thing they will do. Just keep that in mind. Parts While the new parts are not a stand-out in this set, there are exclusive prints and new colour of existing LEGO elements. Take a look at the list below. New part/recolour list: 6322630 (11203pb055) - Tile, Modified 2 x 2 Inverted with Gold 'LEGO' Pattern, exclusive to this set 6322624 (10202pb016) - Playday sheet music 6 x 6 tile, exclusive to this set 6322135 (part 65734 in black) - first appearance in this colour. 6310833 (part 32064a in dark tan) - first appearance in this colour. 6311104 (part 32124 in tan) - first appearance in this colour 6322138 (75c32 in pearl gold) - Hose, Rigid 3mm D. 32L / 25.6cm (first appearance in pearl gold?) 6322139 (75c26 in pearl gold) - Hose, Rigid 3mm D. 26L / 20.8cm (first appearance in pearl gold?) 6173281 (75c16 in pearl gold) - Hose, Rigid 3mm D. 16L / 12.8cm (appeared 3x) 6267914 (75c12 in pearl gold) - Hose, Rigid 3mm D. 12L / 9.6cm (appeared 2x) 11212 in dark tan - appeared in only in set 75317 so far 11211 in dark tan - appeared in only in set 75317 so far 6312473 (part 15068) in medium dark flesh - only appeared in 2 other Mario sets 6294492 (part 9563 in metallic gold) Money / Gold Bar - appeared in 2 other sets only. They look like golden spaghetti strands Conclusion When Donny Chen submitted the original design to LEGO IDEAS, he outlined his main goal in the project. He wanted to capture the mechanical details of a genuine piano, featuring: Removable keyboard with 25 independent working keys, each key connects to its own hammer. Working damper and pedal function. 25 strings. Realistic piano lid which can be open either half stick of full stick. Realistic fall board with a soft close. Removable music stand. Height adjustable piano bench. Self-playing function enabled by adding PowerFunction, which allows keys to play at different tempos and rhythms. Realistic piano wheels. Overall, the final commercial product by the LEGO designer Woon Tze Chee is very close to Donny’s goals, and to some degree exceeded them even if there were some changes made in the interior and exterior design, for better or worse. To highlight a few, these are: The omission of LEGO strings for the treble strings. Likely, looping around strings does not meet LEGO standards so they were replaced by pearl gold hoses instead. The bent side is definitely better in the commercial product despite having a gap, which is necessary to open the door easily. The height adjustable piano bench is actually adjustable. The original design was not. Grand Piano legs design is slightly better because it uses plates and tiles for added detail. No chromed parts. Sadly. On the flipside, there is no paint coat that is going to crack or peel off ever. If you are a music enthusiast or a musician, there are many things to like about the set. The highlights for me are: Great representation of the parts of piano, both exterior and interior. 25 keys, which captures the essence of the piano action mechanism, such as hammer, damper and sustain pedal. Majestic looking set, which is possibly the smoothest set LEGO ever created thanks to the extravagant use of SNOT techniques. Some of the nitpicks I could think of are: The play feature is there, but it is not mandatory to enjoy the set -- majority will display this set only and may not even use the play feature anyway. The strings are not angled inside the piano cabinet, like how a modern grand piano might look like. However, thinking more about the last point, I don't think this LEGO set is trying to be one. I know that the modern grand piano design has 2 bridges, one for the treble and another one for the bass strings. These 2 would cross each other, one on top of the other at an angle, using a wiring method called overstringing or cross-stringing. This has become very common in the modern era as it allows longer strings in a shorter cabinet design. However, grand pianos before the 1800s use a single bridge scale design, without criss-crossing of strings. A simple Google search of Erard grand piano will show that this antique instrument uses an old string wiring method, similar to this LEGO model. As this set alludes to being an antique grand piano design, this is probably the reason why the LEGO designers used the oldest LEGO logo. Finally this leads me to list down some caution before buying (or not buying) the set (soon). The key press does not correspond to the right note or any particular note for that matter. Using the LEGO Powered Up mobile app, pressing any key will play back the correct note in the phone app regardless if you are pressing the correct piano key or not. Some people may find this misleading because one might think it is capable of doing that due to its hefty price. I understand the argument that a cheap electronic toy piano can play correct notes using the right key, so why can't it do the same? Not my own words, but I am just saying that some people might think this way. You cannot play your own song in the app, even if it is all pretend play. The app is also quite restrictive. As one could be building this model to display only, without the intention of ever playing it, the set could have been cheaper if the electronic parts were not included and made as an optional add-on. However, these components were included so you might as well use them for another project. Don't trap them inside the piano if you won't use them for that purpose. There are some reports that this is hard to get because it is in limited availability status at the moment. I am not sure if the stock will normalise after few weeks but keep this in mind. Do check with your local retailer for availability first. The inspiration Review summary Design / Building Experience: 10/10 - I really appreciate the countless SNOT techniques and effort to make the mechanical parts functional depicting that of a real piano. Highly detailed and educational build. My design "complaints" are very minor and easily outweighed by extremely positive results. Playability: 7/10 - In my opinion, this should have been a display model first and foremost, with optional Powered Up add-ons only. The auto-play does not really add much because the app is restricted to very few songs only. You can’t even add your own song even if it is just a pretend play. Some might think that the pretend play is misleading, especially when someone is not familiar with the limitations of the components inside. Minifigures: N/A - Not applicable / not scored Price / Value for money: 8/10 - The price per piece ratio is highly reasonable but the set could have been cheaper if the electronic components were not included. Overall: 8.33/10 - A premium set that is best displayed even if it has very functional parts. It suffers on playability and value but it is a perfect artistic model for music lovers and LEGO fans alike. Full Flickr album could be found here.
- 31 replies
-
Support the project on LEGO Ideas! More Photos on Flickr! The Concession Corner is a high-profile modular building that is perfect for a bustling downtown scene! I made it to be compatible with existing modular buildings. To make the project unique, I decided to make this an end piece inspired by the likes of the Flatiron building. The sidewalk wraps around the entire perimeter, so it can connect both forwards and backwards. I made it on a 32x32 baseplate for the bulk of the set and a 16x32 baseplate for the tall bay window, which wraps around the two sides and gives a great view. This set works well standalone on all sides. It consists of about 2900 pieces and features two tall stories. It features a Fast-Casual restaurant on the first floor, and a loft office space on the second floor. I went through a lot of iterations to pack in building techniques that I'll let you discover. Ground Floor: On the first floor, there is a lot of space outside to pose minifigures. There is a velvet rope line leading into the restaurant, a bus stop with a wrought-iron bench, and two cherry blossom trees on either corner. In the back, there is an entrance to the kitchen and stairs to the second story. When you first enter, you can pick up a menu under a cool burger sign, or pick from the chalkboard above. The employees would be glad to help prepare food at the counter, either to stay or to go. There is substantial dine-in seating, a fountain soda machine, a condiment table, and a handicapped exit. The kitchen has an industrial fridge, a wide grill for searing fresh patties, a sink, and a cutting board. Second Story Once you go up the stairs through the back of the building, you can enter a classy lobby to be greeted by a professional to help you with any studio needs: drafting, interiors, graphics, even contemporary paintings. There's a futon, a runner and two desks, plus a balcony to view the outside. I included six different minifigures representing children, cashiers, managers, patrons, or anything you want them to be. Thank you very much for taking the time to check this out!
- 16 replies
-
- restaurant
- architecture
-
(and 6 more)
Tagged with:
-
"River, DA calling. We have a new weather report, lightning has struck. I repeat, lightning has struck!" - Nigel Wolpert Lightning has struck! by 0937 Superfan, on Flickr More details on the LEGO Ideas Topic or my Instagram . The last return to Hogwarts in Harry Potter - The Deathly Hallows - part II is without doubt the best of the all returns to the school and my favorite one. Despite this scene has the coolest “war code” message ever, warning every student that Harry has came back to the school of wizardry, it also happens in one of the most important places of all the saga - ” If you have to ask, you’ll never know. If you know, you need only to ask.” The Room of Requirement was every time the place where Harry had the opportunity to change his game against the dark magic of “we know who”. The place where the Dumbledore’s Army was born and where most of the wizard friends of Harry train them selfs to be better with magic. The place where all of his friends waited for him - The Chosen One…to regroup for the last fight! This project is my unique entry to the contest “Head back to Hogwarts™” on LEGO® Ideas page. “I repeat, lightning has struck!”… over, and go check it out!
- 9 replies
-
- harry potter
- hp
- (and 7 more)
-
The School of Athens (Scuola di Atene) is one of the best pieces of art in the history of humanity, here's the Lego version: The School of Athens was completed in 1511 and is not only considered Raffaello Sanzio's finest work, but also the work that sums up the spirit of the Renaissance. My brother has struggling to finish this project properly and almost set it aside and gave up. I took it over and finished it in a smaller scale. Why "The School of Athens"? With so many sets based on movie and on pop culture, we thought it was only right to give art in the traditional sense a chance at becoming an official product. For us, this painting represents humanity, explicitly and implicitly. Just at first galnce, some aspects of human knowledge are visible: architecture, painting, sculpture, philosophy, anatomy, cosmology, but also things inherent to the work: manual rendering of materials and surfaces, colour theory or the perspectives that became so common around then. But the fun of it are the layers of extra meaning it bears. The figures stand in certain angles, perpetually braking the symmetry, linking geometry to the real world. Raphael crafted the characters so they are immensely expressive and vital; they really do feel alive, something I feel my brother has also achieved, they interact, they discuss, they disagree, they agree, they are typically human: they cooperate with one another, something the ancients can teach us. I believe this is not a mere fresco, it is a piece of art that can teach us. Who is who? Represented here are some of the most important philosophers, mathematicians and thinkers of ancient Greece, Rome and even muslim Spain. Some of the statues are pagan gods and some of the figures have the faces of eminent Renaissance figures, with Heraclitus having Michelangelo's face, Euclid having Bramante's face and Apelles having the painter's face, all in all, a nice mix, something that also applies to today's multicultural cityscapes. Video: Fun facts about the Lego model: Originally the plan was to give the 1x1 brick with 4 studs on the sides to the women in the painting and the Erling brick to the men, but my brother ended up giving the 1x1 brick with 4 studs on the sides to male figures too, as the Erling brick didn't allow for side hair. The compass Euclid uses are some cherries. The only Olive Green pieces in the whole model are for Socrates, the originator of what today we understand as "philosophy" (the philosophers before him are today known as "pre-Socratics". The robes next to Diogenes are regular Lavander, nor Medium Lavander like the rest of the robes in the rest of the model. Only women wear Aqua garbs.
- 9 replies
-
- heraclitus
- diogenes
-
(and 12 more)
Tagged with:
-
Medieval fantasy is a beloved genre but with the end of both the Castle and Lotr/Hobbit themes, it's one Lego has veered away from (though the latest ninjago wave does somewhat scratch that itch). Here I have build the sort of thing I would like to see from Lego. I have a different take on a dwarven mine compared to existing lego sets like 7036 which is a lot more industrialised than what I have built here. As you may have guessed I made this as a submission for Lego ideas (and I would appreciate your support ) . Thanks for taking a look, I hope you liked it. Ideas Link - https://ideas.lego.com/projects/0d8ccc5d-ea58-4071-a9d8-10ecb781a12b
-
Hello! I'm a Lego fan, a Karate Kid fan, and an avid Digital Designer! Good to be here. https://ideas.lego.com/projects/2665bf8a-ca72-4b1d-8023-75035385791c
- 1 reply
-
- lego ideas
- legoideas
-
(and 1 more)
Tagged with:
-
The Ocean House Hey All! Thought I'd share my new Project: The Ocean House If you like it and want to check out the project or support it on IDEAS you can here. Any support, sharing or feedback is much appreciated! Hope you like it :). Happy building and stay safe all! I'm new to the site so any advice would be much appreciated, likewise if you wanna ask anything please do!
-
It all started with the Obelix bust I created 2 years ago. I knew I would eventually build his partner Asterix, since they share many critical characteristics as the helmet, the nose, ears and cheeks. Then I decided to suggest them both as pair on Lego Ideas because I feel they might generate a lot of interest from big Asterix & Obelix fans like me! If you feel like it, take the time to support in on Lego Ideas to become an official Lego set. Support on LEGO Ideas
-

[MOC] 1969 Mercedes-Benz 280SL
Hass Kabal posted a topic in LEGO Technic, Mindstorms, Model Team and Scale Modeling
Hello to everyone, I am here with the new Lego MOC - 1969 Mercedes-Benz 280SL. I revised a few of the original designs. Some of the important ones are that the side mirrors continue without breaking the oval line at the place where the door exits. Updating the engine as 6 cylinders. Just like the upper part of the hood looks more smoothly oval, with more smooth lines. Please do not withhold your vote on the ideas below link if you like https://ideas.lego.com/projects/91827469-0cb7-4029-98e8-14e1a01af1f4 For all photos, you can check my flickr address. https://www.flickr.com/photos/hasskabal/albums/72157713991355321 Thanks Everyone, -
I've always seen LEGO Pirates in catalogs when I was a kid, but never any merchant vessels. I built a merchant ship guarded by the bluecoats. It's on IDEAS. Pictures can be found here. Support on LEGO Ideas
-
Hi and thank you so much for accepting me on your forum! I am a beginner moc builder and I mainly build alpine themed MOCs. I have just made my first submission in Lego Ideas, a Tyrolean mountain hut to have a break from all the hiking. Rest and eat some homemade cheese here! Please tell me if you like it and if you do, please support me on Lego ideas. It would mean the world to me to know you would enjoy such a build. I would love to have Lego develop an outdoorsy alpine theme. Thank you so much for reading and click below to vote! https://ideas.lego.com/content/project/link/2e842258-824c-4b4a-a46a-1ad8007aef08





transparent.thumb.png.64c75cc99e499bf757c13576b785e380.png)
