Search the Community
Showing results for tags 'blockade runner'.
Found 6 results
-
INSTRUCTIONS are available now! Check out this post for further details: So here she is, finally! I had planned to build this for the 40th anniversary of "A New Hope" in March but I never managed to finish it in time. Well, at least it's still the right year.. :D Tantive IV (1) by Kit Bricksto, on Flickr Although I quite like the official Lego sets for the Tantive IV their proportions were highly inaccurate. I tried to get as close to the original as possible with this model. To get the scale right I started with the hardest part: the cockpit. I wanted it to fit at least two minifigures and that pretty much set the scale for the entire model. Tantive IV (2) by Kit Bricksto, on Flickr The CR-90 Corvette is 126 metres long in universe. My model is pretty much exactly 126 studs long, which makes it 1/3 of minifig scale and to scale with the microfigs. This should give you an idea of just how huge the ships in the Star Wars galaxy are. Tantive IV (3) by Kit Bricksto, on Flickr The top view shows best how off the proportions of the sets (both UCS and playscale) are. The corvette is much longer and sleeker than the Lego-models. Tantive IV (4) by Kit Bricksto, on Flickr The cockpit was the first part of the model I built. I started off with an all-studs-exposed version but didn't like the feel of it, so I tried to figure out a way to get it as smooth as possible. This worked out quite a lot better than I had hoped. Tantive IV (5) by Kit Bricksto, on Flickr One of the trickiest sections to get right was the connection between the cockpit and the main hull. At this point three cylinders meet which is always hard to get right in Lego-form. Tantive IV (6) by Kit Bricksto, on Flickr And of course I can't build anything without adding some interior detail, too. This did result in the main body of the ship being a little larger than it should but personally I don't mind so much. Tantive IV (7) by Kit Bricksto, on Flickr The cockpit seats two pilots and two communications officers. The captain can stand behind the pilots and oversee all manouvers. Tantive IV (8) by Kit Bricksto, on Flickr The main body houses a conference room, that seats four minifigs comfortably, even leaving room for a protocol droid. Behind the conference room there are two comm-stations, one of which has just received the Death-Star plans! Tantive IV (9) by Kit Bricksto, on Flickr Aft of the comm-stations there is the access-tunnel to the escape pods, where C3PO is looking for R2-D2. Tantive IV (10) by Kit Bricksto, on Flickr And finally, in the tower underneath the radar dish, there is room for one more crew-member manning the radar-station. Tantive IV (11) by Kit Bricksto, on Flickr I really hope you like it. This project has been a real work of passion for me and I am very happy to have finished it. Please leave a comment if you like it, I'd really appreciate it! And if you don't like it, well, constructive criticism is just as welcome! ;) Cheers, Kit
-
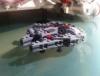
Hi all. I haven't added much to my 1:250 fleet of Star Wars fighters, gunships, freighters and one corvette (plus a couple of mini scenes) this year but I have been working on my photography. I've really enjoyed seeing the groups of ships grow and comparing the sizes of the finished products, Slave 1 and the Rogue Shadow turned out surprisingly big, but the biggest surprise was how huge a Blockade Runner is! In case anyone's interested, instructions for all of them are on Rebrickable... https://rebrickable.com/users/ron_mcphatty/mocs/ And here's another with almost all the ships arranged together, which took far, far longer than I thought it would!
-

[MOC][Instructions] Micro Scale Blockade Runners: The Liberator and Tantive IV
mcphatty posted a topic in LEGO Star Wars
Hi everyone! I have been building up to tackling a 'Blockade Runner' CR90 Corvette for over a year, MOCs this size are definitely not my strong point so my thanks go to community members Bruxxy and MasterBrickSeparator for their help. First things first, here's a render of both the Tantive IV and Liberator colour schemes, there are more on my Flickr page and should any of you be interested the instructions for both colour schemes are available on Rebrickable. I can hear a lot of you screaming at your screens "Its not micro!" and I admit you're probably right, the build is 59cm long and weighs 1.6kg which is similar to the Tantive IV set 75244 from 2019. It is however the same scale (1:250) as the rest of my little fleet of ships so I feel like I couldn't not slip micro into the title. I've tried my best to make the exterior as accurate as possible, I began by dividing and measuring the obvious sections and designing them seperately in Studio, then connecting them to a Technic frame. I started with the cockpit and worked backwards, although I nearly gave up there as getting the shape right whilst leaving space for an bridge was a nightmare, the modular nature of the ship made building the rest much easier though. The central fins also proved difficult, they are the most fragile part of the ship and can be easily knocked out of position, but very luckily they fit around the cylindrical core well enough to look pretty accurate. The fins also make the ship harder to pick up, two hands are required to lift the ship off a surface until you can hold the stand in one hand. I'll keep working on his aspect in case a stronger solution is possible, I would really love it if I could make the ship one-handedly swooshable. Fininishing with the engines I came across a new challenge, how to build the 11 thrusters with enough detail but not so much that they would cost a fortune in small pieces. The structural frame is very strong, its probably overengineered but I'm pleased with how solid the build feels as the strength was a complete unknown to me whilst designing in Studio. Best of all the frame allows for a tiny interior, sadly its not 1:250 scale (Lego pieces only go so small!) but it does give the MOC some extra playability and character. The roof can be removed in two sections to expose the cockpit, the upper deck and top gunner position, a central corridor running the length of the ship and the docking areas near the rear side pods. The upper deck can also be removed to reveal the main deck's conference room, side engineering corridors and micro escape pods, which are also all removable. At the end of the project I especially enjoyed adding a little 4-stud tall crew, each little stack of round plates is probably unreconisable individually but I think that when they're seen together with the ship they really come to life! Whilst putting together the instructions for both colours I decided that I wanted to build the Liberator from Star Wars Rebels. I've been rewatching the show and I have to admit that after seeing the ship in action repeatedly in season 2 I feel that its far more exciting than the Tantive IV! I'd love to take more photos of the Liberator with my other micro ships but at the moment I don't have the equipment, skill or enough micro A-Wings to do a decent job, but I'm working on it. Here's a few photos showing the Liberator along with my micro Ghost and X-Wing, plus the interior. You can see more in my Flickr album. I've tried to balance detail and cost, so apart from a few rare colours for the Rebels crew the 1900ish parts are all common and each of the ship colour schemes will cost roughly £/€/$150 to build. I know that the Blockade Runner has been recreated in Lego many times, both by Lego themselves and the community, but I've tried to make something with a few unique features that is hopefully a worthwhile addition to the roster. Thanks for taking the time to look :) -
Since I started LEGO Star Wars in 2015, I wanted to own a Tantive IV. The sets from 2001 and 2009 were far too expensive on the secondary market. That's why I was really happy when a new version was announced. There was a lot of discussion about the set. Everyone had a different expectation. I am glad that it has become an improved version of the 10198. Nevertheless, there were a few things that bother me. The biggest criticism for me is the cockpit. I do not like stickers. In a few years they will take off and then the model looks bad. That's why I built it with bricks. The role model was the @Kit Bricksto UCS Tantive - CR-90 Corvette. More improvements: - Removed the stud shooters!!! - Removed the handle - Colour matching - Facing the bottom with inverted bows - Extension gun turrent on the botton - Radar turett mirrored down - Brickbuilt upper wings between conference section und radar tower My next goal is to change the inside of the cockpit, because at the moment, Captain Antilles can’t sit inside. Maybe you have more ideas for improvements. Then like to post here. Here are the pictures. Tantive_IV-01, on Flickr Tantive_IV-02, on Flickr Tantive_IV-03, on Flickr Tantive_IV-04, on Flickr Tantive_IV-05, on Flickr Tantive_IV-06, on Flickr Tantive_IV-07, on Flickr Tantive_IV-08, on Flickr Tantive_IV-09, on Flickr
-
A long, long time ago I started working on a micro scale Millennium Falcon. To begin with all I wanted to do was add detail to the Microfighter but I kept tinkering and before I knew it I had a growing collection of micro Star Wars freighters and fighters, and here they are! Instructions for all these little builds are on my Rebrickable page. Since this all started with that Falcon Microfighter the cockpit piece (a light blueish-grey 2x2 truncated cone) became my yardstick for scale. Luckily trans-black 1x1 slope pieces work as fighter cockpits at the same scale so all the ships are, and will continue to be, as close to scale with each other as I can manage, at least based on these pieces and whatever reference images I can gather from Google. My Blockade Runner (April 2021) is the last ship on my micro Star Wars to-do list, although it’s hardly micro! The size and weight were a new challenge for me, I’ve never had to worry about a moc falling apart under its own weight before, but I enjoyed the challenge and managed to make it pretty easy to pick strong. I’ve put together instructions for the Tantive IV as well as the Liberator from Star Wars Rebels, which I couldn’t resist building for myself. Rather than doing new posts for each new ship I’ll edit the very long post below. All the instructions are on my Rebrickable page and there are photos and Studio renders some photos of the ships in this post, plus a few more on Flickr and Instagram. Thanks for looking!
-
[MOC] UCS CR-90 Corellian Corvette – Blockade Runner (Tantive IV)
mortesv posted a topic in LEGO Star Wars
The work building a Rebel Fleet continues! The latest addition the Rebel Fleet is the CR-90 Corellian Corvette, better know as a Blockade Runner. The CR-90 was built by the Corellian Engineering Corporation for the Empire, but many of them were stolen by the Rebels. Over time they became a mainstay in the Rebel fleets. This specific rendition is of course Leia’s counselor ship: the Tantive IV. The model is built using the same 2-meter/stud scale as the rest of my Rebel ships and fighters. Thus the 150-meter ship becomes a 75-stud model. My goal was, as always, to capture every little detail of the studio model. However, this time there was also the challenge to improve the two official renditions of the ship. Comparing the TLG versions with the studio model, it became clear that getting the proportions right seems to be difficult - since both version are pretty far off. As always the design process began in LDD but ended in bricks – some things are simply more easily designed in real life :) When I was done the model consisted of just over 2800 bricks distributed across 250 brick types. The Tantive IV. Chased Through Space. This angle shows off the command section - which was one of the last parts I built. I knew all the proportions of the section; it was just a question of how I could represent them best while retaining crucial detail. It was tempting just to use large cone bricks. But I did not want to compromise any detail. I ended up using a lot of different slope -and wedge bricks and plates, combined with hinges and tiles. Dark red round 4 x 4 plates in combination with 3 x 3 discs was the solution for the red markings on the sides of the command structure. However, this also meant I had to make room for technic axles inside the cockpit – alongside hinges, the spine of the ship, and other stuff. Suffice to say, it is a very cramped bridge :) Model Side View. As mentioned above, getting the proportions to fit with the studio model was a priority when designing the ship. Using pictures and diagrams of the studio model, I have gotten with within a pretty tiny margin. Model Top View. Another challenge was to replicate the smooth transition from the body to the engines section. To achieve that I used corner slopes. Comparison pictures of the studio model can be found here: http://www.modelermagic.com/?p=57848 The Main Dish. The mold for the main dish is the same as the one used on the two TLG versions of the ship. The way it is mounted is inspired by the movie version - using droid arms to get the proper detail. Just below the dish, the studio model has two angled door-like vents on either side of the base. I have recreated this detail using hinges and grilles. On the same base, facing the engines, are also four small, horizontal cylinders – these are visible in the picture below. The area around the antenna sports an almost fin-like structure. The purpose of this structure is to stabilize the otherwise very slender body of the ship – considering the combined torque provided by the 11 Girodyne Ter58 Ion Turbine Engines. I tried to convey this thin structure in a multitude of ways. The cleanest solution I found was using flags. Flags are quite thin and can be placed at the desired angle with no fuss. Using several flags in a row I could slightly adjust the angle from flag to flag to approximate the desired lines. Docking Rings. Beneath the antenna we have the symmetrical docking area. Here we find the docking rings where the CR-90 can dock with other ships. An interesting side note: since the early concepts and prototype models of the Blockade Runner was referred to as the “smugglers ship” aka the Millennium Falcon, the round housings around the docking rings were originally supposed to represent a one floor walkway. The equivalent on the final Falcon is the side docking rings – in the Smuggler Ship’s original form these we 1:1 with the ones on the Falcon. In the final version of the Blockade Runner, the docking tubes are representing several floors of walkways. In this picture it is also apparent that the ship if made up of a number of slightly different sized cylinders. To get these shapes I once again turned to the curved slopes I used in the GR-75. It turned that I could render most of the core body of the ship using these bricks – all I had to do was to create a long square 4x4 center with studs on all sides running through the entire body :) The Main Turrets. As with the docking rings the main turrets were originally equivalent of the turrets seen on the Falcon. Since the ship changed purpose and scale substantially during production of “The Star Wars”, the turrets grew from anti-fighter duty, to heavy turrets effective against large ships – although still immensely underpowered against the shielding of an Imperial Star Destroyer :) Main Hull. The main hull of the ship houses the living quarters. We also find a number of smaller anti-fighter turrets. Oddly these turrets are only found on the dorsal part of the ship, rendering it vulnerable to fighter attacks from the ventral angle. This part also sport a bit of discrete piping. On the spine of the main hull is more detailing and I have displaced some of the slopes one plate to give the side of the spine some texture. Escape pods. But who cares about fighter attacks or encroaching Star Destroyers, when you can jettison yourself to the desolate safety of Tatooine’s sand dunes? As you can see, several of the escape pods have already taken off – perhaps one of them were carrying a couple of oddball droids? The escape pods are made up of a 2x2 cone brick with a 1x1 round tile on top. Jettisoned escape pods are represented by a 2x2 round dbg tile with a hole in the middle, to convey the scorching from the explosion that shot the unlocked escape pod into space. Side Detail. On the sides of the main hull there is a narrow band of greebling on the studio model. The band wraps around the entire section and, like with the section itself, I used hinge bricks to capture the different angles. Main Turrets Bottom View. In this close-up we see more of the detailing of the main turrets. This area also hides the ship’s front landing legs – where the transparent stand is. However the ship is in flight right now so the legs have been retracted :) Engines! Now to the best part of any ship :) The official UCS version (10019) of the Tantive IV was one of my favorite ships for a long time. But when seeing the movies, it is clear that the Lego version has some issues regarding proportions. It is very bulky and square looking and does not properly convey the slender nature of the ship. This is especially true for the engine section, which is a large square block with oversized engines placed directly next to each other. In this regard the later 10198 is much more accurate. I my version the engines have the correct diameter and length in relation to the ship’s overall proportions. The horizontal spacing between the engines are ½ engine diameter. The vertical spacing between the three rows of engines are around half a stud. Each engine sports brick built panel with detailing – no stickers :). I used a bracket brick to have the panel run down the sides of the cylinder. Engines Top View. The 11 Girodyne Ter58 Ion Turbine Engines in all their glory! Here you can see all the details and cables on the engines. I considered using rigid cables, but I had to heat them up to get the proper shape. The cables were also too thick. However, I found that by placing a 1x2 bracket in the side panels I could place levers on top of them. The levers convey thin cables running from the sides of the engine to its core. Engines Close-up. The engine housings were also detailed looking at the studio model and as you can see not two engines are the same. It is worth noticing the angles of the engine housings. I have tried to get as close to the studio model as possible, while also taking into account that the side-most engines have a steeper angle. The middle (seen from the side) engine housings also have their own specific angle. These features were completely ignored on the official TLG models and contributed to the 10019’s blocky appearance. Engines Bottom Rear View. As mentioned above, each engine is different. This is not only in terms of detailing, but also how they are attached to the ship. Top, middle and bottom engines are attached differently. Top engines are placed on the top of a plate, middle ones at the end of technic bricks, and bottom ones are attached to the bottom of plates. Since the engines are mirrored left/right not two engines are the exact same. The detailing of the nozzle of the engines is made using a sailing ship rudder and a lot of 1x1plates with side clips and 1x1 tiles. And yes, the exhaust should have been yellow, but there are no trans-yellow 3x3 dishes :) Scale Comparison. As always, I have a scale model with my MOCs. This time the model is my 7½-week-old son. He is a huge Lego Star Wars fan :) The Tantive IV Flying Away. Enjoy, and please comment!