Search the Community
Showing results for tags 'V2'.
Found 6 results
-

[Idea] Link Two V2 Pneumatic Actuators End to End.
Saberwing40k posted a topic in LEGO Technic, Mindstorms, Model Team and Scale Modeling
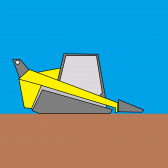
So, @Fieldtest requested a device to link two of the large V2 pneumatic actuators together, end to end. this is what I came up with, and it is so potentially helpful that I thought it would be worth sharing in its own topic. Pneumatic Cylinder Connection by Saberwing007, on Flickr It's pretty easy to make, but it was a real pain to figure out, because Lego, in their infinite wisdom, made some of the dimensions not a whole number of studs, which is really odd for them. Thus, this build needed some very illegal connections in order to work and be stiff. I've also got some more construction pics: Step 01 by Saberwing007, on Flickr IMG_20171214_180212047 by Saberwing007, on Flickr Step 03 by Saberwing007, on Flickr There you go, I hope you all find this to be useful. -
warrior v2 (WIP)
Aventador2004 posted a topic in LEGO Technic, Mindstorms, Model Team and Scale Modeling
this is my second attempt at the warrior supercar. it is a Wip and will be untill my lego part order arrives. I would like to incorporate these features: 1. Hog / servo. 2. Double wishbone suspension with twin rear shocks. 3. Gearbox : canceled. 4. Working (fake) engine. 5. Sporty bodywork. 6. Functional steering wheel. note: this is a fictional car so it will be easier to customize. -

[MOD] 42037 Ultimate *Now with Instructions!*
Leonardo da Bricki posted a topic in LEGO Technic, Mindstorms, Model Team and Scale Modeling
This was just a quick weekend project. I am fond of the 42037 set, as it was one the sets that got me interested in Technic. So, I decided to try to do it some justice, and I motorized it, first with an L-motor, which wasn't great, then with an XL-motor, which was about the same, then with 2 L-motors, which was the best. Then, I got a buggy motor. And since I had just taken apart a failed battlebot, and the buggy motor was lying there, begging to be used, I decided to use it. I rebuilt my 42037 Formula Off-Roader, with a few changes, which are as follows: 1. Changed the colors from light bley/med blue/lime/black to black/white/lime. 2. Removed the inline-4 fake engine. 3. Added full motorization, buggy motor for drive, servo for steering, AA battery box with a V2 receiver. 4. Bodywork changed a bit to fit the new colors and cover the gap left from removing the fake engine. And a light bar was added, because I didn't like the round spotlights. 5. Very minor, but I changed the rear shocks attachment point on the rear suspension arms, they were moved out one more stud than shown in the instructions, in order to have better travel and not be under compression, which was an issue in the original model. If anyone is interested, here is the LDD file instructions! Anyway, I know you're all tired of my rambling, so, with out further ado, I present to you the 42037 Ultimate Racing Buggy! 42037 F 42037 FQR It has easy access to the battery box, both to replace it and to turn it on and off. 42037 FQL The suspension is great, one of the best parts of the original set, which I kept and slightly improved. 42037 Mod 42037 FQR-s The source of power and speed! The almighty BUGGY MOTOR! 42037 Rear The required photo of the underside. The wheelbase and chassis are the same dimensions as the original set, though the buggy motor hangs out the back by a couple studs. 42037 Chassis I hope to make a video soon, but it started raining after I took photos, so maybe in a few days. But finals are coming up, so it may take some time. I will also add some cutaway photos soon, for anyone who wants to replicate my mod. Or, use the LDD file instructions. Thanks for looking at this, please give C&C, ask questions. More on my Flickr. - Leonardo da Bricki -
.thumb.gif.ad7c8d88b264ee812194946c07404504.gif)
Power Functions V2 receiver not in new sets?
mocbuild101 posted a topic in LEGO Technic, Mindstorms, Model Team and Scale Modeling
While looking to buy a PF V2 receiver (58123bc01) I realized that it is only in 9398 and 41999 (both 4x4 crawlers), but is not in later sets like 42030 and 42065. I have been confused by this because I thought that it was suppose to replace the old receiver (58123c01). One thing I thought was that the insides were changed but they didn't have V2 printing, but why I don't know. Hopefully someone knows what's going on! -

[MINI] V2 Motorbike
gsia17 posted a topic in LEGO Technic, Mindstorms, Model Team and Scale Modeling
Hi all. I decided build a motobike for contest because 200 parts enough to do it! Second version of my bike.(First version without suspension here) I inspired by old Lego's motorbikes like 8210 But I did not like the lack of drive, so motorcycle became with a fake engine All photo - https://plus.google....859840203432049 Video review: -

Fastest Lego RC Ever?
1nxtmonster posted a topic in LEGO Technic, Mindstorms, Model Team and Scale Modeling
I put together a super-fast mini rc chassis. It has buggy motor geared up 20:16 for drive, and servo for steering. Lipo and v2 receiver provide power. It goes a measured 17.5 KPH (11 mph). So I was wondering if anyone built anything faster. Video: