Search the Community
Showing results for tags 'Technic'.
Found 1584 results
-
Curious if anyone has used the Build together feature in the Lego Builder app yet and what they thought of it? What set did you use? How many people? Were they all AFOLs? Did it 'work'? Was it fun? It seems odd that any concept of 'togetherness' begins with each member on their own mobile device but I suppose this is a necessary evil given the subject matter. I've always tried to get my friends in on the fun, especially when building the big Technic design released each year around my birthday. Admittedly, there have been varying levels of interest over the years... This year, everyone asked me what I wanted for my 50th birthday (you mean, apart from pretending this milestone isn't actually happening?!?) Naturally I feel inclined to force them through building 42146 with me. What do you think?
- 5 replies
-
- build together
- builder app
-
(and 4 more)
Tagged with:
-
A motorized trophy truck model controlled by BuWizz. It is propelled by two RC buggy motors. Features drive, steering, full suspension, and working headlights. Functions/features: Drive Steering Full suspension Working headlights Instructions available on Rebrickable: https://rebrickable.com/mocs/MOC-156104/JLiu15/red-beryl-t/#details This is a MOC with an interesting backstory. I first decided to do my third MOC in the Red Beryl series (after my Red Beryl GT in 2018 and AWD supercar Red Beryl X in 2019) in late 2020 shortly after my first MOC featuring BuWizz and RC buggy motors - my Azure Racer XL. Unlike the finished model, my first attempt used CLAAS Xerion tires and had the RC buggy motors in the chassis instead of having the wheels directly attached to them. I don't recall exactly, but I even included a two-speed gearbox in the model thanks to the inclusion of a drivetrain and differential from the motors. The model turned out much larger than anticipated, meaning the bodywork would have to be very large as well. Given the model was already performing below my expectations, I decided to abandon the project...until two years later. I knew a good first step would be to use smaller wheels, and the spiky treaded tires from the 42124 and 42126 sets seemed to be a perfect fit for a trophy truck. The rear suspension is similar to that of my Azure Racer XL (it even retains the same basic geometry), although it is a solid axle this time instead of the left and right wheels being independently suspended. However, the suspended section is longer on this model, providing a softer suspension with more travel. I guess the shock absorber setup here is not the most realistic for a trophy truck (as most trophy trucks I've seen have their rear shocks more or less vertical), but the suspension setup nevertheless performed well. The front suspension is a typical double wishbone setup with the entire front axle tilted 10.8° for positive caster. Because the front and rear shock absorbers sit approximately half-compressed while the model is on the ground, it did impact the front ground clearance a little, although it was not really an issue when I tested it. The BuWizz unit is located directly in front of the rear axle and is placed low in the chassis to lower the center of gravity. The two RC buggy motors are each connected to its own BuWizz port (as recommended by BuWizz), with another port used for the PF Servo motor for steering. Because there is one port left on the BuWizz unit, I added two pairs of PF LEDs to the headlights. Thanks to the BuWizz speed settings they can shine brighter than when powered by a PF power source, although in my video I did not film it with the lights on as I did not want the BuWizz to cut power from the drive motors. Designing the bodywork was surprisingly challenging. I wanted to stick to pieces I already have as much as possible. The choice of wheel arches/fenders was easy - I used the black arches from the 42126 set paired with fenders from the 42125 set, adding some much-needed curvature to the model. The hood was also straightforward, as it is comprised entirely of 3x13 curved panels. Because the front axle sits at an angle for positive caster, I attached a front bar to it that allowed for an angle normally not achievable with angled connectors. I tried to avoid blue pins as much as possible, using red or gray pins in place of them. The doors were more challenging and it took me a few tries to get the desired result. I wanted to ensure the doors stand out from the rest of the model, but too much curvature looked weird. I went with a design where they slightly recess into the model. The section between the doors and rear fenders was perhaps the most difficult, as it needed to provide a transition from the relatively flat doors to the curved rear fenders. I went with all curved panels and liftarms for this area. I did have to order some new red pieces for the bodywork, namely the curved 1x2 and 3x2 panels at the top edge of the doors and the red 2x3 and 2x5 liftarms in the section between the doors and rear fenders, but the bodywork still mainly consisted of red pieces I already had. System pieces (tiles and curved slopes) are used to fill in the gaps in these areas. The roof was a simple build, although securing it was a bit challenging as it had a tendency to tilt forward. I had to experiment with the A-pillars a little bit but settled on a setup with 7L flex axles. The rear of the model is left rather unfinished to reduce weight, although that is pretty typical of real-life trophy trucks, and the single spare wheel in the back provides just enough weight for the front and rear axles to sit at similar heights when the model is on the ground. The model performed pretty well, and the two RC buggy motors gave it plenty of power. I had wanted to drive a fast off-road MOC at a skate park for years now, and this is my first MOC that I filmed at a skate park. It was fun seeing the model drive up and down the slopes, although it still lacked torque to completely drive over the smaller slopes. I had to be careful with letting the drive motors run at full power as in the Fast and Ludicrous speed settings (or even Normal sometimes) the BuWizz would cut power to the motors when overloaded. Accelerating from a stop on Ludicrous mode was pretty much off the table, although I was able to switch into Fast mode after accelerating on the Normal setting. Two RC buggy motors with their inner outputs geared 3:1 was good for fast driving and small obstacles, although more torque and traction are needed to overcome larger slopes/obstacles. Overall, I'm quite impressed with how this model turned out. Despite having more than twice as many pieces as my Azure Racer XL model, the performance did not suffer much and I had a lot of fun driving it around at the skate park. The suspension is also satisfying to watch, as the model can "float" over obstacles with both the front and rear shock absorbers approximately half-compressed when the model is on the ground. Compared to my first attempt at the model two years ago, it shows that the ideal approach to such fast RC buggy motor-powered models is not to build big, but just big enough to achieve optimal performance. Video: Photos:
-
Hello! I have been looking at the new little guys in Dreamzzz and got to thinking about all the "odd" figures over the years since the Minifigure was introduced. From 4 Junior's Jack Stone, Basic & Fabuland, the variety of figures from Belville, Technic and the Bionicle/Hero Factory minifig scaled characters... Really, from A to Xalax. There has been a lot of the non standard figures (I liked the Elves Goblins, Rock Monsters from Power Miners and the Game board minis quite a lot also). So, opinions? Like 'em, Love 'em? Loath the figures appearing at all? Just to nip anything in the bud: Minidolls can count in here but after so many consistent years in production I would say they are not odd figures when compared with all the others I have mentioned above. Figures that have appeared for a while, even just one theme, and are now gone.
-

[MOC] Lake Champlain Horse Ferry (Working Replica)
elfprince13 posted a topic in LEGO Historic Themes
Historical Info Horse-powered ferries (also called "team boats") are a unique form of transportation popular in the United States in first half of the 19th century. The most sophisticated version, invented in 1819 by Barnabas Langdon, mounts a treadwheel just below the deck, which is geared to a pair of paddle wheels. Slots in the deck along two teams of horses to be hitched, facing opposite directions, and maintain a steady forward gait powers the boat. A wreck was discovered in Lake Champlain's Burlington Bay in 1983 and remains the only archaeologically studied example of a turntable horse ferry in the world. More information about this unique piece of transportation history, including how to safely visit the wreck, can be found through the Lake Champlain Maritime Museum. About the Model The model is geared to allow a Technic motor to power the treadwheel + paddlewheels, and makes the horses trot inverse-kinematically, as demo'd here: A look at the full ferry: A cutaway showing the internal gearing: Some more shots from minifig-POVs: -
Wasn`t sure if i had to post this on the old thread or to make a new one, but I decided to be safe. Anyway, I recreated Jantayg`s buggy made for the BuWizz 2018 ”Fast car competition”, but, being a recreation not a copy, differs in some manners, such as the way the front frame is attached to the main chassis. This MOC has 1x buggy motor and 1x servo-motor, pneumatic shock absorbers, a good suspension travel and a space more than enough for the battery/ electronics but sticks to around 700g with 1x battery. You can find the digital construction file and the part lists for the other paint-jobs on Rebrickable Thanks to the original creator that accepted this recreation to be made public!
- 19 replies
-
- technic
- instructions
-
(and 3 more)
Tagged with:
-
Dear all, Another year, another crane. This time it's a crane in the size range of the 42042. The crane hase the same track size and width, and shares more or less the same frame, but this time in black, also I decided for now not to motorize the tracks. The body has also more or less the same size and structure as the 42042, but I tried to make the body less wide. The crane has 4 motors, 2 L-motors for the 2 winches on top, one XL-motor for slewing and 1 angular motor for the 3rd winch. They're all housed in the body and connected to the battery box aft of the main body. The 2 ballast boxes each hold 150grams of ballast. The building showed me it's indeed difficult to make a rugged build, due to the flexing of lego parts because of sideways movement of the crane boom. this was almost complete fixed with the installation of the 2 springs and some additionals beams for support at the front of the body. For now the crane can lift 350 grams in its highest and most comfortable position. The cabin has an openable door and can be tilted upwards(not seen here) I used the good old lego metal hook with 50 g of ballast stuck to it, I didn't use a turntable this time because it would make the hook too bulky and too big Here's a view of the panels removed, you can see the placement of the motors and the winches, the winch of the hook is directly connected to the angular motor, without any gears The last photo is for scale, in it's highest position the crane reaches 1,35 m, additional sections can offcourse be added
-

[TC 25] 42055 C-Model: Mining tipper truck (rat race)
Timewhatistime posted a topic in LEGO Technic, Mindstorms, Model Team and Scale Modeling
Hi Eurobrickers, I really like the idea of the TC 25 shrinking contest, but unfortunately I won't be able to participate. This contest will give us a lot of creative mocs. In some cases the participants will choose the same set, which will give the opportunity to compare and appreciate the entries. Nice! Back in 2017, I built a simple small C-Model of (part of) the BWE set 42055: A shrinked version of the mining truck which was included in this set. It was also available as a single set (42035) some time before - rather this is the colour scheme my little C-model corresponds to due to the yellow panel. The main challenge was that it needed 4 wheels (= 12 t bevel gears), but 42055 includes (hard to believe...) only 3 pins for that purpose (tan 2L axle pins without friction tan). ;-) So the fourth axle ist a brown 3L axle with stop. Probably it won't meet the specifications of the contest because of the electric function... ;-) https://brickshelf.com/cgi-bin/gallery.cgi?i=6492892 Mining Truck 42055 C-model https://brickshelf.com/cgi-bin/gallery.cgi?f=569964 More pictures I didn't manage to insert a brickshelf-picture in this topic, so just use the links in case of interest. :-( -
Model of a New Flyer XD40 transit bus in MTA livery. The model has roughly 3800 pieces. Features motorized drive, steering with working steering wheel, passenger doors, and a removable Cummins engine model with moving pistons. Functions/features: Drive Steering with working steering wheel Remotely controlled doors Removable Cummins engine model with moving pistons Instructions available on Rebrickable: https://rebrickable.com/mocs/MOC-153565/JLiu15/2015-new-flyer-xd40-mta-bus/#details Because my NJ Transit New Flyer XD60 model was a huge success, I decided to reuse my design and make another Xcelsior model - this time a XD40 in MTA colors. Unlike my NJT XD60 model which has the livery done entirely using stickers, the blue stripe livery MTA used prior to 2016 is easy to design with blue LEGO pieces. As a result, the model is recognizable as a MTA bus even without stickers, which is why I specifically included "MTA Bus" in the name. The model is not simply my XD60 model cut shorter. The chassis is redesigned from scratch. The front and rear axles are placed at a half-stud offset to allow for smaller wheel arches. The XL motor for drive is placed in front of the rear axle instead of behind it to allow space for the Cummins engine model. The battery is placed much higher and is accessible by removing the upper rear body panel. I added a switch on the roof to allow the battery to be turned on without removing the body panel, so it only needs to be removed for charging. There are also no supports in the chassis for the rear door as the rear door on MTA Xcelsiors open outwards, and the front of the chassis is redesigned to accommodate both the mini linear actuator for the front door and the connection from the steering wheel to the Servo motor for a working steering wheel. Lastly, the chassis is also designed to specifically accommodate for MTA's seating layout, most notably with only a single seat per row on one side in the low floor section. Like my XD60 model, there is also a roof frame that holds both motors for the doors as well as the rear door mechanism (which uses the same general principle as the inward-opening front door despite opening outwards). The roof frame is attached to the chassis using beams, making for a robust "skeleton" that the body is built around. The bodywork has also been redesigned in several places. The wheel arches are now smaller due to the half stud offset of the front and rear axles, although I had to use inverted slope pieces instead of arch pieces to allow the blue stripe to be built entirely in LEGO. This means the wheel arches are not perfectly curved here, but I found it to be a fair compromise for making the entire blue stripe in LEGO. The front lower body panel is one stud higher here compared to my XD60 model, although it kind of makes it look like the front of a MTA Orion VII NG (MTA Xcelsiors in the blue stripe livery have the bottom edge of the front windshield curve downward slightly, and such a curve would be very difficult to model in LEGO at this scale. The rear body panels use a simpler and more robust design, the front roofline curves are angled slightly outward (the space between them was increased by 2 studs), and the side body panels are attached to the chassis/roof frame using white 1x1 Technic bricks with axle hole and part 27940 in white. This allows for a seamless body without pins showing; part 27940 in white was not yet available while my XD60 model was being built. The roof is primarily built using 6x6 tiles this time instead of 5x11 Technic panels - because MTA's 2015 XD40s do not feature a full roofline, the transition from the side body panels to the roof is much more noticeable here which is why I went with the tiles. The model's functions all worked well. The single XL motor was more than enough to power the model, especially considering this model is lighter than my XD60 model. Although the moving pistons on the Cummins engine model are not easily visible (there's one piston visible under the last row of seats), I am happy that I was able to add some additional functionality to this model. And because the pistons are made using half bushes, the engine makes a nice sound while the drive motor is running. While designing my XD60 model I thought there was too little space in the front to incorporate a working steering wheel without compromising the rigidity of the chassis, but I was able to connect the steering wheel to the Servo motor just fine here. There is less reinforcement immediately in front of the front wheels so they don't collide with anything when steering, but the side body panels keep everything robust. I did not test the rear door mechanism before installing it on the model so I was concerned how well it will perform, but it is usually able to open the rear door fully with each door panel rotating 90 degrees. Sometimes the mechanism gets stuck while opening the door, but reinforcing the pieces a little usually solves the problem. While at first glance this MOC looks like my XD60 model shortened and without an articulation joint, it was really a new MOC from scratch. The chassis is completely redesigned and has little resemblance to the chassis of my XD60 model even without accounting for the lack of the articulation joint and a third axle. The bodywork was also improved in several places. All of the functions performed as expected, and the finished model is easily recognizable as a MTA XD40 even without stickers. Speaking of which, I decided to make my model bus 7225 operating out of Grand Avenue Depot in Brooklyn signed for route B62. Overall I am very satisfied with how my second bus MOC turned out, and I plan to continue making bus MOCs in the future, with one already in progress. Video: Photos: Brickworld Chicago Photos:
-
I have been trying to find a place to post Mocs I have built from some of the designers here. (first to admit im pretty useless at anything computer related and may have missed something). But if there isn't such a place, is it possible to add one. ? A place where building, even an old, moc of someone's wouldn't require a dreaded " old post bump" to show it? Anyway that's all I have, and if I have completely missed a spot to do this, I guess this post is mute.......
- 9 replies
-
- technic
- model team
- (and 7 more)
-
Model of a Mack Granite truck equipped with a boom and flatbed. Features drive, steering, full suspension, motorized boom elevation, extension, and rotation, winch, and extending/lowering outriggers. Functions/features: Drive Steering Full suspension Boom elevation Boom extension Boom rotation Winch Outriggers Instructions available on Rebrickable: https://rebrickable.com/mocs/MOC-150955/JLiu15/mack-granite-boom-truck/#details After the 4-output distribution gearbox on my MCI D4500CT Commuter Coach model proved to be ineffective, I didn't want to simply abandon the gearbox design. I decided that I was going to tweak the gearbox a little to be used in a new MOC. I had wanted to use the same suspension setup for my MCI D4500CT model as a test bed for the suspension design, so I settled on incorporating the gearbox into a truck model. A boom truck like this is a MOC I had wanted to make for quite some time, as I see plenty of them in the US but not that many MOCs of them. Because the turntable for the boom is placed higher up, it leaves more room to route gears/axles from the gearbox to the 4 functions it controls. Because the gearbox sits in the heart of the chassis between the outriggers and rear axles, the chassis is built very densely. The gearbox makes use of two Control+ L motors: one for shifting and one for driving the output functions. The drive motor (a Control+ XL motor) sits directly behind the gearbox, and drive is transferred to the rear axles via an extendable CV joint. The drivetrain is geared down after the CV joint to reduce the amount of torque applied to it. Lastly, there is another Control+ L motor for steering which is built into the front axle. I designed the suspension (a simple live axle for all 3 axles) entirely in Stud.io before building it physically, so I had no idea how it would perform upon building it. However, the entire setup worked flawlessly, and there are no issues with drive transmission into the suspended rear axles. My initial plan for this MOC was to just build it as a generic US-style truck, but upon finishing the cab someone said it resembled a Mack Granite, so I modified the cab to actually make it based on the Mack Granite with the Mack Bulldog emblem from the 42078 Mack Anthem set in the front. A number of metallic silver elements are used in the front, although due to the relatively low number of pieces available in that color there is still plenty of gray in the front (such as the bumper). The Control+ hub is placed in the back of the cab and is removable for battery replacement by removing the roof, as the hub and roof are attached to each other. This means the sides of the cab must be sturdy to compensate for the relatively loosely attached roof, so the doors do not open on this model. I decided to build the cab in dark blue, a color I have not used much before, as I now have a sizeable collection of dark blue pieces from the 42083 and 42154 sets. I built the boom in yellow to contrast with the dark blue cab. The boom is built around 3x19 frames covered with tiles. Their abundance of pin holes makes them a good candidate for crane booms. It was difficult routing the two motorized functions through the turntable and into the boom, as two separate axle functions must pass through a small space. Because only two axle functions can be routed through a turntable, I had to make the winch manually operated with a ratchet mechanism. I was initially concerned about the weight of the boom, and while the boom does tend to lean forward during the elevation process, everything remains intact even at maximum elevation and extension and the range of the boom is quite impressive. There are no stoppers for the boom rotation, so the boom can theoretically rotate infinitely as there are no wires going through the turntable. The outriggers, however, were a weak point for the model as they are quite flimsy and are unable to lift the truck off the ground without substantial bending, so I limited the outriggers' legs extension to where they are able to make contact with the ground. Additionally, I should have geared down the mechanism substantially more, but a modification would require essentially rebuilding the chassis from scratch. As a result, I set the gearbox motor responsible for driving the gearbox functions slightly below maximum speed. I had wanted to be able to control the gearbox functions with a single touch (e.g. pressing one button shifts the gearbox then drives it in a given direction) but was not able to figure it out so I went with a much more straightforward (albeit more difficult to use) controller setup. A single slider is used to drive the gearbox functions, and three buttons are used to shift the gearbox (up 90 degrees, down 90 degrees, and return to one endpoint). I have to keep in mind the position of the gearbox while controlling the model, but the setup overall worked well. Overall, this was a MOC that had plenty of mechanical complexity, but certain functions could've been designed better. While all of the functions work as intended, the boom leans forward quite a bit when the boom elevates and the outriggers cannot lift the truck off the ground. The front axle could've also been reinforced better, as during the steering calibration process the steering pinion gear often skips a tooth. Despite the drawbacks of this MOC, it still largely met my expectations as the drivetrain and suspension worked flawlessly and the dark blue/yellow color scheme worked well. Video: Photos:
-

[MOC]◄URAL 4320 6x6►[2023]
Michael217 posted a topic in LEGO Technic, Mindstorms, Model Team and Scale Modeling
Welcome to my garage LEGO!!! Hello! My name is Michael. I'm a Builder from Russia, I love muscle cars! URAL 4320 6x6 The legendary Soviet truck, which has been produced since 1977 to the present! I started collecting in parallel with Dodge at the beginning of the year. Initially, I put ordinary hubs on it and drove around the house very well, but before photographing the finished model, I decided to test it on the street, as a result, it was very hard for the engine, (the old version is on the video) after which, over the past week, I went through the chassis, put the portal hubs, abandoned the fake engine and moved the buggy motor under hood (to make a direct gimbal on the gearbox). As a result, it became slower, but more passable! Description: -Drive Buggy motor -Steering Geek Servo -Managing RCbrick -Permanent ALL-wheel drive 6x6 -Bridges with planetary gearboxes -2x high-speed transmission (the lever is duplicated in the cabin) -The steering wheel turns with wheels -Doors, hood and tank open -Detailed interior and under-hood space -Weight: 2.6 kg Length: 68 cm. Instagram: https://www.instagram.com/lego_muscle_garage/ Join my group in VK: https://vk.com/legomusclegarage All photos on the link: https://bricksafe.com/pages/Michael217/ural-4320-6x6 All photos on the link: https://bricksafe.com/pages/Michael217/ural-4320-6x6 -

42161 Lamborghini Huracán Tecnica
R0Sch posted a topic in LEGO Technic, Mindstorms, Model Team and Scale Modeling
Discussion thread for the upcoming LEGO Technic 42161 Lamborghini Huracán Tecnica. Nr. of pieces: 806 Release date: 01.08.2023 Price: 52.99€ Lime again, how boring. -

[MOD] Motorized Bugatti Bolide 42151
KirTech LAB posted a topic in LEGO Technic, Mindstorms, Model Team and Scale Modeling
Hi everyone! I'd like to share my new motorization project. This time I've modified Bugatti 42151: BuWizz 2.0 receiver as a power source, BuWizz-motor for rear-wheel drive and PF servo-motor for steering. As usually I tried to keep the original look of the set as much as possible and it was unexpectedly difficult to place all the electronic components. The main problem is a width of the model - the inner space between doors is only seven stud wide, so it's impossible to place the receiver between the doors as it's eight stud long. So I've ended up with pretty unconventional receiver placement. You can find details and test-drive in my video: Thanks for watching :) -

[WIP] 2015 New Flyer XD40 MTA Bus
JLiu15 posted a topic in LEGO Technic, Mindstorms, Model Team and Scale Modeling
Following the success of my New Flyer XD60 model, I decided to take the existing design and remake it into an XD40 in Metropolitan Transportation Authority (MTA) livery. I am doing the 2015 model since newer ones have the new blue livery which will be much harder to build in LEGO due to the availability of dark blue pieces. The design uses my previous XD60 model as a base, but this model is more than simply my XD60 model cut down by 20 scaled feet. The chassis is redesigned from scratch, with the front and rear axles at a half-stud offset to allow for smaller and thus more realistically sized wheel arches. The body panels are also attached to the chassis using white Technic bricks with axle hole connected to a white Technic piece with axle, allowing for a seamless finish with no visible pins. A number of details have been polished up since my XD60 model, but perhaps the biggest difference is that the livery won't be sticker-dependent on this model. The simple blue stripe livery means I can easily model it with LEGO pieces, and stickers will only be used for the bus numbers/lettering. I've only modeled it in Stud.io so far, but I largely know what to expect since my XD60 model so the actually building process should be pretty straightforward once the model is finished in Stud.io. Photos: -

[MOC] Off-road truck Gaz 66[instructions available]
keymaker posted a topic in LEGO Technic, Mindstorms, Model Team and Scale Modeling
Hi, I would like to present my newest creation – off-road truck Gaz 66. It is my interpretation of small, old and very popular truck, which has a lot of off-road capability. Someone can ask why next similar small scale off road truck? I would say I like this type of vehicles, the scale and challenges they bring. And with every build I try to test something new, which I wasn't try before. Here the main goal was to go below standard for those wheels width of the model - 15 studs and prepare narrower axles than standard - 11 studs ones. Which I did. Gaz 66 has 13 studs width body with 9 studs (from rim to rim) front axle - stereed and driven. Thanks to that size of the body is more proportional to used wheels. And you can also use tractor tires provided with cargo for even better effect (you can see such modification in real Gaz 66 on one of polish off-road YT channel - LINK). I also tried to add as many details related to real truck as possible, in this scale, I hope there are here some fan of original Gaz 66 and they will recognise some elements I added. Below you can find video and list of features and details. Enjoy. Instructions: LINK General details scale: 1:20 dimensions LxWxH: 30x10,5x12,5cm weight: 946g Features: RC front axle steering (C+ L motor) RC 4x4 drive (C+ L motor) RC winch with place to lock the hook (C+ L motor) 4-link live axle suspension for all 4 wheels three studs ground clearance (with "KrAZ" tires) openable doors and easy access to spare tire working V8 engine with fan located in cabin, plus grill via which working engine can be watched detailed two seats cabin powered by Buwizz 3.0 but also prepared to be powered by standard C+ Hub can operate with "KrAZ" tires included in cargo Photos: LINK My Gaz 66 is powered by Buwizz 3.0, but there is no problem to use standard C+ Lego battery box: Internals of the MOC, so drivetrain connected with V8 engine, steering and the winch: -

digitizing pneumatic piston position
Technic tango posted a topic in LEGO Technic, Mindstorms, Model Team and Scale Modeling
Im trying to make return to center steering with pneumatic pistons due to not being able to use LAs or servos in a particular location. has anyone ever needed to "know" where their pneumatics are? I thought about using a spool of string attached to the end and a potentiometer on the axis of the spool to get a reading of where it is, but maybe there's a better way, with or without electronics. here's my driven, suspended, and hopefully, steered bogey I am trying to implement this on:bogey picture- 7 replies
-
- pneumatics
- electronics
-
(and 1 more)
Tagged with:
-

[MOC] 1:48 Pennsylvania Railroad Q2 Duplex (PF / PU)
Commander Wolf posted a topic in LEGO Train Tech
Hello all, I have recently built a model that might actually deserve a post. This is a working, running (albeit only on R104 curves) 1:48 scale model of the Pennsylvania Railroad Q2 duplex. PF or PU motors power all five driving axles, and the design uses no third party parts besides #11 drivers. See the video for a more detailed description. -

[MOC] 42148 Wheel loader
ilyabuilder724 posted a topic in LEGO Technic, Mindstorms, Model Team and Scale Modeling
My 2nd aternative build for the 42148 set. A simple Wheel loader. I hope you're gonna enjoy the build! Feel free to share your pictures of assembled model! FEATURES Steering Working arm Additional palette to carry -
Hello and welcome to the page! One of my favourite sets ever! It became a part of my collection in a veeery long and hard way several years ago. I was thinking to motorize it several times. Simply install several motors was easy deal, but I wanted a suspension also. This requires fully rebuild the chassis. So, initially I built a completely new scale RC chassis, then adapt it for 8285 outriggers, that adapt it for the 8285 crane then adapt it again for the 8285 cab. I tried to keep as much from original iconic 8285 as possible. None of the 8 PF motors is visible One BIG battery box + 2 sBricks OR two sbricks 2.0 can be used to manage al 8 channels. The only manual feature is a pneumatic polarity switcher, because it would be a 9th channel. Full suspension, rear based on 42043 Arocs set. Servo for steering 2 XL for drive M for outriggers L for pump M for winch L for crane raise L for boom extensionin Please enjoy! https://bricksafe.com/pages/Aleh/liebherr-lrb-355/rc-8285-rescue-tow-truck Truck now uses 6 soft shock abosorbers. To keep it higher it will be enough to replace first rear axle to yellow shock absorbers.
-

[WIP] Mack Granite Boom Truck
JLiu15 posted a topic in LEGO Technic, Mindstorms, Model Team and Scale Modeling
With the gearbox-controlled mechanisms on my MCI D4500CT model proving to be impractical, I did not want to just abandon the gearbox design. Because of this, I decided to incorporate it into a different vehicle. I decided that a boom truck like the following would be god for a four-output distribution gearbox: I have not seen many boom trucks in this style done in LEGO Technic. I've seen plenty of mobile cranes, knuckle boom cranes, etc, but I figured this would make for a unique build, especially as I see plenty of these here in the US. The turntable for the crane is also mounted higher up (at the same height as the roof of the cab), so that'll provide more space for mechanisms. As of right now, the chassis consists of essentially everything to the rear of the wheelchair ramp module on my MCI D4500CT model. A difference is that both rear axles are driven, as opposed to one driven axle and one tag axle. The gearbox outputs will control the outriggers, boom rotation, boom elevation, and either boom extension or winch. There can only be two functions routed through a turntable in order to allow for unlimited rotation, so one of the boom functions will have to be manual. Because the suspension design is identical to that of my MCI D4500CT model, this model will also serve as a test bed for the drivetrain and suspension on my MCI D4500CT model. If everything works well here, I can be pretty confident using this suspension design. Let me know if you have any suggestions for me! Photos: -
The automatic sliding door is part of my 7-Eleven building. I also prepared the step-by-step instruction in my video, in case you want to build one. More MOC on my homepage: https://www.bricksboy.com/moc
- 3 replies
-
- tutorial
- sliding door
-
(and 2 more)
Tagged with:
-

42131 CAT Dozer outdoor experience
KirTech LAB posted a topic in LEGO Technic, Mindstorms, Model Team and Scale Modeling
Hi! I'd like to share some thoughts regarding a winter test-drive of my 42131 CAT D11 Dozer. The first indoor tests left very good impressions, and I was excited to try it outdoor. I still remember a short video from the official LEGO website, were the 8275 Dozer pushes snow (it was about 15 years ago :)) The set isn't new, I tried to find something similar here, but without any results. Sorry, if this topic has been already discussed. - Let's begin with the most important function - a motion. It works very well indoor, especially on a soft surface, but for moving in snow grousers are too small. Of course the model can push some amount of snow but it tends to stuck and skid. Some additional beams on tracks will improve the situation. - As we know, the blade elevation in a stock model works extremely slow, I tried to solve this problem by replacing gears near the actuators. Instead of 12:20 reduction I've done 20:12, but the system even couldn't complete a calibration, so I ended up with 12:12 ratio. But in outdoor conditions (it was pretty cold) it didn't work, probably because of accumulators voltage drop. So, during the test-drive I couldn't change the elevation at all. And as a result, I also didn't use a blade tilting mechanism. - Of course, the ladder mechanism works perfectly in any conditions :) - And the last function - a ripper. If we follow building instructions of the set, ripper won't even touch the ground, so it's necessary to change its connection points. The ripper works very well in loose snow. It would be cooler to have three teeth instead of one, but there is a risk, that it will be not a ripper but anchor, because of low tracks friction :) So, without any modifications the model has pretty low performance in snow (yes, I'm spoilt by BuWizz and buggy-motors). But I had a lot of fun during these tests, you can check the dozer in action: Thanks for watching! -
[MOC] Benz-Unimog 4×4 Off-road RV
dls7223685 posted a topic in LEGO Technic, Mindstorms, Model Team and Scale Modeling
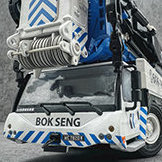
Hello everyone, this is the latest work from MTC: Benz-Unimog 4×4 Off-road RV Designed by Muen 1. Function Description ① XL×2:providing power ② Servo×1:steering ③ M×1:2-speed gearbox shift ④ M×3:3 differential locks for front, middle and rear ⑤ SBrick×2 ⑥ Small battery box ×1 ⑦Yellow hard spring ×8 2. Appearance "Modularity" is a design concept that runs through the design of the car from start to finish. From the exterior to the interior, I have modularized all the parts as much as possible, with the obvious benefit that it is very easy to assemble and disassemble, and no longer afraid of transportation. At the same time, each model is clearly positioned before it is designed, which determines the tendencies and trade-offs when designing. The positioning of this car is mainly to do my best to restore the appearance and rich interior of the real car, so this car uses technic parts to build the chassis, and particle parts to build the appearance and interior. The following are photos of the whole car's appearance, and according to the real car's beautiful pictures taken at the same angle, please enjoy. 3. Interior I always think that the interior of an RV is a very important part, so in the process of designing this car, it can be said that the design of the interior took up half of the focus and energy. Another important reason why I personally like RVs is the various storage spaces, which can be a storage space in places you don't expect, so I also built more storage spaces when designing the interior. The following is a detailed introduction to the interior of this car, I hope you can enjoy it. (1)Cab ① Seats The design of the seats uses #99563 to shape the unevenness of the surface, while the base under each seat consists of four #4532 for additional storage space. Behind the front seats are shelf baskets and in-car video for rear passengers to use and provide entertainment during the drive. ② Central Console I divided the center console into two parts, front and rear. For the front center console, there are several storage spaces with three drink holders. At the same time, there is a shift lever, handbrake and a number of function control buttons set up on the side near the main driver. And the side near the passenger side is the air conditioning vents. For the rear center console, a number of storage space and drink placement that must be the regular configuration, front and side air vents and air conditioning adjustment knob. There is a small clock in the middle for the rear passengers to see the time, but also equipped with a blue satellite phone, we all know that the wilderness places or satellite phone more reliable. Here are photos of the combination of the front and rear master consoles (2)Living area The living area is also designed with rich interiors and "modular". There are two main purposes, one is to facilitate the display of the interior, because my first off-road RV work "Conqueror F", in the process of display found that the interior can not be well displayed. the second is to allow the weight of the car to be reduced during the driving process. So the interior of the living area is very easy to remove as a whole. The interior of the rear compartment consists of 9 main parts, let me introduce them one by one below ① Kitchen Due to the limited space, the kitchen is all open, I personally divided it into 3 sections. First is the lower area, which is a variety of storage space for dishes, I also placed a garbage can, specifically for food waste. The second is the middle area, where the cooking is done, the left is the sink, the right is the stove, most RV's kitchen stove is covered, this is no exception. A variety of pots and pans as well as a wealth of spices hanging on the wall, and a range hood directly above the stove. Finally, there is the upper area with a blue microwave oven and two storage spaces. ②Bar I personally like the bar very much, so I also designed a bar in this RV, mainly for making various desserts and beverages during the rest of the day in the car. The lower half of the bar has 2 levels of storage space, mainly for cups and unopened drinks. The upper part is mainly for a small number of commonly used cups and 2 desserts that have just been made, and there is also a beverage machine with 4 different drinks. These 4 drinks are: orange - Fanta; red - Coke; green - Sprite; blue - Mizone. ③ Left side of the entrance door This module consists of three parts. The lower part is a fire extinguisher. In case there is a fire in the process of parking rest or entertainment outside the car, you can get the fire extinguisher nearby at the first time. In the middle is a white fridge, close to the kitchen and bar for easy cooking. The upper part is a small open storage space. ④ Right side of the entrance door This module is also composed of 3 parts, the lower part is a two-layer shoe rack, placed at the door, in and out of the door is convenient to change and put shoes. In the middle is a small storage space, which is mainly used to place umbrellas to prevent rain from touching the wetland board; There are also two hooks for hanging hats. The upper part is the switch box, the whole living area power switch, there is a specific instrument to show the real-time data of the living area electricity. ⑤ Sofa This car is equipped with two large electric sofa, placed opposite, sofa side armrest has adjustment knob and small display screen. Among them, the sofa near the side of the bed, the bottom is installed with a slide rail, moving the sofa, can enter the storage room under the bed. A sliding rail is installed at the bottom of the sofa to facilitate horizontal movement. ⑥ Table There is a table in the middle of the sofa. To expand the limited space, the table can be folded. After the table is folded, flowers can be placed on the table to beautify the interior environment. ⑦ Storage room The living area has 2 large storage units, mainly distributed under the bed. One is the common storage room, mainly placed washing machine, cleaning tools, repair tools and other common items; The other is a hidden storage unit behind the sofa, which can be accessed by moving the sofa and is used for infrequent items such as suitcases. ⑧ Toilet The toilet is equipped with a toilet that can also be used for bathing. There is a hot and cold water sign and a toiletries basket in the corner. ⑨ TV set The TV set is placed above the sofa and facing the bed, so that whether you rest on the sofa or in bed, you can watch TV programs and relax. Finally, a panoramic view of the living area! 4. Some Details (1)Where is the battery box hidden? (2)The living area tank is located below the rear door (3)Where is the spare oil drum hidden? (4)For parking rest and picnic outside the car, there is a foldable table on the back of the door of the living area, and it is equipped with a storage box (5)Because the car chassis is higher, so the left side of the staircase is designed with handrails, when entering the living area, convenient borrowing; There is a clock on the top of the handle, which is mainly convenient to check the time when taking a rest outside the car or having a picnic (6)The shoe rack is by the door (7)A fire extinguisher is placed in the back of the cab. (8)Skylights in the living area can be opened (9)It's 2023, car phone holder must have! Convenient map navigation! Finally! Hope you enjoy it! Thanks for browsing! Benz-Unimog 4×4 Off-road RV From MTC·By Muen·For Gap.Li -

[MOC] Unimog 4×4 Off-road RV
dls7223685 posted a topic in LEGO Technic, Mindstorms, Model Team and Scale Modeling
Hello everyone, this is the latest work from MTC: Unimog 4×4 Off-road RV Designed by Muen Function Description: ① 2×XL: providing power ②1× servo: steering.×M: 2-speed gearbox shift. -3×M - 3 differential locks for front, middle and rear. -2×SBrick. -1×Small battery box. -8×Yellow hard springs. -

[MOC] 42148 Excavator
ilyabuilder724 posted a topic in LEGO Technic, Mindstorms, Model Team and Scale Modeling
My First aternative build for the 42148 set. A simple Excavator. I hope you're gonna enjoy the build! Feel free to share your pictures of assembled model! FEATURES Working Tracks Working Excavator arm- 4 replies
-
- alternative
- b model
- (and 5 more)


