Search the Community
Showing results for tags 'RC'.
Found 537 results
-

RC Monster Truck [MOC]
Daniel-99 posted a topic in LEGO Technic, Mindstorms, Model Team and Scale Modeling
Hello everyone! I want to share with you my Monster truck that I build for an outdoor winter driving. It has a lot things to improve, but even this imperfect build gives a lot of fun! Yes, this post is mostly not about technical aspects, but about the whole concept and the driving experience it gives! Some highlights: All wheel drive and steering Solid axle suspension with permanently locked differentials Planetary wheel hubs Strong transmission with metal U-joints and metal bearings Brushless motor 1000 kv 3S Li-Po for power 2 GeekServo for steering 120 mm RC wheels with great grip Removable body Together big wheels and powerful motor makes this Monster Truck a real beast. It has both torque and a decent speed. Planetary wheel hubs give enough reduction to obtain the precise control of torque (that is rather unusual for Brushless motors). All wheel steering with deferent steering modes (made as an option of my RC transmitter) bring more fun to the driving. It also increases the climbing abilities of the Truck (as it is shown in the video). -
Hello and welcome to the page! One of my favourite sets ever! It became a part of my collection in a veeery long and hard way several years ago. I was thinking to motorize it several times. Simply install several motors was easy deal, but I wanted a suspension also. This requires fully rebuild the chassis. So, initially I built a completely new scale RC chassis, then adapt it for 8285 outriggers, that adapt it for the 8285 crane then adapt it again for the 8285 cab. I tried to keep as much from original iconic 8285 as possible. None of the 8 PF motors is visible One BIG battery box + 2 sBricks OR two sbricks 2.0 can be used to manage al 8 channels. The only manual feature is a pneumatic polarity switcher, because it would be a 9th channel. Full suspension, rear based on 42043 Arocs set. Servo for steering 2 XL for drive M for outriggers L for pump M for winch L for crane raise L for boom extensionin Please enjoy! https://bricksafe.com/pages/Aleh/liebherr-lrb-355/rc-8285-rescue-tow-truck Truck now uses 6 soft shock abosorbers. To keep it higher it will be enough to replace first rear axle to yellow shock absorbers.
-

Mercedes Unimog U4000 [MOC]
Daniel-99 posted a topic in LEGO Technic, Mindstorms, Model Team and Scale Modeling
Hello everyone! I am glad to introduce you my Mercedes Unimog U4000. I made it last autumn for trial competitions and it became my first successful RC Lego model with Brushless RC motor. Technical aspects: - Brushless RC motor 1000kv with a custom 3D-printed planetary gear. - Custom 3D-prined planetary 2-speed gearbox with remote control (by Geek Servo) gear ratio 1:1 or 1:5 - RC remote control - 3S Li-Po for power - Geek Servo for steering - Transmission with metal bearings - Planetary wheel hubs - 4-link live axe suspension at the front - 3-link live axe suspension at the rear with free articulation - 85 mm RC tires - Light-weight bodywork, total mass is about 1.2 kg I tested this car on various terrain both indoor and outdoor. It reaches about 8 km/h on normal speed and about 1,6 km on low gear. Since the transmission has several reduction gears (made with planetary gears) Brushless motor feels good in this trial car. It gives the truck more power than it will ever need, so the truck can take a significant weight on board (if one change shocks to the hard one). Oscillating real live-axe and grippy tires provide a constant contact with road, so the truck climbs rocks easily both with closed and open differentials. Due to the reference, the gravity center of the truck is moved to the front, so it struggles a bit with going down the hill, but appears to be a great climber. It can beat Lego Zetros both on low and high gear! -
Hi Yes, again but with a lot new features! This Toyota Hilux 4WD / Pickup Truck in its most basic version with a simple cab and the largest possible cargo area is a typical workhorse One more extra body will be in the end;) You can use youtube autotranlastion functions to understand something:) Or just watch review and test drives. Common specs Solid axles Front suspension 4 link Rear suspension 3 link Openable doors, bonnet, tailgate 2-seater saloon LED front lights (option) Removable pickup bed and cab Wheels: 62-68 mm Power functions chassis Control: PF IR / Smart Brick (SBrick) / BuWizz Drive: PF XL motor, 4x4 transmission with axle differentials and rear auto-lock Steering: PF Servo motor Control+ chassis control: Control+ (Powered UP) / BuWizz 3.0 PRO drive: Control+ L motor, 4x4 transmission with axle differentials and rear auto-lock Steering: Control + L motor FACELIFT The exterior has been slightly redesigned and optimized, including the use of new elements and techniques that have appeared in recent years. However, I haven't given up on some simple and solid tech-style solutions in favor of smoother slicker solutions like in the Back to the Future Extra Detail version. The doors now have latch locks, since the old locks on the small cab cannot be implemented. The number of basic system elements has been reduced - now the front bumper is made in a technic style with a small nuance - the mounting of the lights in the bumper is illegal and orange tile parts can fall out and get lost. The interior uses a new steering wheel with a diameter of 4 (for PF cersion). If you do not have one, use the old one with 3. In order to prevent using boring monochromatic paints, retro-style colored stripes are added. You can refuse them in favor of plain assemblies. Initially, there are two color options - white and black. Maybe there will be other colors in the future! I believe you can build red, orange and blue versions with minor mods. CHASSIS: PF and C+ The chassis in PF version still runs on Power Function elements, despite the fact that they have already been discontinued by LEGO in favor of the new Powered Up - Control +. Power Functions are quite common among fans, in the secondary market, as well as in the market for third-party parts and electrics, which, at relatively low prices, makes the model affordable for assembly with low budget. On the results of operation, a number of important improvements have been made to chassis: A fairly common reinforced differential of a new type was used. This diff has a larger gearing of 12-28 versus the old 20-28, giving the model more torque at the price of speed. This is important when using larger wheels, both 68mm and 75mm. But more importantly, the new differential significantly decrease load the universal joints. When using standard 62 mm wheels and standard power, the cardans held the load well, however, with the increase in wheels and especially when using third-party more powerful power sources like BuWizz, the cardans could break. The new differential partially removes the problem, but if you modify the model by installing larger wheels that are more tenacious and using more powerful power sources, I advise you to also buy steel universal joints. In general, you can get by with the old differentials, but with standard 62mm wheels and standard power. By the way, in the rear axle drive, instead of a cardan, a reinforced new CV joint is now used. The second important point is the redesigned front axle mount to increase the front clearance by 0.5 STUD. This update is linked to the first improvement. For larger wheels, you need to mount the axle further from the frame. Moreover, during the operation of the front suspension, the longitudinal displacement of the axle is significantly reduced due to the longer levers and the angle of their attachment. Due to the use of a new steering servo differential, the motor had to be reversed And finally, new function! Rear differential with automatic locking in case of diagonal misalignment of the rear axle. Significantly increased off-road performance of the model will make you happy! The locking mechanism prevents loss of grip during diagonal hanging. The mechanism uses an orange wave shift clutch. The idea was adopted from idea of @Madoca 1977 . The rear axle design can also be used with older type differentials. In addition, you can build a simple and reliable old axle without a lock (but with a new differential), in case you need simple construction. Finally, I decided to upgrade to the new Control+ / Powered UP LEGO motor system. It was a matter of time, because new original PF elements are harder and expensive to find. This is especially true for the SERVO motor. New LEGO fans usually have Control+ elements only. First of all, C+ «bad» for its dimensions: all motors are larger in size. The 4 port HUB is severely limited by the layout of the model due to its large size and weight. Installing a hub in a model of my size while saving the interior will negatively affect the weight distribution and off-road performance of the model. Specifically, in this model, the Hub will be difficult to hide behind seats without adding a body cover. In the end, a compromise solution was made - to place the unit inside the cabin as low as possible. I had to sacrifice seats, but I managed to leave the backs and the instrument panel with the steering wheel. If you do not open the doors, you may not even notice that half of the cabin is occupied by the hub. Therefore, from the outside, the model looks like a regular PF. It should be noted that due to the low location of the hub, it was necessary to make the frame as thin as possible at the point of attachment of the block, which negatively affected the torsional rigidity of the frame. However, the HUB is integrated into the frame in such a way that it is an element of rigidity, and at the same time is quickly removable for battery replacement. The drive motor is now located behind the cab, flush with the luggage compartment floor. Using a flatter motor (instead of XL) now allows different main gear ratios 12-20 (standard), 16-16, 20-12, (even 8-24 and 24-8). On the PF chassis, only non-alternative 24-24. Due to the transferase shifted back, the lengths of the drive cardans have changed. The bending of the front cardans has decreased, which unloads a little. However, this low location of the lead motor made it impossible to use reinforced CV joint like in new PF chassis. In general, the weight distribution of the C + chassis is more successful compared to the PF, which is noticeable when driving on uneven surfaces and uphills. The steering L motor is mounted directly on the front axle. The front axle and its connection to the frame are made new. Control app You cannot use the existing profiles in the Control+ app to control the model (the profile from 42124 buggy has a limited steering angle) so you need to use the LEGO Powered UP app, BuWizz app, Brickcontroller2 (only with a gamepad) or Controlz (recommended): Android version. iOS temporary unavailable. The model is still modular, which makes it easy to assemble, disassemble, repair and modify. OLD BODIES You can use new chassis with old bodies and vice versa. May require minimal modifications. if possible, I will modify previous models to the level of this in terms of body and chassis. More about previous Crew Cab and X-tra cab BTTF: AUSTRALIA MOD Any aussies here? A custom tray, bumper, roof rack and snorkel available as mods. Australians will especially like these accessories. See pictures below: Could you count number of storages here? Accessories include: - Chrome Headlights (Designed by NikolayFX and borrowed from EXTRA DETAILED BTTF Toyota Truck) - Power Bumper (You can get it for free here) - Custom Tray (Inspired by Australian manufacturers) - Roof Rack (2 versions) - Snorkel (2 versions) - Fuel Cans (Big and Small) BONUS In the end I've promised one more body - kind of Dakar Rally Offroader Body is 100% alternate of 42093 LEGO Technic Chevrolet Corvette. You only need a chassis from Hilux (PF/C+). This Instruction is free. thanks @FX6000 for Instructions and cool renders Thank you and happy building more photos https://bricksafe.com/pages/rm8/toyota-hilux-single-cab-pfc-4x4- https://bricksafe.com/pages/rm8/-toyota-hilux-single-cab-pfc-4x4--custom-australia https://bricksafe.com/pages/rm8/rally-off-roader--alterante-body-from-42093-chevrolet-corvette my rebrickable account Chassis Bodies Mods MEGA PACK (7 in 1)
-
Finally, the 2022 LEGO 10300 Back to the Future Time Machine the DeLorean - motorized with powered up ★ Building Instructions on Rebrickable (klick) ★ Features remote controlled motorization - fast driving, 40° steering angle - No scratching gears or rubbing tires Cockpit untouched not flying, but you can still modify it for Back to the future I, II and III version easy to reach Battery box for charging and switching on Off Battery box, Motors and Cable well hidden to not change the looks LED light kit fits in (discount code included) will add Instructions to make your own adapter to power the light kit from the buwizz instead of a seperate battery polygons very close to the movie (not flat as LEGO did it) Multi language instructions: ►english ►deutsch ►italiano ►française ►español ►čeština ►русский The Partfinder: An Inventory of left over parts in all bags to find the without scrubbing through all bags while buildingfor building from scratch Buwizz Profile - my programming for the buwizz included. ★ Details 40° of steering angle with virtual pivot point to not rub against that narrow frame Driven by upgeared large motor No Batteries in the interior, it is still there. Hood is still opening. switch the car on and off and charge from below I added a fix for the gull wing doors to stay up. Also I took the liberty to change the colors of some red/orange/tan bricks that you could see when opening the doors. I will put the bricks needed into the spare parts of the inventory. No instructions for the lights included, but they come with the Light kit. AND: I bought all my light set from Game of Bricks. And (after talking to them) I can give you a discount for a light kit for any of my motorizations. The code is included in the downloads.
-

[MOC] Trial Truck 6x6 [free building instructions]
keymaker posted a topic in LEGO Technic, Mindstorms, Model Team and Scale Modeling
Hi, I hesitated if I even should post this MOC here since it is so simple but at the end here I am. I created this truck mostly to have some fun outdoors. It has minimal amount of features and its main goal is to drive over not so pleasant terrain, like sand, mud, snow and even quite deep water. And I can do that without fears, that drivetrain will jamm, gears will skip, motors will get wet and at the end I won't have desire to clean all this mess up. I also very like the closing mechanism of "differentials" covers. It is simple, effective, works like a charm and has satisfying click when closing. This Truck is also testing ground for a couple of solutions I wanted to try out, like drive shafts connected to the axles at the angle, steering controlled by rod or way of suspension for both front and rear axles. Nevertheless please enjoy the video, use the instruction and check some details below if you want to know more. Instructions: https://rebrickable.com/mocs/MOC-136120/keymaker/trial-truck-6x6-rc/#details Some details and main functions: dimensions LxWxH: 37,5x13x15cm weight: 1132g 6x6 drive (3xPF L motors) steering (PF servo) suspension on all axles completely secure bottom of the truck with panels easy access to all "differentials" via openable covers Couple of highlights why this truck can be fun to build and to play with: Drivetrain - it is very solid, so you won't hear skipping gears, if wheels aren't spinning, then you either broke some part or stalled motors. It is also super easy to use different gear ratio or different number (1/2/3), type (M/L/XL) or even technology of motors (PF/C+). What is more, removing all electronics takes only couple of minutes and truck is ready to taking the shower to clean all evidence of you off-road madness Construction - it is very rigid and solid, you can lift it up by almost any part of the frame and body Off-Road Design - all gears are protected so you don't have to be afraid that they will jamm due to sand, mud, snow, stones etc. And even if something get inside "differentials", it is super easy to open covers and clean this up. Last but definitely not the least - ability to drive through deep water - UP TO 8CM! It over half of the height of the truck. 8cm of water and your electronics is still safe. Internals of the truck: P.S. I know it is rather ugly, but it brings fun! :)- 19 replies
-
- free instructions
- trial truck
-
(and 8 more)
Tagged with:
-

[WIP] Tamiya Hot Shot RC
msk6003 posted a topic in LEGO Technic, Mindstorms, Model Team and Scale Modeling
Last year I bought Tamiya's Hot Shot RC model. I think it's design is very good since when I was very young so I wanted to buy it and did in Christmas in last year. Of course not just for build and control this model, I wanted to build it as lego model so main reason is for comparison with model I will make. I started few week ago but posted in here now. At first I started on chassis. Surprisingly original model's rear tire can fit in medium racing wheel so I bought 2 set of those tire. I use BW3 and 2 BW motor for 4WD drive. And like original model, both front and rear use mono shock. I know this shock is more accurate with original model but I use those yellow hard shock which is little more common because I want make instruction and post on rebrickable. In this version, drive gear ratio is 16-28, 16-28 3.06:1 But when I test chassis gear starting to skipping on both front and rear. So I rebuilt gear train and make gear ratio 24-24, 20-28 1.4:1 but can change gear ratio to 8-8-24, 20-28 4.2:1 or 28-20-28 1:1 too. And add one more shock in rear for better stability. After fix gear skipping, I built remain body without bumper, wing and light. But now I stopped build more. Cause BW3 keep turn off when I drive model 1m. After lot of trying to fix this, I throw BW3 away and change to PF system with Sbrick.(2 L, 1 Servo, 1 rechargeable battery) Now it can drive more but to much slow and don't have much torque.(gear ratio is same 1.4:1) I need to find other way for drive this thing. Than I will finish it's bodywork. -

In-wheel 4WD LEGO car (iWD4)
janssnet posted a topic in LEGO Technic, Mindstorms, Model Team and Scale Modeling
For those not afraid to mix LEGO with RC components, you might like this one: iWD4. A 100% LEGO chassis and body, driven by 4 brushless drone motors placed inside the wheel hub. In-wheel drive or independent wheel drive. The result is spectacular. Great speed, great control, and hardly any wear-out, since there aren't many moving parts. The rims are LEGO compatible and 3D printed, the electronics are drone based, steering is done by a LEGO compatible Geek servo. Rest is all LEGO, including suspension and removable body. Please have a look at this short intro video. Happy to share more details. -
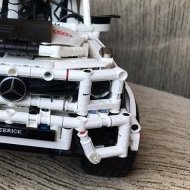
[MOC] Liebherr LRB 355
Aleh posted a topic in LEGO Technic, Mindstorms, Model Team and Scale Modeling
Hello Dear Forum, it's been a while since I started a new model topic - finally the time came. Before start showing the model I'd lke to share some lifestory if it's creation. In spring 2022 because of several reasons (and none of them were positive) I relocated to Poland from Belarus. When I first time came to the old town center I found...a constrution with Liebherr LRB 355 in the center. What it was a beauty :) So I decided to build it. In autumn I was able to bring here most of my parts collection so I started to build. Please welcome Lego Liebherr LRB 355 Drill Machine The model was built on new CAT links, has realistic subtrator drivetrain and a banch of functions: - Drive - XL motor - Steering - XL motor - Slewing - L motor - Pump + V12 Engine + cooler fans - L motor - Outriggers - L Motor - Pneumatic switch - M motor - Drill rotation - M motor - Drill elevation - M motor - Tower rise - XL motor The tower has a crane on the top with all necessary functions: - raising/lowering - by pump - rotation - human fingers - Winch - human fingers - Extansion - human fingers Electric: 2 small battery boxes, 2 sBricks, 9 motor, 2 polarity switchers and a banch of extension wires. Parts count is unknown, but a guess it's aprox 3500-4000 parts. Naked boom is 1 meter tall, while boom + outrigger (forgot about it while filming) + erased crane increases it ti 137 cm. Boom is pretty stable, it can be suspended in the air or may stay on outrigger. During lowering it bends a bit, but here is a balance of weight and robust. All photos are available here: https://bricksafe.com/pages/Aleh/liebherr-lrb-355 For photo/video I used iPhone 12 Pro only. All feedbacks and critics are welcomed and highly appreciated! -
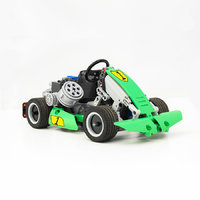
[MOC] Police Interceptor
Anto posted a topic in LEGO Technic, Mindstorms, Model Team and Scale Modeling
After a while without a new MOC (because of my studies ^^), I'm back with a new model! It was made for BuWizz. The aim was to make a model in the continuity of my cross kart. I wanted to get rid of the torque effect on the rear axle (as it was a suspended axle on my cross kart), that made the behaviour unsymmetrical in corners. So I used 2 BuWizz motors as wheel hubs instead! The rear suspension was made so the rear shock absorbers generate friction, in order to have a slow rebound. On my cross kart, the suspension was extremely reactive, but the kart was "jumping" on gravel. On this new buggy, having a slow rebound helps the wheels stick on the ground to gain adherence. However, I wasn't able to do the same thing on the front axle. Why a police buggy? I have never seen this before, I thought it could be nice. I wanted the design to be as agressive and massive as possible. I wanted the design to be close to Polaris or Can-Am, looking heavy, indestructible but fast in any situation. People had to fear seing it in their mirror. You may have seen that the main part of the bodywork was made with 2x5 panels. This was a very useful part to achieve the shapes that I wanted, and to have simple assemblies (no one uses complex building techniques). The BuWizz 3.0 has got 2 PF ports and 4 PU ports. The 2 BuWizz motors are connected to the PF ports while the PU L motor for the steering (acting as a servomotor) and the LED lights are connected to the PU ports. The performance is really great! It is absolutely impossible to use more than the half of the power into a house! And outside, the suspension works well. You can go almost everywhere without being stuck or loosing grip. I also had some crashes but nothing was broken nor fell apart! Little video: And the instructions! https://rebrickable.com/mocs/MOC-132106/Anto/police-interceptor I hope that you'll like this model, and see you soon for the next one! -
Hi, I present my newest creation – off-road truck KrAZ 255 version 2.0. This is successor of my first public MOC – KrAZ 255 to which free instruction are available here. The goal in version 2.0 was to improve basically every aspect of predecessor and to pay respect to this awesome off-road truck. And as usual, most of the features are based on truck Tayga 6455B available in game Snowrunner. This truck is also the next part of my Snowrunner series started with Chevrolet CK1500. On the video below you can check what details and functions I was able to put into this MOC and how KrAZ 255 v2.0 deals with off-road terrain and against obstacles. Extensive list of features, details and interesting facts about this creation you can find below the video. Enjoy! Instructions: LINK General details: scale: 1:23 dimensions LxWxH: 42,5x13x16,5cm weight: 1525g Features: 1. RC front axle steering (C+ L motor) positive caster (click) Ackermann geometry almost perfect pivot point (click) PF servo friendly - 180 degrees of movement for steering input 2. RC 6x6 drive (2 x C+ L motor) independent drive input for each front wheel (click) (for this idea I would like to thank @Fluwoeb and this topic, this is because of you! ) rear wheels driven by two independent inputs (one for 2 left wheels and one for 2 right wheels) (click) front wheels driven by one differential and rear wheels driven by second differential (click) both differentials coupled together to harness power of two C+ L motors both differentials coupled with lock mechanisms (click), controlled separately and manually from the cabin (click) and equipped with visual color indicator of diff lock on/off status located behind the cabin (click) power train equipped with new big CV joints - cardans and old CV joints limited in drive of the front axle and completely removed from drive of rear axles 3. RC winch with place to lock the hook (C+ L motor) 4. RC front and rear lights (Lego LEDs) 5. suspension for all 6 wheels (click) front wheels on live axle suspension with shock absorbers (click) and a big range of movement (click) rear wheels located on independently oscillating arms with rubber suppressors controlling the movement (click) rear suspension without shock absorbers - no side leaning and no bending under the load (click) 6. three studs ground clearance (click) 7. bottom of the truck armored with panels to secure crucial mechanisms and improve dealing with obstacles (click, click) 8. two hooks for connecting trailers, front and rear one, both equipped with lock/unlock mechanisms 9. openable doors, hood, tool box, first aid kit, sideboard bed with separately openable sides, each one with two locks 10. working V8 engine with fan which can be easily removed “for maintenance, repairment or for swap” located in detailed engine bay with a grill via which working engine can be watched (click) 11. detailed two seats cabin with openable and usable glove box (click) 12. working steering wheel 13. modular construction (axles, cabin, additions can be easily disconnected) 14. powered by Buwizz 3.0 but also prepared to be powered by standard C+ Hub (click) 15. prepared to be built also with PF motors and PF servo without significant changes and to be powered by Buwizz 2.0 (click) or even standard PF Battery box with IR receivers (click) 16. "disk brakes" in front (click) and rear wheels and many others small details (click, click, click) 17. equipped with many additions from the game Snowrunner, like bull guard, exterior roll cage, roof rack with fuel canisters and spare tire, double snorkel, sun protector (click) Interesting facts, designing decisions and details: driveshafts for front axle are connected in a way that the longer, more “smooth” CV joint part are connected closer to front axle, so lower to the ground, which corresponds with the idea to prepare bottom of the frame smooth and resistance to sticking out objects which can immobilize the truck (click) most of the motors are placed symmetrically at the center of the truck, which is good for weight distribution, but Buwizz unit is localized off centered, closer to the left side of vehicle. To balance that, motor from winch is placed also off centered, but closer to the right side of truck (click) all wheels can harness power from both C+ L motors, as they are coupled, but rear axles, which in general generate more load for motor, are connected closer to the right motor, that is why V8 engine is connected closer to the left motor, which is connected closer to front axle, as the front axle generates less load than rear ones (click) additionally output for V8 engine has the same speed as motor output - which is higher than rest of the drivetrain - for better visual and sound effect (click) there is a „biscuit connector” placed in rear wall of the cabin to increase ways of location and connection and types of power source which can be used to power up the truck (click) to avoid widening the whole truck, only hinges for sides of sideboard bed are located outside of the sideboard bed to allow opening sides to vertical position, which makes loading the cargo easier (click) positive caster present in front axle has (apart from being next feature adapted from real cars, apart from dealing with not very high tolerance of Lego parts, which causes negative caster and apart from being the force which steers front wheels strait when driving forward) a function of forcing front wheels to stay on axles when driving forward (I think this is the answer you were looking for @AutoBacon in this post ) and many more details you will discover, if you decide to build my truck I would also like to thank @nico71 for his great video series related to Western Star 6900 Twinsteer. It helped me to prepare more realistic grill, hood, roof elements and I believe overall better body of the KrAZ than in my first version of this truck. Thank you! Attention! Two C+ L motors with decreased speed 3 times, so with torque increased 3 times, generate a lot of force which needs to be handled by rather advanced drivetrain. That is why there is a risk for 12T gears to skip or even be destroyed if wheels come across too much resistance due to very rough terrain. Please keep this in mind and happy off-roading! Photos: (click) Here you can see the original KrAZ-255 (1211 parts, 991 grams), the new KrAZ-255 v2.0 in standard configuration (1632 parts, 1220 grams) and the fully equipped and ready for everything version of KrAZ-255 v2.0 (2091 parts, 1525 grams): Internals of the MOC, so drivetrain with differentials and diff locks connected with V8 engine, steering with working steering wheel and the winch I hope you like it, if you have some comments or question, please ask. I will happy to answer.
-

[MOC] Tiger II full RC
Gray Gear posted a topic in LEGO Technic, Mindstorms, Model Team and Scale Modeling
Hi there everybody! It's been a while since I posted anything here, but allow me to present my latest Project: A small scale Tiger II tank! Years ago when I got first into World of Tanks Blitz, the Tiger II was my favorite tank. I still play it sometimes, so I decided to build it. My goal for this Tank was simple: To get all the functions big RC tanks have in a small scale tank model, and still make it look good. - RC driving (powering the front drive sprocket) - RC turret rotation - RC gun elevation/depression - Suspension system to replicate the torsion bar suspension From the beginning it was clear that this would not be possible using LEGO electronics due to the size constraints. I used a CADA Battery box, 2x M motor (drive) and 2x Micro motor (Turret+Gun) to power the tank. The rest of the Tank can be built with 100% LEGO with some minor color changes, especially on the insides to save money. Building istructions are on Rebrickable I hope you like my little gray cat and am looking forward to your comments Gray Gear -
Hello, i like to show you my version of a drifting G-Class. Bodywork design is by https://rebrickable.com/mocs/MOC-111437/_.lego._.technic._/mercedes-benz-g-class/#details i just did some modifications to fit my 4wd chassis with rc components. propulsion: buggy motor steering: geek servo receiver: Radiolink battery: 7.4V LiPo here are some pictures: and a clip: Hope you like it 😊 Cheers, Friedl
-
Brick Exhibition Modellbaumesse Ried scale models October 2022
functionalTechnic posted a topic in LEGO Technic, Mindstorms, Model Team and Scale Modeling
Hi everone Last weekend the Modellbaumesse Ried took place together with the LIGA+MP and the AFOL Technic Team action area. I was also there and made a video recap of the action area. New and old scale models were shown. This year the first time a large conveyer belt and gravel plant was presented and was fun to play with our models. The next exhibition with the AFOL Technic Team will take place in Fürth, Germany at the Bricking Bavaria from 18. to 20. of November.- 9 replies
-
- remote control
- rc
-
(and 4 more)
Tagged with:
-

World's biggest Lego Rc monster truck video
Aerolight posted a topic in LEGO Technic, Mindstorms, Model Team and Scale Modeling
Finally got around to filming. This thing is absurd it gives some hobby grade Rc crawlers a bad name. 20221017_203011 by michael waterfield, on Flickr Minifigure is not quite to scale lol, you can also see the airlines for the locker 20221017_202949 by michael waterfield, on Flickr Body proportions aren't great but not terrible either not helped by the lack of conventional suspension and the hideous compressor 20221017_202755 by michael waterfield, on Flickr Here you can really get a sense of how much is going on, including the gears in the planetary hubs there are 86 gears in just the drive train. Traxxas tires use a strange bead, I assume for drm, which made it hard to make rims for. My solution is not perfect but works for the slow speed. The rims neck down internally to ride the jockey wheels on the hubs, this acts like a wheel Bearing and allows for these huge tires without them wobbling all over the place. Traxxas summit tires are some of the largest rock crawling Rc tires you can get but this might change as more people get into 1/6 crawlers (this truck is 1/12 and still bigger than some 1/6 trucks) If I use it more I will need to add some more metal bushings to the axle drop boxes, as I have already had one instance of pieces melting then fusing together. This still uses my home brew motors which have proven themselves to be reliable with only one failure on my direct drive buggy which has since gained a Cush drive to prevent it from happening again. The Cv joints are holding up well with only surface level erosion but I do keep them well lubricated. Hopefully I won't have to machine metal ones. Spinning all four wheels on tarmac is crazy for tires this big and gummy. Idk what else to say, enjoy the video (walkthrough and action shots) Pity I don't have a zeroes to compare it to though -

FALCON RC Trophy Truck [MOC]
Daniel-99 posted a topic in LEGO Technic, Mindstorms, Model Team and Scale Modeling
Hello everyone! I would like to introduce you my new top-tech mid-scale Trophy Truck "Falcon". This car is a TRUE RC car in Lego clothing. Technical characteristics Full independent suspension with positive caster on all wheels Minimalistic and strong transmission with metal CV-joints 4 - wheel drive 4 Buwizz motors for propulsion (1 motor per wheel) Custom RC controllers adapted for Lego 3S Li-Po 35C 2600 mAh for power GeekServo for steering soft RC wheels 75 mm Custom wheel hubs with metal bearings Light bodywork, 1270 gram of total mass Instructions? Some of you might be interested in instructions. Well, there will be non, I am sorry! Here I will explain why instructions for this car are impossible. Falcon has 4 Buwizz motors for power, which can be easily changed to Buggy motors or Mould King version. Power source and controllers could be replaced with two Buwizz 3.0 units (in theory). But there is no way to replicate both suspension and transmission with lego parts only. Non-Lego solutions: Custom 3D-printed parts, such as wheel hubs, steering arms, suspension arms with 4,5 stud length Modified Lego parts Hand-made parts from plastic bottle ;-) Broken Pythagorean theorem in suspension metal parts, which make the whole car rigid Chassis Falcon has same chassis as a Wilde beast, but with shorter wheel base and suspension arms. So I will not dive into details here. Bodywork I was inspired by a Trophy Truck by Keymaker`s armored Trophy Truck. Though I reduced some details and widen the body by two studs to fit the chassis. Made for outdoor driving This car is not a shelf model. It was made for regular, extensive and extreme driving. Recall, that the elder brother Wilde Beast had a problem with motors: they were not strong enough to translate all the power from Li-Po battery to 90 mm RC wheels. That is why Falcon was made in a smaller scale to fit 75 mm wheels. Now motors does not struggle at all! Enjoy drifting on sandy road? - easilly! Lego Outdoor cars usually struggle from dust and dirt filling the transmission. This car has a minimalistic transmission without Differential, so there is noting to break. The weakest parts of lego cars (wheel hubs with CV joints) have been replaced with custom hubs with metal bearings - no more plastic dust in transmission! And nothing to brake! Massive 3S Li-Po provide an hour-long continuous driving. RC controller with physical buttons is very comfortable to use. After two weeks of tests I added fenders for the front wheels to keep the inside of the car from being filled with stones. 4WD drifting is a fun thing to play with, but I got tired from cleaning the car from small stones after each driving session! -

Wilde Beast 4x4 Pickup [MOC]
Daniel-99 posted a topic in LEGO Technic, Mindstorms, Model Team and Scale Modeling
Hello everyone! I am glad to introduce you my new Lego MOC. It is called "Wilde Beast" and it is a 1:10 scale 4-wheel drive pickup truck. Technical characteristics 1:10 scale, 1.630 kg of total weight All wheel drive with 4 x Buwizz motors powering each wheel separately 2 x Geek servo for steering 3S Li-Po for power RC radio + Wixy units for control Full independent suspension with customizable hardness Custom wheel hubs with metal bearings RC wheels 90 mm (12 mm hexes) Metal U-joints in the transmission Robust 3D-printed steering bones Positive caster angle on all wheels Back to the beginning The main Idea behind the build was inspired by real e-cars. This cars has no gearbox, and each wheel gets connected to an e-motor independently. I tried to replicate this principle with Lego bricks and some custom parts. Bodywork This car has is a 1:10 scale pick-up truck body, Though it is a bit too short for a normal pickup. The body was made to be light and it is build on the chassis with a half-stud off-set in order to make the wheels seating symmetrically in wheel arches. (It was an obligatory decision due to the positive caster angle). There are many things that can be improved in the bodywork, but the current one perfectly satisfy my needs: it is light but make the car somewhat recognizable as a car. Hope to find white fenders to the front wheels some time! All the driving elements are located in the lower 5 studs of the car, so it is very stable. Suspension Wilde Beast has a full independent suspension with positive caster, which is very unusual for pickups. Moreover it was made to be customizable for different purposes. 9L shocks connected to the lower bones of the suspension play main role. At the same time upper bones of the suspension has their own set of shocks which can be customizable! Custom wheel hubs provide a natural King-Pin Inclination. Transmission "A good transmission - is no transmission"... This was my main philosophy for this car. The car has 4x Buwizz motors for propulsion, each motor is connected to one wheel of the car via half-axle (which uses metal U-joints). "Gear Ratio": Slow output of Buwizz motor -> 95 mm wheel. Such solution has its own positive and negative aspects. Positive: extremely low friction stiffness fast cornering (e-differentials) High maximal speed (over 13 km/h) Negative: Too big stress on motors (a smaller wheels would work well) Car does not go straight due to the difference in motors Let me explain the last "problem" in more details. The motors used in the car are "the" same from the view-point of a lego builder. Though they are "different" from the physical view point: each motor has individual characteristics, such as resistance, max power, max rotation speed and so on... This difference can not be seen in slow models (with max speed under 7 km/h) but they became critical at speeds over 10 km/h. As the result, car is always turning to one side and the driver need to correct the trajectory with a steering. There are only two ways to fix this problem: either to make a mechanical balancing via differentials, or to test each motor separately, and make individual power curve to it. A steering system with build-in hygroscope might also help. Controls The car is controlled via RC radio. The whole system is very similar to RC car setup. 3S Li-Po is used for power, it powers controllers for driving motors (called Wixy). The controllers provide the power to Buwizz motors by a signal of receiver. The model is steered with 2 x GeekSevo, though one would be enough here. To see a detailed description of the system, see here: Conclusion The Wilde Beast was a great research project for me. I tried to replicate a real e-car layout and my goal was achieved. Car is very fun to drive, but the driver needs to pay a careful attention to the road. The main problem of the car is the lack of the e-brains which would allow to calibrate the driving motors... P.S. I will definitely make another car with same chassis on smaller wheels to reduce the load on motors. -

Blue Mamba V2 [MOC]
Daniel-99 posted a topic in LEGO Technic, Mindstorms, Model Team and Scale Modeling
Hello Eurobricks! Here is a Blue Mamba V2 - a wild mix of energy and rigidity. The story begins. Several months ago I build a fast off-roader for the King Of The Hammers competitions. The main idea behind that car was the minimalistic transmission. Well, there were now gears in the transmission, but there were CV-joints at the front axle and they were very weak! There was no way to fix that problem until one Russian AFOL comes with the custom wheel hubs with metal bearings and metal U-joints! These hubs allow to use a variety of RC wheels with 12 Hexes. Awesome! I purchased a set of custom hubs, and started the development of the Blue Mamba V2. Before diving into details I want to highlight another principal change in V2 project. V1 Mamba was powered by Buwizz 3.0 unit, but it drowned with my mid-scale trophy truck this spring. So for V2 Mamba I bought a custom Lego-compatible compatible RC controllers “Wixy” provided by another Russian AFOL. These controllers allowed me to use all benefits of GeekServo and Powerful 3S Lipo with 2600 mAh capacity. Bodywork. The car has a minimalistic bodywork. All panels used as structural elements. There is a plenty of space for the cockpit if one would sort all the wirings. The only decorative element is a fake V6 engine located behind the cockpit. Currently I have no PF motor available to make the engine work, but I keep in mind such possibility. Drivetrain. Blue Mamba V2 is a true E-vehicle with 4 PF L-motors powering each wheel independently without any transmission. Custom wheel hubs with metal bearings and metal U-joints make the transmission totally undestroyable. My goal was to minimize the width of the car. But the complexity of the front axle provided a lot of restrictions, so I had to widen front axle by 2 studs comparing to V1 Mamba. V1 Mamba has a steering motor located in the cockpit and linked to the front axle with new CV-joints. I replicated same configuration to the V2, but driving tests revealed big wobbling of the steering system, so I decided to place a GeekServo on the front axle (luckily it is very compact). A small regret is that GeekServo is not powerful enough for this wide and grippy RC wheels, It can not return them back if the car does not move. Likely, a positive caster angle of the front axle helps to back steering when car moves. Suspension. Mamba has 3-Link bridges at both axles with heavy-duty suspension arms. I had many attempts with the spring attachment. Finally, I understood that a responsive suspension requires a direct mounting of springs to the axles. 9.5 L shocks has very good springs (comparing to the soft 9.5 L one), but they were too hard for the car because all motors were placed on axles. An interesting idea came to my mind: why don`t you place these shocks diagonally? It works like a charm! Control. Car has a low center of gravity due to the placement of motors and 3S Lipo batteries. In addition, it has a proper wheel base and grippy tires, which makes the car very stable. Accuracy of GeekServo and RC transmitter provide a very smooth driving experience (though a stronger servo motor would improve the performance). Finally, 4WD helps to go through any terrain, such as sand, grass, etc… The top speed of the car is about 8.5 - 9 km/h. So it is very interesting to play with it outdoors and take it for a walk, since it has enough speed to drive back and forth while person walks. I tested this car with 120 mm RC wheels. The motors have enough power to handle and increased load while all the other plastic components (such as steering elements) were struggling a bit... On my opinion, 95-100 mm wheels are the optimal solution for fast outdoor cars. From one hand they provide a decent ground clearance and able to roll over the bumps. From the other hand they does not provide a lot of stress to the Lego parts. ' Conclusion. After multiple outdoor tests I conclude, that Blue Mamba V2 is the perfect Lego car, which is capable to go through any terrain with decent speed. It is strong and efficient and very controllable vehicle, which is pleasure to drive! Though It is too fast for trial. It is hard to go 2 km/h balancing between obstacles and barriers. But this is not a disadvantage, simply because each vehicle has it`s own areas of use. P.S. Speaking about Wixy Some of you wanted to know more about "Wixy" setup. So I placed all the component on the desk and marked them as follows: Wixy units RC receiver 3S Lipo PF motors Geek servo "Wixy" unit plays a role of an RC ESC unit, and it connects to the other electronic components in the same way: B-cable transmit the power from Li-Po batteries to the bottom PF connector (input) of Wixy units. A-cable feeds an RC receiver for Wixy units and translates the controlling signal at the opposite direction. Unusually for drive the "Channel 2" is reserved. PF motors get connected to the top PF connector (output) of Wixy units. GeekServo gets connected to the receiver. Two Wixy units provide enough power to feed GeekServo, otherwise I can plug and extra power from one of B-cable outputs (there is one specific 3-pin one). At the second picture all components are connected. It is important to note, that a Single "Wixy" unit can transmit only 3A to the motors, but it is the maximal power which PF connectors can handle . So you have to use one unit per Buggy motor. Luckily, 3S Lipo as an enormous amount of power, so it can handle 10 Buggy motors easily! Hope I cleared out the "Wixy" setup for you, but if you have any questions left, do not hesitate to ask them!-
- all-terrain
- 4x4
-
(and 1 more)
Tagged with:
-

PHANTOM Baja Truck [MOC]
Daniel-99 posted a topic in LEGO Technic, Mindstorms, Model Team and Scale Modeling
Hello everyone. This is a story of my mid-scale RC baja truck called “Phantom”. The beginning. I always had a strong desire to go fast. For that reason I made my Red Roadster powered by Buwizz motors (See my Profile for dedicated post). But this sport car has one significant disadvantage - it requires a very smooth road! So I decided to build a trophy truck. I learned a lot about trophy trucks made with Lego. Best of them had 2 Buggy motors for propulsion with a direct connection to the rear wheels. So I decided to build myself a similar setup. First trophy truck I designed in big scale (~1:10) but Buwizz motors were struggling with a load from big wheels (and that is not a problem of motors, but a problem of construction). So I made a portal reduction and the problem was solved. After that I build an ultimate dune Buggy “Dragonfly” with independent suspension driven by couple of Buwizz motors. The result was great, Buwizz motors allowed to drive it very fast on 85 mm wheels. So I decided to build a trophy truck with them. Such wheel size is the smallest one which could be used outdoors. Smaller wheels does not provide enough of ground clearance to go full speed on bumpy terrain. Photos. Front axle. I started the build with the front suspension. A technical task was the following: - to use big Lego wheel hubs - double steering rack - positive caster angle - ridged suspension arms I took many ideas from the front suspension of my Dune buggy and tried to make it smaller. Dune buggy used 9,5 L shocks so I decided to change them to 7 L shocks. Also I was able to avoid ball connections, since they struggle a lot at bumpy roads. Here is the result. The steering motors should get connected to the vertical black axe (on the first picture). The key idea was to place steering arms horizontally and in a slight diagonal way. Such placement caused some friction in the steering system, but from the other hand it reduced the wobbling to ZERO! Also there is a 3 studs distance from the connection of steering arms to the wheel hub and the pivot point of the hub (see picture 2). It reduces the maximal steering angle, but strengthen the steering system and make the control smoother! Rear axle. A technical task was the following: - direct mounting of Buwizz motors to the rear axle - Long suspension arms and long travel - Suspension with progressive hardness I decided to make it simple without any articulation, though there was some provided by bending of plastic parts. There are two sets of springs used. Small vibrations of the rear axle get absorbed by a soft 9.5 springs, while hard bumps compress the rear axle stronger, so the set of 7 L springs does their job. Finally, there is a couple of Lego rubber elements which play a role of fenders. So there are three stages of compression. First stage. Soft settings. Second stage. Hard settings. Third stage. Rear axle touches the frame. Frame of the car and bodywork. A technical task was the following: - two layers of frame - use the roof of the car as structural element - minimalistic bodywork The space frame of the car consist of two layers. Roof of the car tighten the upper layer in order to bear the load from the rear springs. The middle compartment is dedicated to power sources. The "new" cross-beams (15L and 11L) were very helped a lot. The bodywork is made with several panels which can be easily detached for servicing the electronics. Electronics. On photos above you can see a custom Lego-compatible RC unit equipped with two high power cells 18650. It provides more power comparing to Buwizz 2.0, but it is not enough for two Buwizz motors. It get overheated quite fast (5-10 mins). One may ask me, why I use it. Actually, the first version of the Phantom was powered by two Buwizz 3.0 units, which provided a plenty of power to the car. But I managed to drown the car at first outdoor driving test! So I bought replacement for them since there was no possibility to purchase new Buwizz units in Russia. Here is the video of an accident: This month I bought a different Lego-compatible RC electronics from a Russian AFOL, it is called "Wixy". It plays a role of the controller for RC motors and allows to power my cars with 3S Lipos! WIth 3S Lipo I forgot about lack of power and was able to ride the Phantom for miles and miles... Conclusion. The car Is made for outdoor driving. It has a decent speed and a good control. Though there are several weak places of Phantom which can not be fixed with plastic Lego parts. The dust is very annoying, especially on county roads! It fills all holes of the car, most importantly plastic wheel hubs. I destroyed all the wheel hubs I own and there is no way of fixing the problem... Also the car has slight problems with ground clearance - it is acceptable for city roads but too small for stony surfaces. Finally, the Truck can not go trough the tall grass with such small wheels and RWD. -

[MOC] CLAAS Torion 1914 Technic/System
mktechniccreations posted a topic in LEGO Technic, Mindstorms, Model Team and Scale Modeling
Dear all. Allow me to introduce my latest MOC which was in development long time now, its supposed to be scaled replica of CLAAS Torion 1914 wheel loader from CLAAS company in 1:17 Scale. The reason why i chose this moc was due to lack of other "colour" machinery in this segment and also being kind of specific wheeloader for agrocultural sphere which i love. Claas Torion 1914 is colaboration with Liebherr on joint wheelloader project, Liebherr version is L550 and up. Model is combination of technic chassis and functions with system easthetics. Over 2000 pieces and 4 motors of Control + type allows for good looks and good playability, althrought a bit limited by weaker PU motors compare to PF, i chose PU to get in new wave of tech + easier and cheaper accesibility on market as the PF functions are getting more expensive. Functions are provided by 3x L PU motor and 1x XL PU motor Driver 1x XL Steering 1x L Pneumatics #1 1x L Pneumatics #2 1x L Each L motor serves for pump and switch together by sariel pump/switch combo, but modified to suit my needs in this build. there are two 6L pumps connected to each motor without any air tank so the actions are not so snappy and responsive and it all depends on the power of motors and batteries. due to this i am seriosly considering upgrading to Buwizz 3.0 to see if it will make it perform better and faster. I don't usually know what more to type about the MOC so i will answer every question in comments section if i will be able. Enjoy the photos (video later today)- 25 replies
-
- control+
- wheelloader
-
(and 3 more)
Tagged with:
-

RC Car with in-wheel brushless motors
janssnet posted a topic in LEGO Technic, Mindstorms, Model Team and Scale Modeling
Finally finished a first version of a LEGO RC Car with 2 in-wheel, brushless motors. While I know some of you hate the combination of RC electronics and LEGO, others enjoy these hybrid models (hence this post). If you are more the purist type and in favour of LEGO only, please skip this. If you like stretching the envelope using (RC) electronics please have look and let me hear your thoughts. While searching for brushless in-wheel motors I ran into the ideal product: Turnigy Multistar 4225-610Kv. It mounts easily onto LEGO (same measurements) and fits almost any 56-rim. The result is spectacular. Great speed, no wear-out, all traction goes to the wheels, no gears necessary. Sadly, it turns out this motor is no longer available (working on an alternative). Car also includes an (adjustable) software differential running on an Arduino Nano, works surprisingly well. When fully applied the car has serious oversteer, when turned to 0 the car has understeer. The body of the car is a 54100 modified boat hull . It took some cutting but ended up nicely. Please have a look at the video here:- 6 replies
-
- differential
- fast
- (and 6 more)
-
(1).thumb.png.b4d6c907fe73903aec1adfd3cd481a19.png)
lego battlebots!
glowytheglowbug posted a topic in LEGO Technic, Mindstorms, Model Team and Scale Modeling
i just created some Lego battlebots maybe im hosting a little competition in Singapore during December holidays so far i have made a literal tank of a battlebot (brick on the floor with rotating cylinder) and it works decently here is it going against a smaller bot https://www.instagram.com/s/aGlnaGxpZ2h0OjE3OTYyNzUxNzczNzYxNjg4?igshid=MDJmNzVkMjY= thats the fight of 3 rounds also the smaller one got completely demolished lol- 1 reply
-
- battlebots
- rc
-
(and 2 more)
Tagged with:
-

WW Bricks's Technic 42083/42110/42115/42125/42130/42141/42143 RC MODs and MOCs
WW Bricks Studio posted a topic in LEGO Technic, Mindstorms, Model Team and Scale Modeling
Hi Guys, Here to share my RC MODs and MOCs, wish you like them. Please comment below. Thanks! https://rebrickable.com/users/WW Bricks Studio/mocs/ [Full RC] LEGO Technic 42143 Ferrari Daytona SP3 Power functions -BuWizz 3.0 x1 -Driving: PF XL motor x2 -Steering: PF Servo motor x1 - Doors: PU M motor x2 - Engine cover: PU M motor x1 [RC] LEGO Technic 42141 McLaren F1 + 1 BuWizz 3 + 2 BuWizz Motors + 1 PU L Motor [RC] LEGO Technic 42130 BMW M 1000 RR controlled by BuWizz App [RC] LEGO Technic 42125 Ferrari 488 GTE + 1 BuWizz 3 + 2 BuWizz Motors + 1 PU L Motor [Full RC] LEGO Technic 42115 + BuWizz 3.0 / BuWizz motor / PU L & M motor [RC] LEGO Technic 42115 Lamborghini Sian with BuWizz 2.0 [Full RC] LEGO Technic 42110 + 1 BuWizz 3 + 2 BuWizz Motors + 2 PU L Motors [RC] LEGO Technic 42110 RC Land Rover Defender with BuWizz 2.0 [RC] LEGO Technic 42083 + BuWizz 3.0 / BuWizz motor / PU L motor [RC] LEGO Technic 42083 Bugatti Chiron with BuWizz 2.0 My alternative F1 MOCs were made by 42083/42110/42115, [MOC] LEGO Technic 42125 Ferrari F1 Car [RC] LEGO Technic 42115 RC Lamborghini F1 car -
.thumb.jpg.3f4deb19d1e4f36dfb3084a150286f74.jpg)
[WIP] RC giant landship/vehicle transporter
Jayden posted a topic in LEGO Technic, Mindstorms, Model Team and Scale Modeling
This is probably optimistic, but I am in the planning stage of building a massive landship /vehicle transporter. I do plan to build it for real after I complete the studio model. These are the functions I would like to have. The 1st pic is certain - drive, steer, lift. The 2nd pic are functions that would be nice to have - secret door and crane. The 3x19 frames are just to show the distance. This is what i have so far: This all started when I saw this video in my YouTube feed. Then a little while later this came up and so then I wanted to make my own version of a landship In more detail. This is the rear axle: This is the lift mechanism in more detail. The backboard of the lift would be removed for the secret door to have vehicle storage under the deck a bit like an aircraft carrier: Also feel free to suggest a better name for the vehicle. I am keen for suggestions and feedback. Thank you for taking the time to read this.- 14 replies
-
- optimistic
- poweredup
-
(and 4 more)
Tagged with:
-

[MOD] 42104 Race Truck RC
vascolp posted a topic in LEGO Technic, Mindstorms, Model Team and Scale Modeling
I Everybody! This is an RC version of LEGO 42104 Race Truck. Motorization is controlled by pybricks program Remote Bla Bla, so controlling is done by the LEGO Handset, no need for a mobile phone device. It was fun to include a hub and two motors in such a small scale, although the driving motor is kind of outboard. At the beginning it feels a bit clumsy compared to the original set but one gets used to it. It's a cute little truck! Steering at this scale is a bit wobbly, but it works fine enough. I wonder how it would be with the Small Angular Motor for steering. Probably both motors could fit... but I don't have one. Steering motor is embedded in the chassis. Drive motor is outboard in the rear. Two configurations are presented: Simple Drive Mode: Drive motor with two modes:on and off Steped Drive Mode: Drive motor with seven power steps More pictures in bricksafe; Instructions in rebrickable; Remote Bla Bla in github; Some pictures: and a video: Have fun!

