Search the Community
Showing results for tags 'Power functions'.
Found 368 results
-
[HELP] Propulsion by L Motor and XL Motor
T Lego posted a topic in LEGO Technic, Mindstorms, Model Team and Scale Modeling
Hi everyone, I am making a new lego technic supercar, but I have a question. For my propulsion system I want to use 2 XL and 2 L motors. Since the XL and L motor have different rpm (XL 110 and L 195), I don't know what the best way is to conect them. If I have done the Maths correct the L motor should be geared down by 1:1.77. I am trying to connect them in that gearratio but the best option I have found so far is to gear the L motor down by 1:1.66t (using the 20 tooth and 12 tooth gear). Other suggestions are welcome! When powering the motor the sound is just a little bit different, but I dont know if I am damaging the motors and getting all of the torque..... -
Hi everyone, Several years ago I got one set of the famous Horizon Express. But 2013 was a period I came into a small dark age. Most of my Lego City sets were sold off, including the train itself. Now after several years I´m slowly coming out of the dark age. I am planning to make a new city somewhere in the future, but currently I lack the space for any Lego creations. So most of those have to be stored in a box under my bed. My starting point for a new city was a large modular styled train station. As you can see here it's still under construction so minifigs can't enjoy it yet. New Canalview city station WIP Ofcourse I also wanted to have a nice train running around in this new city. I have bought the City high speed passenger train, but felt it was a little too simplistic to go with the new modular styled train station. Another option was creating my own passenger train. But that would take a lot of time, and I'm not really a train builder. Then I remembered the gorgeous Horizon Express that I used to have. I started up my computer and went searching for a second hand copy. It turned out the aftermarket was even more expensive then the original set! Two sets would cost me around € 400,- which is way too much for me. Also two sets would be really long, even too long for the new train station. But after that I wasn't going to give up, I browsed almost all Lego catalogues for more inspiration for the new train. Then I came across an old 12 V set which I really liked as a kid because of it's colors and attention to detail. And then it struck me, why not combine the Horizon Express with the color of the older 12V set? After researching for parts on BrickLink it turned out that a red/black version of the horizon express could be build! After scrambling my own parts for it and calculating it turned out the be much cheaper than buying two new Horizon express's. The result can be seen here: More high res pictures here: https://www.flickr.com/photos/145979506@N07/ There are some changes to the original, like the shape of the lights, the number of cars and the windows of the passenger cars. I like it kinda better this way. It still needs an interior, but I'm happy with the result for now. Also, I'm planning to add real lights to it so it can drive at night too. Hope you like it as much as I do! If you have any suggestions or comments please let me know!
-

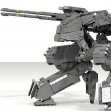
[AMS1] 42056 Porsche 911 GT3 RS Crawler 4x4
Zerobricks posted a topic in LEGO Technic, Mindstorms, Model Team and Scale Modeling
I decided to open a seperate topic for this beast. Inspired by Letsbuild's idea to crawlify a Lego set, i decided to go full crazy and try to upgrade the biggest, heaviest and most orange set to date, Porsche 911 GT3 RS. First thing I built was the front axle, which uses the H frame as a placeholder for bewel gear, so there it no possible way of them to slip: Those with sharp eyes may notice the gears are not aligned, this was done in LDD development mode, more info soon The drive than goes directly to portal hubs with 1:3 gear ratio, giving the model 1:5 gear ratio on each wheel. Front axle also has a servo motor which steers the wheels and powers the Porsche's original steering wheel via a ball joint Rear axle powers the Porsche's gearbox via a couple of clutch gears in order to allow different motor speeds when steering or skid steering - Yes, this 4 kilogram heavy model can even skid steer thanks to its independent motor control. Here is the end result As with the original set, I kept the rear axle 2 studs wider than the front: For suspension I used 4 hard springs, which are hald compressed thanks to the model's immense weight. Due to the porsche's wide chassis springs are quite far apart, so the flex angle is not really big, but on the other hand that makes the model much more stable. Performance wise the crawler works very good, despite its massive weight, so far I had no broke U joints or gears and it has enough torque to skid its wheels on hard surface. Expect more pictures soon and a video soon. -

Tiny tracked vehicle with amazing power functions
Leonard Goldstein posted a topic in LEGO Technic, Mindstorms, Model Team and Scale Modeling
Hi everybody, my first topic, my first moc ... With this moc a had two goals building a tracked vehicle: 1. Make it as small as possible 2. Maximize playability with lots of power functions To the first point: the distance between the tracks is only six studs and the whole vehicle fits into the shovel of a 42030 And now the power functions: it is using a 8878 rechargeable battery box, an SBrick and four M-motors. Two motors are used for driving and there is a subtractor inside (which means one motor runs the vehicle forward/backward, the second motor is turning it left/right). The third motor runs the container lifting device at the back and it also locks/unlocks the trailer coupling. As it is double worm geared it is very slow, but very strong. The last motor runs the lifting device at the front. As there was absolutely no space left for any more gearing, it works by using a rope and a set of pulleys. Enough words, here some more pictures: As you can see these are pictures made with the LDD and so it was easy to extract the power functions: All just digital? Of course I know what you are waiting for. And here is the video showing this little thing in action: http://dai.ly/x5tmoni If you like my creation and want to copy it you can find a LDD-File here: http://bricksafe.com/pages/Leonard_Goldstein/tiny-tracked-vehicle There is also a background picture availably for your SBrick-profile (as you can see in the video). Maybe you have to adjust the resolution depending on your mobile device. Some notes to the LDD-file if you want to copy this: 42003 on the roof are not placed exactly as this is an illegal lego connection. Watch the video for exact position. Same for 32039 at the rear axle. The lifting device at the front needs a rubber band to keep the rope tight. Otherwise the rope would fall of the pulleys. For the lifting device I used a beam with ball cup which is not available in the LDD. I replaced it by 6M Half beams and a 2M cross axle. The cable routing is quite tricky as the vehicle is so small. I used same cable fixer to make this easier. Ok, no Lego-parts. Shame on me. But you can get them in every do-it-yourself store for a little money. Greetings Leonard Goldstein -
hi all, I have just started into the world of Lego trains and controlling them with Arduino and i'm afraid it's become somewhat of an obsession! I have always loved Lego and trains since I was a child but could never afford it. I have a son who's 6 and shares my love of trains so I figured now was a good time to start! :-D I have limited amount of Lego at the moment, and have been mucking around in LDD and Stud.io building some signals, etc..this also includes using Arduino to control lights as well as trains..my first try with using some IR transmitter LEDs worked, but not real well which made me wonder whether IR is really the best method of control..I have read alot of comments already from people that RF is really the way to go so I will try that next when the 433Mhz Tx and Rx pair arrive. This led me to think of the next weakest link in the chain..the battery, which only lasts so long and is a pain to have to pull out and change..I know Lego and even third party companies have a rechargeable battery, but I'm buggered if I'm gonna pay $100-120 for each one!!! I've never had any 9v or 12v rail-powered Lego, and the way I understand it, you switch on the control, it powers the rail so much and makes the train go...but what if the rail was powered on all the time and you still controlled the train with an internal controller (like the RF receiver). Any thoughts on this? Sorry if I sound like a noob, since I have no experience with how the track-powered system works. sPy from Oz.
-

Lamborghini Gallardo
legotechnicisawesome posted a topic in LEGO Technic, Mindstorms, Model Team and Scale Modeling
hi eurobricks! i started this topic a bit late i know, but i still havent finished yet! here is a photo of my progress so far: i need some ideas for the the dash and centre console as a car is not a good car with out a good interior! here is my progress on the inside: any help with the dash and console would be greatly appreciated! thanks! -

Something with Broken Parts and Customer Service
MattL600 posted a topic in LEGO Technic, Mindstorms, Model Team and Scale Modeling
I have 2 broken m motors and 1 broken servo motor, I'm going to throw the servo motor out cause it's not useless and I can mod the m motors (maybe). I also have a battery box with a broken leg hole. Anyways I decided to do this because I've been trying to contact Lego but they keep sending me an error message and blocking me from reaching the humans... Please help, PS I have tons of other broken technic parts but not as important as this. -
Nuclear Building is a round modular building whose shape resembles a mushroom cloud. Model characteristics: Building comprises 3 stories and has a height of 40 bricks. Fits into 32 x 32 modular standard and can be put near any other modular building not taller than 28 bricks. Building is equipped with a functional elevator. Model consists of over 4100 parts. Some of the architectural features: Model consists of 4 modules: The following picture shows how the modules are connected together: The building is equipped with a functional elevator: Despite its oversized top floor, the building can be put near any other modular building not taller than 28 bricks. The connection points are embedded in the fences. Additional links: Photo album on Flickr. Building instructions are available on Rebrickable.
-
[MOC]1977 Holden Torana SLR 5000
veryrusty posted a topic in LEGO Technic, Mindstorms, Model Team and Scale Modeling
Here's the last of my three MOCs. This one is a 1977 Holden Torana. It was created to take on the big Falcon's in Australian touring cars, by putting a large 5 litre V8, in what was a comparatively small sedan. It was a great idea, but executed too quickly. The V8 was only tested on a dyno, but when put in a racecar, the high cornering speeds caused oil surges and creating reliability issues. These were fixed in the followup XU1, which became dominant. That didn't stop Holden fans from buying the SLR5000 in droves. My SLR5000 features: - Full independent suspension. - Remote control driven by 2 L motors servo and sbrick. - V8 motor - 4 opening doors, bonnet and boot. IMG_20170528_140254 by Russell Murphy, on Flickr IMG_20170528_140309 by Russell Murphy, on Flickr IMG_20170528_140406 by Russell Murphy, on Flickr -
Modular trial truck chassis idea
Zerobricks posted a topic in LEGO Technic, Mindstorms, Model Team and Scale Modeling
I got this idea a while ago, when I first got Sbricks. Why not make modular, expendable system of axles and chassis pieces in order to create a system for offroad truck construction. Here is what I sketched up in LDD. First we have a basic axle. It uses 2 XL motors for drive, independet suspension and steering with servo Because we need a minimum of 2 axles, I designed a double chassis holder with two battery boxes: If we combine 2 axles with the double battery holder, we get the most basic configuration, a 4x4x4: In order to expand on the system I designed a single battery chassis extension: Finally we can combine the three basic modules into a 6x6x6: Or even a 10x10x10: In theory there is no limit how far you can go, but I think anything over 12x12 might cause too much strain on the chassis. Important details: - Axles are designed for Claas wheels, which are not in LDD, hence the wheels above may look small - Each axle can use any kind of a combiantion of number of springs and hardnesses for best flexibility and weight support - Each axle is meant to also house and S brick, which allows you fine steering angle control in order to support any kind of configuration or steering mode (only front, only rear, all wheel steering, crab mode) - For now this is still a concept, so I will relase the LDD file once I build, test and polish the concept -

Power functions lights and 42039 question
teos posted a topic in LEGO Technic, Mindstorms, Model Team and Scale Modeling
I've been modifying my 42039 (24 hrs racecar) to be remote controlled with an sbrick and was wondering if the power functions light unit will work for that set? I don't have any of them, so I'm not sure if the wires are long enough to reach both light sections in the front (or two sets of PF lights one front and back). Thanks in advance! P.S. I just got my 1st sbrick last week and they are amazing. Now I want another. -

[MOC]Bulldozer
legosamigos posted a topic in LEGO Technic, Mindstorms, Model Team and Scale Modeling
Hello Eurobrickers! Today I would like to show you my new MOC - a bulldozer. This is not a specific bulldozer model, although I watched little a Caterpillar D9T. A blade and a ripper are full remote controlled, does it mean, can be raised, lowered and tilting. Dimensions: -length: 43 cm, -width: 26 cm, -height: 20 cm, -weight: 1738 grams. Power Functions: drive and steering – 2 PF L motors, blade can be raised, lowered and tilting by 2 PF M motors, ripper can be raised, lowered and tilting by 2 PF M motors, 1 x PF extension wire 20 cm, 1 x PF small battery box, 3 x PF IR receiver, 3 x PF IR remote control. Some pictures, rest are available at the public galleries Brickshelf gallery Bricksafe gallery Youtube video -
Im new to this forum so hi everyone ;) i have fun with PF from few months, and i want to buy a li-po and customize it to lego, i got two of real power hungry buggy motors, and i want to feed em' as much as i can :D I only need to know which voltage is maximum for motors, and for reciever, i have maken a research across internet, and ive heard that motors can handle max 16volts , and reciever just 9 volts, but ive heard too that motors can handle max 12 volts and that reciever too, on many forums i have read different numbers, so i have to ask here :) i have found light and small 14,8 volt li po 850 mah, in good price and i like it, but i dont want to burn my buggy motors and rest of PF, im wondering too about rc unit voltage, if it have 6 aa 1,5v bateries fully charged, it could generate 9v as normal pf battery box but when i compared them, rc unit is way better, and buggy motors are way faster, i hope that someone can help me :)
-
I got some rubber tracks from BrickLink here the other day, and to my pleasant surprise they fitted nicely over the Wheel 30.4mm D. x 20mm ! As I am waiting for the last parts for my Container Stacker MOC, I thought I'd make something else in the meantime, and decided to try to make something like a smaller edition of the 8043 B-model tracked loader, using these new rubber tracks. Although it is somewhat similar to the aforementioned 8043 B-model, it is built from the bottom up using just my imagination, in the course of a couple of days. (My girlfriend is celebrating easter abroad with her family, so I have plenty of time to be creative ) This is the first time I've used studded construction in a MOC since I came out of my dark ages (Albeit just in the lower chassis), and a lot of memories came back to me from doing that! Anyway; this is the result: The yellow bucket is from my old 8862 Backhoe from way back in the day. Both the driving and the other functions are quite quick, and a lot of fun to play with. It uses PF-M motors for all four functions, and PF LED lights for playing at night when the power is out, The construction is very sturdy, if you for instance push down on the bucket, the mini LA wil start to slip before the rest will start to wobble or bend noticably. The back end comes off easily, and hides a lot of the wiring. The battery box can be removed after pulling out two Axle 4 with stop from below. I "cheated" a little with the digger apparatus, by making the entire arm a sort of four bar linkage (or whatever it's called), so the geometry (and thereby the bucket) stays the same for the entire travel of the LAs. This is probably not very true to real life, but it is a lot easier to create. When I made my Swingloader, I think 50 % of the time I used building that thing, was figuring out a good linkage for the tipping function. As you can see, the tipping works really well. A view from the bottom. You can see the axles for removing the battery box, as well as the gear train. Different speeds can be achieved by using different gear ratios. I spent a couple of hours yesterday to build the entire model in LDD, and it turned out 99,9% accurate, I used "illegal" building techniques on two occasions. One you can see in the above two pictures (attachment of the rear mudguards. The other is where the IR Receivers are attached (I had to use one of these in LDD, instead of one ot these , which is used in the real life model. If anyoneone wants to build this, just shoot me a PM with your e-mail, and I will send you the .lxf file. The model has just over 600 pieces. And here is a video of it in action:
-
I want to know where to buy the type of wire Lego uses in PF parts, I can only find grey IDC ribbon cable (see below). I need it to be black to replace some worn out wire on some of my PF parts. Has anyone ever found a matching type of wire/cable? Thanks .
-
The Lost Tomb, is one of my latest creations. Our adventurer, Indiana Jones, descovers the lost tomb of the Islanders' King. I hope you like my creation, and I am open for your comments! Take a close look at the video that follows; by George Patelis, on Flickr The Lost Tomb is Revealed by George Patelis, on Flickr You can find more photos at my Flickr Account
-
BMW S1000RR iPerformance Concept Bike
TheMindGarage posted a topic in LEGO Technic, Mindstorms, Model Team and Scale Modeling
This is my entry to the Rebrick BMW Motorrad competition. Its goal is to balance both performance and sustainability to show that high-performance vehicles have a future in a world concerned with emissions and fuel consumption. I used double wheels on both the front and rear in order to make this model driveable. The wheels are made from 36 chain links bent "the wrong way" - they are around 16cm (20 studs) in diameter. The whole model is about 55 studs long and 13 wide. The drivetrain consists of a PF Large motor geared 1:1 and a PF XL motor geared 5:3. They are hard coupled - yes, I know this is frowned upon but it provides a compact solution, and the load on the motors is no different to driving a car up a hill. The motors are mounted inside the rear wheels to save space and simplify the drivetrain. The motors are connected to an IR receiver which is mounted inside the main body. The battery pack is positioned at the very bottom to lower the center of gravity and increase stability. There is a shaft connecting a 4-cylinder piston engine to the wheels. This piston engine runs on E85 bioethanol which is derived from plants. This means it is renewable and carbon-neutral - the carbon dioxide released when burning it is compensated for by the plants used to make them photosynthesising. It also has a higher octane rating than gasoline, meaning it can actually provide better performance than the fuel it replaces. E85 biofuel engines already exist - all recent Koenigsegg vehicles are capable of running on both gasoline and E85, and these engines can produce up to 1 megawatt from a 5-litre V8. I believe biofuel is the future for high-performance vehicle manufacturers such as BMW. The front suspension uses a Duolever setup where the front fork is suspended on two parallel wishbones. The front wheel is able to move up and down and steer, while having the shock absorbers mounted on the wishbones rather than as part of the forks. A steering linkage allows a PF Medium motor to control the front wheel. The rear suspension uses a similar system called Paralever. It is essentially one half of a car independent suspension, complete with universal joints. It is sturdy and keeps the rear wheel's motion vertical when the suspension compresses. The front and rear wheel arches use the bucket wheel parts from 42055 as an internal structure. I used pneumatic hoses as part of the structure to give the flared appearance of the rear arch. greenshotcertificity.com Every part of the motorbike is designed with the BMW brand in mind (honest, it's nothing to do with the lack of turn signals ). The panelling (especially the side intake) is inspired by the BMW i8, a hybrid supercar by BMW. The suspension matches the types used on current BMW motorbikes, and inline-4 engines are commonly used on both their bikes and passenger cars. Here's a video showing the bike's drifting and burnout capabilities. Music is composed by me. Enjoy! -

Power Functions - combining different motor types
xXFoxhound90 posted a topic in LEGO Technic, Mindstorms, Model Team and Scale Modeling
Hi everyone, Two little question regarding Power Functions: 1. Is it possible to combine 2 L-motors with 2 XL-motors at the same time, working on the same gear of a car (2,0-2,5 kg) or will only motors of one type work? 2. How many M-, L- and XL-motors can be used on a single 8887 rechargable battery box (to move the same car as above) at the same time? Thank you in advance! xXFoxhound90 -
Thought the EB Technic community might appreciate this remake of the 2001 Bionicle set I built for a contest on another forum. It features the same RC tracked drive and swiping claws as the original (this time powered by Power Functions elements, rather than a giant RC brick) plus light-up eyes via PF lights. https://youtu.be/Q76HBzIxZ0E (Apologies if this belongs in the Action Figures subforum - I thought it was probably a better fit for the Technic forum?)
-

[GBW] - Supporting the war effort - Plantasea - The Power of the People
BoBKiD posted a topic in The Great Brick War
[GBW] Part 1: "The Power of the People" The Plantasea forces recruit men from all over the country in order to man all military units and reserves. The recent attack on Filace means only one thing: War is inevitable! [MOC] The Main Gate [GBW] by BoBKiD206, on Flickr The MOC: MOC] The Main Gate [GBW] by BoBKiD206, on Flickr MOC] The Main Gate [GBW] by BoBKiD206, on Flickr MOC] The Main Gate [GBW] by BoBKiD206, on Flickr MOC] The Main Gate [GBW] by BoBKiD206, on Flickr MOC] The Main Gate [GBW] by BoBKiD206, on Flickr As a small extra, the MOC features Power Function lighting. The following pic was taken in total darkness with just the power fuctions lights on. [MOC] The Main Gate [GBW] by BoBKiD206, on Flickr -
Hello fellow builders! I felt that it was finally time to share with you all something that I've been working on/ playing with for a while now: My L-Motor Frame. L-Motor Block Types by Nick Jackson, on Flickr The concept for this project was to create a stable platform on which (primarily) steam engines could be produced with less motor& cable obstructions. L-Motor Block Types by Nick Jackson, on Flickr This would then allow the engine's body to be built relatively free of electrical components, or crammed with them in the case of tank engines. L-Motor Block Variants by Nick Jackson, on Flickr I think that the most interesting part of the frame is the fact that it is easily modifiable, and can essentially go from 2 to 7 axles! At the time of writing this however, I've only dared to go up to 4 axles for a related project. L-Motor Block Variants (2) by Nick Jackson, on Flickr Hopefully these frames and their different gear ratios will inspire you to make a steam engine! Although, there are a great many European engines that are not steam, but employ connecting rods for their drive wheels. L-Frame with Medium-Large wheels by Nick Jackson, on Flickr Lastly, here are some alternative wheel sizes that you may be interested in. These are made possible by the work of BigBen Bricks and @Shupp. The smallest feasible size would be the Medium-Large drivers by Shupp. These would need a bit of reworking from a standard L-Frame in order to clear switches and such. New Wheels!!! (2) by Nick Jackson, on Flickr Here, a set of XL wheels from BigBen fit nicely on a standard frame. L-Frame with XXL wheels by Nick Jackson, on Flickr And, by upgrading to the longer frame size, you could even accommodate 6 of Shupp's XXL wheels! Hopefully this post will benefit everyone, but moreso people who've had a difficult time getting into trains, and especially steam! Please, let me know your thoughts, and definitely share your ideas for a potential future build that might benefit from this design! Oh, and here's the link to the files: https://drive.google.com/open?id=0B9xAgBdzDImZaFFsM2lGVkdmcEk Thanks for reading, ~M_Slug357~
-
[MOC] Ariel Atom 500 V8
TheMindGarage posted a topic in LEGO Technic, Mindstorms, Model Team and Scale Modeling
This is my latest MOC: an Ariel Atom 500 in 1:9 scale! Technically it isn't a true scale model since I didn't use exact dimensions (I just build what I think looks best), but size-wise it's about 1:9. The real car is the fastest ever variant of the Ariel Atom, a street-legal car built for track racing. Released in 2008, the Atom 500 features a 3-litre transverse-mounted V8 made from two motorbike engines. It produces 500 horsepower (hence the name) and redlines at a rather insane 10,500 RPM. Other modifications include massive wings and the gold-painted exoskeleton. The car weighs only 550kg, giving it a power:weight ratio of over 900hp/tonne (higher than anything short of a Koenigsegg) - It recorded a 0-60mph time of just 2.3 seconds and could reach 200mph. It was the fastest road-legal car around the Top Gear Test Track for over two years. That record lap was on damp tarmac - had the track been dry, it would probably still be at the top. Only 25 of these cars were made, selling for around £200,000 each. My model features: Remote control drive and steering with Power Functions - 1 XL motor for drive and 1 M motor for steering 4-speed sequential gearbox operated with paddle-shifters Working steering wheel Full independent suspension with longitundinally-mounted shock absorbers Steering has zero scrub radius V8 engine replica with moving pistons The zero-scrub radius was a new idea for me. When playing around with suspension linkages, I discovered that mounting the links in a certain way would cause all four to move when turning (rather than just the steering link). The center of steering was further outwards, almost exactly in the middle of the wheels (I think it's where the suspension links would intersect when extended, but I'm not sure of this). The geometry I chose works almost perfectly for 68.8x36 ZR tyres on 56mm rims. Here's a picture of the steering links in their two extreme positions superimposed - the point where the wheel shafts intersect is the center of steering: The suspension is standard double-wishbone in the rear, but with a sideways lever converting the upwards motion of the suspension into longitudinal movement of the shock absorber: The transverse V8 was very difficult to fit in because it has even dimensions and the rest of the chassis has odd dimensions. It is connected directly to the XL motor The interior (or as close as you can get to an interior in an Atom) features two racing-style seats, a steering wheel and paddle shifters: The aesthetics were rather difficult at times. The framwork was very difficult even with the 42055 yellow parts (in fact, getting that set is the reason why I built this model), and at times I had to use some tricks. For example, the rear framework looks like it has two beams crossing in an X-formation when in fact the left and right halves of the "X" are two separate structures: I also replicated the exhaust pipes and gigantic rear wing. One of my favourite parts of the model is the side intake and its red stripe: The PF IR receiver is disguised as the air intake and roll hoop: For more pictures of the car, see my video below. Music is composed by me as well: [media]https://www.youtube.com/watch?v=RhmgbCIpHT0[/media] This project is also on LEGO Ideas! I know the success rate is extremely low for such projects, but it would be amazing if this set because a reality! Please support my project here. Any support is much appreciated. -

Lego Tecgnic Truck 6x6 Off-Roader
nnamhcab posted a topic in LEGO Technic, Mindstorms, Model Team and Scale Modeling
A model I've been working for a little while, not much to show yet but pictures soon. 6x6 truck with locking rear diffs and 2 central diffs in the 6x6 drive making for a combination of power delivery choices, similar to the drive train of the mercedes amg 6x6. Using tires from 42054 so its, big near half a meter or so now. Rear live axel suspensions front independet fake v 10 soon to be geared in, possinble addition of 4 speed gearbox and 4 xl motors for drive. with fully rc gear and diff lock control and who knows what else? -
[TC11] La Grange 3001 (WIP)
teos posted a topic in LEGO Technic, Mindstorms, Model Team and Scale Modeling
I began to work on my 1st Technic moc yesterday to see what I could come up with. Here's my progress. I'm quite pleased with where I'm at and what I could accomplish, even if it is basic by many Technic builder standards. It drives nice on carpet, though I'd love to have those rubber dots to make it work on hard surfaces. 20170318_121559 by topazard, on Flickr 20170318_121636 by topazard, on Flickr 20170318_121659 by topazard, on Flickr Trying to figure out how to add a function will have to wait until next weekend (hopefully). By then I might have the parts to finish off the marbled top. For anyone wondering this is supposed to be a Grangemouth 3001. -
Hello, Eurobricks. I wanted to post this page because a few days back, I FINALLY managed to get a 4x8 train motor, so I could motorize the engines on my Lego Helicarrier. But when I put in all the power function accessories, the lights came on, but the rotors barely spun for a second. I was wondering if anyone else had motorized their helicarrier, and experienced a similar problem. If so, do you have any solutions to how on fix the problem? Thank you, Th3_Br1ck_Kid


.thumb.gif.ad7c8d88b264ee812194946c07404504.gif)