Search the Community
Showing results for tags 'Power functions'.
Found 368 results
-
I would like to know what everyone thinks about power functions and 9 volt systems. What is better PF or 9V. Or are they the same. Thx
-

RC receiver (part 8884) whining sound and not driving motor
Crazybill posted a topic in LEGO Technic, Mindstorms, Model Team and Scale Modeling
Hi all. I downloaded the 3D model and built a modified RC version of Lego 42005 shown in this link http://www.eurobricks.com/forum/index.php?showtopic=88490 I used an L-motor (88003) and IR receiver (8884), but I had to use alternative parts for the other 3 power function parts as I don't have them: I used Battery pack 8881 (instead of 8878) - for powering the whole thing I used Medium motor (8883) instead of servo motor (88004) - for controlling the wheel direction I used Remote control 8879 (instead of 8885) What happens is that if I connect the units directly to the battery pack, the model drives fine (the L-motor), but the wheels don't turn very nicely at all (unless there's very little resistance, as when I hold the model in the air). So I guess using a regular motor instead of a dedicated servo one isn't a good choice. The real problem however is when I connect the thing using the RC; the IR receiver unit sounds a high pitched noise and the motors don't spin at all, unless I hold the car in the air (and that also is a hit and miss. especially for turning the wheels). Can anyone please explain what I'm doing wrong? Is the remote control faulty (it's came from a train set, dunno if this means anything), is the battery pack too weak (I used freshly charged batteries), is a regular motor inadequate to simply turn an axle if the turning range is limited (the wheels are already all the way to the right/left)? Thanks for helping out! -
I'm wondering if the PF IR receiver can "see" signals through transparent pieces, particularly trans-clear. I presume it does, but I want to make sure. I'd check on my own, but all my PF parts are at school in Illinois and I'm home in New York for the holidays. I'm hoping it works, otherwise I've got some major design changes to make on an upcoming project. Anyways, has anyone tried this or can someone test it quickly? I'd greatly appreciate it! Apologies if this is a repeat thread, I searched for the topic prior to posting. -Matt
-
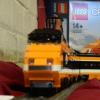
I have just completed the modifications to incorporate the suggestions for my 6 wide power functions shunter. Please let me know what you think and I welcome suggestions for how it can be improved. Thank you all for your support on https://ideas.lego.com/projects/82031 I regret we have only 100 supporters now so I don't forsee this getting up as the 50th anniversary of Lego Trains train. Fortunately James Mathis has what I think is an even better idea https://ideas.lego.com/projects/86744 so if you haven't supported this one I can highly recommend his. The biggest change is the ability to now turn the battery box off and on by pressing the front of the forward dome. I have some pictures on Flickr that show how it works. https://www.flickr.c...57649279163680/
-
I would like to know what everyone thinks about the relatively new flexible train tracks. Do you think it should replace straight tracks from passenger train 7938? Thx
-
Hello I would like some advice on my layout to make it compact and use a fair amount of track. I have 160 tracks. A lot of it is 4.5 volt. The rest is power functions. 20 PF straights, 56 4.5 volt straights. 30 PF curves, 60 4.5. I have 2 switches of each type. Thx.
-
 If you do, what will it have to look like? Should it be modular and per cylinder, or per engine type (inline, flat, V)? Should it come in at least three block sizes or three power levels? If you don't, why not? Will a need for a sophisticated transmission render it pretty useless, or will cost come into play? Is it gonna be impractical to even make one, even with the promise of SO MUCH POWAH? Keep it clean, guys, I'm just genuinely curious with what you think about such a part.
 -

Winter Village Express-- A new project at LEGO IDEAS-- Coming Soon!
James Mathis posted a topic in LEGO Train Tech
It's here! Or, rather, over there, at LEGO® IDEAS. Thanks for checking this train project out. If you like it, I'd appreciate your support vote at the IDEAS project page. If you don't like it, or might like it, let me know in the comments what you would have modified or added. with gratitude, James https://ideas.lego.com/projects/85295 Custom Winter Village™ LEGO® train project, arriving soon on track LEGO IDEAS™. Can you smell the coal, oil, steam, and pine? Can you feel the crisp chill in the air against the warm aroma of spiced cider and nutmeg atop a mug of nog? This project awaits approval, after which your support would be greatly appreciated to enable potential production and begin revenue service. Check back in about one week for additional "Winter Village Express" train project details and get your ticket to travel back in time on a winter holiday as this project goes "live" on LEGO IDEAS. "Tickets, please." ;-) Thanks for checking it out. sincerely, James Mathis -

Two L-motors plus crowdsourcing equals....?
Commander Smith posted a topic in LEGO Technic, Mindstorms, Model Team and Scale Modeling
Hi everybody! What could I make with two rc-controlled l-motors? Thanks! P.S. Why do I have to press keyboard buttons more than once for eurobricks to recognize it? (Otherwise I get this: hi everybody!whatcouldi ak with worctrlldl-mor?) -

Light Rail system, motorized with battery box underneath
BrickBuff posted a topic in LEGO Train Tech
Who doesn't love train sets? I certainly do. But since the introduction of the Power Functions system for motorization, with all its benefits, also came with the need to house a battery box. In passenger train sets in particular, this is a bit of a downside to the system. My Light Rail design solves this elegantly by placing the battery box underneath the train, leaving almost the full length of both carriages available for passengers. See high def pictures here: https://flic.kr/s/aHsjWsg6Ek You can also support me on CUUSOO: http://lego.cuusoo.com/ideas/view/61944 -
Hi all, i got a Horizon Express-10233 as a present recently, and i would like to know more about the power functions as rather new to this. Is it necessary for me to get, 8878-1: Rechargeable Battery Box and 8887-1: Transformer 10V DC. Or is there a way that i can DIY my own rechargable battery box, as the one sold my Lego is expensive, and the transformer looks like any ordinary charger, i believe i can get one outside at a reasonable price as compared to the one sold by Lego. Would be glad if someone could help me with my queries. Many thanks!
-

9398 4x4 Crawler Mod - Aura's Edition
Auranapse posted a topic in LEGO Technic, Mindstorms, Model Team and Scale Modeling
Yet another modification of the 9398, a 4x4 crawler that I just got as a birthday present just a week or two ago (as of 03/10/2014). So mod after mod it ended up becoming a somewhat MOC. This has been widened by 2 studs, has hightened ground clearance and has been given a new body. Compared to the original 9398 it has a much lower COG and better clearance, and climbs better too! Differentials are fitted with rubber, to act as much as a limited slip diff. VIDEO: Old stuff More old stuff -
Here is my most recent project I'm building. I've built the chassis of this Buggy from instructions made by Madoca 1977. The difference here is that I built this to use the AA battery box instead of the Lipo battery. In the future I plan to add one or two of my upgraded XL motor in here but right now the L motors are looking and handling great. More is to come feel free to comment...
-
Hello all! New here to Eurobricks and the whole AFOL Trains community in general. I have noticed that there there are essentially two different train systems the 9v (runs on metal rails using a DC current from a transformer like a normal model railroad) and then Power Functions. I unfortunately don't have any of either to experiment with but I was just thinking would it be possible to merge the two and create a kind of DCC system? (Digital Command Control - current standard for powering and controlling model railroads) What I mean is this, you have the PF system that uses a battery pack, IR or RF receiver to power either a "train motor" or another motor that uses Technick gears etc, to power the wheels. Could not one remove the actual motor from the 9v train motor housing and use the metal wheels as contacts to pass the current through from the metal track to your PF control system? This way you would not have to break your layout into Power Districts and you would be able to run multiple trains on the same line under completely different control. Each train would be controlled by it's unique PF controller yet pulling the same current from the rails. Essentially moving the battery pack from a pack of batteries in the locomotive or tender and placing it in the rails where you no longer have to worry about charging or bringing extra batteries. I haven't been around long enough to see of you guys are doing this yet or not, but just thought I'd throw it out there. As I stated, I unfortunately don't have either system (or trains) to experiment with but will as soon as I have the coin. I recently downloaded LDD and built an MOC that I designed to run in either system or both. I've always been an FOL and trains but never have been able to bring the two together until I downloaded LDD. Let me know what you think of combining both 9v and PF and I'd love some feedback on my MOC in the link below. I went for detail so it turned out to be about to scale so wider and I'm sure taller than the standard size, though still on the Lego standard gauge track. Cheers! https://www.flickr.com/photos/128636628@N08/
-

[WIP] Reliant Robin
Zerobricks posted a topic in LEGO Technic, Mindstorms, Model Team and Scale Modeling
Yo! I dont really post many WIP-s so here it goes. The rear axle uses 9L links as leaf springs while the front uses a classic spring. I plan to use RC motor to make this thing as ridiculous as in real life -
Well, it has taken several months of planning and building to get to the point where I could run my Ghost Train MOC around PennLUG's "Snailtopia" layout at Philly Brickfest. I have to send out a special thanks to KC a.k.a. Kreative Snail in the Lego Community for letting me participate in this weekends events. First off, these pictures are of what I call the "functional beta" or version 0.75 of the Ghost Train as I know my design has a huge number of flaws and this weekend brought out many of those including the lack of power from using only 1 Power Functions train motor. So here are the pictures of my MOC as it set on the layout earlier today. And of course, trains photos are meaningless unless I they have some videos of the train in motion so here is the Ghost Train in action. So now I have about 8 weeks to improve the train and put it back into action for what should be the official version at PhilCon.
-

Motorized 42005 Monster Truck
codefox421 posted a topic in LEGO Technic, Mindstorms, Model Team and Scale Modeling
I really liked the look of 42005 Monster Truck, but wanted to motorize it. I found Splat's motorized version, which helped kick me into gear and order the necessary parts. Once all the parts arrived from several BrickLink orders, I started thinking: why not try motorizing the model without following Splat's build? Later, I'll tear my design apart and try his build. So here is the result of my tinkering. Motorized LEGO 42005 by niaconis, on Flickr I've been able to retain much of the look (and build) of the official LEGO model. Motorized LEGO 42005 by niaconis, on Flickr The battery box is easily removable and slips into the empty space at the back of the truck for use. Motorized LEGO 42005 by niaconis, on Flickr It is possible to charge the battery without removing it from the vehicle. Motorized LEGO 42005 by niaconis, on Flickr A BricksTer Open Source Bluetooth receiver prototype is mounted to the frame using technic pin/axles and half bushings. I found I needed the bushings because the holes are sized for studs, which have an ever so slightly larger diameter than technic axles. Motorized LEGO 42005 by niaconis, on Flickr A servo motor mounted in the front steers the front wheels while an L motor mounted at the back drives the rear wheels. I wish I could have geared down the drivetrain more, but I found I currently have no 48-tooth gears. Motorized LEGO 42005 Steering Demo by niaconis, on Flickr In the animated gif, you can roughly see how it is steered with an Android phone. And finally, I present a short video showing the monster truck driving around in a local park, controlled by the new proof of concept accelerometer input for the BricksTer Android app (which you can also see in the gif). Thanks for reading this far! I appreciate critique, comments, and suggestions! -
Small Offroad Race
Zerobricks posted a topic in LEGO Technic, Mindstorms, Model Team and Scale Modeling
Here's a clip of a race between two very different offroad machines Chettah 4x4 and Fox 8x8x8. Also what do you think of the navigation bar made using annotations? -
Lego mechnical servo motor
Zerobricks posted a topic in LEGO Technic, Mindstorms, Model Team and Scale Modeling
THIS TOPIC got me an idea to make a mechanical servo motor using normal power functions. Because BS is down a video will have to do for now: -
Here is my first Space MOC to be posted to EuroBricks. Introducing the Pest Annihilator a.k.a. The Cootie Crusher. This modular ship consits of three sections which can be separated into their individual components. The version in the photos represent version 2.5 of the creation as it has undergone some changes to make the vehicle more stable and kid friendly in the last 10 months. The drive section that contain all the Power Functions features is built on an odd Technic beam basis while the structure around the chassis is an even styled system build. The Pest Annihilator/Cootie Crusher
-
UPDATE: see below... _____________________________ I do not know exactly where to put this truck, or in the City or in Technic. Given that, it looks like Lego City vehicle and is in minifig scale, will probably be alright here. As the title says, this is Iveco Eurocargo truck. You can see the original on this link: http://dayerses.com/...urocargo-02.jpg For this MOC I was inspired by M_longer with his Mini PF truck: http://www.eurobrick...showtopic=33204 And what is so interesting on my truck? In particular, that the dimensions are in minifig scale, however it contains a Power Functions components for moving and turning. Here are some photos without PF components: Truck has a cabin 6 studs wide and cargo compartment 7 studs wide. Overall length is 21 studs (6 cabin + 15 cargo compartment). Spacing between front wheels is 5 studs (because each wheel is 1 stud thick), but back wheels have a spacing of only 3 studs (because each wheel is 2 studs thick). On the front wheels there is one tire plugged on each one, on the rear wheels there are two tires on each one. So the rear side of the vehicle looks very realistic. Here is visible the entire length of the truck: Front view: Detail view on the rear wheels: And here are some photos with PF components installed: At the top of the cargo compartment there is visible PF receiver. Maybe a little disturbing, but I had to install it somewhere. The vehicle also has some Technic bricks that are used for more strength. Under the cargo compartment cover there are hiding PF components. You can find there the BB with 6 AAA batteries, receiver and two M motors. Lower motor drives the rear axle to drive the truck forward/backward, upper motor is responsible for turning the front wheels (drive left/right). Above the motors there is the receiver that goes through the cargo compartment cover. On the BB there is a spacer installed, which is also used as an on/off button for BB. Here is a movie: Enjoy. ____________________________ UPDATE The cargo compartment cover is placed on the vehicle and is constructed so that it is consistent with the elevation and longitudinal spacers. Spacers prevent movement of the cargo compartment cover forward/backward and downward. For disclosure of cargo compartment you just lift up the cover. It's that easy. The most disturbing part on a truck are cables. And I do not mean aesthetically, but also spatially. It is difficult to find a suitable place for their implementation. Compared with the vehicle from M_longer: mine has the same basic drive, but turning is resolved differently. I also installed two M motors so that's why there is less space.
-

Convert Audio Output into LPF RC Protocol Infrared Signal
TechnicRobot posted a topic in LEGO Technic, Mindstorms, Model Team and Scale Modeling
Recently of my experiment how normal audio output signal convert into LEGO Power Functions RC Protocol infrared signal. My audio command files are specially composed to meet the LPF RC Protocol Combo direct, Combo PWM and Single output mode. Any MP3 music player with audio socket can act as LEGO Power Functions 8885 IR Remote Control (6034989) and 8879 IR Speed Remote Control (6019910) to send LPF RC Protocol infrared signal. The demonstration used mobile phone to remote control LEGO Power Functions Motor and Servo Motor forward, backward and PWM in 7 steps. The basic circuit used 2N3904 NPN transistor to convert MP3 audio output signal into LEGO Power Functions RC infrared signal, to control LEGO Power Functions Motor. The basic circuit simple but requires higher power to drive. The advanced circuit used LM393 comparator and 2N2907 PNP transistor to convert MP3 audio output signal into LEGO Power Functions RC infrared signal, to control LEGO Power Functions Motor. The advanced circuit complex than simple circuit but requires less power to drive. My LPF RC Audio Command Files Download: https://drive.google...dit?usp=sharing -

[MOC] Skunk Hot Rod
BusterHaus posted a topic in LEGO Technic, Mindstorms, Model Team and Scale Modeling
I'm hesitant to post this after sm 01 showed his Hot Rod - Lucky 13. That being said, the Skunk Hot Rod my first MOC with Power Functions. Two large motors provide rear wheel drive through an adder (differential). The steering is done by a servo motor. The elements are placed asymmetrically to lower the COG. The battery box is in the trunk and its switch is accessible through a swivel door. Suspension is independent in the front, trailing arm (is this the correct term?) in the rear. I used the small shocks for two reasons: the travel is supposed to be short, and I wanted the suspension to be preloaded about halfway. Because of this, you can see the car bounce up when you switch the travel direction rapidly. The car drives very well although the steering is very slack because of the multiple gears. If I were to rebuild this again, I'd place the servo where the engine should go and would hide the two L motors. Here are some pictures and a video: -
On the page http://lego.wikia.com/wiki/LEGO_Wiki I found the information that Power Functions is being discontinued, I don't get it -- what does it mean that there will be no more motors, batteries, etc? My Lego God...
-

Electric (PF) throttle for pneumatic engine
nerdsforprez posted a topic in LEGO Technic, Mindstorms, Model Team and Scale Modeling
Hey Ya'all, I am new here, so I sincerely hope that there is not already a thread for this. I see there is a thread for 8110 improvements, but this post only partially applied to it so I am beignning a new one. I built a mechanism for electrically controlling the air valve for Lego Pneumatics. Take a look and comment! Glad to be part of the community! http://mocpages.com/moc.php/393479