Search the Community
Showing results for tags 'Motor'.
Found 136 results
-
Hi all, Just made a LDD file of my design of a M-motor track switch. Some inspiration from around the net, but for people looking, here is a solution. LDD File. M Motor switch track design Switch track goes between the red tiles and the rest. This is for a left-side switch track, mirror for right side. Have fun.
-

[MOC] XL Lego Supercar with Motorized Suicide Lambo Doors
Lox Lego posted a topic in LEGO Technic, Mindstorms, Model Team and Scale Modeling
Due to the XL size of this car the placement of larger panels across the width of the car was possible. This really gave the vehicle a unique styling. I was able to use the large red panels for the interior and the black panels at the bottom rear of the car. Inside are 2 XL motors for drive, servo for steering, and 1 m-motor for the motorized suicide doors. The weight was so excessive on the shocks I had to put an extra strong shock on each axle bringing the total to 12 shocks. Still, the frame barely misses the ground. Framework was completed 100% from scratch, with a fake inline 6 engine. Check it out! Brickshelf link: http://www.brickshel...ry.cgi?f=563502 https://www.flickr.com/gp/139930963@N04/0dHU77 -

How to Motorize the LEGO Mars Rover?
sir_launcelot posted a topic in LEGO Technic, Mindstorms, Model Team and Scale Modeling
I am looking for some suggestions. My daughter is building the Mars Rover set (go here for the details: http://www.eurobricks.com/forum/index.php?showtopic=98222) for a presentation at school and I told her I would help make it operate by remote control with one of the power function kits. Problem is that it is a lot more complex than I thought. (I have no experience at the expert LEGO building). I think I can maybe get it moving with a remote, receiver, and simple motor attached to one wheel, but I do not have any idea how to do the steering and don’t know how to move any of the other functions (camera, antenna, robotic arm). see It was not designed to be converted to power functions / motorized. Here is a photo of the underside: I am not sure the easiest / best way to add power for drive and steering. It just has to move a little bit in the classroom, not drive outdoors in all terrain. I posted in another forum and a member suggested that I post here. Any suggestions to help me figure out what I need to do and what to buy to easily make this work would be much appreciated. Thanks much! -
Hello! I am new. (And I need some help, please!)
sir_launcelot posted a topic in Hello! My name is...
How to Motorize the Mars Rover I am looking for some suggestions. My daughter is building the Mars Rover set (go here for the details: http://www.eurobricks.com/forum/index.php?showtopic=98222) for a presentation at school and I told her I would help make it operate by remote control with one of the power function kits. Problem is that it is a lot more complex than I thought. (I have no experience at the expert level building. (No building the rover is not part of the project, she is doing it as an additional part of her presentation on Rovers). I think I can maybe get it moving with a remote, receiver and simple motor attached to one wheel, but I do not have any idea how to do the steering and don’t know how to move any of the other functions (camera, antenna, robotic arm). see So, to steer, I use a servo? How do I operate the other things, more servos? And to move things slowly, do I need complex gearing? (I was looking at the SBrick which might work. I saw a few designed steering racks and chassis on Ebay, some simple, some pretty complex. Would I be better off buying another set that has a chassis and steering and drive designed to work with motors and then build it and adapt the Rover to it? Any suggestions to help me figure out what I need to do and what to buy to easily make this work would be much appreciated. Thanks! -
I have a question for all of you guys and gals on here. Would it be possible in any way to simulate a hydrostatic drive in lego using pneumatics? I've been trying to figure it out but can't come up with anything. Sidebar-I just watched a show on Scania trucks and now I see why they're so popular
-

My motor wires keep breaking
JJ2 posted a topic in LEGO Technic, Mindstorms, Model Team and Scale Modeling
Sorry for the little bit misleading title but I was building and found out that unless the wire is in the exact right spot my XL-motor does not work What makes me so mad about this, is that it has happened to me MANY times (4 times) before and the motors are only about a year old. It first happened to my servo motor and I contacted Lego about it and then they sent me a replacement and I was happy about that, then a few weeks l was using 1 of my M-motors and the same thing happened, but the wire was already damaged from another project so I let it slip. About 2 months later I was using my other M-motor that was in perfect condition and found out that it had happened that that motor too, and then just now as a already described it happened to my XL-motor. I am wondering what should I do at this point, I want to contact Lego to get replacements but I don't think they will believe that within a year 3 of my motors have had the same problem and they have already sent me a replacement servo. Should I contact Lego and find out if they will sent me a replacement, or just suck it up and hope it dose not happen to my 2 L-motors? Sorry if this topic is kind of useless. -

[MOC] Pullback Racer w/THREE Motors
DamonMM2000 posted a topic in LEGO Technic, Mindstorms, Model Team and Scale Modeling
The original Aero Racer featured a dual motor setup. This is a completely overhauled pullback racer with three hard-coupled pullback motors. Combine that with large tires, and it makes for a superb setup for more than adequate torque and speed and exceptional distance run. Features flex axles and (non-functional) V8 piston engine. -

[MOC] The fastest Lego Technic lipo racer | At the very limit
896gerard posted a topic in LEGO Technic, Mindstorms, Model Team and Scale Modeling
I have long awaited the moment that two race buggy motors would be in my reach, as they are quite expensive now... and I also bought the Lego Technic lipo battery two years ago. The perfect recipe for a small lightweight racer! Read the rest of the story at: http://www.moc-pages.../moc.php/424516. For now, there's just these two pictures and two videos. To post the photos on Eurobricks, I had to serieusly resize them. If you want to see the better quality images, just click this link: http://www.brickshel...ry.cgi?f=561899. All photos can also be found on the MocPage link, and can also be hosted from MocPages. This is because brickshelf has sometimes a rather long posting time. Please do not use THESE EXACT photos on another website, they are really at 10% of their real quality because Eurobricks requests it. The brickshelf photos are really better! -
B&W MOC SUV new motorized functions
Lox Lego posted a topic in LEGO Technic, Mindstorms, Model Team and Scale Modeling
RC technic Lego B&W SUV with motorized rear trunk, hood, rear wheel drive with a differential and steering with the servo motor. The first rendition of this car below: -
Hello guys I am starting to get into 9v now and I have 5 motors. They all run at different speeds and some are slower when they first start but get faster when they have been running for a minute or two. I am wondering if anyone has tips and tricks to fix/tune up or clean the motors so that they all run at the same speed. They all run fine it's just some run slower. Thanks -RailCo
-
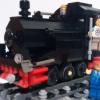
Hiya guys! Hope you guys can help me out here. Is there a way to check how these train motors work? I've got two of the black ones. They seem to be complete. I'd love to know if they are in working condition, but I haven't got a clue how to check... I'm a nitwit when it comes to electronics I'm afraid U_U Hope you guys can help me out! Thanks!
-
It has been almost 15 months since I finished building my last "friends-themed" amusement ride, the teacups. Now, I happily present the latest addition to my amusement park: the tourbillion! Tourbillion is a mechanism widely used in vintage watches. A tourbillon aims to counter the effects of gravity by mounting the escapement and balance wheel in a rotating cage, to negate the effect of gravity when the timepiece (thus the escapement) is stuck in a certain position. It is also a kind of training given to astronauts so that they can be get used to the Outer Space. Now, the girls are sent to the machine: Tourbillion has recently become a kind of amusement ride. It is just invented in Switzerland in the middle of 2015. The first launch (which requires you to buy tickets), however, is in HONG KONG!!! Want to see it rolls? Here are a few still images: Of course, you may find a video more helpful to you: Want a virtual ride? Watch this video: As usual, before I have completed my work, I suffer quite many times of failures. ^^ My former works of the Friends' Theme Park for your easy reference: 1. Grand Carousel: http://www.eurobrick...topic=87068&hl= 2. Ferris Wheel: http://www.eurobrick...topic=87882&hl= 3. Gyro Drop: http://www.eurobrick...topic=88256&hl= 4. Bumper Cars: http://www.eurobrick...topic=88770&hl= 5. Teacups: http://www.eurobrick...ds +theme +park I wish I can build part 7 of this park before long.
-

9V motor issues - replace or convert to Power Functions?
Tannerman posted a topic in LEGO Train Tech
Long time reader, first time poster. So back in 2002 I picked up 4535 LEGO Express Deluxe to run around our Christmas tree. It features a 10205 My Own Train engine and tender with 9V motor and light package. I typically only run it around the holidays (after cleaning all the track, etc), but over the past few years I've been having issues with the motor. This year I'm noticing that it just runs for awhile... and then stops, almost as if its overheating or something. If I wait a while (5-10 minutes), the motor seems to work once again. My gut is that the motor is giving out on me finally, but wanted to confirm with those in the know. That said, if my 9V motor is failing, I'm looking at affordable next steps -- and also trying to keep a 4-year-old boy pretty happy. Do I suck up secondary market prices and buy another 9V motor or do I make the jump to Power Functions? If the latter, then I don't know really where to start regarding what I'd need to purchase from BrickLink, etc. Any help or advice would be appreciated (Also, if anyone has successfully converted this engine/tender combo to PF, I'm all ears). Thanks in advance! - Steve -

[HELP] Pneumatic Valves
DK-Brickfan posted a topic in LEGO Technic, Mindstorms, Model Team and Scale Modeling
First of all, this is my first post. But I've been looking a long time and are very inspired by sheos RH400 I am working on an excavator with 6 V2 pneumatic pistons for the boom, arm and bucket. And 2 small LA to open the bucket. Same principle as RH400 and other large excavators. So far I have made the valve battery with 3 major LA which opens and closes the valves. But it does not work as intended. So I need ideas for a new valve battery. I hope you can help me with this project. Regards Jonas. -

[HELP] Fixing Micromotors
9v system posted a topic in LEGO Technic, Mindstorms, Model Team and Scale Modeling
hi all I have tried two time to get a dead micro motor back to life and so far I have been able to get them working but then I try do get rid of the magnetic powder and that kills the motor when I try to put power through it. has anyone been able to successfully get them working again without having to take them apart again? if so can you tell me how you did it? thanks 9v system -
Hi, i'd like to know what possibilities there are to motorize lego technic pieces. I've already know about the lego power functions, but I don't know if this motor kit is compatible with all lego technic. Besides, I'd like to know if there are other options with other different motors. I presume that the problem will be in find suitable mechanisms... thank you in advance!
-
This is a tutorial detailing how to modify a LEGO 9V train motor so that it may be powered independently of the track. This effort is part of a larger project inspired by Thorsten Benter’s article in Railbricks Issue 7 titled “PF and 9V Trains: The Best of Both Worlds”. Step 1) Open the 9V motor. This has been covered elsewhere, so it should suffice to say you carefully remove the 12 tabs holding the bottom cover on with an xacto blade or something similar. There is enough friction to hold the bottom cover in place later even without the tabs. Step 2) Remove all internal parts. Ignore the fact that I took this photo after completing step 3. Step 3) Use a rotary tool with a cutoff disk to bisect the metal strips in the top of the motor enclosure. These strips are exposed in the top studs, and we will later use them to pull power from the track and apply power to the motor. Very important: Be sure to apply NO PRESSURE when using the rotary tool. Instead, just lightly touch the spinning cutoff disk against the metal strip, and let the tool do the work. It will take some time, so be patient and careful. If you apply pressure, the metal strips will heat up and deform the plastic. If the plastic deforms, it will be impossible to interface with LEGO bricks and PCB adapters (like the one in the upper-right corner of the picture). Keep it light and easy. You will thank yourself later when you haven’t ruined your motor’s plastic housing. Step 4) Desolder the metal pieces from the electric motor. I don’t have a picture of this exact step because I used the electric motor from a Power Functions train motor. If replacing the 9V motor with a Power Functions motor, open up the PF train motor using a T6 bit, remove the electric motor, and desolder it from the wires. Step 5) Solder a short length of wire to each tab on the electric motor (do this outside the housing to avoid accidently melting it). I used 32 gauge DCC decoder wire, but you can use whatever you have that will fit inside the motor. Reassemble the motor with exception of the wheels and the bottom cover. Step 6) Attach the wires to the outermost halves of the metal strips; the innermost halves are connected to the wheels through the wipers. I used a silver epoxy for this. I chose silver epoxy for two reasons: 1) I didn’t want to risk melting the studs by soldering the wires to the metal strips, and 2) silver epoxy has a lower resistance than graphite epoxy. Step 7) Reinstall the wheels and make sure everything is running smoothly. This would also be a good time to lubricate the gears if you want to. Make sure you don’t get any lubricant on the electrical parts! Press the bottom cover onto what remains of the tabs, and you’re done! If you ever want to run the motor directly from track power, simply use a PCB adapter with a loopback connector or connect a LEGO wire (9V or light gray end of PF). This is what a PCB adapter looks like when installed on the motor. (I’ve updated the design since taking the previous photo.) And here is a connector leading up to the electronics (currently just a Power Functions battery box, soon to include a Bluetooth receiver) in my Horizon Express. The connector plugs into the PCB adapter. The PCB adapter is attached to the electrical studs on the motor. And the motor is pinned to the bottom plate of the locomotive. Now I can charge the battery in my train without taking it off the track, run it indefinitely on a mixed metal and plastic layout, and have non-line-of-sight control when I add the Bluetooth receiver. It really is the best of both worlds!
-
Hi All, It's been awhile since my last post, so I thought it was time I made another. I have been in receipt of a BB12VB-RED recently! Ahem, probably more like a year or so ago. As you can see from the photos, one of the pickups is very damaged… Another Eurobrick member, Alainneke, had already kindly made some replacements out of brass… I had sent him the diagrams of the pickups in AutoCAD, and extremely excellent reproductions were sent as a test in return. At the time I’d only opened my 'teenaged' black motor, as seen in photos, and the new brass pickup studs were supposed to be destined for it… The RED 12V motor is very, very rare, I have held back on using the replacement pickups until now… I am glad I have waited though, my apologies Alainneke! After reading VGO’s suggestion in post http://www.eurobrick...pic=50345&st=25, post #28, I tried the idea out on a black motor and it moved during the operation and I snapped a tab off the end, see pic. So I decided to build a jig out of Lego to hold the motor. The top part of my jig is real Lego, while the bottom is entirely made of Fako(Fake Lego) due to my needing to augment some of the pieces to fit the underside of the motor and wheels. I used MEK(Methyl-Ethyl-Ketone) to ‘weld’ the pieces together, along with some small strips of a smooth(no embossed numbers) credit type card, see pics. Okay, My advice is that you try and run a razor blade around the circumference of the bottom of the motor, hopefully using a ‘jig’ like shown. I do mean “Razor blade” as a “Stanley” knife blade will do the damage that I have shown in my earlier openings, try a ‘BIC single blade’… Making and using a ‘BIC’ single razor blade… I used the razor whilst the motor was in the top part of the jig. Once in the jig, use a 2.5mm rod/nail and hammer in both power plug holes, to gently persuade the bottom to come loose on either side. Seat partially opened motor on the ‘bottom’ part of the jig, and use the remainder of the credit/shopping card to gently hammer down on the wheel axle to pry the last of the plastic welds apart. The motor is now broken open… Here are some pics of the open casing with the old and new pickups, I will update the post after I have cleaned up the motor parts. If for whatever reason you need to take a wheel off, I.e. for cleaning excessive hair/crud in sleeve bearing, then you start by removing the cir-clip next to the sleeve bearing. Move bearing nearer to gear cog, then gently pries the cylindrical spring clip out of the wheel in the same area as the hole in the wheel. When you're cleaning the parts inside, be careful with the metal part 'A'. There are two small hardened steel discs that sit either end of the spindle, only the dirty grease is holding them in.... Now it's time for reassembly and re-greasing...
-
Hey guys! Here is my latest creation, a teak wood motor boat! Complete with superb chrome decor, adjustable steering wheel and rudder, opening engine panel, detailed engine, this boat is sure to earn some double takes while cruising along the waters. ~Hope you guys enjoy!
-

LDraw PF medium motor - crashes LDView?
djm posted a topic in Digital LEGO: Tools, Techniques, and Projects
I'm in the process of creating the build instructions for Akiyuki's Cup-to-Cup GBC module (refer to this forum post). I appear to have encountered an issue with the LDraw PF Medium motor, which is causing LDView to crash. I'm wondering whether someone would be willing to take a couple of minutes to run the following simple test to see whether they see the same behaviour and post their outcome of the test. Obviously the real build instructions are more complex than just a medium motor! I have simply distilled the build instructions down to the point to identify the part that appears to be causing the issue. My machine is running Vista (Business), SP2 Build 6002. 1) Use MLCAD to create an ldr file that contains only a PK medium motor (part # 58120). 2) Open the ldr file from step 1 in LDView. A screenshot of mine is show below: 3) Exit from LDView. It is at this point that I am seeing LDView crash: Any feedback will be appreciated. Regards, David -
hi all I have recently got one of these motors http://www.bricklink.com/search.asp?colorID=11&itemID=2396 however there seems to be another speed setting as shown in the gearbox pic, is it possible to move the little brass gear on the motor shaft so it meshes with the bigger gear. thanks
-

[HELP] Motorising model 8880
JohnBS posted a topic in LEGO Technic, Mindstorms, Model Team and Scale Modeling
Hello everyone, Has anyone successfully motorised model 8880 Supercar? I am looking for a design which has an XL (or L) motor for driving and a M motor for steering, with one IR sensor and any battery box. If necessary, I could sacrifice (or simplify) the gearbox. John -
What is the handiest way to power a 3 axle bogie? Im building a LKAB 6 axle locomotive and i don't know how i could power a 3 axle bogie with power functions. I have seen some designs with motors placed vertical above the bogie but i don't know how to attach something like that to a frame. And what would be the best motor to power it? Thank you for helping!
-

Motorized Blue & Yellow diesel locomotives - Power Functions MOCs
Murdoch17 posted a topic in LEGO Train Tech
I have motorized my 7939-inspired MOC and added a new engine inspired by early Box-cab diesels. This is my first couple of motorized MOCs ever, and I'm not sure I did it quite right. I won't be building them, but if anyone wants to take a crack at them be my guest. Here is the front view. The yellow engine is also build able in red or black, while the blue engine is also build able in white. The cab on the yellow engine opens up, but the blue loco is inaccessible at this time. It may be possible to fix this, but it would require a roof redesign and I don't feel like redoing the engine (again) right now... Here we see the innards of the engines: The triple A Battery box and IR receiver. There are two 2x2 holes in the frame of the engine for a PF cord to the motor. No lights are included, but it may be possible to make them fit inside if you really wanted to. The roof sections that are hidden in this picture are removable, and are held on by four studs each. LDD file: http://www.mocpages.com/user_images/80135/1432672946m.lxf As I said above, these are my first motorized models, so please tell me if I did something wrong. Also, Comments, Questions, & Complains are always welcome! -

Fake fake V12 engine
jorgeopesi posted a topic in LEGO Technic, Mindstorms, Model Team and Scale Modeling
I redid my 2012 tatra v12 engine with new parts to make it more robust, I never thought put it in a supercar as Bruno did in his LaFerrari but I think could be a good idea, the V12 Lego fake engine is huge for the 1:10 scale. My Tatra V12 from 2012. http://www.youtube.com/watch?v=aMzqBx-loAY&feature=youtu.be '>http://http://www.youtube.com/watch?v=g3-EXlwyxcI