Search the Community
Showing results for tags 'Liebherr'.
Found 46 results
-

42146 Dragline Liebherr HS 8300 - B-model alternate build
Timorzelorzworz posted a topic in LEGO Technic, Mindstorms, Model Team and Scale Modeling
Hello everyone, I want to share a new creation. This time it is an alternate build (B-model) for the Liebherr LR 13000 Crawler Crane set #42146. You can find instructions here to build the model by yourself. 100% made out from parts of donor set 42146 with no additional parts needed. 100% controllable with official Control+ Application. In order to all functions of that Liebherr HS 8300 Dragline Excavator, you get a complete overview in the following article on how to build, control and calibrate this alternate model. Summary of Functions & Features remote controlled tracks and 360° superstructure rotation remote controlled boom remote controlled independently hoist-rope and drag-rope controllable with official Control+ App for Smart Device using 6 motors and 2 hubs spinning radiator fans detailed cabin playful details like fire extinguisher, ladder, railings and exhaust pipes brick-built bucket 133 cm / 52 inch long 100 cm / 39 inch high high-quality premium PDF instructions includes guide how to calibrate the model Impressions Main control The Liebherr HS 8300 Dragline Excavator is designed to work 100% with official Control+ Application using the already known interface from its main set. Driving tracks and rotating the superstructure works exactly like the LR 13000 does with the original designed buttons on the app interface. Boom control The giant boom of this alternate model is controlled with the right app lever. It drives the longest rope (shown in blue) through pulley mechanism to raise and lower the boom. The highest and lowest position of the boom depends on the limitations of the app after proper calibration of the model. The boom stops automatically in the lowest position to always ensure a 360° rotation of the superstructure without colliding with the tracks. A linkage mechanism slightly moves the nose who is helding the drag-rope and ensures that the app can detect the highest boom position during calibration. As a nice addition, a spinning radiator fan is connected to the same motor that drives the rope for boom. The second fan spins freely. Hoist-Rope & Drag-Rope Controlling the bucket works like the real machine with an independently hoist-rope (shown in green) and drag-rope (shown in red). The hoist-rope is controlled either up or down with the left joysticks vertical movement. By horizontal movement with the same stick, the drag-rope goes in and out. Since this two ropes are controlled by just one joystick, combinations with both ropes are possible and also needed for proper playing. This requires a bit practice though, but makes it possible to control the bucket and two ropes together with just one (steady) finger. The length of the hoist-rope depends on the app limitations for that joystick movement, meaning that the hoist-rope can't go too long before the app stops the motor. On the highest position of the boom, the bucket can reach the ground with fully extended hoist-rope where boom and hoist-rope are in limited positions controlled by the app. During calibration the app also detects the most inner position of the drag-rope. Working under ground With lowered boom and extended hoist-rope, it is actually possible to dig something below the model. This makes fun by placing the model on a table for example. Calibration For a correct calibration by the Control+ app, it is required to separate the hoist-rope from the drag-rope. In the instructions there is a full guide included how to calibrate the model during building. Additionally there is an extra PDF guide included that explains how to calibrate the model at any time. Please make sure you have completed the calibration to ensure the best playing experience with this model. How to build Building the Dragline Excavator starts with the base from the LR 13000 main set. Make sure you build the undercarriage with book 1 until step 343 is completed. Before you continue building, check the tracks und turntable function. After the correct calibration with Control+ app, the instructions for the HS 8300 takes over to complete the alternate model. The premium instructions for this model comes with 338 pages of high-quality images and building steps to ensure a satisfying and slightly challenging building experience for a 18+ set. Make sure to test all functions and alignments of ropes through the building process. Happy people with sealed parts can open bags 3 to 5 to complete the build. Connecting ropes with spools and making nodes can be an annoying thing even for the main model. If you already have built the LR 13000 main set, you can let the spools with ropes connected. The alternate model starts with wound up spools during the building process. Controlling quick guide To become a real Dragline expert under the sun, here are some quick tips for controlling the model: 1) Place the model from the left to the right At the beginning, place your model driving from the left to the right to match the joystick interface for the Control+ app. 2) Sliding bucket over ground This is some basic control for Dragline Excavators. Slide the bucket over smooth surface by controlling the drag-rope winding inside simultanously with the hoist-rope slightly going down. 3) Moving bucket along the boom As advanced controlling, this requires a bit practice but also avoids loosing cargo when the bucket moves along the boom. The drag-rope should go out simultanously with the hoist-rope going up with a bit tension on both ropes. 4) Unload the bucket On a loose drag-rope, the bucket always hangs in the air on the hoist-rope. Simply give some length on the drag-rope to tilt and unload the bucket. 5) Keep watching the drag-rope The app itself cannot detect outer limitation for the drag-rope. In case the drag-rope goes out too far, it is possible that the rope slips over the spool. Treat the drag-rope always with a bit tension. 6) Avoid tension on same direction This case is also not detectable by the app. When the drag-rope goes in simultanously with the hoist-rope going up, there is too much tension at any point. As a result, the parts holding the bucket are going apart at the weakest pin connection. Giving some length on both ropes and connecting them together solves this. Final note Goal with this alternate model was to create something else from the hard discussed Liebherr LR 13000 Crawler Crane. Rebuild, re-calibrate and having fun is exactly the way how this model works. The app goes hand in hand with the design with a large learning curve on controlling the model. Let's find it out by yourself. Think out of the 42146 box and have fun with this replica of Liebherr HS 8300 Dragline Excavator. If you like the design and you even own the 42146 LR 13000, go for it on rebrickable and build your own. -
[MOC] Liebherr LRB 355
Aleh posted a topic in LEGO Technic, Mindstorms, Model Team and Scale Modeling
Hello Dear Forum, it's been a while since I started a new model topic - finally the time came. Before start showing the model I'd lke to share some lifestory if it's creation. In spring 2022 because of several reasons (and none of them were positive) I relocated to Poland from Belarus. When I first time came to the old town center I found...a constrution with Liebherr LRB 355 in the center. What it was a beauty :) So I decided to build it. In autumn I was able to bring here most of my parts collection so I started to build. Please welcome Lego Liebherr LRB 355 Drill Machine The model was built on new CAT links, has realistic subtrator drivetrain and a banch of functions: - Drive - XL motor - Steering - XL motor - Slewing - L motor - Pump + V12 Engine + cooler fans - L motor - Outriggers - L Motor - Pneumatic switch - M motor - Drill rotation - M motor - Drill elevation - M motor - Tower rise - XL motor The tower has a crane on the top with all necessary functions: - raising/lowering - by pump - rotation - human fingers - Winch - human fingers - Extansion - human fingers Electric: 2 small battery boxes, 2 sBricks, 9 motor, 2 polarity switchers and a banch of extension wires. Parts count is unknown, but a guess it's aprox 3500-4000 parts. Naked boom is 1 meter tall, while boom + outrigger (forgot about it while filming) + erased crane increases it ti 137 cm. Boom is pretty stable, it can be suspended in the air or may stay on outrigger. During lowering it bends a bit, but here is a balance of weight and robust. All photos are available here: https://bricksafe.com/pages/Aleh/liebherr-lrb-355 For photo/video I used iPhone 12 Pro only. All feedbacks and critics are welcomed and highly appreciated! -
 https://www.youtube.com/watch?v=uUW5Z1O_SzQ MOC information(Kudos to Huib van der Hart) Number of parts: 12205 PCS Size: 145*21*32 cm Weight: 15.5KG PF Electrical parts: 5XL motor, 3L motor, 6M motor, 2 servomotor, 2 sets of Bluetooth lithium Introduction to the model: Can realize the front and back movement, two kinds of steering mode switch, support crab line movement. Chassis support arm supports remote deployment. There are simulated V8 engine walking implementations that can be linked. The counterweight module can be raised remotely using a rope. The lifting of the boom is pushed by a third-party electric push rod, and the hook rope is remote control. Boom expansion is manually controlled. The overlift device is manually controlled.
 -

excavator Liebherr 984 LEGO Model Team
amon161 posted a topic in LEGO Technic, Mindstorms, Model Team and Scale Modeling
I present to your attention the Liebherr 984 excavator. Liebherr 984 Model weight 6.5 kilograms Model width 30 stud Chassis control two M motors with separate BB Pneumatics control three M motors and an XL motor for turning the tower as well as with B For pneumatic pumps a separate L motor with BB -

Rainbow Technic Liebherr 9800
kraai posted a topic in LEGO Technic, Mindstorms, Model Team and Scale Modeling
I wasn't planning on building a Liebherr excavator in a rainbow colour scheme (really wanted to do the Sian instead), but got a donor set at the end of last year for a pretty good deal, so could not say no. I started at the beginning of the December holidays disassembling the Land Rover and some other models to have enough parts to build this behemoth, which was finished this week (yay!). The build was amazing - even with the frustration of rebuilding sub-assemblies multiple times to make the colours work. As always, I tried to stay away from grey and black where possible, and not let any identical colours be adjacent to each other. For a bit of added details, I chose printed tiles for all tiles up to 2x2 in size. The front bucket is really boring in one solid piece of grey, so I will display it holding some Bionicle Zamor spheres to add a bit of colour. Shot on an iPhone X in the park outside my house, it's just too big to photograph it with my regular white backdrop. -

[MOC] Liebherr L506 compact
Jack06 posted a topic in LEGO Technic, Mindstorms, Model Team and Scale Modeling
[MOC] Liebherr L506 compact wheel loader Hello everybody, after a while I'm happy to present my latest MOC to you. It's a replica of the Liebherr L506 compact wheel loader, and it's controlled via a Vengit SBrick, as always. Some Infos about the model: 999 parts Width: 17,5 cm Height: 18,7 cm Length: 38,4 cm 4 functions Instruction is available on Rebrickable since today: https://rebrickable.com/mocs/MOC-59847/JB Lego Creations/liebherr-l506-compact-wheel-loader/#details Some pictures/Render, hope you like it: The video: Best regards and merry Christmas Jakob -
New world tallest LEGO crane finished - 10m tall LEGO model
Natural_born_user posted a topic in LEGO Technic, Mindstorms, Model Team and Scale Modeling
Is it possible? Yes of course. After all, you can build anything from LEGO bricks. A crane model made of LEGO bricks with a height of more than 10 meters should not be a problem. And it does not. But let's start from the beginning. The works manager arrived at the construction site and gave an order to start the works. And that's where it started. In fact, it started 5 years earlier, when my model of a large crawler crane reached 7 meters, described on eurobricks here: The experience gained during the construction of that model was used now in the construction of another, larger and much higher crane model. The construction target this time was at a minimum height of 10 meters, which, if successful, would make this structure my new tallest model crane in the world. The construction took about two years intermittently with many modifications along the way, especially in the area of winders and the main arm structure. The crane is made entirely of Lego bricks with no metal improvements and with no using glue. The exception are the lines and the load on the counterweight. The improvements that needed to be made compared to the previous seven-meter model were, above all, reducing the flexibility of the main arm structure, increasing the possibility of winders lifting the lower and upper section, extending the rear arm and increasing the load on the counterweights. For transport, the crane was disassembled into 13 elements, some over two meters long: As for the counterweights, I increased the load to 35 kg compared to the previous model. The counterweights are located on a tracked, remote-controlled chassis that allows the model to rotate. And here is the new reinforced main arm structure, when tested in tight conditions: and already in the right place: The lower section of the main arm is less than 5m long, which, combined with the height of its installation in the crane, makes the lower section itself reach a height of over 5m. Construction continued. Installation of the upper section with a length of just over 5m. And its trial straightening with a winder. The final result. Some technical data: Maximum height of the main arm: 10m Rear arm height: 1.8m Load in the area of counterweights on a tracked chassis: 35 kg Crane weight excluding counterweights: approx. 24 kg Arm lifting winder drive: 2x XL reduction 24: 1 Drive of the winder straightening the upper arm section: 2x XL reduction 24: 1 Hook winder drive: 1x XL 5: 1 reduction Platform drive under counterweights: 2x XL reduction 64: 1 Youtube: And links: My website Naturalbornuser.pl (polish) Flickr gallery Main polish LEGO forum -

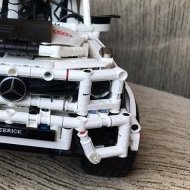
Liebherr PR776 Dozer - Lego Technic 42100 alternate model
eric trax posted a topic in LEGO Technic, Mindstorms, Model Team and Scale Modeling
The idea for the B model in the form of the Liebherr PR776 appeared in December 2019. Unfortunately, I had no experience building alternative models, so first I assembled a simpler model - skid skidder based on Bobcat T870. Having already some experience and, what is important, knowing what I can afford during the build, especially the list of parts, I made it. I tried to make all the functions and as much as possible to make the original look like this The tactic I chose when designing was to check whether the new engines and hubs would fit in the 1:18 scale model (scale to the wheels). In fact, when I put the first hub between the tracks and the drive motors, I ran out of space in the chassis. Another problem was the new, long actuators. While they are great for lifting the blade, they are too long for the ripper. In the original, these actuators are very short. To keep the dimensions of the ripper I had to build them much more into the center of the model. This added another space problems and the need to place one of the engines at the bottom of the frame. I really wanted the model to resemble the original as much as possible, so I started building with modeling the hood. Then I took care of the blade, which consumed almost all DBG system bricks. However, the basic curvature was pretty nice. Its appearance gives a lot of visual effect. The problem was the shape of the cabin. I don't know who designed the original, but there is a suspicion that he was drunk. Fortunately, it was possible to create a quite realistic cabin and interior. It is masochism to use the Control + system on models of this scale. How to build in two large hubs so that you can replace the batteries from the bottom and turn them on from the top? The first hub is located under the hood between the tracks. From the bottom we have access to the battery and we activate it with a clever switch in - the left platform. The second hub is located directly under the cabin. This can be easily folded back to gives access to the control hub and turn it on using a switch in the cabin The model does not have a realistic suspension. I resigned from it because the model weighs over 3 kilograms. I really wanted it to be stable and the tracks did not make such terrible sounds as the model A while driving. There are, however, four tilt carts that make it easier to climb over obstacles. Some technical data: Length: 46 cm, Width: 25 cm, Height: 23 cm, Weight: 3.04 kg Drive and steering – 2x XLarge C+ motor Ripper – lift (Large C+ motor) tilt (Large C+ motor) Blade – lift (XL C+ motor), tilt (Large C+ motor) I wanted the application configuration to be as simple as possible, so I also created a custom profile in the buwizz application which greatly simplifies the configuration of the model control. I also made a layout to make the control panel pleasing to the eye. Instructions can be bought at Sellfy and Rebrickable: https://sellfy.com/m1longer/p/42100-dozer/ https://rebrickable.com/mocs/MOC-51120/M_longer/42100-liebherr-pr-776-dozer/ Custom stickers: https://www.mocsmarket.com/lego-mocs/lego-sticker-set-for-liebherr-776-dozer-42100-b-model/ Download custom BuWizz profile: https://cutt.ly/kfx57he -

[ REVIEW ] Lego 42100 Control+ Achievements
cyberdyne systems posted a topic in LEGO Technic, Mindstorms, Model Team and Scale Modeling
Good day, everyone. Nowadays, when everyone has to stay at home, I want to show you, how you can spend a lot of your free time with interest. As you know, all Lego sets with control+ system have special "achievements" in the app, which you gain for special actions with set. I've made this video as a tutorial, how to get all the achievements that I know about. Thanks for watching, stay at home! Your Cog In The Machine -
Hello everyone! Before I start I want to wish all of you to stay healthy, survive and win the disease! Today at my birthday I decided to share with you my latest MOC. This is a brand new Liebherr LR 11000. From the previous model, it took only some boom sections and proportions. The chassis and superstructure built from nothing and were rebuild several times. Below please let me share with you some dry specifications of the model: - Crane is about 2 meter high - weights 5 kg - requires at least 5 big battery boxes for been fully operated - can be managed by 3 sBrick units. - has 10 PF motors (4 are in the chassis) - Has 9 pneumatic cylinders + a pump - Has a full-size V6 diesel fake engine like the real crane - Has 6 winches, 3 of them are installed to the boom like in the real crane, but none of the motors are on the booms. - Crane is able to assemble and disassemble back from horizontal to working condition without any human help. - Has 4 pneumatic features, three of them are operated from the cabin, two of them are operated from the operators work seat Now is hte time for it's features: - Driving and steering - one XL motor per each track. Torgue increased 1:25 - Slewing by 2 M motors - L Motor for SA Frame winch - L Motor for the Main boom winch - M motor for the luffing jib winch - M motor for the secondary hook winch - L motor for the main hook winches - Pneumatically adjustable operators cabin - Pneumatically adjustable derrick counterweight horizontally - Pneumatically adjustable derrick counterweight vertically - Pneumatically rising chassis for (dis)assemble. - L motor for the pump and V6 engine - Individual Sbrick custom profile - 3 Pair of lights: - Front LED - Cab LED - Main hook winches LED Here is the link to photos, I'll post some directly here: https://bricksafe.com/pages/Aleh/2020-lego-liebher-lr-11000 Bonus: Here is the performance of the superstructure stability without boom and without counterweight(!), only one battery box insalled for fotors activity. Boxes are full with batteries (24 pcs) Easy to fix the front suspension: https://bricksafe.com/files/Aleh/2020-lego-liebher-lr-11000/IMG_2983.jpeg/800x600.jpg 1,5 kg load. Please enjoy and feel free to ask any questions.
-

Liebherr HS 8040
Porsche96 posted a topic in LEGO Technic, Mindstorms, Model Team and Scale Modeling
Liebherr HS 8040 Specification Length 40s / width 23-29s / height 21s (32/18-23/17 cm) – without boom Scale: 1:18 Maximum height depending on the lenght of the boom I 70 cm – equivalent 11m II 87 cm – equivalent 14m III 102 cm – equivalent 17m IV 121 cm – equivalent 20m Weight: 2945-4014g Power supply 2xBB 8878 Controlled by two sbricks 2x M 3x L 2x XL Functions Driving - 2 Ls Track sliding - M Rotation of the uppercarriage - M Lifting boom by a winch – L Two winches for moving the bucket – 2 XLs Today, I’d like to present you a dragline excavator Liebherr HS 8040. I came up with the idea of building such a machine after watching a movie from Brick Creek exhibition. The whole construction was made in about two months. For driving I used two L motors, which power both tracks with ratio 1,67:1. Because of that ratio the excavator is pretty fast (maybe too fast for such a machine). Because of variable track spacing there is no space to add other gear reduction, while maintaining the stability of the structure. The tracks are slided by four small linear actuators, driven by M motor. The mechanism of retracting tracks is based on guides of three studs height and one width. They come into the undercarrige, based on two cnostructions made of 5x7 frames, and connected by the system of sliding tracks. Details in photos below. The uppercarriage is mainly based on frames, connected by liftarms and housing made of technic panels. For rotation I used M motor with ratio 120:1. Three winches are made in similar way: the string is wound on a sleeve on an axle, between two 36 gears, driven by 12 gears. For lifting boom there is one L motor, and for moving the bucket there are two XL motors. I used modular counterweight, like in the real excavator. In the lightest configuartion it weighs 319 grams and consists of a battery box and back cover of the excavator. The heaviest configuartion of the counterweight it weighs 1140 grams. It consists of the lighter configuration and additional battery box, cover and lead weights (8x70g), which are protected against movement while driving the excavator. Boom is a simply, durable construction made with liftarms. Most angular connections are „legal”, but because of the narrowing of the first and the last section of boom, not all of them are. But they fits with no problem. Boom configuartions: I) I + IV: 30s + 44s, max height of the excavator 70 cm II) I + II + IV: 30s + 21s + 44s, max height of the excavator 87 cm III) I + II + IV: 30s + 42s + 44s, max height of the excavator 102 cm IV) I + II + III + IV: 30s + 21s + 42s + 44s, max height of the excavator 121 cm I built two buckets: a dragline bucket and a clamshell bucket. The excavator can be also used as a crane, but while lifting heavier element it would require bigger counterweight. Before I started the building, I wanted to make something fully modular. I think it worked out :) Operating the excavator is not easy, it requires a little of experience, which I am achieving. This type of machine is designed primarily to dig below the ground on which it stands (f.e. dredging water reservoirs), that’s why it’s hard to dig from a flat surface. I encourge you to like my new fanpage. Gallery -

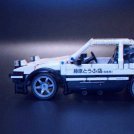
[MOC] Liebherr T264
Jundis posted a topic in LEGO Technic, Mindstorms, Model Team and Scale Modeling
Hi guys, yeah I know, I am late showing a MOC of a dumper truck, as both Effermann and jorgeopesi both did excellent jobs! I started with this MOC of the Liebherr T264 in july but couldn't keep up with their pace... In contrast to their more playable MOCs, I tried to stay closer to the design of the 42100 while maintaining all the main functions of the original dumper truck. The T264, as it is the little brother of the bigger T282/284, has been chosen because of the better suited scale of the 94.3x38R tires. The three main functions are driving, steering and tipping. All are controlled by Ozzees ControlZ, which works like a treat. The MOC is driven by a PU XL-motor, steering is done by an PU L-Motor. The two pneumatic pumps and the switch are both driven by one PU M-motor using the ingenius idea of Sariel for the compressor/valve combination. Overall I really tried to stay as close to the original look and functions as possible. The rear suspension is a live axle guided by a center pin and sprung by two hard shock absorber. The steering has an Ackermann geometry and a very narrow turning radius. I am not really satisfied with the placement of the steering rack in front of the wheels as the connections seem a bit too flimsy for this big model (1620 pieces, slightly over 2 kg). Although I tried different configurations, I couldn't find a better solution of the placement. Two hard shock absorbers on each wheel manage the weight very well and bouncy :-). The PU-hub is placed in the easily accesable front section. I added some more little technic features, as both cabin doors can be opened and the little ladder can be lowered. And finally, here with the reason why I build this MOC :-) -

[MOC] Liebherr R 980 Excavator 1:25 motorized
Brickzone52 posted a topic in LEGO Technic, Mindstorms, Model Team and Scale Modeling
Hello Everybody Im happy to introduce you my Liebherr R 980 excavator scalemodel 1:25. The whole excavator is fully motorized with power functions. The goal was to combine the motorized technic world with the usual lego bricks. Was not that easy because of the weight. This beauty will be for ever with me, thats why i also builded up a box as you can see on the pictures. Let me know what you think. :-) Best Regards from Zürich Switzerland. Dani 0 by Dani Brickzone, auf Flickr 0 2 by Dani Brickzone, auf Flickr 0-1 by Dani Brickzone, auf Flickr 0-3 by Dani Brickzone, auf Flickr 0-2 by Dani Brickzone, auf Flickr 0-5 by Dani Brickzone, auf Flickr 0-6 by Dani Brickzone, auf Flickr 0-4 by Dani Brickzone, auf Flickr 0-12 by Dani Brickzone, auf Flickr 0-13 by Dani Brickzone, auf Flickr 0-14 by Dani Brickzone, auf Flickr 0-7 by Dani Brickzone, auf Flickr 0-8 by Dani Brickzone, auf Flickr 0-9 by Dani Brickzone, auf Flickr 0-10 by Dani Brickzone, auf Flickr 0-11 by Dani Brickzone, auf Flickr 0-15 by Dani Brickzone, auf Flickr 0-16 by Dani Brickzone, auf Flickr 0-17 by Dani Brickzone, auf Flickr 0-18 by Dani Brickzone, auf Flickr 0-19 by Dani Brickzone, auf Flickr -

Liebherr LTM 1400-7.1
TheItalianBrick posted a topic in LEGO Technic, Mindstorms, Model Team and Scale Modeling
In the past 2 months I've been working on a mobile crane. I initially started with the Liebherr 1350-6.1 but then decided to add another axle and go for the 1400-7.1 For reference I'm attaching an image of the Felbermayr livery I'm going for. I think blue is a nice alternative to the usual "yellow" technics mocs/cranes! image share Some of the features: integrated pneumatic suspensions (currently this crane can run both on pneumatics or normal shock absorbers) 7 solid axles of which 6 are steered and 5 are driven studded design (although the axles themselves are built in studless technique) as many details as possible (I haven't completed this MOC yet so at this stage there is room for adding more) decals/stickers where needed 2 or 3 Sbricks (1 in the carrier and 1or 2 in the upper structure) 2 L motor for driving 1 L motor for steering 1 M motor to extend the outriggers 1 M motor with autovalve to lower/raise the outriggers pneumatics. At the moment only the carrier has been completed digitally, upper structure to follow The chassis itself it's a 5 studs tall/thick and should provide enough rigidity. As you can see the outriggers take quite a lot of space, both driving and steering shafts had to go either below or above them! upload pictures Here a view of all the axles: currently showing pneumatic pumps but given how much they cost I've decided to use standard shock absorbers More renders. hosting images online image sharing sites free Hope you've enjoyed this. Will start building it soon hoping everything goes smooth! Then will develop the upper structure and share more images. Cheers, TheItalianBrick! -
Liebherr R 918 Litronic
Jack06 posted a topic in LEGO Technic, Mindstorms, Model Team and Scale Modeling
Hello together, here is my newest Moc. It is an excavator of the company Liebherr. It's controlled by two Sbricks. Now some Pictures, i hope they work: I also build it in real, here is a short movie: https://youtu.be/Mt4kWwQOS_0 -
[MOC] Lego 42100 Mini-Replica
cyberdyne systems posted a topic in LEGO Technic, Mindstorms, Model Team and Scale Modeling
Good (random time) everyone! I was fascinated by the 42100. So, as I still haven't got one, I've decided to make my own version, but a bit smaller... I came up with an idea of an extra small excavator with all possible functions on board. No RC this time, of course. Only manual controlling. The bucket was a hard thing to do. But this quarter-cylindrical piece and a rope served me really well. I tried to make it as close to the real set, as possible. All the pipes, railings and barrels were recreated in my replica. The mechanisms inside the haul are both simple to understand and hard to invent: First boom section is raised via small linear actuator placed inside superstructure The same LA lifts the second section Worm gear to turn the levers system which tilts the bucket The bucket can be opened by pulling the rope Big turntable supports the superstructure. I don't really know what else to say/write. So the video is at your service. This video is a bit humorous. I hope, you would like it. Thanks for watching! -
 It's official: what we've been doing for the last half of year together with LEGO was turning a real-life Liebherr R 9800 into an RC model. And guess who drove it :D More video content will follow soon! My behind-the-scenes video: And finally, here's a brief behind-the-scenes video from LEGO:
 -
I was preparing this for over a week and more is coming soon (outdoor reviews will be available on saturday 5.10.2019 and next wednesday 9.10.2019 ). The more i'm playing with LEGO, the more i'm getting addicted. I would appreciate if you could give me a subscribe! Build time of 42100: 9 hours ( 4108 parts ) Build time of 42110: 6 hours ( 2573 parts ) LEGO 42100 Liebherr R 9800 Excavator | Test Drive with Cat Food LEGO 42100 Liebherr R 9800 Excavator | Outdoor test - do not this at home! It hurts. LEGO 42110 Land Rover Defender Speed-Build & Functionality Showcase LEGO 42110 Land Rover Defender Outdoor Test LEGO 42100 Liebherr R 9800 Speed-Build LEGO Technic Control+ App Review | Easy tutorial how to use it First unboxing of 42100 & 42110 ( I was first on youtube :D )
-

42100 QA Issues
Zerobricks posted a topic in LEGO Technic, Mindstorms, Model Team and Scale Modeling
Here are the issues I found during build of my 42100 set: 1. Damaged motor - I had a simillar injury on one of the C+ hubs in the 42099: 2. Actuator's input shaft color is Dark red instead of Orange. Also one actuator seems to have corrosion, while the other has a very rough surface finish: 3. Instructions have a few issues too. The 2L axle here can interfere with the 12 tooth gears if not inserted fully. I'd use a normal cross-pin here: 4. This assembly is almost impossible to take apart without damaging bricks: 5. You can't test the model in third phase. App won't connect to the hubs, because all motors are not yet wired to the hub. I'm thinking contacting lego costumer service regarding actuators, they seem to be a poorer quality than normal ones and they also feel like they are totally unlubricated. What is your opinion on the issues above? -
42100 Liebherr R 9800 hands-on review [VIDEO]
Sariel posted a topic in LEGO Technic, Mindstorms, Model Team and Scale Modeling
Due to reasons that will be revealed in the first week of October, LEGO has been kind enough to allow me to release my full 42100 Liebherr R 9800 review earlier than other authorized reviewers: Chapters for your convenience: 00:37 - box and unboxing 04:13 - new pieces 05:59 - pieces in new colors 06:28 - parts list 06:47 - speed build 23:33 - functions 32:21 - impressions 43:43 - final note -

[MOC] Lego Liebherr R 9800
Tomas TECHNIC posted a topic in LEGO Technic, Mindstorms, Model Team and Scale Modeling
I really like the Liebherr R9800 so I decided to build it myself. My version has got six functions (all powered by PF elements, controled by three IR receivers) Drive - one L motor for each track Turning superstructure - M motor Arm - XL motor, M motor, M motor It is not as big as official Lego Liebherr but functions (I think ) works really good. -

42100 Liebherr R9800 Excavator
Ngoc Nguyen posted a topic in LEGO Technic, Mindstorms, Model Team and Scale Modeling
LEGO Technic 42100 “Liebherr R9800 Excavator” Price 449,99€ 4108 parts new control system CONTROL+ 7 motors (CONTROL+) 2 CONTROL+ hubs new parts: Linear Actuator long (12 studs?) big gear wheels dbg (grey) (like in 42095) new liftarm frame 11x7x1 no B-model at the moment Go nuts -
Hello guys! At last I can represent to all of you my latest MOC. It's a Lego Technic Liebherr LR 11000 Crawler Crane. I tried to build a copy of a famous Liebherr-brand crawler crane. If to be honest it was my dream to build a human-high technic crane. This model is approx two meters high. It has five independent winches! Real crane has six, but two of them goes to one hook, what was not necessary to represent in lego version. Except string crane is build of 100% Lego. As a counterweight I used three big battery boxes in the superstructure and three ones in the additional counterweight carriage. Below I will list crane's functions. RC: 1,2) Chassis drive and steering - one L motor for each track. 3) Superstructure rotation 4) Operator's cabin uplifting via small linear actuator 5) Main boom winch 6) Luffing Jib winch - winch is located on the main boom like in the original model 7) First hook winch 8) Second hook winch - winch is located on the main boom like in the original model Manual: 1) Derrick boom winch - needs only when assembling/disassembling crane 2) Addiction counterweight extensioin - need to balance crane under heavy loads 3) Addiction counterweight up/low - need to balance crane under heavy loads or without a load 4) Addiction counterweight steering - need to steer wheels in the counterweight carriage when superstructure rotating and need to make wheels parallel to move crane forward or backward 5) Chassis uplifting - chassis have installed four small linear actuators which can lift the chassis under the ground to put on tracks like in the real Liebherr!! As TLG doesn't have any pulleys of 0.5 stud wide and with the pin hole in the center and 3D parts are too expensive I decided to drill the original ones. Firstly I used 4 mm drill to make a round hole instead of an axle, after 4,5 mm and finished with the 5 mm drill. No any part was broke. And this time I already has video to show you: And a couple of photos. https://bricksafe.com/pages/Aleh/liebherr_lr_11000 Hope you will like it. Feel free to ask any questions. Also very appreciate critics. But for sure my wife definitely will not stand another crane To start building i was inspired by the set 42042 - I love it too moch!
-

[MOC] Liebherr LTM11200 crane
Jeroen Ottens posted a topic in LEGO Technic, Mindstorms, Model Team and Scale Modeling
Hi, Probably not the wisest move with three other projects ongoing, but a couple of weeks ago I couldn't resist starting again on designing the Liebherr LTM11200 crane: Some of you may remember the first version of this, which I designed a couple of years ago: This time however I try to iron out all the kinks that were present in the earlier version. It is still work in progress and even though the performance has improved over the earlier version I am still far from a smooth operating, well working machine. Especially the retracting of the outriggers and the whole steering system are still pretty poor performance wise. As you can see I have changed the colour scheme to a more available white with orange livery. Comments, questions and advice are welcome Leg godt Jeroen -

[WIP] Five-axle mobile crane (inspired by Liebherr LTM1200)
Erik Leppen posted a topic in LEGO Technic, Mindstorms, Model Team and Scale Modeling
Since the beginning of my AFOL-hood, I have been a crane guy, with many mobile cranes built in the past. Now, during the more recent years I tried to diversify, partly thanks to competitions like those on Eurobricks, and built various other vehicles. I think it's time to see if I haven't unlearned how to build a crane :) So, the goal. I aim for a five-axle crane in the same scale of 42009. I think five axles is a perfect balance: enough to be imposing, but not so much it becomes awkward :) I use the Liebherr LTM1200 as a source of inspiration. The extra space between axle 3 and 4 gives me some extra leeway, but I also find it to look better. This image is from the Liebherr folder; I drew a grid over it with 8 studs for the wheels, and some markings in red. Most functions will be manual. Not sure if I can even get a motor in, but I will try. But there is one function I really want: suspension. I think it just looks cool to have a multi-axle vehicle with suspension on all wheels, and it makes my model less of a 42009-clone. To do this, some other functions will have to be dropped, like the motorized double-acting outriggers. This is the progress so far. Each axle is a fixed unit that is connected to the frame by two shocks and two ball joints. As vertical space is limited and Lego suspensions always tend to become taller than desired, I had to find a way to create a sturdy frame, so I went for studded Technic bricks. This makes the frame very strong. Also I think it's a nice deviation from all-studless building :) (This will principally be a studless model, don't worry.) Then, the steering. If you ever want to add and connect the steering to so many suspended axles, let me warn you: it's not fun. Every axle needs two U-joints. I just ran an axle with lots of U-joints (at least 6) through the entire thing. Not optimal, but it works. The outrigger housing is a real pain to work around. Steering angles per axle are varied the 42009 way: by having different steering arm lengths. The ratios are 100% : 50% : 0% : -67% : -100%, or, in easier numbers: 1/2 : 1/4 : 0 : -1/3 : -1/2, where the denominator is the length of the steering arm. Axle 3 is the only axle connected to the fake engine. Speaking of which, there's hardly any room left for that! So I decided I will add a boxer engine (which is lower), and it will still have to stick out one stud above the roof of the cabin. So be it. Driving the fake engine will be a challenge by itself too, because the unwieldy geartrain for the front axle's steering is in the way. I will have to sacrifice a lot of ground clearance for the driving axle. Next up: add the fake engine, add the outriggers, lay out the measurements of the cabin, and see if I can get the first boom segment in place. One note about colors. It will not be yellow. I just don't want to add another yellow crane, but I'm still in doubt about color options. I love trying out weird color combos as you might know, but the boom will probably be white, because of the panels I have (thanks to 42025). So I will probably do a multicolor scheme where white and black/gray are combined with one or two non-grayscale colors. I love to hear what you think of the first take :)