Search the Community
Showing results for tags 'Lego'.
Found 2795 results
-
I´m happy to present you my newest model, a not exact copy of the ferries on lake Balaton in Hungary. Hope you like it! As I was a small kid we often spent our summer near Balaton. If someone is younger than 6 and lives normally in a small village, it is really impressive to see cars which drive onto a ship and after that they come down on the other side. That´s why it was always a highlight for me to visit and sometimes travel by this ferry. Still nowadays if I´m there I wait the ferry once coming and going away. It´s still the same ferry as 25 years ago, I still find it really cool and it brings back the old memories. It took 9 months from the idea to the final MOC. The building process included some really cool challenges and was one of the most exciting developing projects in my entire MOC-life. The idea was to build a remote controlled ferry which can swim and drive on real water, can catch the coast reliably and my older tiny RC models (Milka truck and Flixbus) have to be able to drive up and down. The last requirement was to make it possible to show the whole setup on exhibitions. At first I searched on the internet for the biggest one-piece plastic box and ordered one of them. It was difficult because most of the big boxes has small bottom wholes to let water out. I needed exactly the opposite of it. Keeping water in the box. The measures of the box decided the measures of the model. On the beginning I tried to experiment with some LEGO boat hulls. The facts that these hulls are not completely closed and the ship is without vehicles already very heavy brought me to the solution to use empty bottles. They are the most reliable things to keep air in and protect the electric parts, like Sbrick from the water. Of course you can say I could put everything to a higher position, not integrated into the deck. But no, if everything would be in the building, everything would be on one side and the ferry would be completely unbalanced. On this side everything would be under water. What I could do was to integrate the motors on the other side into the deck. It was also not enough. I needed counterweights. At first some LEGO keels, but they were not heavy enough (they contain air, too :/). So at the end I used simply some pieces of steel. The real ferry has Voith Schneider propellers. We know that it´s possible to recreate it with LEGO bricks, but not at this small size. And he depth of the box is only 15 cm. That level of reality was also not the goal of the project. The draught of the loaded ferry had to be less than 15 cm, so I decided to use 4 propellers. Of course the available propellers of LEGO are like disasters, if we examine their functionality. If they are not, they are too big. So I built my own version out of Technic pieces. The propulsion uses two channels of the Sbrick, one for each side. You can turn with the ferry that way. I thought you don’t need this feature in this thin box, which is only 10 cm wider, than the ferry. But I was not right. You really need to do turning maneuvers to keep the ferry parallel with the walls. And yes, I hope I will have the chance to drive the ferry in a bigger pool in the future! Next challenge was to catch the coast stable enough for the buses and trucks. Maybe I said earlier that the ferry is everything else than horizontal. The counterweights are good, but not good enough. The proportion of the weights of the vehicles and the real ferry are also different than at the LEGO word. So the LEGO ferry has extremely strong reactions, if the vehicles come. The real ferry has also water tanks to balance itself. The LEGO ferry doesn´t have such a help. So I decided to build the ramp so that it can take part in bringing the ferry into a better position at least near the coast. There is a hook on the ramp (see in the video). It catches the panels of the coast and don´t let the ferry go away. After that it goes down a bit more and forces the whole ferry to raise itself a bit. The coast is horizontal, so this force brings the ferry also closer to the right horizontal position. That is nice, but as the vehicles arrive, it changes. That´s why I had to develop a correct order, position and driving path for the vehicles, too. These small vehicles are not off-roaders. If you can´t follow the instructions, the vehicles stuck on the ramp. But if you do everything well, it works smooth! The most difficult one of the nonfunctional problems was to create the meeting of the deck and the curved walls without gaps. I used for it 1x2x2 panels. The deck goes actually into the wall (under the top of the panels). But the upper end of these panels is not equal high with a whole number of plates, so I had to sink the wall on the sides with a half plate. I did it by using different wholes on the Technic frame, as for the deck. 1 Technic whole is 2,5 plates, so using neighboring wholes gives us the 0,5 plate difference. The ferry had its first appearance on Bricks4Family 2021. It worked surprisingly well during the weekend. After the box was completely horizontal and the exact level of the water was also found. By catching the coast the visitors often thought, it´s enough to turn off the propellers and open the ramp. What they (and I on the beginning) didn´t realise was the fact that if the ferry drives, the water goes in the other direction under it. If the propellers stop, the water brings the ferry slowly back. One method is the perfect timing with opening the ramp. Other method is to keep the propellers on and opening the ramp at the same time. After Bricks4Family I made a few very small changes on the ferry, so on the second exhibition (Ilmbricks 2021) worked everything even better. I put for example a door on the side, so it was possible to switch on and off the battery box, without removing the captain´s deck, the life boat and the whole roof. The deck has also 4 invisible, but removable panels. If they are removed, I can hold the ferry by holding the really strong Technic frame. Now there are small Technic bricks in them. It became much easier to remove the panels with the help of a small bar or an axle. If you really read all of these, a huge thank you for it! Hope you liked the ferry! You can find the pictures in high res in my Photostream! PS.: The next exhibition where I plan to show the ferry is Bricks am Meer 2022 in Bad Zwischenahn, Germany. Hope we can meet there!
-
Join this chat to chat with Flaming Bricks! Q&A if you will Hello Eurobricks members! Feel free to drop any thoughts of questions below! No one asked, but my favorite color is red and my favorite flavor of ice cream is cookies and cream All by myself... :(
-
Hello Ferrari and Speed Champions fans, the Ferrari F40 (tipo F120) is a mid-engine, rear-wheel drive sports car engineered by Nicola Materazzi with styling by Pininfarina. It was built from 1987 to 1992, with the LM and GTE race car versions continuing production until 1994 and 1996 respectively. As the successor to the 288 GTO (also engineered by Materazzi), it was designed to celebrate Ferrari's 40th anniversary and was the last Ferrari automobile personally approved by Enzo Ferrari. At the time it was Ferrari's fastest, most powerful, and most expensive car for sale. Building instructions are available on the following links: https://rebrickable.com/mocs/MOC-99799/_TLG_/ferrari-f40 https://www.mocsmarket.com/lego-mocs/ferrari-f40-building-instructions/ It is a studless build in the new, 8 studs wide Speed Champions style. I wanted to create a sleek model which is as accurate as possible in this small scale. I prefer the brick built solutions to keep the flexibility of the used parts in further builds, and therefore only Ferrari logo stickers are used. (If you preferred a better shaping instead of a real rear side grill, then 2pcs of parts 61409 could replaced by 2pcs of tiles and some additional stickers, see the picture 3.) My intent was to keep the width-length-height ratio of the real car and this size makes it possible. The model contains lots of details: for example the emblematic front, hood , side and rear intakes, the narrow black line on the front and sides, the front turn signals, the side view mirrors etc... Maybe the most challenging one was the iconic rear side with the vehicle registration plate and the rear spoiler, here there is a half stud offset. I tried to fill every unnecessary gaps and therefore some tricky build techniques are used. The model has space for one minifigure. I suggest to use small or middle sized hair. Thanks for visiting, _TLG_ Ferrari F40 - instructions 1 by László Torma, on Flickr Ferrari F40 - instructions 2 by László Torma, on Flickr Ferrari F40 - instructions 3 by László Torma, on Flickr Ferrari F40 - instructions 4 by László Torma, on Flickr Ferrari F40 - instructions 5 by László Torma, on Flickr Ferrari F40 - instructions 6 by László Torma, on Flickr Ferrari F40 - instructions 7 by László Torma, on Flickr Ferrari F40 - instructions 8 by László Torma, on Flickr Ferrari F40 - instructions 9 by László Torma, on Flickr
-

Lego Monkie Kid is crossing over with Batman (Kinda)
Killian posted a topic in Brick Flicks & Comics
So.... There's a new DC comic where a teenager takes on the mantle of The Monkey King, becoming The Monkey Prince. The story, set at least partly in Gotham City, features The King Bull Demon, Shifu Pigsy, Nezha, Red Boy, Princess Iron Fan etc.. I'm cautiously hoping it does well and expands on the Monkie Kid lore, hopefully making The Journey To The West more popular in America and Europe etc, so Lego may release the Monkie Kid sets in more places and continue with further seasons of the show so that season 4/the next special isn't necessarily the end of MK's animated adventures. "Introducing the newest hero in the DCU, the great sage, equal to the heavens, better than his predecessor the legendary Monkey King, even better than the Justice League—and definitely the Teen Titans—(actually, all the heroes combined), everyone put your hands together for…the Monkey Prince! Marcus Sun moves around a lot because his adoptive parents are freelance henchpeople, so this month he finds himself as the new kid at Gotham City High School, where a mysterious man with pig features asks Marcus to walk through a water curtain to reveal himself as who Marcus really is…someone who has adventured through The Journey to the West, can transform into 72 different formations, can clone himself using his hairs, and is called…the Monkey Prince!" https://bleedingcool.com/comics/new-10-page-dc-comic-monkey-prince-0-in-full/ -

[MOC] Lexus LC500 EV3 1:8
StudWorks posted a topic in LEGO Technic, Mindstorms, Model Team and Scale Modeling
After four years of on-and-off work, I completed my first 1:8 Technic car, a detailed Lexus LC500 powered by Mindstorms EV3. Why Mindstorms EV3? The project started before I purchased a BuWizz 2.0 along with PF motors, I also wanted to build the best car I could with EV3, as it first got me into Lego Technic almost 7 years ago. After those previously mentioned years of on-and-off, which were for designing the chassis, it took five months to make the exterior, as close to the real car as possible. The LC500 EV3 has opening doors, hood, and trunk, working steering and drive with working steering wheel and paddle-shift* 4-speed gearbox, retractable "Performance Package" spoiler controlled by a medium motor, full independent suspension, fake detailed V8 engine with moving pistons, DNR shifter, adjustable front seats*, rear seats, functioning glove box, and custom stickers. *Special thanks to @Jeroen Ottens for his great DB11 instructions! Greatly helped with the chassis, front adjustable seats, and paddle shifters. The LC500 EV3 is more of a display model than ideal RC car (due to popping cv-joints in the differential and stressed motors due to weight) so I decided to keep it as is. More pictures on Bricksafe: https://bricksafe.com/pages/StudWorks/lexus-lc500-ev3 Thanks to the EuroBricks community for helpful feedback along the way. -
This colorful LEGO mosaic of mine was made in Jan. 2022. https://flic.kr/p/2mZhC7j https://flic.kr/p/2mZiVri Color Explosion by c.behrens, on Flickr It is made of 4 x 9 = 36 stk. 32 x 32 LEGO baseplates. It gives a total of 36.864 studs or 1 x 1 LEGO bricks. It measures 102 x 230 cm.I have used bricks and not plates. There is used a total of ca. 18 kg LEGO bricks included baseplates.It contains a total of 64 different colored LEGO bricks. It was my goal to get as many different LEGO colors in it as possible. The brand new 2022 color Neon Yellow is also in it. And also the color Light Nougat that is new in basic bricks is in it.It even contains a Metallic Silver brick in the middle and also a 1 x 1 brick in Pearl Gold rains as stardust over the artist name. In the middle there is a ring of "fire" that is made of the brick color Glow In Dark White. That way the picture attracts attention even in the night.The picture has the working title of Color Explosion, but I have 21 suggestion for new / better / other titles:1. Ring of Fire (Refers to the glow in the night)2. Color Explosion3. Life is in Colors4. Big Bang5. The Creation6. LEGO Colors7. LEGO Explosion8. Colors9. Color Circle10. Paletton11. RGB (RGB stands for the three primary colors red, green and blue)12. Color wheel13. Color art14. HOT15. Colored16. Orgasm17. Genesis18. Colorpalette19. Colorful20. 64 (Refers to the total number of colors)21. The picture with the many names.The picture hangs in my bedroom at the end of my bed. In that way I have a beautiful "sunrise" every morning and it reminds me of the creation of the world, the big bang, - or the beginning of a new and wonderful day. And it also reminds me that life comes in many colors and shades. There are sad gray days and those wonderful bright days where everything shines. Lifes ups and downs.In the evening when I go tired to bed it reminds my of, that it would be nice with a lovely colorful and explosive orgasm. So you understand that it is a nice colorful picture to have in my bedroom.What do you think of it? Do you have a good name for it? Or what name do you find the best?Please comment and post below! Leg godt! Christoffer Behrens - Denmark Member of Byggepladen.dk
-

Guldan, Orc Warlock Warcraft - Custom Minifigure
Lego Custom Undead posted a topic in Minifig Customisation Workshop
Welcome, Friends! I am glad to present you my new handmade work – Guldan LEGO custom minifigure. Having grown up weak and sick, the sickly orc Gul'dan, once expelled from his native clan, will return later to wipe it off the face of the earth forever. Being rejected by the Spirits of the majestic remains – the Throne of the Elements, Guldan will hear a mysterious whisper which will later change the balance not only on Draenor but also far beyond its borders. It will make Guldan the most powerful orc warlock who will receive the immense power of fel magic and almost unlimited power overall in exchange for eternal service to the forces of Darkness. LEGO does not officially produce Lego Warcraft sets. But Lego series have Orcs, Trolls, Goblins, Dwarves, Elves and other fantasy characters. And LEGO fans have a fantasy. Therefore, Lego Warcraft fans have already been making Lego Customs on Warcraft for a long time. World of Warcraft is an amazing fantasy universe which is older than a lot of its fans. «Guldan», «fel magic» – everyone knows these words, even those who do not play computer games and those who are not interested in Fantasy themes. Warcraft is the universe for all time. Many years have passed since its inception, but the fans have not gone. Warcraft, without any doubt, is one of the pillars of fantasy worlds and deserves respect. I wanted to join this world once again by creating my own Guldan LEGO custom minifigure Guldan belongs to Shamans in the Lego Custom Undead Universe. Guldan custom minifigure can be twisted from all sides – Here. My latest customs on Eurobricks: Kaligula (the Governor of the Nothern Lands) Dark Wizard (Mage of the Army of Darkness) Ragmar, Elder Witch (also known as Mad Princess) Lego Halloween Custom Minifigure (Lego Scary Movie) Two Headed Ogre Cho'gall Warcraft Baba Yaga Custom Lego Minifigure (Russian Folk Tales) Soul Taker -
The season 3 trailer is out in China
-
This project is based on the house of Ole Kirk Kristiansen, the founder of the LEGO group that celebrates its 90th anniversary this year. I made several rooms in the house. The workroom contains various details such as his typewriter and various blueprints. If you want you can support this project https://ideas.lego.com/s/p:ddb75bfdf7644f8386cb25501c7a685e
-

[MOC] The Milwaukee Road EP2 Bipolar E-2 - in 12V style
Paperinik77pk posted a topic in LEGO Train Tech
Hi all and Happy New Year!!! Since I'm waiting for H0 parts to arrive to continue my experiments, I am browsing the Internet a lot to get some inspiration. Searching for some American locomotives I found (again) the Bipolar, a locomotive which I like a lot...but I always end forgetting its name. I recall the GG1 in my mind...but the name Bipolar name simple does not fit into my 64kb of memory (38911 bytes free)! So, I thought it could be nice to try this big lady in 12v, just for fun. In this case, I built the E-2, the lattest rebuild of one of the Bipolar family, made in 1953. It's a massive thing, and the two motors will surely be helpful to move the locomotive and the Hiawatha train (I did not design the wagons, but for sure they would be...heavy!!!). As the original E2, the locomotive has asymmetric details on the two "big noses". The colors are WRONG - yellow should be orange, black should be dark gray, so I kept a 7740 paint scheme, well suited to the color range available in the 80s. As any high-end locomotive it has some expensive parts (all the windows). One note - the 2x2 windows can be also in old gray (from 7740), a bit cheaper option. The locomotive has 6 point of articulation, I think it could manage the R40 curves - my real life DB BR78 is less articulated, just to made an example. As you can see, the whole body seems a bit taller than normal 12v trains, but all in all, the real bigger details are the two pantographs. I don't think I'll ever build it in real bricks - for the only reason that I'm not so convinced to see it going around R40 curves. Maybe it could be a good shelf queen I hope you like this one! Ciao! Davide -
“The Thing About Trains... It Doesn't Matter Where They're Going. What Matters Is Deciding To Get On” Hi guys! This is my latest project, I've been working on it really hard and I would LOVE to hear your thoughts on the final result. Please don't take it as a promotion or something, even though it's on Lego Ideas. Here is the whole story behind the build :) https://ideas.lego.com/projects/d8f0433c-efdb-454d-9a7d-981df8d55ead The Idea The idea of creating an ultimate Christmas train dates back to 2016-th. At that time, I just started my Lego journey and in that regards I had nothing except of Santa’s Workshop set, love to Christmas and everything around this holiday. Being inspired with the above mentioned set I was enthused by the idea of having a Lego train going around our Christmas tree. The Polar Express has been on our “to watch during the holidays” list for many years, so I knew for sure that this is the only train we need. After a quick web search I haven’t found a Lego set but I have found something more valuable – the Lego Ideas website! Long story short – I was hooked, and I owe the Polar Express that I’m an AFOL, as since that very moment there wasn’t a day that I didn’t visit the website. Obviously at that time I didn’t have enough skills to create something as big and complex as a train model. Thanks to Lego Ideas – I’ve started to practice with smaller models, took part in contests, activities etc. and little by little started to work on my dream train. Of course, there were numerous breaks, fails, other projects etc. but I never left the idea of creating my “ultimate Christmas train”. Well… looks like we might be on time for the 20-th movie anniversary in 2024-th! both acсompaniment and voice are mine* :) About the build "Hey! Hey, you! Yeah, you! Do you know what kind of train this is? Actually, it's a Baldwin 2-8-4 S3-class Berkshire type steam locomotive built in 1931 at the Baldwin Locomotive Works. It weighs 456,100 pounds and has a tractive force of 3,450 pounds." Pere Marquette 1225 is a reference for both the book and the film. *The model you see on renders and video has around 2800 pieces but can be easily scaled down to 2000 or even less by using existing train platforms (6 studs wide cars with 5 windows and 1 row of seats, will be posted shortly in updates). *The model uses new powered up system (L-motor fits well), including steam locomotive lights *The model is built with real bricks and turns fine *Proportions of the train are thoroughly adjusted in accordance to the reference train *A roof and one of the side walls of each car can be easily taken off to reveal a detailed interior Extra: - a motorized Hobo is skiing on a rooftop just like in that most exciting scene of the film - the lost ticket shots out a ventilation grill operated by a lever on a car’s wall 8 minifigures and a reindeer 😊 - The conductor - Hero Boy - Hobo - Hero Girl - Know-It-All kid - Billy - Smokey - Steamer Easter Egg hunt Do you like to search for Easter Eggs? Then leave a comment if you found any 😉 "Seeing is believing, but, sometimes, the most real things in the world are the things we can't see." *please desregard the m motor. I found a space for L motor which works way better with this train
-
Kaligula, the Governor of one of the Northern Lands – Dark Wizard Custom Minifigure
Lego Custom Undead posted a topic in Minifig Customisation Workshop
A new LEGO custom minifigure that I have included into my collection. I am glad to show you the Kaligula. Kaligula was the Governor of one of the Northern Lands. He did not bring anything good to his lands during his reign that was cruel – reprisals, vice and immorality. He wrote himself into the bloodiest pages of the Lego Custom Undead World. Dark Forces quickly noticed a Tyrant carried away by Dark Magic and lured him to the Dark Side. Kaligula accepted the primacy of Darkness, quickly and brutally cracked down on the new ruler who took his place and continued his atrocities in his native lands in the form of the Terrible Dark Magician. No one else wanted to fight for power any more because he knew that he would be instantly destroyed by Kaligula who fiercely did not tolerate any rivals and always crack down on with them quickly and brutally, only feeling a threat to himself. The lands lost their Governor and faith in a bright future for a long time. Kaligula became a shadow overseer of his lands and the Army of Darkness got into its ranks another strong Magician controlling the part of the territory of the Kingdom. Kaligula custom minifigure can be twisted from all sides – Here. My latest customs on Eurobricks: Dark Wizard (Mage of the Army of Darkness) Ragmar, Elder Witch (also known as Mad Princess) Lego Halloween Custom Minifigure (Lego Scary Movie) Two Headed Ogre Cho'gall Warcraft Baba Yaga Custom Lego Minifigure (Russian Folk Tales) Soul Taker -
Hello everyone, let me introduce my latest creation. Ever since I get 42093 corvette I had an idea to disassemble it and use all this parts to create something playable and offroad capable. This 1:15 model of legendary F-150 truck was made with Power Functions elements and Sbrick for future truck trial competion or just for indoor fun (because of the weight (1250 g) I think this is not very competitive truck). It was a long project for me because of time constraints so I had started it before LEGO release their bigger one. This model has 4WD transmission with 2 L-motors driving each axle separetly (driving ratio - 3,5:1), servo motor for steering. Front suspension is independent double wishbone, rear is live axle with panara link. The model has openable doors, sunroof, hood and tailgate. Instructions in pdf were made in Stud io (my first experience with this software so it took a long time). Link for instructions: https://reb.li/m/93403 Also I created some additional color options with available parts. I hope to add instructions for those and the video with the orignal orange one later.
-
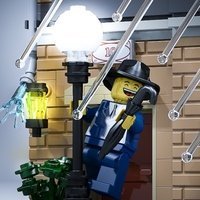
Sike has had many failed business in the past. His biggest failure was Sike Costumes. However, he is now running two successful businesses out of his three story building that is located next to the city Police Station. He has a gun shop on the first floor where he has over 50 guns and hundreds of boxes of ammo in stock. This business is in the black, but it is more of a front than his primary focus. Sike's apartment is on the second floor where he relaxes and streams his favorite shows. Sike spends his evenings working in his lab on the top floor, where he produces the towns best "blue sky candy." This is by far his most thriving business. More pictures can be found on Flickr
-
Hello, Friends! In addition to heavy LEGO minifigure customs that many of you liked, I will show other LEGO custom minifigures from Dark Fantasy theme that I have included in my collection. This custom minifig is the Dark Wizard from the Lego Custom Undead Universe. Black Magic Hat on head, the Staff of Dissecting Lightning in hands, Avadon Robe and Full Magic Cloak cover the body. A black beard and an unkind look. Dark Wizard custom minifigure can be twisted from all sides on my YouTube Channel – Here. My latest customs on Eurobricks: Ragmar, Elder Witch Lego Halloween Custom Minifigure Two Headed Ogre Cho'gall Warcraft Baba Yaga Custom Lego Minifigure (Russian Folk Tales) Soul Taker
-

[MOC] Lego Technic Tugboat
makushima posted a topic in LEGO Technic, Mindstorms, Model Team and Scale Modeling
Lego Technic Tugboat Lego Technic MOC - Technic Tugboat by makushima Lego Technic MOC - Technic Tugboat by makushima -
I was just scrolling through my YouTube notifications and it turns out that there's a new LEGO Marvel short film, which you can watch here. I've only briefly skipped through to some of the scenes, as I don't have time to watch right now, but here's what I've got (SPOILERS): It seems like the film is only using 2020 sets, which leads me to believe its a sequel to Climate Conundrum. I'll be watching it later today, and post my thoughts as well.
-
The Mando'ade (The sons and daughters of Mandalore) Faction Leader: N1majneb Capital: Mandalore Planets: Bandomeer (O6), Botajef (O6), Celanon (O6), Fedje (L5), Lantilles (P8), Ord Mantell (L7) Updated to reflect changes regularly Grid: O6 Sectors: Members: Wombat, Professor Thaum, Ekule, Wolv Description Mandalore is a free world. Decades of Imperial dominance are finally over. The Mandalorians have wrestled away control in the vicious battle remembered as the Liberation of Mandalore; Kote Yaim'ol, the "Glorious Return." The faithful warriors of Clan Eldar have provided something to all Mandalorians they have not had for far too long: a home. Now comes the time for rebuilding, for looking to the future. We must work to unite the Clans, sounding our call to bring all the exiles home. We extend the offer of friendship to all Mandalorians. Every day, more return. They join the fold, bringing their experience, their craftsmanship, their excellence. Every Mandalorian strengthens the others, strengthens us all. As in time immemorial, we fly the ancient banner of the Mando'ade. It reminds us of where we came from, and who we are. The great history of our people, our conquest, our destruction, and now, our rising again. While not every Clan has joined us, all are welcome. Together, we will build great things. History During the Great Purge, many Mandalorian families and clans were entirely wiped out. Some members of Clan Eldar were fortunate enough to escape by fleeing their homes - a hard act for any Mandalorian. These disparate groups managed to keep in touch and, now that the Empire has fallen, are tentatively making contact again. With the fall of the Empire, Clan Eldar led the charge to return Mandalore to its people whilst the Galaxy dealt with the larger threat of Pyerce and his Imperial ideals. Eldar's attention turned to restoring people's trust and faith in Mandalore. The Duchess rallied the returning Houses and Clans under the banner of The Mando'ade, in the hope that Mandalorians could once again be unified in the Galaxy... Leadership Mandalorian society is pyramidal: it has a ruler, big internal factions known as houses, and familial units (clans) allied with said house. The Mando'ade unite behind The Duchess, for her efforts uniting the Clans and forming a resistance against Imperial oppression. Once more restoring a free Mandalore. Beneath the Duchess, a council formed of the Clan heads sit to ensure no Mandalorian is forgotten. Costume Famously clad in the beskar'gam (Iron Skin), many Mandalorians honour their family by wearing the Beskar passed down to them through the generations. Many choose to reforge and redesign their armour to make it more befitting to it's new owner, others choose to let the imperfections of time tell their family history. But not all Mandalorians wear armour, owing to the scarcity of Beskar. Those that do may wear incomplete armour too. Nonetheless, Members of The Mando'ade, and their allies, wear a wide range of different-coloured armour, and some wear no armour at all. No Beskar helmet (Buy'Ce) is gender specific. The Art of The Mandalorian states it denotes a sub faction and not gender in much the same way as the helmet designs of ancient Greece offered regional variation of the same design. All buckets are welcome within The Mando'ade! But times have not been kind to the Clans, and many new members still need to earn their armour... The Mando'ade does not expect its members to follow The Way. Removal of your helmet does not make you any less Mandalorian - Giving up does Build notes Territory A Current list of Worlds and Assets Current Planets: Bandomeer (O6), Botajef (O6), Celanon (O6), Fedje (L5), Lantilles (P8), Ord Mantell (L7) Grid: Hyperspace Lanes: Braxant Run, Celanon spur, Hydian Way, Junction Tierrel Loop, Salin Corridor, Randon Run, Relgi Run This map updated regularly to note The Mando'ade's influence. How to Join Enjoy all things Mandalorian? Whether you've been a long time fan or you've decided 'This is the Way' recently? Do you enjoy building your own Star Wars themed MOCs and enjoy adding a little narrative to these builds? - Things you will need to do: - Make a EUROBRICKS Account (You can't post to the forum if you do not have this) - If you don't have one, be sure to make an account with a Photo-Hosting site such as Flickr or Bricksafe (You will need this to post the photo to the forum) - Contact N1majneb (On Eurobricks) or Discord https://discord.gg/P4ea72VR - Create a Build for the Mando'ade on Mandalore (O7) and post to the forum (This will give you access to the Mando'ade Primary Channels & Ensure the willingness to post on the forum) - Have Fun! Useful Links Mandalorian Language Inspiration Build Inspiration from Art of the Mandalorian Spaceship Ideas
-
[MOC] Lego DRG V3201 - Diesel/Pneumatic Locomotive - in 12v style
Paperinik77pk posted a topic in LEGO Train Tech
Hi all, always starting from this inspiring discussion... ... @Reker1000000 introduced me to a very particular locomotive: "DB V3201 seems like it would be an interesting starting point for a locomotive to model in 12v style with the red motor..." The locomotive we're speaking about is the DRG V3201, one of the first experiments to upgrade from steam to Diesel engines. In this case, Diesel motors were available , but problem was related to transmitting their power to the wheels. Gears were too weak, Hydraulic transimission was still in development...so the idea was to replace steam with compressed air, therefore maintaining the "old" transmission system (including distribution) used by steamers. In short, it worked this way: DIESEL ENGINE --> COMPRESSOR --> RESERVOIR -->CYLINDERS --> COUPLING RODS --> WHEELS More or less what is seen in some Pneumatic locomotives made in Lego (great stuff!) with electric motors. Well, seems great, but there were many problems related to the heating of compressed air, its cooling (!) and cylinders lubrication - all for maintaining its efficiency. Here's an interesting link! http://www.douglas-self.com/MUSEUM/LOCOLOCO/diesair/diesair.htm All in all - a very complex hybrid system, with many gaps to be solved with engineering "patches". But it's a cool locomotive and making it in 12v style could really be a challenging task. First of all, it's the most asymmetric thing I've ever seen , second - it's a very tormented design - which cannot be captured fully in 12v style, due to lack of parts at the time. It's however a very peculiar locomotive (depicted also in a postal stamp!!!) and it's worth to be tried. Here it is, just out of the shed , helped by a small V60. In reality, this event could not happen, since the V3201 was scrapped many years before the launch of the little shunter, but since we can do whatever we like with our fantasy, I was more optimistic and imagined a restored V3201 ready for some hystorical train! The V3201 is based on the chassis of a BR78, which - luckily - is one of the 12v locomotives I've already tried to create. Therefore, chassis was already prepared and only needed to be adapted to the longer body. This big beast has a quite boxy body, which seems to be made soldering together some parts of cabins, cut from steam locomotives. The central part of the body is sticking a bit out from the overall shape, and this is due to the big submarine diesel and air reservoirs. The main charachteristics are the two big gray radiators, the small windows on the corridor side, and those big stairs. Stairs were a nice thing to replicate, even if these are not the same as in the prototype. I did not use the big train doors, since these did not allow me to recreate the stairs and handrails. In the real thing, the stairs go over the cylinders, so using the 12v standard ones was quite a mess. I replicated them with normal parts. and this was not a problem. I had however to "cut" the stairs in half, the upper one being fixed to the body, while the lower one being part of the bogie (and turning accordingly). With the 12v motor, this design needed to be somehow adapted. On a real 12v motor, the central hole can accept an half Technic pin. Using a normal Techic brick some plates and tiles solved the problem. The ladder is kept in place by the pin and "slides" together with the motor. Between the radiator and the cabin there's a small, virtually transparent door since it's made of a panel full of small holes. The body in reality should be 4-wide in that point. I tried fences, door fences, everything did not fit and SNOTting was quite impossible (for me at least), given the limited parts available. Even Marklin's model is solid in that point, so I concentrated more on having at least a grille pattern. Using the ladder part was not so nice, it was just confusing. I therefore tried the just seen @zephyr1934 technique (thanks to you and Katy!), to have some visible horizontal lines. I used 3794b parts (jumper) . It works also with normal plates, but this is way better. Doors features a possible, even if not used at the time, SNOT for the door hadle, using headlamps bricks. Here's a shot from above, showing the 7-wide central part of the locomotive. As you can see I played a lot with the jumpers parts. And here's the "blind side" of the locomotive there's not so much to say ,being pretty smooth! Apart big red wheels and red motor, 2x1x2 and 1x1x2 black windows are there, just to remember there's some 7730s and 7750s blood inside the veins of this "thing". Here is visible the big radiator... ...and here is visible the smaller one. Looking better at the central headlight you can see some "white stuff" between the bricks - it's the classic 12v light brick with the addition of a small diode. This old trick allows the headlight to be lighten up according to locomotive's direction. Radiator is made by 1x1 plates, trying to replicate the "pattern" of the real thing. I put here red lights in 7777 style, even if these should be white, according to prototype. A brief mention to the Shed - it's an old MOD - I do not sincerely remember if I already presented it here in Eurobricks. It's a 7777 build, converted to a more shed-looking thing. Since I like to replicate dioramas in 12v style, this could be a nice addition to the overall scene. I hope you like it! Thanks again to @Reker1000000 for his inspirational idea! Ciao, Davide -
Hi! a mini part of a big city...New York..now on LEGO Ideas LEGO IDEAS - New York Corner
-
Medieval Countryside Layout, which will be part of a Christmas Exhibition at the Salling Department Store, Aarhus, Denmark (in a slightly modified version) late October 2021.
-
[MOC] Lego Art - Sridevi Mosaic (Building Instructions)
makushima posted a topic in Special LEGO Themes
Lego Art MOC - Sridevi Mosaic Building Instructions: https://play.google.com/store/apps/details?id=max.moc.mosaic.instructions Lego Art MOC - Sridevi Mosaic (Building Instructions) Lego Art MOC - Sridevi Mosaic (Building Instructions) -
This thread collects everything you think you know about 2022 LEGO Star Wars sets; discuss your opinions here! Please read before posting: Stay on target. No wish lists. Remember that this topic is for discussing sets that are rumored to come in 2022. If it's something you wish to see or something you think that we will see sometime in the future, but not something that's actually rumored to be a 2022 set, then it is pure speculation and it belongs in the Future Star Wars Sets topic. (We also have a topic for minifigures you want to see, which might be more appropriate.) No fighting. Yes, we actually have to post that! We strongly suggest you refrain from criticizing sets on the basis of what you imagine they're going to look like. Wait till we have pictures before you start complaining. And even then, think twice about it If you post news in this thread, it will not be transferred over to the 2022 News thread. Be smart, think about what you are posting and in what thread you are posting. This IS your warning! If you have substantiated news, you can post it in the 2022 News thread. If your news is not able to be substantiated your post will be removed. If you choose to post fabricated information; you can expect to be banned. It's not worth the fifteen minutes of internet fame. Do not post watermarked or confidential images; they will be removed and the poster will be dealt with appropriately. As stated in our Member Guidelines: This topic is for 2022 discussion, not 2021, and not 2023. We will make a new topic when we feel it is necessary. If your post was on the boards, and now it's not...there is a good chance it was either hidden or moved. Off topic posts, placing info in the wrong thread, or a request from LEGO to remove something; these are all possible reasons why something may have disappeared. Eurobricks Star Wars Forum Spoiler Policy With regards to upcoming sets and rumors: Read at your own risk. This is a topic about potential items to be released. If you do not want to know, stay out of these forums!!! With regards to spoiler tags: these are not required and we will not force anyone to use them. That being said, I'm sure if you did use them, the community would be a much happier place! Please be respectful of others. If a member used a spoiler tag, their intention was to keep something quiet; it was a courtesy to others. If you choose to comment on the contents of that spoiler tag, please refrain from publicly mentioning what the contents of the spoiler were!!! With regards to movies or shows: We feel that two weeks from the release date is an ample amount of time for most people to view a movie. Once a movie or episode is released, we the staff, will do all we can to curb the usage of spoilers in any of the topics in the Star Wars forum for two weeks. If you do not see the movie or episode within two weeks, then you read here at your own risk. This is the policy in the Star Wars forum, going forward. If you did not agree with us in the past, so be it. From this point on, we will not police the threads unless something becomes an issue. We ask that members not mini-mod (directly telling other members how to behave ) in the thread and tell others to use spoiler tags. If something is a problem, please inform the mods by reporting it. Any questions, please ask in the appropriate thread.
-
Hi all, after seeing the beautiful V60 created by @Asper, I realized that I've never tried to represent it (I started with the V80 and V100). Being the iconic 7760 historically identified a s a V60, I did not pay too much attention to that specific group of locomotives. But it's a nice shunter and has a pretty complex shape, so I wondered if it could be possible to replicate it in 12v-style. The result is pretty similar to the 7760 and to the red little locomotive shown near the car-loader in 7777 book. The front hood starts in 4 wide, then becomes 5-wide to return again to 4-wide. The rear part of the cabin is 5-wide and features low doors (standard train doors were too big). 2x1x2 blue windows are going all around the cabin (no absurdly expensive 3x1x2 windows needed!) I did not mean to make it too complicated, but at least representing the enlarging/restricting body was mandatory to make it different from the 7760. Paint scheme and the headlights were made to elaborate a bit the front and rear parts. Some handrails made with bars could have been nice, but were not existing as parts at the time. I made also the red version with yellow stripes - just to see how it was like. The more I look at it the more I think also the V100 needs some restyling, now! That's all for the moment! Ciao! Davide
-
[MOC] 1:22,5 Scale - G Gauge (45mm) - Toy Locomotive (Mark II) and new LGB-based "gondola" wagons
Paperinik77pk posted a topic in LEGO Train Tech
Hi all! Here we go again with big Lego trains running on 45mm G Gauge track! Some of you may remember the yellow Toy Train locomotive I prepared back in 2019 -it was one of my first experiments with G-Gauge trains. This little locomotive was based on a small Powered-Up battery box and a Medium motor. Here it is during a night run on the new 45mm copper track with wooden sleepers I restored to be used on my small garden railway. Here's a detail of the old chassis with the original 1,667:1 gear ratio. This solution proved to work fine on a flat track at home, but was completely useless on the garden line, which can be easily considered a "mountain railway". A 3:1 gear ratio worked better, but gears were too stressed and speed was ridicolous. Plus, with some wagons, the motor always needed to work at full speed. Therefore, back to the lab, I completely revisited the heart of the locomotive, and updating some details on the exterior. Here it is, the Mark II (TADAAAAAAA) !!! And...what's new??? Actually, at body level, it did not change so much from the older one . Handle bars, and headlights have been modified and a new exhaust scoop has been added over the hood (there's no more a red On/Off button). The real new part is under the bodywork: A completely new chassis has been introduced, and now features a new 4-ports PuP Hub and a more efficient Large Motor. Gear ratio is now 2.779:1. It is very strong and smooth - the big battery/bluetooth hub helps traction (which can be increased with the use of rubber bands around the wheels), and the L-Motor is a great improvement over the M-Motor. I've prepared some workflows on the PuP application to work at 25/50/75/100% of the power. The chassis can be detached from the body with four "fast unlock" pins, so changing the batteries is now an easy task. Then, with a locomotive now up to the task of garden railroading, I needed some rolling stock. I've some LGB wagon bases with studs on top (item number 94063) which are the perfect chassis for some wagons I've designed in Stud.io. Both axles are steering, to help the wagon working on tighter curves. So here it is the small gondola , in a bright blue color: And the tan/beige gondola with taller sides: The LGB chassis runs smoothly and really helps the whole train to roll better. Sometimes these things are available (used or new) with an acceptable price, so I get them. A final photo of the consist (fat least for the moment)! Next to come, a passenger and a closed freight wagon with sliding doors (let's see who comes first). I'll try it on the garden railway soon and give some feedbacks (for now only some pretty satisfactory tests were conducted on homemade ramps) I hope you like it!!! Ciao! Davide