Search the Community
Showing results for tags 'Car'.
Found 718 results
-
Sharing my MOC 1948 MG TC Racing Green. The build is meant for a series of my modular building MOC 6-studs wide vehicles, this time round for the Pet Shop townhouse. :) Hope you guys like the it! Reference photo of MG TC Racing taken from ClassicarGarage/Marc Vorgers Check out my other MOC vehicles for modular building: MOC Volkswagon Beetle Type 1 for Pet Shop: http://www.eurobricks.com/forum/index.php?/forums/topic/141253-moc-volkswagon-beetle-type-1/ MOD Cadillac v16 Convertible for Palace Cinema: http://www.eurobricks.com/forum/index.php?/forums/topic/121161-moc-1938-cadillac-v16-convertible/ MOC A4 Checker Cab for Cafe corner: http://www.eurobricks.com/forum/index.php?/forums/topic/123511-moc-1950-a4-checker-cab/ MOC Ford Thunderbird (First Generation) for Parisan Restaurant: http://www.eurobricks.com/forum/index.php?/forums/topic/143150-moc-1955-ford-thunderbird-first-generation/ MOC Volkswagon Camper Van for Detective Office: http://www.eurobricks.com/forum/index.php?/forums/topic/144105-moc-volkswagen-type-2-camper-van/
-

[WIP] 1:6 Tommy kaira ZZII, finished but still to build
hexgraphica posted a topic in LEGO Technic, Mindstorms, Model Team and Scale Modeling
Hi everyone, this is my long term build: the Tommy kaira ZZII. My favourite car ever; maybe you remember it from Gran Turismo because of its power to weight ratio, its handling or its looks, but it actually exists (in 1 prototype). This build aims to be fully functional, with mechanical components replicated as close as possible: suspensions layout, chassis, engine (not a proper one because of size), exhaust, steering... A chat with designer Kaira helped figure out the rear suspensions layout, while the rest of the underpinnings was understood thanks to the few chassis images on the internet. It's quite expensive to build so it'll take a long time, mainly because I've never went shopping for bricks on the internet before and I need to figure every possible way to keep the price down. The wheels are custom modeled but actually I'm going to fit the 911 GT3 RS ones to it. Images of the real thing: https://www.facebook.com/media/set/?vanity=hg.hexgraphica&set=a.3702758483104313 Pics of the build: -
transparent.thumb.png.64c75cc99e499bf757c13576b785e380.png)
[MOC] Reversible Robot Car - remote controlled
BrickDesignerNL posted a topic in LEGO Technic, Mindstorms, Model Team and Scale Modeling
This is my first creation with the Robot Inventor set, 51515-1 , created in stud.io using LDraw parts as custom parts. I hope you like it and it inspires you to build. The PDF building instructions and part list are available at Rebrickable for free. I haven't build it myself because I do not own the set, but greg10 did and posted a photo. In LEGO Studio the motor cables are not available so; I recommend to use the 49283 Wire Clip with Axle Hole (also available in the set) to manage them so that they will not end up in the wheels. -
After my 2 pick-up alternates, I returned to set 10265 twice more but this time to create 2 vehicles heavily inspired by iconic and classic sportscars from the 1960's in which Ford also played a key role, the GT40 and the Shelby Cobra which both fit perfectly with the 1967 Mustang. First the GT40 famous for winning Lemans. The GT40 was first built in England, but the later version in the US. GT04 main by Nathanael Kuipers, on Flickr The model features working steering wheel, opening doors, and engine cover with an engine that can be removed and displayed separately. GT04 open by Nathanael Kuipers, on Flickr Next is the Cobra Roadster, also a car that originated in the UK, but which Shelby with the help of Ford imported to the US. There it was equipped with a much larger engine that also required other changes to the chassis and suspension. I built this specific model for the TLCB Lock-down competition Cobra Roadster by Nathanael Kuipers, on Flickr This was a tricky model to render in bricks due to all its curves. Cobra Roadster rear by Nathanael Kuipers, on Flickr As with the GT40, this model features a working steering wheel and opening doors. Both front and rear open too. Cobra Roadster open by Nathanael Kuipers, on Flickr If you're interested to read more about the development or would like to see more pictures of either vehicle, please consider to have a look at my website NKubate.com. Thanks for looking!
-
Hey all, I just wanted to share a new Lego creation that I just finished up, after a year of working on it. It's based on the Borderlands video game series and I'm hoping long term fans will enjoy it! Anyone wanting to see more, including 360 video and free instructions can check out my website or instagram profile. Thanks! www.HansenBricks.com https://www.instagram.com/hansen_bricks/
-
I built 2 pickup alternates from Creator Expert sets. The first one is from the 10265 Mustang set, and to keep within the theme and time period I decided to go for a Ford F100 from 1970. The model includes steering by HoG, opening bonnet, doors and tailgate, a detailed interior and engine. Once done I thought why not try to build a pickup model from the 10252 Volkswagen Beetle too? So that's just what I did with this vintage American pickup truck somewhere from the 1930's. It has similar features as the 10265 alternate except for the steering function, which was not possible. Some pictures: Pickup trucks from 10252 and 10265 by Nathanael Kuipers, on Flickr 10265 Pickup Truck by Nathanael Kuipers, on Flickr Pickup Truck guts by Nathanael Kuipers, on Flickr 10252 Vintage pickup truck by Nathanael Kuipers, on Flickr 10252 Pickup truck rear by Nathanael Kuipers, on Flickr More information and pictures for model 10252 and 10265 at NKubate.com. In case you want to build your own copy building instructions are available at Rebrickable.com
-
Merry Christmas to all of you in this weird year, i hope all of you stay health and safety! Well, i hope you enjoy this cars....or at least you get some smiles.... As usual questions, and criticims are wellcome.Like past year im make some cars for some minifigs. This one is a litle "bizarre", but no one saids that greek goddes can,t be badass :P I like this minifig, like her "ugly" face, so i made this, it´s old schooll, and was nice go back to basics... This rally car is inspired by the iconic Renault 5 copa turbo, so i make it 5/4/6 wider to try to chatch the spirit.... This is the last car i made this year ( 2 days ago......yeah im very lazy.....) im looking at my minifigs collections, see this cowboy girl and boom.....big jeep/bronco 4x4 off road car...horns (i wish i have bigger horns) and patriot pattern tiles... Once again Merry xmass, and happy (couldn´t be worst.....) new year.
-

Fastest Lego RC Ever?
1nxtmonster posted a topic in LEGO Technic, Mindstorms, Model Team and Scale Modeling
I put together a super-fast mini rc chassis. It has buggy motor geared up 20:16 for drive, and servo for steering. Lipo and v2 receiver provide power. It goes a measured 17.5 KPH (11 mph). So I was wondering if anyone built anything faster. Video: -
Hello Knight Rider and Speed Champions fans, KITT (Knight Industries Two Thousand) from the original TV series Knight Rider is one of the most famous fictional cars. It is a modified 1982 Pontiac Trans Am which is an artificially intelligent electronic computer module in the body of a highly advanced, very mobile, robotic automobile. It is a studless build in the original, 6 studs wide Speed Champions style and fits perfectly to the new City style cars too. Building instructions are available here: https://rebrickable.com/mocs/MOC-52083/_TLG_/kitt-knight-rider/ More details: I wanted to create a sleek model which is as accurate as possible in this small scale. I minimized the use of stickers to keep the flexibility of the used parts in further builds, and the last picture shows the car without any stickers. The model has space for one minifigure. The Michael Knight figure on the main picture is from the set 71286. One of the most challenging details was the front with the iconic red scanner bar and the rectangular white headlights. I made lots of versions and I think the actual one with some tricky build techniques is the best one. Simple black stickers were added to the side of the clear transparent elements on the sides to make visible the headlights only on the front side. The model contains lots of details: the circular fuel cap on the left side, the orange one and the red one turn signal lights on the sides, the side-view mirrors, the convertible roof, the small rear wing and the blue vehicle registration plate on the rear to which a custom sticker had been added. The steering wheel is modeled too, and three stickers are added to the dashboard to recreate some of its iconic elements. The wheels are built too and on my physical model the white circles between the wheel covers and the tires are made of a Lego rubber belt. Thanks for visiting, _TLG_ KITT - Knight Rider - INSTRUCTIONS by László Torma, on Flickr KITT - Knight Rider - INSTRUCTIONS by László Torma, on Flickr KITT - Knight Rider - INSTRUCTIONS by László Torma, on Flickr KITT - Knight Rider - INSTRUCTIONS by László Torma, on Flickr KITT - Knight Rider - INSTRUCTIONS by László Torma, on Flickr KITT - Knight Rider - INSTRUCTIONS by László Torma, on Flickr KITT - Knight Rider - INSTRUCTIONS by László Torma, on Flickr
-
2 speed automatic car - Ramp Test
TechnicBrickPower posted a topic in LEGO Technic, Mindstorms, Model Team and Scale Modeling
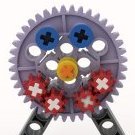
My 2 speed automatic gearbox is put to the test by incorporating it into a 2 speed automatic car. This gearbox implements a number of design principles aimed at improving the gearbox performance - namely of placing the torque detector on a separate path to the main gearing power path to reduce torque and power losses in the gearbox, and using gear disengagement to switch gears instead of gear engagement. A simple derivation is presented of the physics involved in driving up a ramp in order to determine the amount of additional torque required at the motor output to be able to overcome the gravity and the corresponding potential energy. The torque of a large power function motor is measured by measuring the output axle speed using a laser tachometer and relating that to the linear torque/speed relationship of the motor. These measurements are demonstrated for the car without any loading and with simple horizontal motion. Finally the car is put to the test by attempting to drive up a 40 degree ramp. -

[MOC] Chevrolet K10 Silverado 1985 Update
Michael217 posted a topic in LEGO Technic, Mindstorms, Model Team and Scale Modeling
Welcome to my garage LEGO!!! Hello! My name is Michael. I'm a Builder from Russia, I love muscle cars! Chevrolet K10 Silverado 1985 Description: - 2 L motor for drive - Servo motor for steering and steering wheel - 1 Small power supply ( Hot swap ) - Counterfeit engine under the hood (connected to motors) - Detailed interior - Doors, hood and trunk open - Swap body -4x4 Instagram: https://www.instagram.com/lego_muscle_garage/ Join my group in VK: https://vk.com/legomusclegarage All photos on the link: https://bricksafe.com/pages/Michael217/chevrolet-k10-silverado-1985-update Trailer: - Platform lift - Working ramps - Retractable front wheel -
Hello everyone, A few months ago I stumbled upon some digital renderings made by Reddit user u/brxstr of a Back-to-the-Future DMC DeLorean, which looked fantastic. He/she had (has?) the Stud.io file available on Rebrickable.com, so I downloaded it and planned to build it. In doing my due diligence I found out that the model was originally designed by user Troelskf on Brickshelf, so I want to make sure (s)he gets credit as well. I ended up redoing large parts of the design for several reasons: Part availability and cost. Several parts were very expensive (the F40 windscreen for example) so I came up with alternative solutions for those. Stability and Buildability. As the design has never been built IRL, certain parts of the design looked great in Stud.io, but did not work in the brick. For example, the click hinges for the shaping on the back were originally positioned right in between two clicks, which meant there was an ugly gap. The doors were so flimsy in their original design, they would fall apart when touched lightly. Operability. The doors were not opening in the original design, as there was no tolerance for the swing movement (they looked great opened and closed, but would have to be removed and reassembled to change them from opened to closed. The lid for Mr Fusion could not be opened for similar reasons. Improved looks. I completely redesigned the dashboard, adding more and more detailed instrumentation. I changed the gear lever and created a different flux capacitor design. I modified the hose work around the engine, and redesigned the back section to make it look more like the BttF version, including custom license plate. Generating instructions. The original file was a purely digital design, with no consideration for building the set with real bricks. I spent many hours redesigning the build sequence and creating detailed, step by step instructions. They are almost complete (Isn't it wonderful that if you move a part from one step to another in Stud.io, it decides to undo all the call-outs in the instructions which in turn leads to page layouts resetting?). I still have one change to make but then the 300+ page instructions are ready. Here is the final product. Hope you like it. More pictures in my Flickr album (click on any one of the images to get there). Total cost was ~$200 (US), but I had most of the common parts on hand. Would likely be closer to $300 if all 1600+ parts had to be purchased.
-
Minifig scale, I wish I had more chrome but it is what it is. The piece it all stemmed from is 85940 and then the rest of the car just sort of worked itself out. I actually started making a random car stemming from this piece and then by accident discovered that there was one that had the exact same headlight configuration so I continued on with the 1961 Chrysler New Yorker. Lego 1961 Chrysler New Yorker by legomanijak, on Flickr Lego 1961 Chrysler New Yorker by legomanijak, on Flickr Lego 1961 Chrysler New Yorker by legomanijak, on Flickr Lego 1961 Chrysler New Yorker by legomanijak, on Flickr
-

[WIP] 40+ km/h racer - need your help!
TechnicSummse posted a topic in LEGO Technic, Mindstorms, Model Team and Scale Modeling
[WIP] 40+ km/h lego car Since i like to see some ideas and open discussions, i decided to make this project public. So lets start with the current progress: A few pictures of the first tries, with the following specs: - 4 motors, gearing 24:8 from low-speed-otput - 1 PF-battery-box, attached to an old 9V switch, controlling 1 of the 4 buggy motors. Switch is controlled by a micromotor powered with the auxilary output of the rc unit. - 3 motors powered with the RC unit - total weight (without speed computer, to stay below the magic number :D) -> 991g (1012g with the computer) 4th motor is used as a booster, activated with the auxiliary padels, once the car reached like 15 km/h Fresh video, done 1 hour ago ;) (38,7 km/h) -> -
Martin, Aston Martin. Kind of a tribute to the late Sir Sean Connery, the car he made famous or was it the other way around. Minifig scale, the colour is not the best but even Lego won't do it properly. Lego Aston Martin DB5 by legomanijak, on Flickr Lego Aston Martin DB5 by legomanijak, on Flickr Lego Aston Martin DB5 by legomanijak, on Flickr
-
Once upon a time, there were three "Lego" girls who went to the police academy... This MOC depicts Townsend Agency from the hit 1970s television series, Charlie's Angels (specifically season 1). The Angels' 3 iconic Ford cars — the Mustang II Cobra II, Mustang II Ghia and Pinto Runabout — are parked outside the building. Also included are 4 minifigures, one for each Angel (Sabrina, Jill & Kelly) and their trusty co-worker, Bosley. The Townsend Agency building can be either displayed as a brick façade or folded in to form the office interior. There are numerous little details, such as the speakerphone from which the unseen Charlie's voice emanates. Additionally, the office space is scattered with objects pertaining to many season 1 episodes. If you like it, please support it on Lego Ideas so it might become an official Lego set. Hope you enjoy! Support on LEGO Ideas
-
A car I made about 4 years ago and was patiently waiting for all the necessary parts to be produced in Dark green. That time has not yet arrived unfortunately so here it is in red. Lego Jaguar XKSS by legomanijak, on Flickr Lego Jaguar XKSS by legomanijak, on Flickr Lego Jaguar XKSS by legomanijak, on Flickr
-
[MOC] Chevrolet K10 Silverado 1985 [2020]
Michael217 posted a topic in LEGO Technic, Mindstorms, Model Team and Scale Modeling
Welcome to my garage LEGO!!! Hello! My name is Michael. I'm a Builder from Russia, I love muscle cars! But this time I have prepared something special! Meet the Chevrolet K10 Silverado!!! Description: - 2 L motor for drive - Servo motor for steering and steering wheel - 1 Small power supply ( Hot swap ) - Counterfeit engine under the hood (connected to motors) - Detailed interior - Doors, hood and trunk open - Swap body -4x4 Instagram: https://www.instagram.com/lego_muscle_garage/ Join my group in VK: https://vk.com/legomusclegarage All photos on the link: https://bricksafe.com/pages/Michael217/chevrolet-k10-silverado-1985 For the first time I used the construction of the chassis separately from the body, that is, the body can be easily removed and any other body can be built on the chassis. -
The colour combination was obviously decided by the black fender piece 6255875 which will probably never exist in any other colour. Thankfully I had the necessary dark red parts to recreate the iconic colour scheme of the car. Lego Citroën 2CV Charleston by legomanijak, on Flickr Lego Citroën 2CV Charleston by legomanijak, on Flickr Lego Citroën 2CV Charleston by legomanijak, on Flickr
-
2 4 wide rally cars. I used my custom bottom plates so it can fit a driver easelly.
-
Putting an automatic 2 speed gearbox in a car
TechnicBrickPower posted a topic in LEGO Technic, Mindstorms, Model Team and Scale Modeling
This video is about putting a 2 speed automatic gearbox in a test car and seeing if it will go up a steep ramp. I am not a car designer so very minimal detailing. -
It's been four years since the last classic European car graced the CREATOR range, and I said then I'd be delighted to see more of them. Since then we've seen the handsome Mustang and the sleek Aston Martin DB5 - technically a European classic car but I haven't counted that one! The range's latest offering, the Fiat Nuova 500 ('Cinquecento'), fits neatly into the category of small cute classics previously epitomised by 2014's 10242 Mini Cooper and 2016's 10252 VW Beetle. I was delighted to see the widespread use of a rarer colour (dark azure) in the Beetle; now Bright Light Yellow takes centre stage for the Italian classic. The Fiat 'Nuova' 500 was launched in 1957 as a successor to the 500 Topolino and was designed as an inexpensive, practical city car with a rear-mounted engine following the style of the successful Beetle. Its 479 cc engine boasted a stunning 13 horsepower (my lawnmower is 430 cc). Just short of 4 million were produced until the model was succeeded by the Fiat 126 in 1975. Earlier models featured rear-hinged 'suicide' doors; these were replaced with conventional front-hinged doors with the release of the 500F in 1965. Review: 10271 CREATOR Fiat Nuova 500 Parts: 960 Price: £74.99 | $89.99 | €79,99 | AU$139.99 Like the Beetle and Mini, the LEGO Fiat no steering, but aims at a realistic body for display with authentic features. Coming in at the same price as the VW Beetle (in the UK; the latter is pricier in most regions), the Fiat consists of over 200 fewer parts. Let's see if that price hike is worth it. Box I confess that at first glance at the box i thought this set was ordinary LEGO yellow, and it was only in looking at the little painting on the box that I noticed the paler tones of Bright Light Yellow - it's particularly noticeable when you compare to the yellow round tile on the artist's palette. The box art mimics approximately the scene of the painting, with the car posed attractively in front of Rome's iconic Flavian Amphitheatre, or Colosseum. I was disappointed not to see a tiny easel in the painting. Some lens flare adds sparkle. Cobbled streets abound. The box rear shows off the car's attractive rump, along with the set's other features which exceed the bounds of their respective insets. The car stands out beautifully in the otherwise nondescript and unidentified back street; a pronounced sepia filter provides a warm which contrasts but complements the dark blue of the CREATOR Expert range box trim. Sadly, thumb tabs are the designated means of opening - disappointing for an adult-oriented set such as this. I am pleased to see some schematics along with real set reference images on the box top: This saves me the job of sourcing my own reference images! They've even produced a LEGO schematic. The box contains some nine polybags - three modules with three bags each, the instructions, and a separately-packaged fabric part, which you can see here. Instructions The manual comes in a separate polybag which also contains the sticker sheet. There's no cardboard backing but the wrapping has in my case done a good job of preserving the booklet. I love this! The square manual evokes an old Polaroid photograph, and if that weren't obvious enough there's a rotated panel within the picture like a photo within a photo. The faded colours and dress provide the perfect 60s vibe and (even though I'm not that old) have me pining for family holidays long-since passed. Interestingly the car featured in the picture is an older model with rear-hinged doors. I think this is the first time I've encountered a LEGO instruction manual that doesn't feature the set on the cover. A downside to the cute square booklet is that it doesn't stay open, and I wasn't about to go breaking the perfect-bound spine just for the sake of some photos. The instructions are clear against a duck-egg blue background, with suitable callouts, and extra guidance for the few tricky bits. Some four double-pages at the front provide some interesting history into the car and the FIAT company. I'm a big fan of these educational instructions - what a fabulous way to preserve our cultural heritage. Also in the instruction pack is one of the prettiest sticker sheets I've ever encountered. The decals for the car are reasonably easy to apply, though the smaller square ones all go onto curved parts. They are well colour-matched. The 5x5 square painting is gorgeous. As is customary, a variety of nationalities are featured in the car registrations. The Danish (DK) and German (PN) plates both feature the set number formatted to a realistic registration number (although in Denmark, 10.xxx numbers were for motorcycles I believe). PN is not an obscure region of Germany but instead refers to the set designer Pierre Normandin. The Italian plate is worthy of note. 'TO' is the area code for Turin (Torino; the 'T' in FIAT and the firm's city of origin); 'F01965' can only refer to the 500F model which was released in 1965 and was the first to feature front-hinged doors, as does the LEGO version. Parts The three modules' parts are shown in the thumbnails below: click the pictures to see larger versions. I didn't identify any new moulds in this collection, but the headline is the shear number of parts appearing for the first time in bright light yellow. This colour has been in the ascendency for a few years, featuring for example as panels and bricks in Friends sets, or as the secondary colour of the new livery of the CITY fire sets, but I have not previously encountered such a fine spread. This extends too to the SNOT parts; there are SNOT brackets and bricks of various conformations all in BLY - contrast the Beetle whose extensive SNOT pieces were for most part grey. Otherwise, the 10x4x1 windscreen and the 4x2 2/3x1 trans-clear curved bricks are found only in the Old Trafford set, and there are three (one spare) 1x1 round tiles with a lovely FIAT logo - see later. The four medium dark flesh arms-with-pins in the centre photo took me a while to identify; they are originally Nexo Knight parts found more recently as ice cream cone limbs. Build I won't go through this exhaustively; instead I'll just try to give you a feel for the build and highlight some interesting bits. We join here fairly early in module 1. Of some interest is the construction of the chassis: In the centre are dark grey 2x4 plates with pins on each side, usually used as wheel axles, here connecting to the technic beams on either side. The centre beams are connected to the outer beams and the black 2x2 plates with technic hole via 3L pins. The result is a strong floorpan only a brick high. The underside is reinforced; see here. The rear bumper and lights is attached via SNOT plates, and also unusually with the 2x3 clippy-tile. I remain uncertain of the purpose of the two blue stud-pins on either side of each end of the chassis; they serve no apparent purpose except possibly to help put the axles into the right holes. If that's the case, I can't help but feel a little patronised. Next we build up the rear, at the start of Module 2. You get to see how the wings are attached at a slant using hinge-plates in a technique that will be familiar to anyone who has ever built an X-wing. See here for a part-assembled view. Above these slanted sections, SNOT-attached curved plates help define the car's double-curvature. Note the small 2x2 with corner cutaway, which attaches solely to the single stud of the grey headlight brick you can see mounted on its side - it's next to the turquoise brick if not immediately obvious. I always like headlight bricks used this way. You can also see the gearstick and handbrake, along with the bars to which the chairs will be attached. Up till now the build has been enjoyable, without being especially challenging. It starts to go up a gear at this point. r The dashboard section is a SNOTty conundrum that requires a bit of mental gymnastics to keep oriented correctly. This is made harder by the fact that a sticker needs to applied to one of the inverted 2x2 curved plates, seen here at the base of the dashboard but will face to the rear of the car when mounted - and it will be all too easy to set it upside down. The black block seen here is the fuel tank, which will attach to the visible forward-facing yellow studs of the dashboard section therefore reverting to studs-up. Towards the front are two black 2L pin joiners, the purpose of which is a little mystifying at this point. I (wrongly, as it transpired) assumed they were to attach the headlights. Next come the doors. I've part-deconstructed one here to show how it's made. 1x2 SNOT brackets - regular and inverted - hold some 1x2 clicky-hinges; these attach to 2x1 clicky hinges to produce a half-stud offset to which the contoured door upper is attached, delightfully smooth with curved plates on inverted tiles. Note the 1x1 corner panel brick just in front of the door hinges, and the 1x4 brick-with-slot at the base of the door - these are significant as will be explained later. On the right is the rear window made out of a door panel. The result is slightly asymmetrical, but it's barely noticeable. Moving into Module 3, the front panel is attached to the the inner studs of the 1x2 SNOT bricks, and the two 1x1 grey inverted brackets. You might think this would be a little weak, but the headlights help to keep it attached. Here you can also see that the black pin-joiners have nothing to do with the headlights, which instead will attach to the forward-pointing bars of the black 1x1 round-plates-with-bars (these things) sandwiched between 1x2 round-end plates. Why the round-end plates? And, for that matter, the heel-print tiles? Answer: they allow the wings to attach at a slant. Regular plates or bricks would interfere with the square front ends of the wings. Here, also, the purpose of the black pin-joiner part is made clear: the wings are seven studs long, and the 1x2 curved-top bricks require a 1x2x(4/3) curved brick to fill the gap. This has a protruding plate, and the black cylinders accommodate and also support this. Note the as-yet-unattached wing at the bottom of the picture. The free end of the hinge will be mounted on the black and yellow studs just in from the door hinge, and this reveals the reason for the 1x1 corner panel: it accommodates the rounded pivot of the hinge plate. Kudos to the designer for the problem-solving skills on display here . Finally, the secret of the folding roof is revealed to be more of those mini-frying pan pieces, this time in BLY. They leave a small visible irregularity in the roof edge, but I'm glad they are at least colour-matched. It is then a little tricky to attach the windscreen and the luggage-compartment cover without breaking it, but when it's done, plus wheels and the set's extra bits, we have a finished car. Overall, the build is deceptive. Apart from a few tricky bits, it is smooth and easy to follow, but enjoyable; it is all too easy to miss some wonderful design touches that help recreate the car's curvy outline. I'd rate the difficulty as 'Expert' (harder than Average but not Master or Legendary ) The Complete Set First impression: yup, it's definitely a Fiat 500. I think the LEGO version has the iconic double-curved bodywork down pretty well. I was pleasantly surprised by the slanted front and rear wings, which help to recreate the ovoid shape of the Fiat, and weren't immediately apparent from the box art or my brief look at the promotional pictures before receiving the set. It looks great in Bright Light Yellow which I think was the perfect choice: whilst the car would look stunning in a bright mid-blue tone, or dark blue or green, these have been used recently for CREATOR cars; possibly the only other colour I could see making such an impact here is the very rare Medium Green. The head-on view isn't the car's most interesting angle. The windscreen is perhaps rather obviously too rectangular, a flaw of the medium of course. There should be a curve to the top edge, and the screen of course should bow slightly. The front is nicely contoured, and I like the use of the unicorn horns to mimic the flashing here. I'm not quite so keen on the headlights, which I think might have been better made with inverted domes. You can see I've put on the Italian plated for the Italian car. A three-stud-long tile is used (3x2 at the back) which works well. The curvy rear has I think turned out nicely, helped by the stickers which are a reasonable representation of the vents for the rear engine. I'm not so keen on the flare of the wheel arches form these angles, but they are less obvious from any other viewpoint. Ideally, the lip of the wheel arches should extend all the way round, but no such part exists. You might also notice that the construction differs front to rear: Inverted slopes are used at the rear, but I think the SNOT-mounted cheese wedges at the front give a smoother more circular outline. The contour of the roof toward the rear is a little fussy from the side, with an obvious step between the roof and rear window. I do like the double-curve of the sides, but this comes with slight problems: notice the half-stud gap behind the door handle, caused by the upper bulge being offset, but this improves the front edge of the door, where the cut corner almost perfectly matches the rake of the windscreen. Ideally the top line of the upper curve would be continuous with the curve of the front luggage compartment; it's close, but not quite matched, and interrupted by the windscreen. The tricky curves of the rear have provided a significant challenge, which the designer has worked hard to overcome. The result is mostly successful: The convex engine compartment cover works superbly, and the light clusters look great and are instantly recognisable. The transition from the rear curve to the side is a little awkward: above the light clusters, there are two 45-degree slopes topped by a 33 degree cheese wedge, then moving to the almost-vertical bottom end of the yellow curved brick: the 33 degree cheese looks a little incongruous and I wonder whether another 45 slope would work better. I like the way the 45 slope echoes that of the cut-corner curved slope on the side, but below this the curved end of the rear wing ends a little messily. I can't suggest how to improve this though, and I am being super-picky here: the overall result is lovely. The birds-eye view really emphasises the car's ovoid outline. From here almost everything is smooth, and I hope you agree that the slanted wings are a triumph. I also like the minifigure skates as door handles. Here's a real one, in a similar colour, for comparison: The LEGO version has managed to reproduce the double-curved body sides pretty well, with only the step at the sides of the windscreen interrupting the curves. Missing are the tiny wing indicator lights, which i believe were standard on the 500F (correct me if I'm wrong), and the door mirror, which does not appear to have been mandatory and may even be a later addition. The lack of door mirrors does make the LEGO car look a little odd, conditioned as I am to seeing them on all cars these days. Features The luggage compartment cover lifts to a maximum of about 45 degrees to reveal a poky space taken up almost entirely by the fuel tank and spare wheel. No room for picnic baskets in this car. On the plus side, the spare wheel is the same size as the other wheels, unlike the Beetle's. I've switched to the German plates for this section. The inset shows a close-up of the 1x1 round FIAT tile, which is pretty and much nicer than the VW equivalent. You might notice here a slight quirk of the construction: the front panel sits half a plate height proud of the main body; the 1x8 tile on the top therefore half a plate behind. The latter lines up perfectly with the compartment cover when closed. It's barely noticeable, and if anything helps to smooth the contours. I'm not so keen on the black bars to which the headlights are attached, and wish they'd used light bluish grey. The doors open wide - really wide. On the inner aspect of the door is some dark red to match the seats, a telephone handset for the inner door handle, and an antenna to mimic the window handle (not a winder: it rotates the quarterlight window). Recall that I mentioned the 1x4 brick with groove at the bottom of the door: here you can see the reason for its use: it allows the door to close around the protruding pivot of 2x2-2x2 hinge plate at the rear (second panel). Again, an ingenious solution. The front seats flip forward, as you can see, using the ice cream cone arm pieces. True to life, the dashboard is rather Spartan body-coloured painted metal, and the steering column features an indicator lever and a single speedometer. You may just be able to make out some cheese wedges under the steering column to represent pedals. Compared to the real thing, the LEGO version is reasonably accurate. There's even a white round-end plate behind the speedometer, which would a more impressive nod to accuracy were the steering wheel also white. The wheel should probably be larger, but having seen the problem of the oversized steering wheel in the Mini, I think too small is better than too big. I've taken the roof off to give a better view of the interior. The decal does a good job of imitating the real dashboard switches, though there should be one more and some indicator lights. Here too you can admire the handbrake and gearstick, the latter crudely but effectively realised from a flick-fire pin in a ball joint. There's a surprising amount of space for such a dinky car; you could even sit two adults in the back, provided they have short legs and don't mind getting intimate. I'm not sure how authentic the white tops of the seats are; I can't find a reference image to a car which has them, except for this model. The rear engine is also given a bit of detail. True to life the cover opens downwards; the cover is perhaps a little thicker than necessary, but the effect when closed is pleasing. Here the engine looks like a rather randomly thrown-together collection of parts, but when compared to the reference image below, you can see that the designer has gone to some effort to make it accurate: Bonus points for the gold flower piece to match the oil filler cap! Finally we should look at the accessories. There's a sturdy travel case, emblazoned with national stickers of Switzerland, Sweden, Italy, Denmark, Poland, France, Germany, and Somewhere; there's a tall easel on which can be mounted the really quite beautiful artwork on a 5x5 grey tile. The accompanying artist's palette sports four paint colours only one of which (red) features in the painting: the yellow is regular yellow. Only the palette and brush fit in the trunk, requiring the easel to be stowed in the passenger footwell and poking out of the roof. The automotive masterpiece, meanwhile, must be thrown unceremoniously onto the back seat like grocery shopping or children. The trunk mounts easily onto the rear luggage rack, where the combination of reddish brown and MDF colours complement nicely the light yellow of the car. Comparison So how do the European small cars compare? Bear in mind that while the Beetle and Fiat and built at approximately the same scale (the VW Beetle is a metre longer than the 500), the Mini should be the same size as the Fiat. I now notice that somebody, probably a small child, has tipped both the Fiat's seats forward. I'm really quite positive about the Fiat, but I can't help feeling that it looks a little bland compared to its older siblings. Perhaps it is because the front is relatively featureless. The (intentional and authentic) lack of door mirrors is particularly noticeable here. All three look amazing from the rear. The Mini again has an unfair size advantage, and I am perhaps not doing the Fiat justice by showing it straight on where its narrow profile makes it seem that much smaller. However you feel, I think you will agree that the three make a great collection. Conclusion I really like this car. The slanted wings and double-curved bodywork help to capture the essence of this automotive classic, working well despite the constraints of medium of LEGO. The bright light yellow livery helps emphasise the car's playful nature, whilst bringing yet another peripheral colour to the LEGO mainstream. Realistic features abound and add to the display potential, and it will sit happily on the shelf by itself or in the illustrious company of any of the CREATOR Expert cars, including the Mustang and Aston Martin. The selection of BLY pieces will delight any parts-collector or MOCer, especially given the array of SNOT pieces. The build process is satisfying, and in the latter stages both entertaining and somewhat challenging, with interesting techniques from which I've certainly learned a thing or two. And now I find I have a conundrum. I reviewed the Beetle in 2016 and was quite critical; it is for the most part a great set, and an interesting build. It is currently still available, and in the UK is the same price as the Fiat, despite some 200 more parts; it is perhaps more interesting to look at, and not just because it is physically larger. On paper, the Beetle is the better set of the two. However, there is something about it which didn't sit right with me, and still doesn't: mostly it is the steep rake of the windscreen which resembled more a 2CV than a Beetle, but also the chunkiness of the wheels and wheel arches always felt a bit off to me The Fiat doesn't really suffer any of these issues. Aside from a few minor cosmetic substitutions, I don't think I would change anything about the set as it is, with the currently available parts, and I don't have any major criticisms of this set. And yet, if you asked me which of the two you should spend your hard-earned £75 on, I would have to say ... the Beetle. If you can afford it, get both. The Fiat is a better rendition of the original car, and has a wonderful informative instruction manual usually the preserve of Ideas or Architecture sets. Design 9 There's very little I would have done differently. Build 8 A little mundane at the start, but gets interesting from Module 2 onwards, with some mind-screwing SNOT work and some fascinating solutions to tricky problems. Parts 8 Lots of useful SNOT parts, and a ton of parts that are new to Bright Light Yellow. If you need BLY, get this! Play/Display 8 The car's small size and narrow profile might make it look less imposing compared to the Mini and Beetle, but its colour and curviness do make it stand out. Value 7 Parts per pound, it is still great value, although perhaps not compared to the Beetle. Whether this difference is due to licensing (TLG has a long history of licensed VW products) or the extended manual, I don't know. If the latter, I will just quote myself: Overall 80% My score 9/10 I love this set. Fiat or Beetle? Follow your heart. Oh, and TLG? More classic cars please! Rufus's 10252 Beetle Review Fiat 500 on Wikipedia
-
[MOC] MUSCLE CAR Garage Russia SPB [2019]
Michael217 posted a topic in LEGO Technic, Mindstorms, Model Team and Scale Modeling
Welcome to my garage LEGO!!! Hello! My name is Michael. I'm a Builder from Russia, I love muscle cars! All three cars produced in 2019) Instagram: https://www.instagram.com/lego_muscle_garage/ Join my group in VK: https://vk.com/legomusclegarage Dodge charger 1970 Description: -XL7.2 motor for drive, 375 Horsepower under the hood! -Servo motor for steering and steering wheel -Small power supply -Detailed interior All photos on the link: https://bricksafe.com/pages/Michael217/dodge-charger-1970 Chevrolet Camaro 1975 Description: -L 5.7 motor for drive, 300 horses!) -Servo motor for steering and steering wheel -Small power supply -Detailed interior All photos on the link: https://bricksafe.com/pages/Michael217/chevrolet-camaro-1975 Ford Mustang 2005 NFS Most Wanted 2005!!! Description: -L 5.4 motor for drive, 500 hell's horses!!! -Servo motor for steering and steering wheel -Small power supply -Detailed interior All photos on the link: https://bricksafe.com/pages/Michael217/ford-mustang-2005 Enjoy your viewing! Rate, comment! Thanks!) -

AWD 1:10 scale car
jorgeopesi posted a topic in LEGO Technic, Mindstorms, Model Team and Scale Modeling
I can finally do an AWD 1:10 scale car with a realistic width between wheels, less than 24 studs, thank to the land rover wheels. I always wanted to do these cars but it was impossible to achieve the right width without use the old 8880 system, now I have a few cars to build that I had discarded, let´s see what I am able to do, of course with the old style bodywork, flex axles and only a few panels. Many years ago using the 8880 system. Now using new wheels. -

[MOC][WIP] Nissan R32 GTR
Gray Gear posted a topic in LEGO Technic, Mindstorms, Model Team and Scale Modeling
Hello guys, I haven't posted anythig here for a while. I have been working on this Nissan R32 GTR even before the Mazda RX-7 was completed. I was scared that I would not be able to accomplish a build worthy of wearing the legendary "Godzilla" name. Thats why I did not post any WIP Pictures earlier. But now I feel like the build has progressed enough that quitting is out of the question, and any obstacles have been cleared already. I am fairly pleased with the build now, but it was a long way to get here. I hope you like it too. Yes, I can get these wheels I used for the taillights in transparent red as well, dont underestimate the power of the dark side ;) The Car has an AWD system, hooked up to a 6-Speed manual transmission powered by the RB26 with a single turbo conversion. Sorry for the bad quality pics, black is really hard to photograph. I am looking forward to your comments, improvement ideas and whatever else in the comments. Stay safe out there. Gray Gear