Search the Community
Showing results for tags 'Architecture'.
Found 375 results
-
Vodovodni stolp (in Slovene language) or Water tower is one of the most prominent buildings in my hometown Kranj, Slovenia. Its location is 46°14'54.1"N 14°21'35.6"E. When it was build, it was positioned well outside the borders of the town, however, as the town grew, a new neighbourhood built around the tower was renamed after it. The Water tower was designed by Jan Vladimir Hrasky, (1857–1939), a Chech engineer, hydrologist and builder who was also a lecturer at the Prague's Technical Faculty. The building of the Water tower began in 1908, and finished 3 years in 1911. When the tower was built, it was considered as one of the most impressive and magnificent water supply buildings in the area. It provided water supply for the town of Kranj and 15 neighbouring villages. This is one of the oldest picture of the tower I could find online (unknown author, source). The Water tower is 34 m high, and is today one of the most prominent attractions in Kranj. At the top of the tower is an octagonal two-chamber water reservoir with a capacity of 250 m3. The tower was used to provide water pressure for facilities in Kranj and its surroundings. Today, the Water tower is still functional and is part of the water supply network. It provides pressure to the surrounding buildings and serves as a discharger for equalizing water pressure. Today, the Water tower presents a specific cultural monument of local importance, mostly due to its authenticity, age, historical value, technical qualities, and conservations. In addition, when the town was expanded to the north, the newly built neighbourhood was named after its hallmark. Since 2006 the tower is opened to the general public one day a year, and the visitors can enjoy the view from the observational deck. The picture of the tower taken by Panoramio user Brkne in 2008. It still looks as it did in the black and white picture, however, the town has expanded far around the tower. The LEGO model I made is about 20 cm in height and has 411 parts. A view from the side reveals a symmetrical shape of the tower. The top with the water reservoir and an observational deck was the most challenging part. Specifically, I had a problem building the safety fence. I chose a simple string with studs, and the final solution was the third one I tried. I'm not completely satisfied (it doesn't look safe enough for potential visitors), but I cannot think of a better one.
-
Hello all! I live in Bergen on the Norwegian west coast. It's the second largest city in Norway, with about 270,000 inhabitants (yes, really, it's tiny...) and, since I'm not originally from here and not too biased, I think I can say that it's certainly one of the most, if not the most beautiful city we have up here. At least when the sun is shining, which sadly isn't too often - Bergen has a reputation for being the rain capital of Norway... Anyway - the arguably most famous landmark in Bergen is Bryggen (Norwegian for The Wharf), which is - I quote from Wikipedia - "a series of Hanseatic commercial buildings lining the eastern side of the fjord coming into Bergen. Bryggen has since 1979 been on the UNESCO list for World Cultural Heritage sites. (...) Today, Bryggen houses tourist, souvenir, and gift shops, in addition to restaurants, pubs and museums." I first attempted to build a version of Bryggen in MLCad a couple of years ago, but gave up after I discovered that the 40 or so 1x1 dark green plates I had used didn't actually exist in any set. They still don't, and although they probably will in the near future I didn't know that when I heard about the Architecture contest at the Eurobricks Event 2014. So for this new version - which I eventually managed to finish for the contest - I worked my way around the problem. There's still a fair few rare bricks in it, but nothing that I couldn't get hold of. Typically, the 1x1 trans-clear tiles were very rare when I built this - but they're just about to be released in larger quantities in the Trevi Fountain set... I wanted to avoid making the buildings too similar, so I built them one by one, from left to right, using mainly this Wikipedia picture as my reference, trying to pick the most easily recognisable details from each building and translate them into microscale. I started with all the facades, then filled them out to four studs deep, and finished the base last. And then I had the Norwegian Certified LEGO Professional Matija Puzar engrave a tile for me, to make the MOC look as much like an official set as possible. As I don't normally build this small, this whole thing was a challenge, but a fun one, and I'm very happy with it. It didn't do particularly well at the event, but I had fun making it anyway, and I especially enjoyed moving outside my comfort zone for once. I might just do that more often - which I believe, in general, is an absolute necessity to improve as a builder. Hope you like it - thanks for watching! More pictures in the Flickr set. The finished product along with the picture I used for reference. Some of the details: And, finally, a little presentation I made to go along with it:
-
Eurobricks Event 2014 - Architecture competition pictures
Vincent Kessels posted a topic in LEGO Events and User Groups
Here are the pictures for the Architecture competition. First place Dresden Frauenkirche in Dresden, Germany by Rolli, 28 points Second place Royal Albert Hall in London, United Kingdom by Rufus & Pandora, 19 points Third places Aviva Stadium in Dublin, Ireland by Dfenz, 14 points Berliner Fernsehturm in Berlin, Germany by Skalldyr, 14 points Holmenkollbakken in Oslo, Norway by Cecilie, 14 points For more images see: Holmenkollbakken - architecture scale Forth place Ulm Minster in Ulm, Germany by Holodoc, 8 points Fifth place Gemini Residence in Copenhagen, Denmark by Christian, 5 points Sixth place Cologne Cathedral in Cologne, Germany by Aredhel, 3 points Seventh places Newport Transporter Bridge in Newport, South Wales by Peppermint_M, 2 points Frauenkirche in Munich, Germany by Andrea, 2 points Eight places Hamar Olympic Hall in Hamar, Norway by Quarryman, 1 point Hans Christian Andersen Museum in Odense, Denmark by Chocolatecake, 1 point Evoluon in Eindhoven, Netherlands by Vincent Kessels, 1 point Storebaeltsbroen in Denmark by Morton, 1 point Biological museum in Stockholm, Sweden by Etzel, 1 point Amsterdam Central Station in Amsterdam, Netherlands by Scubacarrot, 1 point Bryggen in Bergen, Norway by L@go, 1 point Vodovodni Stolp in Kranj, Slovenia by Redhead1982, 1 point -
Holmenkollbakken is the most famous ski jump in Norway, and also one of the most famous and visited landmarks and tourist attractions in this country (possibly even the most famous ski jump in the world). It's situated on top of Holmenkollen, which is a hill in Oslo, and it's very close to where I grew up, and I have also recently moved back to this area. From the top of the hill there's a great view over the city of Oslo, and there's also a ski museum underneath the ski jump. The ski jump dates back to 1892, but has been changed/rebuilt 19 times. The last rebuild was in 2011 for the Nordic World Ski Championship. My model is based on this newest edition. For more background story, see wikipedia: http://en.wikipedia....olmenkollbakken This model won me a third prize in the architecture competition at the recently held Eurobricks event in Billund. A big thank you to everyone that voted for it This is actually the third time I have made a ski jump in Lego inspired by Holmenkollbakken, but it's the first time I've tried to be true to the proportions and build it in a proper scale. A couple of pictures of the real ski jump:
-
The Beauties of Hungary: part 2 – Heroes’ square Name: Millenium Monument on Heroes’ Square – Hősök tere, Milleniumi emlékmű Location: Budapest Piece count: 457 The Heroes’ Square is a major square in Budapest. In the centre of the square is the Millennium Monument, which has been finished by 1906 – ten years after the millennial celebration of the Foundation of Hungary. The central element of the monument is a column with Archangel Gabriel atop holding the sacred crown of Hungary in his hands. The base of the column is surrounded by the equestrian statues of the seven leaders of Hungary, with Árpád in the middle. Behind the columns are two colonnades each with seven statues representing great figures of Hungarian history. The list of these figures has been changed several times in the course of time.
-

The Beauties of Hungary: part 3 – Votive Church of Szeged
Yooha posted a topic in Special LEGO Themes
The Beauties of Hungary: part 3 – Votive Church of Szeged Name: Votive Church of Szeged - Szegedi fogadalmi templom Location: Szeged Piece count: 673 The church was built by pledge after the city’s escape from the great flood in 1879. Szeged has been hit by several floods of the Tisza River. Construction began in 1913, but due to the outbreak of the First World War, it was not completed until 1930. Part 1 – University of Debrecen, main building Part 2 – Heroes’ square -
Hello guys! As some of you may know, I am a fellow architecture fan and I do achieve architectural study. So it is somehow following this idea that I made my dream house. I'm just warning you it is going to be lets say not a conventionnal way to present a project. I may precise a Lego project. Architects sometimes use posters to show their realization and for this one I really want you to feel and understand my reflexion. It is somehow part of the realism of the project. There are many thing I don't like in our way we build and think houses. I do believe there is many waste of space. Is that roof section really useful for you? Do you want everyone to see inside your house from the street? Also, one teacher I had make me realize that the first thing you usually see when looking at a house is a big white garage door... Seriously... I won't comment. Residential architecture have always been a chaotic setup, because everybody makes what they want and, of course, because there is some "gaps" in the urbanism rules. Many similar projects have been already realize and I am aware that this situation is more notable here in North America than in Europe. The way us, american, deal with the territory is really different than anywhere else. Density is the key! Okay back to Lego So first you will look at three posters that explains and show the projects and finally you will see more close up of my dream houses. Please enjoy. Comments and suggestions / opinions are always welcome! Poster #1 Poster #2 Render Thank you everyone! Harton
-
A backyard TV store, perhaps from the 80s/90s and not in use anymore. There is a building (that used to be a music store) in my hometown that gave me the inspiration to this model.
-
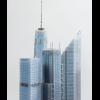
Here's my latest: the twin Petronas Towers in Kuala Lumpur. Roughly 1/650th scale. My favorite feature is the model's skybridge connecting the two towers. I built it as a simply supported slip joint - and it works much like it does on the real building. I can gently push the towers around in different directions and bridge will not come apart.
-

MOC Modular Building - LBGS (Lego Bank of the Golden Scorpion)
niteangel posted a topic in LEGO Town
This is my first time to do an MOC modular building, and it is a chance for me to put my profession into practice in the brick city! (I am working as an architect) There is still a lot of room for improvement and detail refinement, but at least the basic shape is all here. Yes, this is a bank, the Lego Bank of the Golden Scorpion. Finally, the Lego citizens can get their money here for shopping at the Grand Emporium and watching movies at the Palace Cinema! And yes, finally my street is starting to look different than the others! Overall view, the workers are cleaning up the place and preparing to get off work... The main entrance has two doors, left and right, separated by a little pond. The middle fountain is a mushroom jet, and water at the entrance? It is all about feng shui! (in Chinese feng shui, flowing water means money!) The front elevation is decorated with a lot of golden pieces, and the scorpion logo is right there too. It has a golden and silver on its left and right sides respectively, symbolizing trading and monetary matters. Let's talk a look at the first floor. Instead of making the whole floor removable, I retain the front facade of the 1st floor to the G/F, as a little test to see if this section cut is more useful or interesting... G/F . Basic Services (card return, passbook check, ATM, appointment booking...) The ground floor has a small counter for some basic and easy services. A guard is at the door, while you can see the ATM on the left. On the right is a lift to other floors, and it is a bubble lift! (glass lift) Another angle of the floor. A staff is handing a new credit card to the client... Let's have a ride on the lift to the next floor! 1/F Bank Vault The bank vault storing the most valuable things is located on the 1st floor. Today some green money cases are delivered and a staff is watching. Well, sounds like there are enough gold bars to buy the new Lone Ranger Lego sets coming this summer! 2/F Premium / Advance Services The topmost floor is for advance banking services, where you can find a bigger counter (I should put more staff in). The table on the left allows customers to talk to staff on more serious matters like setting up new accounts, insurance policies or getting more information on new saving plans. There are also seats for customers to wait during busy hours. Another angle. The call button of the lift is not on the wall but on a pedestal. This guy at the counter is taking out quite some money from his account! There is nothing on the roof for security reasons. You know people can go to another building from one roof to another in the modular building series, right? It is too easy! So here, there is nothing but a roof with security wire beneath. There is a UPS (uninterrupted power supply) machine but again, it is well secured with alarm system linked to the police station. I guess the crooks cannot get into this bank that easy like in the set 3661! Here is what it is like to be next to the Town Hall! :) Oh, the money transport truck has just arrived! Hope you enjoy it! The bank starts running this Monday! Thanks! -

LEGO special edition set - Show Off Your Design Skills!
johnma1943 posted a topic in General LEGO Discussion
Found all these interesting photos posted by Tom Alphin --- LEGO Architecture Studio 21050 Over 1200 LEGO bricks. Elegant design for LEGO adult fans Guidebook with 272 pages of tips and techniques Build your dream house With the trees Harmony design Sculpture Building Towers Build your own city Bedroom / Furniture With the minifigures design your own castle show off your design skills Perfect for designers, architects and anyone who wants to build their own creations! -
A Bridge rebuilt After gathering dust on my shelf for some time I finally decided to redo my Lego Brooklyn Bridge. I decided the redesign was darmatic enough to warrant it's own topic. If you are interested here is a link to the previous version which I would now merely call a sketch for the new bridge. This project started out of my love for the iconic Bridge. Altough I am from Austria and have not set foot on the actual Brooklyn Bridge (yet) I developed a serious fascination for the iconic landmark after reading the book "The Great Bridge" . After countless passes of revisions on the original brickbuilt model and even more versions of the Bridge in LDD, I finally arrived at what I consider to be the ultimate rendition of New York City's oldest suspensionbridge in a scale that makes it a great model for displaypurposes. I bhave the bridge built in real bricks, but I'm still working on a light-setup that let#s me take prober pictures of the model. But a picture says mor than a thousand words, so without further ado... Some details about the model: Scale: 1/650 Length: 85 studs Height: 13 bricks 2 plates Width: 5 studs Pieces used: ~850 For some more Information you can check out the Cuusoo-page I made for the model: http://lego.cuusoo.com/ideas/view/690 Edit 02/02/2014: Added photo: towerexploded
-
Old Kamensk’s Ironwork Headquarters Styazhkin museum (3) by vir-a-cocha, on Flickr Facts: Architect................ Malakhov M.P. Purpose................ earlier Kamensk’s Ironwork Headquarters nowadays Styazhkin museum Location................ Kamensk-Uralskiy, Russia Style..................... classicism Years................... 1825-1830 History Kamensk is a town in Russia with a population of about 170 thousand people. Its official history begins in 1701, when there was a decree of Peter the Great on the construction of ironworks on the banks of the rivers Kamenka and Iset. October 15, 1701 was issued the first iron. The plant began to supply guns and mortars which for 200 years have participated in the wars with Sweden, Turkey , in the Patriotic War of 1812 and others. From 1825 to 1829 the town's appearance changed drastically . By architect M. Malakhov was reconstructed Kamensk's plant. Two new blast furnaces, the administration building, warehouse and hospital were built. Also it was rebuilt the main temple of the town. On photographs of early 20th -century the administration building of the plant on the background there is a Monastery. Architect Mikhail Pavlovich Malakhov (1781-1842) was born in the province of Chernigov (Ukraine). After graduating from the Academy of Arts in St. Petersburg, was promoted to the architect of the 14th class. Since February 1815 enlisted architect in the state of the Ekaterinburg mountain plants. Malakhov made a significant contribution to the implementation of the general plan of Ekaterinburg. Under his leadership in Yekaterinburg were built the most valuable monuments in the classical style. All his buildings marked by high professional skill, elegance of proportions, clarity of composite solutions, original handwriting, peculiar only to this architect. Model I tried to arrange MOC in the style of a official Architecture series. The building is made in 1:250 scale. The main difficulty was the structure of round rotunda, which relies on short and quadrangular dome. At this scale, the number of colonies was sacrificed to save the recognizable shape of the building. Styazhkin museum (2) by vir-a-cocha, on Flickr Styazhkin museum (1) by vir-a-cocha, on Flickr The modern photograph shows two wings that were in form of covered colonnade. During the Soviet period the spaces between the columns were walled up with brick walls with windows.
-
Yesterday I assembled my 2nd - and last - Architecture set, the Farnsworth House (21009). Three things I thought about my experience: 1 - Assembling those dozens of 1x1 white flat tiles is a PITA, not much of an enjoyment. To makes matter worse, it is impossible to assemble them so that they all become "perfectly aligned". I am a perfectionist and the fact that it is impossible, at least for me, to make them neatly aligned, because they have a certain unavoidable "slack" between them, and by being 1x1 they then can slightly rotate in the stud, does not please my eyes as I was expecting. 2 - So I had an idea to solve the problem. Dunno if this has been talked about before, but one solution would be if Lego would develop a "profiled" flat tile, a 1x2 and/or 1x4 flat tile with a profile on top of it to mimic the design as if that flat tile was like a row of perfectly aligned 1x1 flat tiles (like those bricks that profile a real brick but the profile is in its side, not on top). This would solve the problem of misalignment of rows of 1x1 flat tiles and also would make assembling dozens of tiles much easier because, well, you would have less tiles to deal with. The problem for Lego is that it would decrease a lot the advertised number of pieces of a set like 21009 making it even more difficult to "explain" why it is so expensive. Also, I am not sure it would be possible to profile the top of a flat tile, it could make it too weak. 3 - I am not really happy with this set. After assembling it, I didn't see anything very much special about it. The picture of it in the ads are great but the final product is kind of boring. I will of course keep it and the price I paid for it was very good, $15 below retail (shipping included, no tax!), but it just proves a certain theory that I have that small Lego sets usually look much better in pictures than in real life, with exception of the big ones, the ones with 1000 or more pieces: the big ones look better in real life than in the ad pictures... The ad pictures, by showing them bigger than in real life, fool the eyes.
-
Set Name: Eiffel Tower Set #: 21019 Theme: Architecture Pieces: 321 + 3 spares = 324 pieces (more on that later) Year of Release: 2014 Price at Release: EUR 45/USD ??? INTRODUCTION Today i received my brand new 2014 21019 Eiffel Tower, and i decided to do a review of it.s This brings my LEGO Architecture collection to 20 sets, the only one that i am missing is the 21001 Hancock Center. I was fortunate enough to be in the US at the time of the 21050 Architecture Studio launch so i snatched it instantly. Maybe i will do a review of that also. Anyway, on to the review: THE BOX FRONT: _DSC0827 by adrian.baias, on Flickr BACK: _DSC0829 by adrian.baias, on Flickr SIDE: _DSC0828 by adrian.baias, on Flickr UNBOXING: Enjoy your building experience! (I did): _DSC0830 by adrian.baias, on Flickr Contents: _DSC0831 by adrian.baias, on Flickr The Booklet: _DSC0832 by adrian.baias, on Flickr Being printed in portrait mode, it is a little bit hard to keep open without some help. BUILD: The parts... _DSC0835 by adrian.baias, on Flickr Closeup of the more unusual parts... _DSC0836 by adrian.baias, on Flickr Coincidentally or not, this set has exactly 324 pieces (including the french name plate and the spares), which is the exact height in meters of the real tower. So the construction begins... The base is ready. _DSC0838 by adrian.baias, on Flickr The build is structured into three parts: The base, the median part, and the top: The base and the median part... _DSC0840 by adrian.baias, on Flickr Connected,., _DSC0842 by adrian.baias, on Flickr The top completed... _DSC0843 by adrian.baias, on Flickr And is done. COMPLETED MODEL: _DSC0844 by adrian.baias, on Flickr The completed model looks stunning. Closeup of the base and the nameplate: _DSC0846 by adrian.baias, on Flickr "Aerial" view: _DSC0847 by adrian.baias, on Flickr Another angle: _DSC0848 by adrian.baias, on Flickr And another... _DSC0850 by adrian.baias, on Flickr From the top: _DSC0852 by adrian.baias, on Flickr MODEL ACCURACY: I haven't seen the real thing in person but to me it looks pretty spot on at this size. CONCLUSIONS AND SCORE: Design: 10/10 It couldn't get any closer to the real thing at this size. Build: 9/10 A little repetition, but overall nice building techniques. Parts: 7/10 Good grey/dark grey assortment, but nothing too special aside from a few pieces. Value: I could not give it a value as i'm collecting all of them even if i pay a little more. But at 45 Euros, i think this is in the standard price range for an Architecture set. Overall: 10/10 I'm a little bit subjective here, but i believe is one of the best Architecture sets. Definitely top three for me. It looks great as a display piece and it has the perfect size and proportions. I recommend it heavily. Thank you for reading and i hope i didn't bore you with my first review. Adrian.
-
I have written up a review of this new architecture set at Rebrickable and have plenty of build photos at my Bricksafe page.
-
If you have a good memory, you may remember the Corinthian column I made some time ago. I got a lot of good comments on that one (thank you!), and I wanted to build some more... stuff . I wanted to revisit that magnificent Ancient Greece, with it's buildings. I wanted to give those ruined pieces of art their former glory again. I wanted to build... some more columns. Real Greek ones, this time. Not that modern Roman stuff. If you have a perfect memory, you may remember that I said the Ionic column was hard to do because of its spirals (volutes, if you prefer fancy terms). I did have a go at designing one however, but I began to think the spirals were impossible to do . And if you don't get those right, your column is not right. You can take that quite literally. I made a compromise on the volutes, but had to fight all kinds of structural blabla . If you have a good eyesight, you may have noticed that I'm presenting now an Ionic column nontheless. What happened? Some would call it a miracle, some just inspiration. I found the Indiana Jones whip. It was just perfect. The size, the shape, the extra details, the easy connections, the look and feel. I felt this whip was made for something more than being in every Indiana Jones set. It became my new best friend. Once I had my spiral (the only spirally part in LEGO, I believe), the column flowed onto my LDD screen (and a bit later, on my render screen). At once, all the structural hustle and bustle fell away. At almost the first try, I had something I was completely happy with. A worthy sibling of my Corinthian column. And that's what you see in front of you. Before anyone asks: the column should be buildable in real life. I know the whips aren't available in white, but everything else apart form the One Rings I used, is available in white (now even the croissant!). Furthermore, I believe the column's quite stable. It uses the same technique that I learned from Jamie, in the designer video on the LEGO Creator website . This is my tribute to that video, because it made me want to make columns five years ago. I've come a long way... . So I hope you enjoy this Ionic column in minifig scale, containing 254 bricks. And I looked it up for you: this is the first one in LEGO to appear on the internet. Hope you appreciate it.
-
Hello everyone! I just recieved my 2014 set 21019 Eiffel Tower. I will try do to a review of it in the following days. If not, i will still post some photos of the box, booklet and set as soon as i have the opportunity. I'll be back with either the photos or the full review.
-
Hello The famous Castle Neuschwanstein by King Ludwig II. Next to the experiment of some new hairy trees and stairways, this is my second entry to the MocOlympics 2013. More pictures on flickr and MOCpages. (You can find my entry to the first MO round here. ) I hope you like it. Jonas
-
I recently noticed that, while looking at my copy of set 21002 empire state building, some bricks were cracked. however, the cracks are only visible when the bricks are connected. Has anyone else noticed this problem? With this set or others?
-
Sorry if i have posted this in the wrong category, but I wanted to share my first moc creation published to Lego Cuusoo entitled Modern Modular Furnished Beach Front House. It is a displayable and playable piece meant for adults and children alike, both boys and girls. Please do not let the pink colour put you off; I have proposed this in many different colours including neutrals like grey and white. I designed it with the intention of making this house as flexibly integrative as possible with all types of Lego scenarios. This house is bifold; it can open in the middle on hinges like the Monster Fighter's haunted house, and the roof is removable in 3 parts. It also has originally designed furniture and assessories. I am currently working on the landscaping. A complete set of updated photos are available at the following links: thank you for your interest and your vote!
-
Hello, just finished this small MOC of a 60s style bungalow with garden and pool. It is built of bricks within a steel frame painted in white. https://secure.flickr.com/photos/professor_chaos/sets/72157635754315904/
-
Hello all, There is my LEGO MOC model, Santorini In this 96x96 model, I had put sone iconic buildings of Santorini, such as windmill, church and some white villa. Really thanks for your watching.
-
For the summer L13 contest of the Brickpirate forum into the Architecture section, I choose to reproduce a castle built into the XVIII century : the Haroué Castle situed into Lorraine, France. The real castle The Haroué castle or Haroué Palace is situed into the centre of the Haroué village, south of Nancy. It has been built from 1720 to 1729 on a ancient castle preseving its 4 main towers and the moats. The castle presents interesting characteristics relatied to a year : - 365 windows, - 52 chimneys, - 12 towers (some are included into the building), - 4 bridges over the moats. Today, it is still occupied by the descendants of prince Marc de Beauvau-Craon who was the initial owner. Source Wikipedia (french). More information and nice pictures can be obtained on its website. Some pictures taken from the sky : The main structure is easier to get when the trees are without their limbs : Starting the Architecture version As an introduction, I would only cite Adam Reed Tucker who designed many officiel Architecture sets : The challenge may not seem so obvious: straightforward design and basic LEGO elements, what else could you ask for? However, there are two not so obvious challenges even with a seemingly easy build, namely those of scale and proportion. The aim is then to get the good scale which allows to respect the proportions of a building using LEGO parts and to try to include characteristics details in such a way that the building is immediately identifiable to the people who know it. For tis castle, the starting point are the towers at the corners because, at this scale, it is not possible to use other parts that 2x2 round bricks with a cone on top. This fixes the scale of the MOC as illustrated by this drawing where 2 cm corresponds rougly to 2 studs : At this scale, from the 4 mains characteristics points given above, the chimneys have been sacrified (most of such castle have chimneys), only the 6 outside towers are kept in order to preserve the U form of the castle, the nulber of windows has been reduced but the 4 bridges are present. Finally, as a main decorative element, the huge trees of the forward court allowing to date the representation at the end of spring after rain. MLCAD virtual model. Virtual modelling is well adapted for Architecture MOCs because it alloxs to have a good idea of the final rendering, to have an accurate parts list and to show the buildings steps into a small movie. The real model. It follows accurately the virtual one : I have only modified the portal and added tiles for the description stickers (the writing have been added using photoshop). The pictures below describe the MOC better than my words. More pictures are available by clicking on the small ones : To end, the Architecture like box of this MOC. I hope you will enjoy this french caslte's MOC.
-
Everything except for the houses and vehicles are rather simple, yet effective from my point of view, wish I hope you share with me, over and out.