Search the Community
Showing results for tags '8x8'.
Found 61 results
-

[MOC] Medium 8x8 Scania dump truck
TomasHubik posted a topic in LEGO Technic, Mindstorms, Model Team and Scale Modeling
Hi Guys, I would like to share my 8x8 medium dump truck with you. The target was to create 8x8 dump truck with 4 differencials in compact size with good driving abilities. It drives quite well, but due to large amount of gears, even XL motor have some trubles (wont stop, but you can hear little bit) while steering/climbing, but I'm happy with result, even view could be better. Some info: Propulsion: 8x8 by PF XL Steering: 8x4 by PF Servo (different angle for second axle) 1 Differencial for each axle Dumping by 1 M motor. No suspension, but thanks to flexible body, it can go well over obstacle. Opanable doors I'm sorry for really bad quality pictures, will upload short video soon. What do you think? -

[MOC] Mini 8x8 Trial Truck "TT1"
syclone posted a topic in LEGO Technic, Mindstorms, Model Team and Scale Modeling
Good day! After watching truck trial videos on YouTube I decided to make my own . The digital version was finished one month ago , but I had to buy 8 55976 tires to build it IRL. It was completely designed in LDD , I was afraid to have some weak points , but it resulted being one of my best designs ever done . There have been very small changes - different colors of some parts & improvements on the rear cabin support & front suspension supports. download LDD file Bricksafe The truck can be powered with any studded battery box. The drive is done by worm gears and 8t gears. Thanks to that , even using 1x m-motor for drive it is quite powerful. The steering is done by another m-motor geared down 1:2. The front axles have different steering angle. The weak point is the chain drive which sometimes skips, acting like a clutch gear. The IR receiver is completely hidden inside. The rear suspension is pendular, and both rear axles are linked and supported by 9l links ( idea from ZBLJ's trial truck) The front axles are linked to the chassis and between them by 6l links , and linked to the body & between them by 9l links. I haven't came up with a good enough interior, but there's enough space for it. LDD file Thanks for reading, I will make a video soon -
Just an 8x8 Vignette, for the Flickr Summer Joust contest. I made a simple base with a small battle scene on it. Not really a story, but it's a viking woman ambushing a soldier of the Empire of Evilness. Hope you like it, C&C welcome!
-

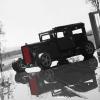
WIP Tatra T-815 8x8
legotechnicus posted a topic in LEGO Technic, Mindstorms, Model Team and Scale Modeling
Hi guys, I waned to show my latest creation a 8x8 tatra truck. It's still a wip (for a very long time now) but I bought 2 new sets with some piecies I needed. Right now I'm going to focus on the cab to make it better looking. Will post updates when I've had some progress Here are the pictures ] -

[WIP] MOD of 8258 Crane Truck with 8x8 (8WD)
tripletschiee posted a topic in LEGO Technic, Mindstorms, Model Team and Scale Modeling
As I am a big fan of Quattro & Co., I allways wanted to upgrade my models with AWD. For christmas my wife gave me the 8258 Crane Truck and - as most of you - I think that this was a milestone in the Lego Technic Flagship era. So after finishing it I immediatly started to think about the possibilities of upgrading this excellent set with 8x8 and other improvements. Here you can see now my progress so far: Added double wheels in the back added second driven axle in the back (as developed by BS-user arachnid) added most of the improvements of Designer-Han added opening doors added (first?) center differential added the first driven front axle See here the first impressions of my changes. ..... ...... . In the moment I think about adding a second center diff between the two front axles, but I am not quite sure, if that is neccessary for the playablity (torsion in the drive train and thus rubbing tires). I will test that. Updates will be posted here soon. -
Here's my Phase 1 build for the storehouse category in Age of Mitgardia. I limited myself to an 8x8 base size for this build, and was mainly trying to make a realistic looking cellar entrance. Fruit cellars are commonly used in Mitgardia to store food, and other goods. Rats can become problematic, but it looks like this one's food stealing days are over: See more pictures here: link Comments and suggestions welcome
-
Due to a more relaxed atmosphere during holidays, I was able to bust out my LEGO collection after almost a year of inactivity. While current MOCs are not presentation-ready, I've been meaning to share some of my old vignettes. Hereby presenting Grinding Skater Vignette, with CMF Skater Boy doing his favourite railing grind trick. C&Cs welcome!
-

[WIP] [TC8] 8x8 off road crane
Zerobricks posted a topic in LEGO Technic, Mindstorms, Model Team and Scale Modeling
So as soon as I heard about the new contest, I knew I wanted a different crane as the normal mobile ones... A quick google search for off road crane inspired me as soon as I saw this picture: More info here: http://www.ww.mainpu...ifting/6196.htm Yes, its an 8x8 off road crane with massive tyres, suspension and what-not. After fiddling in LDD and real life I came up with front suspension: As you can see, its inspired by 42043's rear axle assemby, but upgraded: - with all wheel drive - portal axles, - improved steering system - longer, harder shock absorbers - can carry A LOT of weight The steering system is my own idea (as far as i know), by using different handle and steering arms length I get different steering angles: Another thing I built are the outriggers. Because this is an off road truck, the outriggers need to be high enough not to bump into terrain, yet they have to lower enough to do their job. This is why they extend at an angle: The outriggers may look rather thin and weak, but the fact is the 13L beam and 13L rack are in a sandwich which cannot be seperated, so they can carry lot of weight, as long as you dont bend them sideways too much. Here is how the front suspension and outriggers look like together: And I already started working on the rear axle... You can see its simpler than front axle, it has more support, and its very solid. There are a total of 10 points holding the rear axle assembly: - 4x Springs - 4x Longitudal links with rubber bricks with limited longitudal movement (you need a bit of movement in order for axles to flex sideways) - 2x Panhard links which keep the axles from loosely moving sideways Also notice the drive axle on the left, thats for the fake motor drive. More info soon... -
Small scale truck trial
Zerobricks posted a topic in LEGO Technic, Mindstorms, Model Team and Scale Modeling
Since the new Arocs relased with new suspension parts and a great idea for the rear axle I was thinking, why not also make small scale truck trial machines/races with 62,4mm wheels as a reference point. I think this translates to roughly 1:13 scale. Because this is a smaller scale the models should be easier to build with less parts and more structualy rigid I think a max of 2 x XL, 3x L or 4x M motors should be enough at this scale... What do you guys think? Wanna debate, maybe even set up some guidelines and build something? P.S. click here for some axle ideas at this scale -

[MOC][FTC2045] 2045 Mercedes-Benz Athane
Thirdwigg posted a topic in LEGO Technic, Mindstorms, Model Team and Scale Modeling
From Thirdwigg.com For Immediate Release, May 22, 2045 The 2045 Mercedes Benz Athane prioritizes safety, sustainability, and versatility. The 2045 Athane is the most advanced and cost effective truck in our 150 years of truck building experience. As cities become denser and multiple transportation modes are becoming more prevalent, road safety for all road users must be paramount. The Athane’s ThemoCommLink (TCL), located on the right front and right rear bumpers, allow motorized vehicles to communicate to one another. The TCL also detects the heat signature of pedestrians and cyclists. Identification and communication with other users, keeps all road users safer. The driver is seated in the center and forward in the cab to increase vision. Retention of a human driver allows for relational interaction at the job site, and helps the technology make good decisions about varying road situations. The TCL Technology assists the driver so fewer errors are made. The front bumper shaping and full length wheel guards lowers the severity of crashes with non-motorized users should they occur. The Athane uses eight steerable wheels to improve weight distribution and increase city maneuverability. While many manufactures are switching to floatation and hover type drivetrains, this setup allows for unmatched braking control, and removes disruptive air currents to those walking and cycling close to the moving truck. The Athane’s Methane-Hybrid driveline continues Mercedes Benz’s prioritization of decreasing fossil fuel use. The Athane uses electric propulsion using energy stored in the batteries under the cab and bed. Battery charging is done by braking and by a small methane powered combustion engine behind the cab. Additionally, the Athane can be ordered with an induction charger under the cab to work with newly developed induction charging roadways being installed in many municipalities. Methane gas is clean burning, and a significant byproduct of the waste and recycling process currently in place with Octan Rubbish. A partnership with Octan Energy and Mercedes Benz has developed a standard way to reap, store, transport, and fuel the Athane’s regeneration engine using methane gas. Removable methane tanks are house behind the rear wheels, and in smaller tanks in the cab. Today’s logistics companies are searching for ways to improve versatility and lower cost. The Athane’s SmartStack systems allows for interchangeable bodies, cargos, and applications all with one common truck. The SmartStack system makes it easy to change the load in just minutes. The connection fits the international container standard. Many body work designers are applying this standard as well. In one afternoon, you can ship a container, deliver a load of concrete, and pull a fifth-wheel with the standard hitch. Welcome to the future. The 2045 Mercedes Benz Athane keeps all road users safer, decreases our harm on the planet, and supports all work tasks needed. Features: · 8 wheel steering · Sleeping bed · Aerodynamic cabin · In-cab Storage System · ThemoCommLink, front and rear · SmartStack System · Fifth-Wheel Hitch · Wheel Guards · Large/Low Bumper · Methane Tanks · Hybrid Motor · Induction Charger · Batteries · Passenger Jump Seat · Front and Rear Lighting · Video Mirrors on Each Side of the Steering Wheel · Visibility Focused Driver Placement Press Release Gallery Here. -
Patria AMV 8x8 WIP
Doc_Brown posted a topic in LEGO Technic, Mindstorms, Model Team and Scale Modeling
Hello everyone! I started work on this, with the goal of having independent suspension and gearing down after the differential. I have hit a snag, hard to see, but the gearing "cracks" after the diff, because it can move from each other. Its really bad and when geared with 12t and 20t will not even move on level ground under its own power! When geared with 8t and 24t it will move but slightest bumps will cause it to grind gears. There is just no room between the gears and universal joints for reinforcement. You will also probably spot the plastic washer I made to stop the diffs from being torn to a pulp. Many wont approve of this, but I only have 2 good ones left! And need to protect them as they are a little pricy to replace. This does work very well tho. Has anyone succeeded in gearing down after the diff on independent suspension before? Any ideas or advice would be greatly appreciated, at this point I'm going to scrap this and start again, perhaps forget about gearing down after the diff. Thanks -
This '8x8 Vingnette' concept is based on the #40120 Valentine's Day Dinner and #40121 Painting Easter Eggs. It's a great way to display minifigures and show different scenes. This model is based on Stephen's iconic studio from 'The Brick Show.' It features all the main details such as the minifigure wall, brown desk with a LEGO Apple, table with a PC monitor, spinning chair, LEGO City boxes on the floor, white storage unit with a UCS Sandcrawler and two Brick Show stickers. The Stephen minifigure needs printing of 'The Brick Show' logo as well as on the two 'Flat Tile 1x2.' It's not necessary but I feel the computer monitor should have a sticker to show the screen and the LEGO City box. Any other graphics will take away the charm of this '8x8 Vingnette' concept. Would you purchase this kit and realistically how much would you pay if the torso printed and the stickers? I would say it would cost £15-£20 without the figures and stickers; if those are included I would increase the price to £20-£25. Let me know and if it get's enough requests at those prices I may join with 'The Brick Show' once again and sell them as kits :) I really hope you enjoyed this in MOC; feedback and criticism is much appreciated. Adeel
-
This model is based on Jason's studio from 'The Brick Show.' It features all the main details such as the the lime green and blue walls, white desk with a Sopwith Camel set and an IPad stand, white stool, three LEGO City boxes on the floor, brown storage unit with a Volkswagen T1 Camper Van, Two shelves with two baseballs, LEGO apple, 'Buzz and Woody To The Rescue' set, Minecraft Micro World and one Brick Show sticker. The Jason minifigure needs printing of 'The Brick Show' logo as well as on the two 'Flat Tile 1x2.' It's not necessary but I feel the IPad should have a sticker to show the screen and the LEGO City and Toy Story boxes. Any other graphics will take away the charm of this '8x8 Vingnette' concept. I really hope you enjoyed this in MOC; feedback and criticism is much appreciated. Check out Stephen's Studio: http://www.eurobricks.com/forum/index.php?showtopic=111312&hl= 8x8 Vignette Series: http://www.flickr.co...157655067793505 Adeel
-
This '8x8 Vingnette' concept started with 'The Dark Knight - Interrogation Scene' vignette which was based on the #40120 Valentine's Day Dinner and #40121 Painting Easter Eggs. This one represents the 'AMC Movie Talk' studio in Burbank, California. The hardest part was to make it accurate as possible due to is contemporary design and curves, such as the table and back wall. This would include three minifigures: John Campea, Jon Schnepp and Dennis Tzeng. I have avoided the graphics on the faces since it's a nightmare to find them on LEGO Digital Designer. It would also include three AMC logo patches and one laptop. This one needs a few stickers and gaphics to make it more accurate such as the screens and the graphics on the walls. I wanted to post this week since yesterday was John Campea's last show. I will definitely will re-upload this when I own the parts and design the stickers and graphics. Render Time: 8 Hours AMC Movie Talk: https://YouTube.com/AMCTheatres I really hope you enjoyed this MOC; feedback and criticism is much appreciated. Adeel
-
This '8x8 Vignette' concept started with 'The Dark Knight - Interrogation Scene' vignette, which as based on the #40120 Valentine's Day Dinner and #40121 Painting Easter Eggs. This is loosely base on the #76005 Daily Bugle Showdown set. I didn't want to have the set displayed but the top floor I had to keep as it was the highlight if the set. I have changed the design of the the office and the exterior of the top floor and kept is simple and small as possible as it could be whilst using all the cool stickers used in the building. 'MOC: J Jonah Jameson's Office - 8x8 Vignette' Album: https://www.flickr.c...157653583747370 I really hope you enjoyed this MOC; feedback and criticism is much appreciated. Adeel
-
.thumb.jpg.016a6eb86b18b81d346aeaf7d8b54908.jpg)
[MOC] 8x8 Maz 535 Trial Truck
Pego posted a topic in LEGO Technic, Mindstorms, Model Team and Scale Modeling
Hello! I recently ordered some new tires from bricklink and wanted to make a truck to test them. I originally wanted to do a Man Kat1, but decided to do something smaller, so I tried to replicate a MAZ 535: The real one has independent suspension (mine has live axles), so it is not very accurate, also the wheelbase is about 1 stud too long between the 1st and 2nd axles. This truck features: 4 live axles with "leaf springs" 8wd with an L motor 4 wheel steering with an M motor The steering is a little sloppy (2nd axle) but it's still very enjoyable to drive. I love these tires, they are super grippy and have a deep tread, much better for offroad than the newer ones: -
[MOC] Mini Sisu E11T 8x8 trial truck
Pego posted a topic in LEGO Technic, Mindstorms, Model Team and Scale Modeling
After building the Gaz 66 truck, I went for a slightly longer truck, an 8x8. I tried to replicate the Finnish military truck Sisu E11T just because the wheelbase is long enough, the bodywork is definitely not very accurate though. The length of the u-joints would make it very hard to make it shorter with this design. Axles 1 and 2 are pretty much the same as the front axle of the Gaz, but this one uses 4 19L flex axles for leaf springs, because 8 shorter flex axles would not fit. Features 8wd with 1 L motor 4 wheel steering with an M motor 4 leaf sprung live axles Video: Suspension test: LDD file: https://drive.google.com/file/d/0B3uQRNR6UbBWeU5tc0lDU2ZGQTQ/view?usp=sharing -
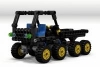
Hi! This is a new chassis I have built, it features: 8 wheel drive by an XL motor 4 wheel steering by an M motor 4 live axles I willl put a winch on it still (any other ideas?). The performance of this thing impressed me a little, because I have only seen 8x8s with 2 XLs or more, so I wasn't sure if it would have enough power. The body will be of the russian Kamaz 6450 truck. I will make an LDD file of this too.
-

8x8 with Locking Differentials
Nalyd997 posted a topic in LEGO Technic, Mindstorms, Model Team and Scale Modeling
Hey everyone! I have started tinkering in LDD on my next project. Here are some photos This is the first time I have built anything this large so we will see how it goes. I plan on using 2-4 xl motors for drive and will have an m on steering and another on a gearbox/winch. I think I will build a similar chassis to that of Sheepo's Defender as it is pretty sturdy. Anyway I will report back soon. (I have attached the .lxf if anyone wants it) 8X8.lxf -

[MOC] MAN M1001
MajklSpajkl posted a topic in LEGO Technic, Mindstorms, Model Team and Scale Modeling
Hi, I am presenting you my latest MOC – a mega monster, which I would gladly have it parked in my backyard (I would of course need a large backyard first) - MAN M1001! Since this creation was being built during a lot of night shifts since the end of March 2013 until the end of July 2014, me and this beast are almost in a kind of relationship and through that year and a half I have hated it and loved it again, almost left it, but returned to it... Now, as this saga of mine is soon to end (recycling), I'll indulge myself a little and also write something about the real truck and some creative adventures I've had building. I also want to present the MOC with a bit more photos, I hope it is OK, I haven't found any limit regarding number of photos in a post. If there is some violation, I'll gladly make it right. Those of you, who are not so much into reading, I suggest you just skip it and proceed to photos – no hard feelings. MAN M1001 / M1002 / M1013 / M1014 I haven't found extremely much data on the web. There is a lot more on younger M1001 relatives KAT I and KAT II. A summary of the data obtained is as follows: Those trucks' production started in the early eighties in Germany in the factory MAN AG for the needs of American armed forces and have been designed as a tactical 10-ton tractor units for transport and supply of tactical missiles Pershing II (MGM-31C) and Gryphon GLCM (BGM-109G). Through several versions and successors the MAN 100x series proved to be one of the best off-road tactical vehicles around the world. According to some data, it should not have any problems with fording up to 120 cm water, climbing slopes of up to 60%, sideways driving on slopes up to 40%, overcoming the 1.9 meter trench and overcoming step to a height of 0.6 m (depending on tire size and undercarriage configurations). American forces have used four versions of the basic truck that is powered by 400 horse (several data) V10 turbo-diesel. All versions are built on extremely torsion-resistant box section framework 8x8 chassis with steered front two axles. All axles are rigid "live" axle with rubber mounted springs and large shock absorbers. Basic models are the M1001 - a tractor with a crane, winch and even 30 kW power generator and the M1002 - "tow truck" or a wrecker with a crane, a small flatbed and a carrier for a bunch of spare tires. A little younger models are the M1013 which had a crane in addition to an even bigger flatbed, and the M1014 which is plain flatbed truck. All, except the M1002, which is longer due to towing equipment, are 8.57 m long , 2.5 m wide and only 2.75 m high (cab and lift), 2.85 m (spare tire) and 3.1 m (the generator). Sources: http://olive-drab.co...tos_man_8x8.php http://man.army-uk.c...quip.php?ID=333 http://www.truckspla...odel.php?id=646 http://heavycherry.c..._tarpaulin.html At the beginning of my research and modeling, I came across information somewhere (currently I cannot find the source), that the investors (U.S. armed forces) demanded the trucks to be low enough that they can be transported by rail. It is from this demand the trucks got the recognizable cab with trimmed top edges, so the loaded trains remained in the characteristic profile of the rail. With this same purpose the engine is not mounted under the cab, but behind and partially in the cab between the two seats. MAN M-MajklSpajkl Those of you who dug a little through the source pages of the above given description of the real trucks, have probably quickly noticed, that my MOC is actually neither one of the types described - it's a hybrid. At the beginning I fell in love with the M1001, I liked it’s silhouette by far the most and began modeling , but later I found out that because my axle design, the chassis came too high and that it does not look too good as a tractor - so therefore I camouflaged the chassis with a flatbed and of course the obligatory crane. I designed the flatbed and the crane without leaning to the actual models and therefore got a little strange formation of the crane and the outriggers. I tried to replicate the crane as closely as possible though. Modeling process began by obtaining blueprints and photo-material of the M1001 and scaling it to the size of 9398 4x4 Crawler tires. Scaling to these tires produced an approximately 1:14 scale, which already shows the size – but hey, building big was the main idea! In addition to the cross-sectional blueprint of the rear I also used an "en face" photo printed out in scale, so it was much easier to model the characteristic front of the truck. You are to judge, how I pulled it off. I must say that my MAN is not nearly as technically superior as I have described its big brothers above and that it is a beast only if you use a little imagination or see it on photos… I'll soon tell you why. But first,... 1. MOC DATA: Length: 79 studs overall (63.2 cm) – I had to lengthen the chassis for 2 studs due to drive train Width: 23 studs (18.4 cm) + rearview mirrors max. 4.5 studs on each side Height: 25 studs (20 cm - top of the cab without air vents), 31 studs (24.8 cm - top of the folded crane) Weight: 3680 g (truck) + 280 g (crane) + 640 g (4 power generator (cargo) only one with six AA batteries) = 4.6 kg Part count: ALOT! I will provide exact number when I disassemble it, I'm guessing about 3000-4000 pieces - update: after painfull disassembly I counted 4404 parts. Motorized functions: - 8x8 propulsion (reduction from the engine to the wheels 1:21 in 1st gear and 1: 12.6 in 2nd) - Front two axles are steered in first/second ratio 1:0.67 + working steering wheel - Two speed gearbox (1 - 1:1667, 2 - 1:1) - Differentials lock on axles 3 and 4 - Working windshield wipers - Automatic pneumatic valve for lowering / raising the outriggers Other features and details that I would like to highlight: - Rigid full-sprung axles (live axle) - three point hitch - PF LED headlights, on/off via the PF pole reverser - Opening cab door - Adjustable rearview and side view mirrors - Manually pulled out outriggers - Separately opening sides and rear of the flatbed - "Access" to the gearbox via a door in the bottom of the flatbed - Access to the imaginary controls for pneumatic or. "Hydraulic" pump through the side door on the flatbed - Access to power switch for the front light through the side door on the flatbed - Spare tire - Illustration of the engine behind the cab - Manually "driven" crane Atlas 4300 M5 with a double pull-out arm and winch - "Rich" dashboard - Seats and shifting stick in the cab - Protective grids for front and rear - Cargo – power generators (the idea was born out of a major sleet storm in our country past winter) - I must have forgotten something... PF components used: - 2 x XL motor for propulsion (engine coupled with the so-called "adder" differential) - 1 x L motor for steering - 4 x M motors (auto-valve, gearbox, differentials lock, wipers) - 2 x PF switch (on / off lights, pole reverser on one of the XL motors) - 1 x PF led lights in front - 3 x IR receiver (v2 drive and wipers, 2x the ordinary for the rest) - 4 x large BB (one for power, three for lipstick – power generators) - 1 x IR Speed Remote control (drive and wipers) - 2 x IR remote control (the rest of the motorized functions) - 1 x PF extension wire 20 cm - 2 x PF extension wire 50 cm And now some photos to take a breath during such a heavy reading… Looking mean… Ready to unload… The crane stood relatively well to the loads applied, due to much bending I have only tried it with the empty generators. High loads (kids) led to the main two LA snapping of the pins, since they were not transversally braced. Atlas 4300 M5 crane Flatbed with lowered and removed sides… The generators… I find them quite cute, so the lineup was necessary. For those who have yet to read themselves out of breath, I would have a little description of the "guts" of this birdie. Bare naked chassis (more or less) for starters: 2. CHASSIS AND BODY The truck was meant to be modeled as realistically as possible and so I decided for the chassis of two main studfull beams, which were laterally connected in a fairly robust box-section frame by the 5x7 technic frames. The beams were changed countless times, because in the course of construction a need for holes exactly where they were not would came up, or there were certain parts in the way, etc. The cabin is built from a combination of studfull and studless technic bricks, and even some sytem bricks were used for better looks. All other parts of the truck are in "full studless" technique, with some little system bricks add-ons. 3. AXLES and DIFFERENCIALS LOCKS As soon as I had the idea for a 8x8 truck, along came the idea of planetary reduction within wheels. There are very good solutions for this kind of reduction within the "large racing" wheels (ZBLJ), for "medium racing" I found none, well at least not such that would ensure that the technic turntable is as close to the wheel as possible. I thought of a solution shown below, which looks good, but has the disadvantage that it is necessary to attach the wheel to the turntable before attaching the turntable to the axle. The wheel is attached to the freely rotating 4L axle with stop, so it must be pushed next to the turntable well and in such a way that small technic bush and the free end of 2L red axle are caught between two spokes of the wheel. Of course, the wheel must be turned with the spokes inside. It was a little easier to push the wheel into place when I got some new axles 5L with stop... I find this kind of reduction very interesting, but it creates a lot of friction, which is fatal as you'll read further on. The trucks' axles were the first parts designed and they too, like the chassis, have seen many, to many variations. Back then, when I was designing the axles, I only had enough of the "new" bewel differentials. Locking those is a little more volume-consuming, and therefore such a fat boy for the axis, which you can see below. Differential is actually locked by locking a "by-pass" axis. Because I undertook this for the first time and because I spent all 9L links I had on suspension, it was a real hassle to find a solution for remote locking differentials. I figured out some kind of lever solution, where the mechanism mounted on the chassis practically just hugs a small lever on the individual truck axle. In such way both of the non-steered axles' differentials are synchronously locked. Unfortunately, the system worked well for the locking, while the unlocking of the rear axle was very hard or almost never unlocked -I blame the designer! On the photo below, you can see the transmission from the motor to the double "fork" from the bottom side of the truck and the »fork« hugging the lever in the detail in the lower right corner of the photo. 4. PROPULSION This is more or less a sad story - maybe mix of bad decisions and inexperience. Yeah, THAT THING WON'T DRIVE! As you will see in the video I’m preparing, it only works in the "air" mode. The reason? This colossus is heavy as ... and my enlightenment has insisted on feeding drive to all four axles from a single source. Imagine now half a meter long technic spindle full of universal joints and to ensure easy win, use two CV joints directly on the power source. Those babies sure can take some torque - NOT! Add another bunch of gear in each axis and in each wheel and you get a CV joint without the »joint« part. Anyway ... noted, written in the black books of things not to do! After many attempts, I decided to leave the matter as it will; it should be as an example for the future. 5. STEERING Again, things could not be much worse here, well I suppose it could fall apart completely. However, I like the concept that I tried to put to work very much, so it was again left to be represented in the "air" variant: Proposed design does not use the usual steering rack, but a system of levers, a bit closer to the real 4 axle truck steering system. One wheel hub is pushed forward and backward and this hub is linked to its own pair to the other side of the axis by a rod. The theory is, of course, one thing, and the reality is another. Please find below a display of described system, first the mechanism on the left side of the chassis where the motor is. The worm screws drive two lateral axles and steering wheel in the cab for which I've succeeded quite an interesting transfer with simultaneous reduction 1:8 of L motor speed (see the detail). Each of the transverse axis has a different reduction of rotation, so as to ensure a smaller turning of axis no.2 against axis no.1. Thus, the reduced rotation drives the levers, which steer the wheels. For this reduction, there is quite a simple calculation using geometry - for my MAN it should be 1:0,73. I spent some time looking for the most ideal relationship between the technic gears, but then again, a compromise, and I installed the ratio of 67% (1 - 12/24; 2 - 12/36), which is not very far off. The system, unfortunately, did not work under the weight of the cab and there was too much backlash in all these levers. In order to alleviate the matter, I connected the levers with technic friction pins, hence the axis are a bit jumpy when "air" steering due to overcoming the friction in pins. I know, I should change back to frictionless pins for »air« steering presentation, but… hmnjah… 6. WINDSHIELD WIPERS Motorized windshield wipers are one of the cutest and reliable functions of this little toddler, especially since they're controlled via the IR Speed remote control and thus can adapt to the amount of rain. It is a simple version of the system that drives wheels on steam locomotives - the rotation transferred to the oscillation. It only bothers me, that I somehow didn't manage to get the motor that drives the wipers somewhere in the bottom of the cabin and therefore there is a driving axle between the seats leading to the motor behind the cab, which is to me quite a fine mockup for the real engine. The reason that there is no room under the cab is in the fact that the main beams of the chassis stretch quite deep into the cab and that the suspension of the front axle is attached just below the seats. 7. AUTOMATIC PNEUMATIC VALVE and CRANE OUTRIGGERS When I was almost finished with the truck, there was only one free PF function left and the crane outriggers were missing. There was practically no space left, except behind the spare tire. Luckily, I managed to squeeze in there a modified version of the automatic pneumatic valve by My version is just geometrical adaptation to the space that was available and I think I succeeded well. For those who may not know (not many here I guess): automatic pneumatic valve (there is quite a handful of different types from several inventive authors on the web btw.) is a pneumatic valve with only one motor powering a pneumatic pump and switching the lever of the pneumatic valve at the same time. I had quite some difficulties and I spent some time looking for the right combination to attach the valve softly enough to work as it should. If it was too stiff, it would not change the valves position when changing the motors direction. From left to right you can see a pneumatic pump, driving PF M motor and worm with a pneumatic valve on the photo below. The solution for the outriggers manual extension is IMHO really a small piece of art. Well, a good idea at least. They’re mounted in 5x7 technic frames, through which two axles slide and are protected from falling out by a connector. Since the pneumatic tubes pushed the outriggers outside, I made a "lock" to hold them in place. Loading capacity of the outriggers is of course purely symbolic. CLOSURE, FINALLY And now to conclusion: I'm tired, and not of writing so much of my bad English. I will not start on such a vast (at least to me) and long lasting project for some time, if ever again. I'm really happy that I can finally fully present this MOC to you and I am pleased also that I insisted until it was finished, even though not completely succeeded, but managed to learn a lot of new in terms of design and construction of such a model. I am pleased with the level of small details, which I think for me is increasingly important for a MOC to have. Thanks to all who survived this long writing, as well as the rest of you who just looked at photos and grimacing at the amount of the text. No hard feelings, eh? For those curious, find at this link a number of additional photos, including some of those during the construction, which I didn’t include in the presentation. Best regards, here is another photo of my third child to conclude. Miha And finally - a video: -
Mini portal axle (R)evolution and more...
Zerobricks posted a topic in LEGO Technic, Mindstorms, Model Team and Scale Modeling
Few years ago I made the first big scale portal axles... Now its time to do same at small scale! Here's the result: The axle has a 1:2 portal gear ratio and uses the CV joints for steering. Steering is done via 7 stud long steering rack. Its meant for lighter smaller scale models, like the ones Madoca77 is famous for. I also made some variations of the axle and to top it off I also added the mini 8x8 tatra chassis. You can download the LDD file here: http://www.brickshelf.com/gallery/zblj/Ideas/MiniAxles/mini_drive_axles.lxf Some video footage: So what model should I make with these? Please vote! Thanks! -
[MINI] Trial Truck 8 Wheeler
Rockbrick posted a topic in LEGO Technic, Mindstorms, Model Team and Scale Modeling
Mini TrialTruck Big step deciding to show you my w.i.p, my two small sons have been helping out currently trying to keep it down to 200 parts and less studful...(its over by a couple of pieces, including the minifigs) Got to throw some minifigs in there too... Features: Pendular rear suspension in two axes... Forward/back, left/right Progressive steering on the front two axles, front wheels steer more than the next set behind. HOG steering in the tailpipe, flip open front. All done from my 'spares' box - for some reason I do not have any right-angled connector elements in Black... not even in current models We'll see how this evolves and whether it will enter the competition or not (my sons want it to) but I know It ain't gonna win prizes but that is not the point in entering.... LXF file here -> TrialTruck_v3.2.lxf Please use, improve....and most importantly share, I want to see 20 variations of these in the competition -

LPE Powered 8x8 Trial/Trophy Truck (WIP)
1nxtmonster posted a topic in LEGO Technic, Mindstorms, Model Team and Scale Modeling
A little work in progress I started recently. I decided to marry together two of my favorite projects, the LPE and the Oshkosh HEMTT 8x8 trial truck. I'm going to power it by a portable air tank and long air hose. I could use regulated C02 and have a onboard tank (a 20 oz paintball tank), but my tank is running low. HEMTT: LPE: And some progress: -
[MOC] Just another Tatra
Doc_Brown posted a topic in LEGO Technic, Mindstorms, Model Team and Scale Modeling
Hello everyone, Thought I would share my quick build Tatra to test my asymmetrical half axle setup. Turned out to be quite good surprisingly. The body work was very quickly built, inspired more by the shape of the Tatra T813. Specs: 20cm (H) x 20cm (W) x 38cm (L) Weight 1.910kg 2 x XL for Drive 1x Servo for Steering I also wanted to make it blue, and colourful just like the trial trucks. -
[MOC] Reverse build, PATRIA AMV 8x8 "Instructions"
Doc_Brown posted a topic in LEGO Technic, Mindstorms, Model Team and Scale Modeling
Ok so "instructions" is pushing it, more like sped up visual guide. haha. I recorded this more for my record really, but if anyone is interested in checking it out, pretty cool to watch. If only we could build this fast! More pics can be found here. Its functions are: 4x XL Motors for propulsion 1x Servo for steering 3x M Motors for Turret and Rear Door 3x PF Lights Full Independent suspension 8x Ansmanns 1.9” Tires “Twin” 2 Speed Differential Gearbox Specs: 71cm (L) x 21cm (W) x 27cm (H) 5.6KG Weight Original video