Search the Community
Showing results for tags '8-wide'.
Found 30 results
-
Hello all, I would like to share with you my most recent model. It is currently digital, but a physical build will be coming soon (with instructions). UP #844 is one of the most iconic locomotives that has ever graced the main line. Both powerful and elegant, she has captured the attention and imagination of railfans since her delivery to Union Pacific in December of 1944. #844 was the last steam locomotive delivered to UP and the only steam locomotive of any American Class 1 railroad that has never been retired. She has seen revenue and excursion service for over 78 years. During this time, she has had several modifications and upgrades. Some minor, such as a livery change and some major such as a Worthington SA feedwater heater added around 1955. For this build, I wanted to capture her essence and model her as she would have appeared in April of 1949. A careful eye will note several key features: by this time she was modified to be oil burning, a mars light had been installed, she was still using the Sellers exhaust steam injector and she wore the two-tone gray paint scheme in Harbor Mist Gray and Armour Yellow. This model is 8-wide, 1:48 scale and displays #844 as she would have been seen while pulling the Overland Limited, Los Angeles Limited or Portland Rose in April of 1949. #844 represents the absolute apex of duel-service steam and I want this model to represent nothing less. It is powered by two large power function motors with a 3:5 gear ratio so that she has both high tractive effort and can travel at high speed. Next step…building the instructions and ordering parts!
-
Presenting another of my Danish State Railways’ (DSB) trains redesigned to 8-wide and digitally rendered (with a bonus livery)... DSB IC3 The Danish State Railways’ (DSB) highly successful and innovative InterCity 3 aka IC3 passenger train was co-developed by Siemens -Duewag in Germany and ABB Scandia in Denmark. The train is operated by DSB in Denmark and Sweden, by Renfe Operadora in Spain and by Israel Railways in Israel. Amtrak in the USA and Via Rail in Canada have tested the train in the past. A trainset consists of three units; two diesel motor units (Litra MFA and Litra MFB) and one intermediary unit (Litra FF). Up to five trainsets can be coupled together. 96 trainset were built for DSB from 1989 to 1991. All are still in service today. My model: Original white and red livery used from 1989 to 2002. Fictionally named “Jørgen Vig” with the crest of Billund added. Scale: 1:48 Length: 157 studs (MFA: 55 – FF: 47 – MFB 55) or approx. 122 cm Width: 8 studs Bricks: 2.948 (MFA: 1.040 – FF: 861 – MFB 1.047) Locomotion: 2 x 9v or 2 x PF/PUP train motors Power: 9v, 2 x LEGO AAA battery boxes or 2 x BuWizz battery boxes Control: 9v, PUP, SBrick, PFx Brick or BuWizz Designed: 2022 Conversion of my 7-wide model from 2017 to 8-wide with more accurate dimensions. Very high setting render from Stud.io with custom decals added in the PartDesigner tool. Its able to navigate R40 but looks rather silly doing so: Interior with seats for 83 minifigs: Decorative side design for the bogies - a combination of parts and the molded decorative side for train motors: The coupling part can be change to a Liftarm Thin 1x7 (BL#32065) when combining several trainsets. Technique used for the sliding doors: Removing the 1 x 4 Tile as shown enables the door to slide open as a play feature. The fixed outer doors are a necessary part of the construction otherwise the very long body breaks too easily due to the roof being removable. However, they are designed to be rebuilt open when needed and the trainset stationary on display: The trainset is (fictionally) named Jørgen Vig with the crest of Billund added: Free building instructions: Option 1: https://open-l-gauge.eu/dsb-ic3/ Option 2: https://snakebyte.dk/lego/instructions/trains/diesel_engines/dsb_ic3_(8_wide)/index.php Bonus livery: Livery when Amtrak tested the IC3 Flexliner DMU (Diesel Multiple Unit ) in 1997:
-
After a fairly long hiatus designing any new rolling stock it's time to present another one of my Danish State Railways’ (DSB) locomotives redone to 8-wide and digitally rendered. DSB Litra EA The Danish State Railways' (DSB) first electric locomotive was built by Henschel & Sohn in Kassel, Germany (the first two) and Scandia, Denmark (the remaining ones). 22 were built in total from 1984 to 1992. 1 was scrapped. 16 were sold to Bulgaria and Romania from 2007 to 2010 and 4 to Bulmarket in Bulgaria in 2021. The last remaining one (EA 3004) was transferred to The Danish Railway Museum in 2020. Wiki here and irl photo here. My model: DSB 'modern' red & black livery used in the 1980s. Scale: 1:46 Length: 54 studs from buffer to buffer Width: 8 studs Bricks: 1.397 (BuWizz), 1.403 (PU) or 1.401 (PF) Weight: 996g (without battery box) Locomotion: 2 x L-motors (BuWizz & PF) or 2 x M-motors (PU) Power: 1 x BuWizz 2.0 or 1 x AAA PF/PU battery box Control: BuWizz, PU or SBrick Designed: 2023 It has the serial number EA 3024 and is named 'O K Kristiansen' My 6-wide DSB Litra EA from 2011. All renders are from Stud.io with custom decals done in the PartDesigner tool. Access through the removable roof to a quite roomy and fairly correct interior showing the different locomotion, power and control options: 2-axled bogie design with MS Train Wheels from Brick Train Depot which are slightly larger (by one plate) than LEGO standard Train Wheels: Update 22.02.2023 The design is done and the model is currently being thoroughly tested
-
Hello. Im not to fond of the tender or the coach that came with the Emerald Night. This can be seen as blasphemy but I wholeheartedly believe the Engine deserved better. So thats what I intended to "fix". So far its built in Studio but it will be built in bricks as soon as Im happy with the end result. The design and color scheme stays true to the original passenger car design but it have been widened and made longer. Working on a 8-stud wide basis meant that the tender had to be made wider as well to make the transition between the tender and the coach seem more fluid. Tweaks are still being made so criticism and tips are welcome. Thanks for looking!
-
I've been split in scale since I began building LEGO trains with all my shunters, freight wagons and latest passenger train being 7-wide or 1:54 and all my older locomotives and passenger wagons being 6-wide or 1:60. With almost all of my buildings close to true minifig-scale, I've been contemplating to unify my scale for a few years now but I couldn't decide to go for either 7 or 8-wide...in addition to being pretty much satisfied with most of my 6-wide models as they are. Well, no more Presenting my favourite Danish State Railways’ (DSB) locomotive redesigned to 8-wide and digitally rendered in two versions and liveries... DSB Litra MZ The powerful Litra MZ locomotives were built by Swedish Nydquist & Holm AB (Nohab) and Danish subcontractors on license from General Motors. 10 MZ (I) were built from 1967-1969. 20 MZ (III) were built from 1972-1974. 61 in total were built across all four variants (I-IV). Quite a few are still used today by private railway companies either domestic or abroad, in Iran, Norway and Australia. My model of DSB Litra MZ (I): DSB maroon livery used in the 1960/70s with the highly recognizable crown and wing logo on the front. Scale: 1:46 Length: 56 studs from buffer to buffer Width: 8 bricks Bricks: 1.264 Powered: 2 x L-motors, 2 x AAA battery boxes + 2 x SBricks, 1 x AAA battery box + 1 x SBrick/PFx Brick or 2 x BuWizz battery boxes Control: PF with SBrick, PFx Brick or BuWizz Designed: 2020 My older 6-wide version from 2016: https://www.eurobricks.com/forum/index.php?/forums/topic/119474-moc-the-danish-state-railways-dsb-locomotive-litra-mz-i/ All renders are done on the very high setting in Stud.io with all of my own custom decals added in the PartDesigner tool. Upgearing from 20 to 12 teeth with a ratio of 5:3....more speed, less power PF L-motor design with good advice from some of the Brick Train Depot guys. Credit to Duq for coming up with the original idea of using the T-piece. 3-axled bogie: The center wheel will utilize a black hockey puck as a blind driver or a 2 x 2 round tile with open stud and 1 x 1 round tile placed on top on it as the alternative. https://www.bricklink.com/v2/catalog/catalogitem.page?P=47576#T=C My model of DSB Litra MZ (III): DSB "modern" red & black livery used in the 1980s. Scale: 1:46 Length: 56 studs from buffer to buffer Width: 8 bricks Bricks: 1.331 Powered: 2 x L-motors, 2 x AAA battery boxes + 2 x SBricks, 1 x AAA battery box + 1 x SBrick/PFx Brick or 2 x BuWizz battery boxes Control: PF with SBrick, PFx Brick or BuWizz Designed: 2020 My older 6-wide version from 2011 and redesigned in 2015: https://www.eurobricks.com/forum/index.php?/forums/topic/172599-moc-herningværket-vestkraft-is-complete-set-of-locomotives-and-wagons Part of the fun and what set LEGO trains apart from pure model railroading is the inclusion of minifigs, so whenever and whatever I always try to make space for them and also keep on some play features and interiors. The 8-wide body is quite roomy and has a fairly correct interior. 2 x PF L-motors with either 2 x AAA battery boxes + 2 x SBricks, 1 x AAA battery box + 1 x SBrick/PFx Brick or 2 x BuWizz battery boxes can be utilized: Both locomotives with DSB Litra MZ (I) in front of the later version DSB Litra MZ (III) in the background: Technical addendum: For the first time ever I have used technical drawings overlayed with LEGO scaled grids to get the dimensions right or as close to right as possible. The models haven't been built yet but some smaller builds have been used for testing during the design phase. My slightly shorter test train didn’t really like driving through R40 curves, no surprise there Too much length overall and the wheel sets in both ends of the bogies are also pretty far from each other producing some drag. Going through isn't impossible though but rather uneven and a tiny bit struggling, especially with added wagons. There are no problems driving on straight tracks and through larger radii curves. To my surprise however was the finding that the total number of parts were the same or even slightly less than a similar 7-wide model So henceforth, 8-wide it is
-
This project started about year ago as upscaled version of Dodge Charger R/T 1970 from set 75893 - 2018 Dodge Challenger SRT Demon and 1970 Dodge Charger R/T (as you can see looking at it's front) & since then (well since abandoning idea of having red stripe at back) evolved into modular Dodge Charger second generation MOC but can also be viewed as MOD of sets: 75893 - 2018 Dodge Challenger SRT Demon and 1970 Dodge Charger R/T 76173 - Spider-Man and Ghost Rider vs. Carnage 76912 - Fast & Furious 1970 Dodge Charger R/T There are some extensions not yet show, I'll update this post with additional pictures as soon as they are finished. Project is 95% finished since only remaining issues are: - better insides (replace invisible from outside bricks [well, mainly plates] to increase integral stability of model - decide which details I prefer most (for example mirrors) - add movie/tv shows/other (popular?) variants of car (for example blade version) - connected to "better insides" because it has to be modular compatible (and that may require small changes in modular system like it happened few times before) So this is (hopefully not too long) intro, let’s jump to pictures of said MOC (MOD?): 1968: 1969: 1970: Old build body - without doors: Openable hood & trunk - tried different variations that would be visually nice & would fit here but I couldn't find any other than cutting three light bluish gray brackets - 99207 - so I didn't: Ghost Rider modification (1969): Additional photos of back (which I'm super proud of) for version 1968: & 1969-70: Color variations: Last minute changes (if we can call two-three weeks ago like that): used 15625 (Slope Curved 5 x 8 x 2/3) part instead of combination of 15068 (Slope Curved 2 x 2 x 2/3) + tiles + plates for better curve at back added 25269 (Tile Round 1 x 1 Quarter) in doors Both changes are inspired from upcoming speed champions set. Old versions of car are still visible in pictures - for example all colored versions (yellow/red/gray or black "Old build body - without doors") What parts are modular? - front - front air intakes with (or without?) lights and also box that contains them (intake + lights part can be replaced inside box between versions or with enough parts whole box can be replaced) - back - whole back panel - lights are different between 1968 and 1969 (1970 is the same as 1969 one) - mask - used to add air intakes or supercharger (or both) - R/T printed tiles (wherever they fit) - wheels (different variations require different wheels) - seats (different variations require different seats combination/colors of seats) Additionally this is my first post here: Hi everyone, have a great day! ------------- Update: Instructions available for free -> https://rebrickable.com/mocs/MOC-119419/thomasanderson/modular-dodge-charger-2nd-generation-1968-70-8-wide/
-

[MOC] Lego DB BR80 12v - in Torben Plagborg style (8-wide)
Paperinik77pk posted a topic in LEGO Train Tech
Hi all, since I read the very, very interesting thread about Torben Plagborg creations, I've been trying some new designs (some are just sketches, just to understand how things could work). Now, in this nice thread some nice 12v creations can be seen - but one captured my interest more than others. It's a little blue steamer with a black 12v motor. It seems pretty big, so I'd say it was an 8-wide experiment. In general, all the top shelves are very interesting. Starting from that little steamer, I began to think about a 12v locomotive in 8-wide. So I started designing another small steamer (I'd say a well known prototype): the great Deutsche Bundesbahn BR-80. 8-wide is not a common scale for me - I only tried it two times in my whole life, so it was a trial and error process. I tried to use parts that could have been available in the last 80s /first 90s - during the Phase II of the Gray Era and the advent of 9v era. And here it is...it recalls me a "fat" 7727/7730, with a touch of 7810... 8-wide gives some possibility also to work with odd number of studs (boiler is 5 studs wide instead of the classic 4-wide used in standard 12v steamers). I kept the standard cylinders, the ladders, rods, red buffers and magnets, which fit nicely an keep the 12v feeling alive. I used Some SNOT for the doors, using headlight bricks. Everything was already experimented at the time (e.g. the B-model wagon with horizontal sliding doors in 7735 instructions). Right side is quite symmetrical to the left one, apart some details. 12v motor looks nice, now that the body is correctly larger. Weights can sit on top of the motor - but the model could already be sufficiently heavy to have some decent traction and pulling power. I think adding lights won't be a problem nowadays, but for sure at the time (80s/90s) it could have been an additional challenge ! But...there are some issues that must be noted: The buffers overhang is quite...massive - and this SURELY will create problems with 12v switches, since the buffers will collide with the switching electric mechanism. Coupling wagons on R40 curves could be impossible...since this BR80 is longer than any other 12v locomotive or wagon not based on bogies chassis. Weight of a complete train could be excessive for the poor 12v motors. I think it has been a very fun experiment, a real "12v+" MOC...but being realistic - in my opinion it's too limited by the motor, wheels size...and 12v track geometry itself . Maybe, with 3d printed 12v wheels and a PF-based motor it could work on PF flexible track - but it would then loose 90% of its "vintage" appeal. I'd classify it as "Virtual Shelf Queen" ! Ciao! Davide -
This model, inspired by the 2020 Lamborghini Sián FKP 37, is the second MOC from my Time Cruisers Contest entry that I updated and made instructions for, available on Rebrickable soon. At first I wanted this model to have opening doors, but after realizing I wasn’t able to fit any minifigures or have the recognizable side air intakes if I did that, I let this desire go. Instead I decided to make the engine as similar looking to the real engine as could be, working with little Lego elements. I hope you like it! Special thanks to Christopher Leslie Stamp’s team and The Lego Company for creating the new Lego Speed Champions line. Special thanks to my fellow Lowlug LUG members for teaching me so much about MOCs and working in Bricklink Studio in such a short time. Special special thanks to Chef_NL/Rob van Leeuwen for saving me heaps of time. Studio crashed during the finalization of the instruction booklet and somehow I lost the original file in the process and got a (seemingly) useless backup file in return. Also special thanks to Barneius, Brickengineeringdude, Bricks, Blocks & Mocs, Legotuner33, I'm a conformist!, _TLG_ and numerous other great MOC designers around the globe for showing me tons of beautiful models, techniques and how to format a MOC entry properly. Thank YOU for watching! Please do not hesitate to comment and post some feedback. Yours, Ravelino why does K33p 0n Br!cking translate to this in EB language?
-
Hi everybody, new guy here! I'll admit, I've been reading and following Eurobricks for years, more years than I can count fingers on my hand. I officially signed up a couple months back, but have yet to post anything until now. I wanted to have something interesting to show you guys before I did, and now I do (hopefully). Allow me to present my custom LEGO Speed Champions MOC's! First of all, I love the Speed Champions sets. As a car guy and a LEGO fan, these are the best of both worlds. That being said, the designs leave a lot to be desired, which is also part of why I love them so much. I see an opportunity to exercise some creativity and do some hands-on building to make them as accurate to their real counterparts as possible. It starts with widening these models to 8-studs. That makes them too large for City-scale, but improves the look dramatically. Plus, with the added dimensions, you can put more detail into the models and get the proportions of auxiliary features (such as lights, exhaust, grille, etc.) correct. Truth be told, many of these had been in the works for almost a year, the first wave, that is. Most of the second wave is still in the works, though the Mustang and Corvette you see above are almost done. I've been constantly tweaking, retweaking, and fine-tuning my designs and I feel like I'm never fully satisfied with any of them. Some of the cars you see above haven't been fully completed. Some of the other Speed Champions are not shown in the photo because they're still half-built. In time, I will eventually show all of them. Today, I'll be showing one that has been completed to my liking: the Porsche 918 Spyder. With these models, I stick to a few rules that I set for myself: One, use as few of the stickers as possible. Stickers can only give so much depth; therefore, brick-built designs will look more authentic. Two, no custom parts or custom stickers. In the occasion that I do use stickers, I only use what's given on the sticker sheet. Three, no illegal building techniques. I want these to resemble a model that LEGO themselves would put out as a set. The common opinion is that the Porsche 918 is the dullest of the first wave of Speed Champions. I quite enjoyed tooling with this one, and it was actually easier than expected. I ditched the stickers for the front and rear intakes. I used stickers for the badges, fuel caps, and headlights. Technically, I could've gone with trans-clear cheese slopes for the headlights, but it didn't look quite right to me. I'm not a fan of the Speed Champions window/cockpit pieces for doing 8-wide builds. This is a Spyder, so it wasn't too hard to come up with a brick-built substitute. Without the window pieces, I'm now able to fit two minifigures side-by-side. It works because the construction of the sides is relatively simple and not very bulky. Being a convertible also helps too. I went with the brown leather plastic interior because I think it looks very classy. I try to recreate the interiors as accurately as possible. Side mirrors are an extra touch for added realism. This model also features a removable front trunk (frunk?) that can fit a couple of the suitcase pieces. You can see it in the short little video I have below! So, that's it for my first post! Let me know what you guys think! I'm always open to constructive criticism and if you have any alternate building techniques in mind, I'd love to hear about them! Also, please let me know if I'm doing something wrong with regards to posting and/or forum conduct. I'm still learning!
-
Presenting another of my Danish State Railways’ (DSB) locomotives - redesigned from 7-wide to 8-wide and digitally rendered but already built and tested DSB Litra MK The Danish State Railways (DSB) first radio control shunter Litra MK was built by Siemens/Vossloh in Germany as type VSFT G322. 25 were built from 1996 to 1998. All but one shunter were transferred to DSB subsidiary Railion in 2001 and DB Schenker Rail in 2007. My model: DSB Gods version. Scale: 1:45 Length: 27 studs Width: 8 studs Bricks: 586 Locomotion: 1 x M-motor (PF) Gear ratio: 1:1 Power: 1 x 9v battery with 1 x PF custom adapter Control: SBrick Designed: 2020 (third attempt at the class) (Very slightly) updated: 2023 Very high setting render from Stud.io with custom decals added in the PartDesigner tool. Rear with the hidden SBrick inside: Removable hood for easy placement of the 9v battery inside - likely a 800 mAh rechargeable Li-Po one: The mechanical power transmission technique with 1:1 gearing: On a tableau at exhibitions: Link to my NedTrain Vossloh G 400 B and other liveries based on my design My earlier 7-wide version was rather fragile and prone to implosions when handled wrong but this time around the construction is pretty solid and the mechanical power transmission much better with surprising pulling capability. Long live 8-wide
-
Presenting a Dutch version of my DSB Litra MK - thanks to UrbanErwin for giving me this idea NedTrain Vossloh G 400 B My model: Scale: 1:45 Length: 27 studs Width: 8 studs Bricks: 640 Locomotion: 1 x M-motor (PF) Gear ratio: 1:1 Power: 1 x 9v battery with 1 x PF custom adapter Control: SBrick Designed: 2020 (Slightly) updated: 2023 Very high setting render from Stud.io with custom decals done in the PartDesigner tool. Left: Central coupling arm on without any wagons. Right: Central coupling arm replaced with a coupling magnet when pulling or pusing wagons. Interior with placement of the SBrick, M-motor and 9v battery: On a tableau at exhibitions: The railing can only be made in Dark Green using BlueBrixx parts for now. Change all Dark Green to Dark Turquoise and the railing can be made using genuine LEGO parts.
-
It's been a long time since I built anything, so please don't laugh too hard at this Here's what the car looks like: https://www.netcarshow.com/toyota/2018-gr_super_sport_concept/ I think I got close, these smooth bubbly cars are tough to recreate. https://flic.kr/s/aHsmMpW2Qe Toyota GR Super Sport Concept by Henchmen4Hire, on Flickr
-
MOC: Vossloh style "DSB" locomotive with remote decoupling
Selander posted a topic in LEGO Train Tech
As regular readers of this forum well know, I have an interest in onboard remote decoupling, see for example my (old) article in Railbricks. Recently I updated the decoupling bogie design to be more mechanically robust, to have wheels with lower rolling resistance and (hopefully) to look better. With the deoupling bogie ready I needed a new locomotive to try it in....so I designed a new locomotive around the bits and pieces needed…. This time I decided to make a build solely with bricks already "in stock"....hence not the normal shopping rounds on bricklink. I found the german Vossloh locomotives and liked their light grey / green livery which also matched my available bricks and elements. The green cab really cried for white decals so I used some Danish DSB that I already had….. But DSB + Vossloh is not a combination from real-life, as far as I know, so please see this as a product of my own imagination… The locomotive is quite full of PF Components: Battery box, IR receiver, M-motor + gearing for driving the mini actuator plus a regular train motor for propulsion. -
Models in this thread: #1: Wrecker (60056 MOD) #2: Container Truck (60027 MOD) #3: Ice Cream Truck (70804 MOD) #4: Joe the Plumber's Badass Step Van (70811 MOD) #5: Sunshine Surfer Van/Volkswagen T2 "Bay Window" Camper Van (Creator 31079 MOD) Hi all, while everybody seems to be freaking out about "alternate models a 7-10 year old could build" I have a different suggestion to make: alternate models for grown-ups - we're AFOLs after all, aren't we? Of course what I'm thinking of are no real alternates - you will have to add quite a few parts. But what you - hopefully - get are more elaborate City vehicles that are supposed to go well with the modulars. As we all know Town vehicles are primarily designed for Children, they lack the complexity of the CC buildings. On the other hand they often have attractive colour designs plus great functional elements that are worth preserving. Thus what I'll try to do is to modify some vehicles according to the following rules: using the typical design elements of Town vehicles (windscreens, mudguards etc.) omitting most of the studs fixing holes where possible keeping all that’s nice and replacing all that’s too simple using not too fancy building techniques, models must be easy to reproduce use of stickers from the set allowed keeping or even enhancing the playability functions must be functions, devices shouldn’t be movable just by hand seating at least one fig - but under no circumstances in the center of the cockpit ;-) 100% Lego, no third party stuff allowed By saying no fancy techniques there is one - very important - exception: the wheels (but more on that subject later). This is the actual range of widths I'm building all my vehicles in: #1: 60056 Custom Wrecker The original model of this wrecker (see http://brickset.com/sets/60056-1/Tow-Truck) is one of my favourite town sets of the actual range. I really love its nice colour scheme plus there are some great design elements which I've tried to preserve as you may see. As said, wheels are very important in my opinion, that's why I try to avoid the usual City wheel/mudguard combination which leads to a certain monotony in town layouts, especially due to the fact that the same combination is being used on passenger cars and on trucks which makes no sense to me. Thus I try to use as many combinations as possible. Another advantage of this is that you get different types of wheels with many different diameters suitable for quite a few purposes. Another important aspect of this model is functionality - a tow truck should be usable for towing purposes. The original set is already quite functional, however, I wanted to have separate functions for the boom and for the lifting cradle. Plus both should be functions in the above mentioned sense, that means, not just movable by hand. That's why some technical stuff is built in - which is much easier with a 7w than a 6w form factor, as you may recognize. That's the way it works: Thanks for looking, some more pics on my Flickr. More vehicles to come.
-
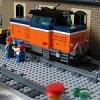
I was looking at that thread about compact PF solutions, and I thought about posting this MOC. The Alco HH series is a line of very early diesel-electric switchers (made in 'Murrika of course) produced between 1931 and 1940 after which it was succeeded by the much more well-know S series. The HH1000 was the 1000HP variant of the HH series of which 34 were produced between 1939 and 1940. Because other companies' color schemes were more difficult to implement, my HH1000 carries that of Union Pacific. UP owned exactly one HH1000, numbered 1251, which it acquired from the Mount Hood Railway in the late 60s. It was probably retired not long after. The most difficult part of the prototype to implement in Lego was by far the cab. Ideally the columns at the corners of the cab would be something like 2LU x 2LU, but that is pretty much impossible in Lego. After much fiddling I was able to get 2LU gaps in the back, but the cab is too long by about a stud to accomodate 5LU columns from the side. You'll notice the PF receiver sticking out of the center window. To me the main feature of this loco is that it is the perfect shape to cram two M motors, the AA battery box, and the reciever into a body 30 studs long. The receiver is actually just floating because that's the only orientation that works. The tractive effort is a little less than what I was able to get out of the RF-16, a combination I think of less weight and shorter bogies, but for practical purposes it'll basically pull anything reasonable - just slowly. As far as I can tell having a gear ratio other than 1:1 is more or less impossible here. This model has been about 85% complete for the past month or two, mainly for testing, but I'm about to BL the remaining parts, so it should get done soon!
-
 Hi all, hopefully it's okay to put all the train stuff together in one thread - I don't have that many train MOCs yet, plus all things belong together somehow. A few of you might know me as a car builder mainly, however, from the beginning I was interested in the different elements of Lego layouts - cars don't mean that much to me without a proper surrounding. That's why I've also built some other stuff over the years - which leads to the question of a proper scale. Scale When dealing with several types of vehicles and buildings, scale becomes an important aspect, that's why I've tried to find a proper graduation of widths for vehicles (like others did, too, but a bit larger since I'm developing things with the cars in mind): Some more info about this subject you may find in this EB thread: http://www.eurobricks.com/forum/index.php?/forums/topic/97314-citytown-vehicles-range-of-possible-widths/ The Monorail Regarding trains, I started in 2013 with a PF-driven Monorail train: The EB thread you may find here: http://www.eurobricks.com/forum/index.php?/forums/topic/82147-moc-monorail-train-7w-with-powerfunctions/. There are some developments going on regarding the Monorail, too, but that will be shown later. The GP38-2 The GP38-2 you can see in the photo above was a first step into the "real" Lego Train world in 2015. I'm a huge fan of those great US Lego train layouts plus I wanted to see what trains and especially locos would have to look like to match the other stuff I’m building, especially the cars. I soon found out that even 8w might be too small for one of those gigantic American locomotives I wanted to build, that’s why I opted for 9w (plus railings), which furthermore looks quite good on the Lego rails with their large scale. When looking for a proper livery I soon found out that the St. Louis - San Francisco Railway (“Frisco”) would be a good choice since the rather simple logo could be built completely out of Lego quite easily. There don’t seem to be too many of them in Lego, I’ve seen 2 or 3 of them since, I guess, but maybe that’s rather due to my lack of knowledge in this field. The GP38-2 has gone through some changes recently to make it more fit for its duties (see below) - it originally had body-mounted couplers which didn't work out - and to improve its handling so that it might be more or less finished right now. This is what it looks like today: Some more pics on Flickr. The loco has moving radiators, propelled by an M-motor, connected with the front lighting and operated via the IR receiver so that you have a bit of a startup procedure and the possibility to let it idle properly which is otherwise rather difficult when mimicking diesel-electric locos with Lego. Some specs: Scale: 1/43 Length (platform): 50 studs Length over couplers: 42 cm Width (platform): 9w Weight (with 4 batteries and two aluminum dummies): 1,130 kg The Hump Yard Originally meant to pull a (probably rather short) cargo train within a collaborative layout I recently thought about having a hump yard in order to get some more action on the layout. The GP38-2 had to be modified for that purpose (especially regarding the trucks), plus there had to be a second loco (a GP15-1, still a WIP) to push the cars uphill with 2 locos combined (which also proves to be a big improvement when pulling rather heavy cargo trains through curves). I also built some cars (also WIPs, except the caboose below). On a meeting with fellow builder Steffen Kasteleiner (see https://www.flickr.com/photos/29666619@N04) I was able to use two of his magnificent tanker cars so that there were already 5 cars to be humped, as is documented in this video: The main point here is the decoupler for which I used the great and well-known decoupler design by CamelBoy68: http://www.eurobricks.com/forum/index.php?/forums/topic/80286-decoupler/ However, I added a spring so that you don't have to operate it any time you want to decouple a car. The downside of this is that you have to take off the decoupler part when pulling the train out of the yard. Still thinking about a solution to set down the whole spring unit for that purpose. Another possibility would be to pull out the sorted trains at the opposite side of the yard so that the hump is omitted completely. But that would require even more room. Of course the switches are operated by hand at the moment, I just edited that in the video. I'd love to enlarge the whole thing - however already a baby hump yard like this requires a lot of room. The Caboose Now for the caboose: Some more pics on Flickr. The caboose is also 9 studs wide, of course, the cupola even 11 studs. I would have loved to build the cupola in 10w, however, I wouldn't have been able to build the roof in the style I've wanted. I've already been told on Flickr that there should be done more regarding the trucks, however, I haven't found a proper solution for that purpose yet - in fact you don't see much of the trucks from above at this width, but that might not be a proper excuse for you train guys! One aspect in the title is still missing: containers. You may spot the 9w yellow well car with a 7w container in the video which is still in the making. Containers are an important aspect regarding scale since you can't use the usual 6w containers in such a surrounding. Plus containers are quite important to me because they are some kind of interface between road and track vehicles. There's already a proper container truck, there's a 7w container design with a special stacking lock, and there's a (hand-operated) reach stacker in the making. Hopefully this can all be presented together in the near future. 100% Lego. Thanks for reading all this stuff, more to come!
 -
Similar to my thread of a year ago, wanted to share a couple more freight cars I've been building on the side: Conrail N6A I've shown this Conrail transfer caboose in a couple of my threads, but never formally, so here it is. The prototype is one of several classes of transfer caboose Conrail inherited from the Penn Central. The model was designed almost two years ago, and I got around to putting it together last year. The "skirt" that covers the tops of the wheels is typically the toughest thing to model on American freight cars: if you run on R40 track, the bogies usually need to pivot enough such that the wheels will scrape... this isn't a problem on the N6A because it's quite short; no fancy engineering is required to compensate! The geometry of the skirt and such are still similar to that of my earlier flatcar. And with stickers Brickshelf Gallery PRR G43 Like the caboose, this gondola might have shown up a few times, but never formally. The G43 is a 52' gondola built during the last decade of the PRR. Most of them went to PC and then Conrail. This model was designed and built last year. The dimensions are very similar to the aforementioned flatcar, and it's basically built the same way: the structural component (the sides) is studs-out, and the floor and trucks are studs-up. Once again, much of the work done to make the skirts work on the flatcar are applicable here. Thus, the hardest thing here was figuring out what to do about the shallow trapezoidal part in the middle - eventually I went with wing plates. Finally, this probably should have been dark red or reddish brown, but all three colors seemed to somewhat off, so I ended up going with the most common. I also looked at weathered designs, but its a little bit too difficult when there are a lot of large, exposed parts like the wings. Brickshelf Gallery Alaska Railroad 15800 Series This is a side-dump car, typically used for MoW work. Technically Wikipedia thinks its a type of gondola. As you can see, the specialized feature of this type of car is that it empties sideways: unfortunately the model does not have this feature! This car has actually never been posted: I only recently completed the design and model: Doing the textures on the sides was a little big challenging, especially trying to "blend" it with the ends. On the prototype there are a ton of funny angles that are hard to model in LEGO. Construction is otherwise typical: studs-out for the body, studs-up for the chassis. Those droid-body things are really good for the big pneumatic pistons. Brickshelf gallery Finally, this is a repost, but here is the gondola and caboose running with my EMD Model 40:
-
After taking a shot at creating a couple of 9-wide 2017 F1 cars, I though it would be fun to turn the clock back 50 years… to 1967. The cars back then were incredibly dangerous mid-engine-missiles, but I have been a fan of their classic look and simplicity for a long time. I made an effort to recreate one in 8-wide LEGO as a kid, but I was never fully satisfied with the results. Today I’ve started all over with new designs, and I’ve done my best to capture some key details that made these cars look so distinct. I present to you the Ferrari 312 vs. the Lotus 49. ^ And here they are! The yellow racing livery on the nose of the Lotus is made up of five individual custom stickers, and nothing is folded. I felt there were no attractive options for brick-built livery, plus I knew I’d have to make stickers regardless for the racing numbers, “TEAM LOTUS” logos, etc. ^ The ’67 Ferrari 312 is one of my absolute F1 favorites, producing what is perhaps my favorite engine sound of all time. It was featured prominently in that Ferrari/Shell V-power commercial showcasing a variety of Ferrari’s Grand Prix machines. ^ The iconic Lotus 49 was easily the fastest F1 car in ’67, but arguably lost the championship because it… broke a lot. Still, with the innovation of bolting the engine directly to the chassis to act as part of the car’s structure, Lotus effectively changed the sport. ^ The raised lip surrounding the cockpit is, in my opinion, an important aspect of these classic cars’ look. I tried several ideas for capturing it before settling on this one. ^ The sections of the Lotus’ low lying exhaust pipes seen beneath the rear axle are actually attached separately from the rest of the pipes seen in the rear, using minifigure “Tool Box Wrench” pieces. ^ These two models, like their real life counterparts, differ most visibly in shape towards the rear. While there was no way to capture every detail in this scale, I did my best to approximate the distinct look of each car. The Ferrari’s 3-litre V12 engine is very different from the Lotus’ famous Cosworth DFV V8. ^ Note that the rear tyres are wider than the fronts, just like the real cars. Those older LEGO tyres actually fit perfectly on the newer Speed Champions wheels, which really worked great for these MOCs. ^ These classic cars are essentially in scale with both of the 2017 F1 cars I built a little while ago. The wheelbase of this Ferrari 312 is just over 2/3rds the length of the wheelbase on the Ferrari SF70H, which is accurate! The 2017 cars are also a bit wider than the 1967 cars (9-wide vs. 8-wide), which is also just about right. ^ While full minifigures can’t fit in the cars’ narrow cockpits, it is possible to build “drivers” using minifig heads on 1x1 bricks with a round 1x1 plates underneath. They may look like bizarre board game pieces on their own, but they work well inside the cars for display. Thanks for taking a moment to look at my MOCs! I've also posted this on MOCpages (link), and larger images can be found on my Flickr page (link). Comments and feedback are always appreciated.
-
This project started, in a wholly different form, several years ago in response to two thoughts I had: "How can I make a long train without making excessively expensive?" and "I really want some modern rolling stock". Originally the obvious answer was articulated well cars. Well cars have very little structure to build, and Jacobs bogies mean relatively few wheels and even fewer couplers per unit length (compared to a train of the same length made up of "regular" 4-axle, 2-bogie rolling stock), both of which are particularly expensive parts. I would need to build containers to "fill out" the train, but that did not seem to be a big issue. Unfortunately the articulated well car project got to something like 95 to 99 percent completion when I pulled the plug. The car looked fine, that was never a problem, but they turned out to have more operational and structural issues than I had hoped: most poignantly they couldn't clear switch handles right after turns and the bottoms would fall out after extended running. Furthermore, to make the car look "filled" enough, I would need to build something like 15 to 20 TEU worth of containers, which increased part count and weight. Double-stacking containers also decreased stability and made the bottoms more likely to fall out. So the well cars ran empty at like one BayLTC show, and then they were shelved while I tried to think of solutions that I never found.Fast forward another year and I found out about articulated spine cars. Spine cars are similar to well cars in that they are articulated and intermodal, but spine cars trade density for flexibility: they can't carry as many containers per unit length as well cars, but they can carry containers or trailers and can fit in a small loading gauge. From a modeling perspective, spines have even less structure than wells, and more importantly can be filled with half of the 15 to 20 TEU worth of container, saving more weight and more parts. So here's the model: The car itself is 214 studs long and comprises just 1018 parts, giving a part per stud length of 4.76. For comparison a relatively tame looking "regular" piece of rolling stock like my flat car is 33 studs long with 335 parts, giving a part per stud length of 9.85 - almost twice that of the spine car, so that gives an idea of how efficient the spine car actually is. Construction is very simple. Everything is studs up save for some of the trim. The center of each section is actually pretty strong since it's just stacks of plate, but there is still a bit of structural non-integrity around the bogies since the spines have to taper down to a single plate for clearance. The most difficult part was of course making sure nothing scraped or interfered with anything when the car goes through a full R40 curve: I mocked up three sections of the car before committing to the final build: And of course, the build would not be complete without containers. With the well cars, I built an ad-hoc collection of 20 and 40 foot containers, each with a slightly different design, partly because I didn't feel like it was the main part of the build, and partly because I needed so many. Since the spine cars would need much fewer containers to load up, I decided to make them good. There's essentially two kinds of containers here: a "detailed" type and an "efficient" type. The detailed type is actually what I call the "RailBricks Container", which appeared in issue 14 of the now defunct(?) publication. The efficient type is just made of panels and detailed with a sticker in order to be light, but all the containers at least have tiled roofs to clean up the lines. There is also a trailer mostly designed by @jtlan And all the bits put together: All the weight-saving seems to have paid off as the loaded car doesn't seem to be that heavy - even my EMD Model 40 can handle the whole thing just fine. Having run it at several local LUG meetings and a full-day event, I think I have run it long enough to verify that the cars don't develop structural issues after long periods of activity. EDIT: Instructions now available for sale on Rebrickable: https://rebrickable.com/mocs/MOC-57497/NonsenseWars/148-scale-ttx-articulated-intermodal-spine-car/#details
-
Hi everyone! I haven't posted on EB in a while and this is my first time posting in the Town Forum. So a few months back, I decided I wanted to design a city bus based on a bus I saw in a Youtube video quite a long time ago: My final model definitely looks a lot like my inspiration, but I'd like to think I put a bit of my own spin on it as well. I tried to squeeze in detail in the front, which turned out alright, I think. The bus has seating for 16 people and a few small places for baggage. The doors can open as well, but for them to work in LDD, two parts need to be removed first. I'm not completely satisfied with the design, as I think it needs more detail and the door mechanism improved. However, I don't have too many ideas at the moment on how to solve those problems. If anyone wants the LXF file, let me know and I can send it to you. Thanks for reading!
-
Hi EB! I haven't posted in a long time, but I have actually been building stuff. I promise. I had been looking to put together an american freight train for some time now: I originally thought I could get away with building a long articulated well car (which would make up the entire length of a practically sized lego train), but the well car has proven to have more restrictions and less reliability than I would have liked, and as such it was time to build some regular freight cars. Tank Car All of these freight cars were actually designed in maybe 2014, but at the time I did not actually intend to build them, preferring the aforementioned well car instead. This tank car was completed first because I was able to acquire almost all of the parts through my local LUG. The only expensive parts were the 8x8 dishes on the ends, which are apparently quite rare. As much as I hate to be imprecise, the car is a little bit of a freelance: I did work off a drawing to get the proportions, but I apparently could not find a photo or model of the thing in the drawing, so the greeble around the the dome and platform is a bit of a guess. The ladders are also a bit disproportioned, but that is more of a convenience. This car probably has the most interesting construction of the three here: I wanted to use the various 8-wide circle parts, but I did not want them to make up the load-bearing structure (so you can't pull the car apart). Therefore the load-bearing structure is actually a Technic frame that kind of moves up and down such that the top and bottom set of circle parts can connect at alternating bulkheads. Flat Car Like the tank car this is a little bit of a freelance, but I really wanted a flatcar such that I could put random stuff on it, and modern flatcars at our scale are far too long to run on R40. I found two models for reference, and I believe my drawing is for the bottom one, but the car itself really takes more from the top one. This one was actually the toughest one to build. As I designed it in 2014, there wasn't nearly enough structural integrity and the wheels would easily rub on various other parts in curves. It took me quite a few iterations to increase the structural integrity to an acceptable level without compromising the overall appearance of the car (mainly not making it too tall). As you can see the details of the final design look nothing like the details on my original LDD build. Build-wise, the key to making it structurally sound was to make the studs-out sides the load-bearing element, and the difficulty was doing that while still giving the trucks enough clearance to pivot fully in an R40 curve. If you press on the car in a turn there is still a but of scrubbing, but for now I consider that acceptable. Hopper Car Unlike the other two, this car is actually based solely on a specific model! It is the latest one to be completed, and I think it is actually my favorite of the lot. It took me a while to get around to it one because I thought it would need a lot of parts, but it was mainly just the 1x2 rails (something like 100 of them) and they were relatively cheap. Construction is mainly studs up for the chassis and studs forward/backward for the sides. Each side is a studs forward and a studs backward section held together with rails on the top and bottom with some additional SNOT needed to go around the ends. It's probably the sturdiest of the three cars, but also the heaviest. Well that's it for now. There is a full gallery with a few more pics if it ever gets moderated. I do have a new locomotive in the works too, and it will be interesting.
-
Hey all, I'm finally getting around to sharing one of my latest MOCs, a Norfolk and Western GE U30B. The U30B is a four-axle second-gen diesel-electric locomotive produced between 1966 and 1975. 296 units were built for 12 railroads, of which 110 went to the N&W. With the U30B I wanted to make a "no compromises" Power Functions locomotive. I felt that my first three Pf implementations had gotten progressively better, but that they all still suffered from what I considered various compromises like not being able to change gear ratios or not being able to easily replace batteries. The no compromises loco would have to hit these checkboxes: good PF visibility easy to change batteries high structural integrity max traction/power for given form factor ability to use different PF motors/change them ability to use different gear ratios/change them Given these constraints, I chose the N&W U30B because it was one of the last modern diesels to have 1) a high short hood, which I really like, and 2) 4-axle trucks which are more easy to make with more structural integrity than 6-axle trucks. Those being said, U30Bs for other railroads were built with low short hoods, and the 6-axle U30C was twice as popular as the U30B. After a few months of on and off development and construction, this loco was completed in February, just in time for locomotive power testing! At my usual scale of 15" per stud, the 1100 part loco is 8-wide and a whopping 51-long from magnet face to magnet face - the longest I've ever made. The construction isn't really anything to write home about: like my HH1000, most of the model is studs up with large tiled plates forming the detail on the sides. The handrails are made of a third-party tubing, which isn't quite as good as flex, but orders of magnitude cheaper. There is one slightly clever bit where the roof has been raised by 1LU in order to not have a ridge between the "plate with bow" and the "roof tile" and said 1LU gap is filled with a bracket: But the real question is: how does it fair with regard to my original requirements? The PF receiver sits at the end of the loco with the dome exposed - I consider this generally the best case for PF; reception from the front isn't quite as good as it could be, but I'd rather have that than the top of the receiver sticking up further. As with my previous two PF diesels, I have used the big AA battery box in order to get the most amount of energy into the loco without going to a custom power source. This drives two L motors - the biggest motors you can fit in a 5-wide body - connected to a V2 receiver. The battery box is secured by two "crossaxle 3M with knobs". Pulling off the sides (which are connected with about 6 studs) and pulling out these pins allows the box to drop out the bottom. Similar to a Real modern diesel, most of the structural integrity is in the frame (blue), which is just a big mesh of big plates. Furthermore, the battery box is mounted to a set of technic beams (green) which rests on the gearboxes (yellow): the weight prevents the gearboxes (which are just studded together) from coming apart when a lot of torque is applied. But those L-motors are pinned into the gearboxes with a pattern (red) such that M motors would also work! And E motors! And I have left enough space and connection such that the old geared motor with the appropriate extra reduction could also be used (I think). Finally, the motors are oriented such that the drivetrain has an extra stage (green) where gears of different sizes can be used and the gear ratio changed. This screencap shows 3:1, but in practice I have been using 5:3 with the 20-tooth and 12-tooth bevels, which I find to be a better balance between speed and torque. EDIT: Instructions now available for sale on Rebrickable: https://rebrickable.com/mocs/MOC-84533/NonsenseWars/148-general-electric-u30b-v21-power-functions/#details
-
Streetcar PCC 551 I had built a generic European Streetcar/Tram that I posted here and had then been shown images of a local (to me at least) Streetcar used in Kansas City. Once I saw it I knew I had to build it. This is an 8-wide, 48 stud long recreation of that Streetcar. The were a number of different paint schemes used in PCC 551's history including one with a black swoosh down the side, but this one is a later version. I used the red tile on a headlight brick to represent the KC Public Service logo which is the Scout image. Here's an image of the original taken by Stephen Rees https://flic.kr/p/5unpgz The windows are 'authentic'. Apparently the head of the KC Public Services department decided that the traditional split windows that normally come with the PCC looked old fashioned so he commissioned the new single pane approach. Here's an image of the doors - they're inset half a stud using jumper plates and made up of a combination of SNOT plates and tiles, L-shaped plates and Darth Maul's Light Sabers! Here's the door build details Of course there's an interior! With seating for 19 Passengers and standing room for a further 11. And one final shot of the Streetcar with a couple of passenger's who probably won't get it. Comments, criticism and ridicule most welcome! Edit: Having a chance to think about the front end I'd like to show you this revised version
-
Lego Chicken Bus I've been wanting to build a Bus Depot for my economically deprived Lego city for a while, but it morphed into a Far-eastern Jeepney Depot which was kind of good, but the Jeepneys I built looked they really belonged in a circus (pictures on my Flickr account) so I leveled the Bus Depot and rebuilt the Jeepney into a Chicken Bus! The chassis is six-wide, the passenger space seven-wide and the roof-eight wide. I wanted a top heavy vehicle that looked like it would lurch around corners scattering the luggage and goods (and chickens) off the roof. There's a Bike rack on one side. Here's a view of the Luggage rack - the crates, ruck sack and empty beer bottles are secured with an old POTC fishing net. The Bus's schedule is loose and variable and it will frequently pull into towns to drop off and pick up passengers, but whatever you do do not let the Bus leave the town without you! - you might be there for a long time It's been a long time since that windscreen has seen a squeegee.... And a final shot of the spacious interior with comfy seating for at least six minifigs. Comments, criticisms and ridicule encouraged!
-
First of all, I have to admit that both of these are not so much "my own". The cargo truck was reverse engineered from someone's MOC that I once saw at classic-town.net, but couldn't find ever since. The dump truck (its hopper to be exact) is almost identical to the hopper Zed designed for his unbelievable KRAZ, definitely check that one out. So, here go the pictures. Cargo truck: Nothing special inside, just some furniture, boxes and a dog: I'd like to point out the washing machine, 1x1 round tile was made for this: Now the dump truck, nothing special here: So here you go, two trucks, one dog and a washing machine. For those interested, the .lxf files are attached. .lxf files are available at Bricksafe, so here's a link to the cargo truck, and here's a link to the dump truck