Search the Community
Showing results for tags '2014'.
Found 80 results
-
Hey, what's up! Today I was going through my pictures and found this, a MOC I had made sometime in 2014. It was my first SNOT MOC. It's not the greatest, but I think it's still worth showing. Droids are attacking! I remember being super hyped about this battlepack, and was quite proud of my MOC. Anyway, thanks for looking. God bless. -JD
-
After i got the 60052 set, and had my review up, I went on a building rampage. Just as in the good old days when I first got back into LEGO, I just putted brick's together not overthinking things. Im pleased with the result, though I will probably change a lot of stuff with it as I usually end up doing. This is my impression of how the Cargo Train station could look ( offcourse adding a tonof bricks to it ). Now, everything is plated up, preparing the whole of the build ( and what is to come ) to be placed on baseplates for a larger layout. Im not to satisfied with the pictures but had my lightroom removed before I viewed them. Will probably take some new shots during the weekend. Hope you like it though. Click for larger image. I already felt that this set screamed to be modified. Bricks n bolts then posted a picture of a mod ( moc ) he made himself, that inspired me a lot. And this is the outcome. Click for larger image. Only MOD of the 60052 set I've finished so far besides the cargo train station itself is the forklift. As i want my Maersk 1651 set to go with this, Iv'e made it these colors offcourse. Now, the forklift its not as functionel as the original one from 60052, but I personally like this better . I build more for show than for functionality. Track end buffer inspired py the post in this forum. Im quite pleased with how it turned out. And dammit, I forgot to include a Doctor Who reference, which is always do with my MOC's. Then again I was in a hurry if I were to get the pictures taken. Wont forget them in the next photo session. Let's get those astronauts up in the air ! Im feeling that my first train and the corresponding wagons will have to be a transport for my TLG shuttle. Build In Progress as I write this. Please do comment and ask questions if any. All feedback is always welcome. KlodsBrik.
-

[REVIEW] 42029 Customized Pickup Truck
Rishab N posted a topic in LEGO Technic, Mindstorms, Model Team and Scale Modeling
The Lego 42029 Customized Pickup truck is a Lego Technic set that was released in the second half of 2014. The set has 1063 pieces and retails for about 100 USD which seems a bit high. When the first images were leaked, the reactions were very mixed. Some people liked it others didn’t and the main complaint was that the set’s front end looks quite ugly. Honestly I wasn’t a fan of the whole second half of 2014 line up, but I decided to buy this set for the parts and do a review of it as I quite enjoy making reviews. Anyway lets get on to the actual review. The Box I apologize for the glare on the box, I'm not sure how to avoid that. The box is weirdly shaped as it is long and short in height. It feels full and has a pleasant weight to it which makes you think that the price was worth it. Here's what I mean about the shape. Compared to a model with similar parts, the box is not really square. Here's the back of the box. It displays the model's various functions, the possibility to motorize it, and the B model. The B model honestly looks terrible to me as it looks like a mess. Here's the contents of the box. There are 11 bags and once opened, the parts barely fit on my temporary, tiny table that I was using to build. The box also contains two instruction manuals( and no instructions for the B model as always) and an unsecured sticker sheet. Since the sheet wasn't secured, mine arrived with a large bend in it. This picture is after 5-10 minutes of trying to flatten it. The Build The build starts with the rear axle and the mini linear acuator for dumping. Not much is really going on right now. Some beams are placed diagonally to make a sort of truss which is kinda interesting. The other interesting thing is how the dump function works. Normally in Lego vehicles the linear acuator pushes the dump bed up as shown in this photo by Blakbird. Instead of using this basic pushing mechanism, the acuator in 42029 is mounted facing downward and fully opened in closed form. When you want it to dump, the acuator pulls the bed up instead of pushing. I'm not sure what benefit this gives, but it is an interesting way to make a mechanism. Anyway back to the build. The build then goes to the front of the chassis. At this stage, you get a feel for the size of the model, and to me it seemed a bit small at first. After that the build takes an odd step. In a model it makes more sense to build a complete chassis and then build the bodywork, but in this model the build ignores that the chassis is not finished, and moves on to the cab section. The cab looks alright, but the interior looks very half baked. The seats are too small for this model and they're blue... again . I'm really getting tired of seeing blue seats in models. It doesn't look realistic, and is it really that hard to make different colored seats? This trend has been used sparingly for many years, but then in 2009 it started to get used for most models. It's been 6 years of that now and I think its time for change. Anyway on to another overused Technic mechanic- the gearbox. The 42029 follows the time honored tradition of a function splitting gearbox. This iteration of it is quite simple with only two functions- a winch(again ), and a dump bed. The functions are controlled by the black bevel gear on the bottom, or from the 8 tooth gear on the right as that's where the M motor can be placed. The cab is attached and the model starts to resemble its final form. Next the engine is added. This was also a source of controversy as it was a V6. Most pickup trucks use a V8 so this was a bit odd. It's also not that hard to squeeze in 2 extra cylinders as evidenced by Sariel's motorization of it, so this seems to be laziness on TLG's part Another interesting thing I found was that the instructions displayed the old mold for engine blocks while my set included the new blocks. The odd thing is that my 42009 also has the newer style blocks and its from 2013, so I would think the 42029 instructions would include these new blocks as the set came out a full year after 42009. Next you have to build the front axle. I'm not a huge fan of these new hubs as there has to be so much space between the suspension arms. Also an interesting technique is used to limit the suspension. The white pieces, which are normally used in studded sets, block the arms from sagging under weight. Front axle mounted. At this point the steering also works and you could have a rolling chassis if you wanted to. And now the cliche winch piece is built. On a side note, I have 2 shelves of Legos. One shelf contains supercars and the rest is ordinary sets. Every single set I have built on that shelf has a winch or thread of some kind. They're all done differently, of course, but i just find winches boring. As a function they're quite boring unless its absolutely necessary such as the 42009 or 8258. Now here's another source of disappointment- the ugly front end. When you look at modern pickup trucks( especially American ones), they all have a feeling of power. The grilles are massive and are covered in chrome and the lights are large and boxy. Just look at the new Ford F-150. The 42029 looks so weak compared to these trucks. Instead of large boxy headlights it has bug eyed lights which are made from gearbox extenders. The grille also looks terrible. Its a mashup of red and grey parts which does anything but evoke a sense of power. I think they could have made it look a little better if they had replaced the red bushes in the grille with grey. Also look at those #3 connectors in grey. There was also some controversy about this as they look very out of place, and this was the perfect opportunity to bring back the rare #3 connectors in red. They brought back the red 5x11 panels in this set, so why couldn't they do they same for these connectors? I replaced mine just to see how it would look and it looks a lot cleaner. Overall the whole front area looks quite disappointing and feels sloppy. Anyway on to the rest of the build and there's not much left of it. The dumping bed is attached and a few other details are added and bam you're done. The dumping bed is an uncommon feature for a pickup truck, but it works well, and gives it a second function thus giving TLG an excuse to use another function splitting gearbox Here are the spare parts Completed model Here's a few pics of the finished model. I think the rear is simple and pretty well done Here's a side shot. With the high suspension, it feels more like a crawler to me than a pickup truck. The suspension is one of the best things about this model. It feels neither too soft or hard and is nice and bouncy. It also has amazing travel. The model's winch also works smoothly as with every other model with a winch. The set can also be motorized with the 8293 power functions set. All you need is an M motor, LEDs, a battery box, and a clutch gear. Motorizing it is quite easy and only takes a few minutes, but one should manage their cables properly, as I didn't pay much attention to the placement and it they stopped the bed from fully closing. I didn't care much for the motorization as it just put lights on the roof and motorized 2 functions. Unlike the 42024, this set doesn't really need the motorizing as the functions work at a reasonable speed, so I decided to not keep the motorization and advise you not to waste your money on the extra parts required to do the motorizing. I decided to take the set outside in order to match its rugged looks. Nice view of the V6 and its turbochargers? Not sure what the things are on top of the engine. Everything opened I also decided to give the dumping bed a practical test with birdseed and it worked well although the bed and parts of the chassis got quite dusty One flaw with the dumping is that the tailgate has to be opened manually. It doesn't make much sense to put a dumping function yet not have an easily opening tailgate. Personally I would have liked to see the tailgate use frictionless pins and some sort of manual locking mechanism. It would feel a bit more realistic at least to me. Final Thoughts The model doesn't have the greatest looks or the most realistic functions, but it has a great assortment of parts. Personally even though this set claims to be for older ages, I feel that it would appeal to younger children more due to its high ride height and quirky looks. It is also one of the most durable models that I have built. The suspension absorbs drops and it can be rolled over multiple times with no or minimal damage. At one point it accidentally fell off a sofa and it survived with only the roof lights and one steering link breaking. With all this sturdiness, its an interesting build as there is so much reinforcement and it is fun to see how they achieve this. The model is easy to break into chunks and has a lot of possibility for modification, so that's always good. Overall Build- 8/10 It's a fairly standard build, nothing too surprising, but it is fun to see how sturdiness can be achieved. Also there are a few interesting parts Looks- 4/10 Really TLG? This looks nothing like a modern pickup truck. I get that its "customized" but that gives no excuse to how half baked the looks are. The front end looks sloppy and the rear is just simple Parts 10/10 Steering arms, suspension, CV joints, ton of red parts, beams in black, dark bluish grey, etc. Its a great parts selection to build your own model. Functions 7/10 Lets see, it has great suspension, steering, a V6 , yet another winch , and a function splitter which really wasn't necessary. Price 7/10 At first glance the price looks alright, and you get the .10 cents per part ratio, however, it feels like it should have been priced a bit cheaper. Just look at the 42024- over 900 parts for 70.99. Now I understand that this model uses some more expensive parts and such, but i think it should really be priced at $85. That sounds like a more fair price since you have to pay an extra 30 to buy the kit that motorizes it. Final score 36/50 The set is a big pile of 'meh'. It could have been better, but its just average, and doesn't have much realism. It provides a ton of modification possibilities(Perhaps this was TLG's intent with this set hence the "Customized" name) and I would love to sit for hours and modify it into something better, but it also fills the function of expensive parts pack, and that's what I will probably be using mine for. In a perfect world where I had more money, I'd love to buy 2 of these and use one as a parts pack and modify the other one, but I guess I'll just have to modify this one and then break it for its parts. For now though its staying on my shelf just beckoning me to go and try to make it even more of a customized pickup truck. Thanks for reading my review. As always constructive feedback is appreciated and please voice how you feel about this set too. -
First time posting a mod. Let's see how this goes... When I bought the 2014 AT-AT, I thought it was a really good set. It's technic frame makes it really stable despite the high centre of gravity, and for a system-scale set it is impressively large. It is very posable. It has it's problems though. In essence, it's a technic set with some plates tacked on to it. That usually makes for a set with a lot of gaps if you don't get the angles exactly right. It was also very studdy, whereas the "real" AT-AT is relatively smooth. Some of the colour choices seemed very inconsistent (a lot of stray DBL bricks everywhere). And, of course, the cockpit. The sides angled inwards too much, and it could fit only one pilot. Also: it lacked the red view port. So I decided to try to remedy all that, and basically turned a large pile of plates into a large pile of tiles. In the proces I found out that lighting is really important when trying to take pictures of LEGO. Sorry if it's hard to make out some of the details... You can find more pictures in this album.
-
Review: 70162 - Ultra Agents Infearno Interception
Vorkosigan posted a topic in LEGO Action and Adventure Themes
Name: Infearno Interception Theme: LEGO Ultra Agents Year: 2014 Pieces: 313 Pieces Minifigs: 2 minifigures Price: USD $29.99 This set is nearing the end of its run on shelves as the new wave comes in, but still awaits a review. Personally its my first Ultra Agents set, I went for it because of the Blade Runner similarity. First, of course the box. The back, showing off all the action features and app tie in. The build is divided into two stages in numbered bags. The instructions has a very simple pale green background with grid pattern. Some parts that were interesting to me, I believe only the flame helmet piece is new. Nice to have the space armor in red. I don't buy Star Wars or much action themes so this is my first set with spring loaded missiles. This is the completed first stage of the build. Here you can see the ejection seat mechanism The figures, Agent Soloman Blaze and Infearno. The mech leg is a nice touch but while Soloman is a decent looking figure, Infearno is the clear standout. He really reminds me of a Mega Man villain. His armor, flame throwers and flame board are simple builds but come together very well. The printing on Infearno is very cool, its a shame the armor covers it up actually. But its great to have the printing available. The final build, look familiar? Getting even more Blade Runner-ish in this mode. All features open, the spring fire missiles work reasonably well and its nice they can be hidden. I feel like this should've been reverse printed or else the instructions should show it going on the inside. Lastly, here are the extras. Thanks for reading. Playability: 8/10 Nice articulation, typical flick fire missiles, ejection seat. Great swooshability for a small vehicle. Design: 9/10 The car design comes together very well. Unusual but functional front wheels. Doesn't feel fragile despite nice detailing. Price: 7/10 Average price per piece, I think this would be better at $25 despite quite a few trans pieces. Now is the time to get it on clearance. Minifigures: 8/10 Soloman is classy but not too exciting, Infearno is excellent. Parts: 7/10 Good amount of trans bricks, there are 1x2 trans light blue used that could have been simply dark bley. Total: 39/50 Solid build, good design, I'm tempted to pick up more Ultra Agents sets. -

Your favorite MOCs of 2014
jorgeopesi posted a topic in LEGO Technic, Mindstorms, Model Team and Scale Modeling
No survey, no better or worse just your opinions. I am going to search my favorites it has been a long and good year, sure it will be tracks in my list . Happy new year, I forgot it . -
2014 is nearly over and throughout the year we've have some great new sets for the Superheroes theme, but the question is, which has been your favourite. These can include the normal sets and UCS Tumber, aswell as any polybags you have particularly liked. You can either choose your overall favourite set or separate it between the two different themes of Marvel and DC, i think i will do both. Marvel - Milano Spaceship Rescue DC - Jokers Steamroller Overall - Milano Spaceship Rescue
-
Just stopped by my local Target to see they had several sets on clearance: Lots of Chima down 15% or more including Legend Beasts and of course Speedorz--which seem to be on perpetual clearance All Hero factory IFB down as much as 30% Some Creator down 25-50% (including 31019 Forest animals at 50%) Some Lego Movie down 30% Storage boxes, clocks, watches down up to 30% Sadly, no clearance discounts on City, SW, or Super Heroes. Edit: some large (not arctic) City sets were marked down 15%, and Juniors as well. They also had some of the new Bionicle and Classic sets in stock ahead of the 1/1 date.
-

LDraw Parts update 2014-02
legolijntje posted a topic in Digital LEGO: Tools, Techniques, and Projects
There's a new LDraw update, version 2014-02. For the people here that don't like to read, here's the page that sums up all the new parts. If you do like a little more information, the following text sums it up pretty well: Source It also includes my first parts -
What are you going to do now, Bowman!? You are forsaken... As a conclusion to the final Hobbit movie, and to Middle Earth... The poster for the final Hobbit movie, the Battle of the Five Armies, built in Lego! Finally! After 2 months of work, hours of set up, buildings crashing/rebuilding, and adding lighting, it is finished! I built the Hobbit Poster for the Final Hobbit movie in Lego (excluding Smaug). Poster link. I had tons of fun building this, probably my favorite (but most tedious) part of this is the water and fire effect with it. I hope you like it too! Also my first and maybe last entry into the CCCXII 4th Wall: Backstory: My friend and I are doing a collab of this poster, and were going to enter it into the CCCXII. I was going to build Laketown in the picture, and he was going to build Smaug. I decided not to build the exact poster, but added my own artistic flare with the stone. Also, I don't have that much brown. :P What you see is basically everything, I have basically no more plates or tiles. I did have a ton of fun building and designing it however, which is most important. :) Problem: Unfortunately, Smaug is not ready. We are going to take pictures of both sections together at a later date, but after the CCCXII is over. However, I still wanted to enter into the CCCXII. Conclusion: so after we talked about it, I took the photo of Laketown, excluding Smaug. So this is only HALF of the collab. We will take photos of that at a later date. So this is my section, I hope you like it! In case you are wondering, this is what I have been working on for a while. :) Enjoy! Also, MERRY CHRISTMAS! Soli Deo Gloria! ~Matthew~
-
With 2014 coming to an end, I thought it would be nice to give a look back and remember what this year brought along with it. So, in your opinion, what was the: best/worst LEGO set released in 2014? best/worst LEGO minifigure released in 2014? best/worst LEGO theme overall in 2014? And finally, what are you most excited about for 2015? (Happy New Year! )
-
Hello all! This my entry for this year's Expand the Winter Village Contest, the Game Room and Hot Tub. It's meant for the elves and Santa, who work long hours, to get some much-needed leisurely time. Some of the images are low-quality (like the first one), but I don't have the best camera/editing software. I hope that's not too much of a distraction from the build itself . Anyway, this took me about a week and a half to complete, and I hope you all like it! The main focus of this building is the exterior. Lots of details are present and I tried to give the building a unique style because I thought it would make sense if the elves had their own way that they design buildings. The chimney has a very rugged, worn-down, weathered appearance to it, which complements the building nicely in my opinion. The interior, while not as detailed as the exterior, is packed pretty full with 3 different board games, a fireplace, and a snow shovel. The second story is twice as tall as the ground floor (elf construction is weird, huh). The flooring in the kitchen is sunken in, too. This is the bakery that makes the best pizza and banana cream pies in the North Pole! There is a shelf with wine and soda, a handy step-stool, ladder, brick oven, and a place to sit and eat. ...And now the hot tub. This was a last minute edition to the build, and I think it turned out great! I tried to keep the style unique just as with the main building. Santa seems to be enjoying a much-desereved glass of wine. I encourage you to go here and see some more of the photos, like the back of the building and the attic : https://www.flickr.c...57649258976898/ Here's a link to my entry from last year in case you are curious what that looked like : http://www.eurobricks.com/forum/index.php?showtopic=89353#entry1759582 Well, that's it! Wishing everyone else entering this contest good luck and a fun time building C&C welcome.
-
Hi everyone, this is my first ever input into Eurobricks. I've been lurking for a while, and this contest made me decide to finally create an account. This is the first thing I have ever built using CCBS. I bought a bulk lot off eBay last week, and having never used it before I must say I enjoy using it a lot more than I thought I would. I'm glad that Bionicle next year is using this system, I feel like it's definitelly a step in the positive direction. Not to say I don't love the old system, I still can't get enough of the originals. Anyway, I digress. Here is my entry to the contest: BFTGM Entry - The Malevolent BFTGM Entry - The Malevolent by Tr0jinH0rse, on Flickr The Malevolent are a race native to the dark caves of Okoto, a violent and primitive species who wear the bones of their victims as armour and trophies. They wear a skull mask to frighten and intimidate their prey, and any who are foolhardy enough to challenge them. The villagers of Onu-Koto are wary of disturbing these beasts, as they don't want to end up as the next piece of armour on a Malevolent. Also, here is a shot of how I imagine the Malevolent to look in the dim light of a cave: BFTGM Entry - The Malevolent by Tr0jinH0rse, on Flickr More photos here: Thanks for looking! Good luck to everybody who entered the contest.
-
The Viridescent Viper by mpoh98, on Flickr Hey All! Well, I decided to join in Nnovvember. :) Built this little Vic Viper last night, what fun! I had a blast building it, and stickering it as well. Some areas were a pain to get the sticker to be exactly right (for example on the 2 front wings, I put 4 tiny olive-green stickers over the cracks), but the end result was satisfying. I had a lot of fun building this Vic Viper for Nnovvember, and hope to next year as well! The Viridescent Viper by mpoh98, on Flickr The Viridescent Viper by mpoh98, on Flickr The Viridescent Viper by mpoh98, on Flickr Enjoy! Soli Deo Gloria! ~Matthew~
-
This is how you play with one of the final Hero Factory sets. Run away! The faceoff. Giddy up! This is the first of a new series of threads that I am starting. Look out for many more sets I will be photographing soon, in many different themes!
-

Nathanaël Kuipers 2014 Supercar
Paul Boratko posted a topic in LEGO Technic, Mindstorms, Model Team and Scale Modeling
Here is an early prototype concept from Nathanaël for a new supercar... The gearbox placement is vertical behind the mid mounted engine, which is pretty unique and it works off of a slick linkage system... This will defintiely be progress to keep an eye on... More information HERE -
Bonsai Tree + Working Clippers! Bonsai Trees are a form of Japanese Art using miniature trees grown in small containers. My creation I built for Creations for Charity! I tried to get the affect of some tree branch leaves that are clipped, and some that are not. I also incorporated 2 clippers, one more realistic looking one (the small one on the left of the tree), and 1 bigger one that you can actually use to "clip" the leaves. :) Enjoy! You can buy this and other creations on the C4C Bricklink store, which opens October 15! Donate a creation to C4C today! Soli Deo Gloria! ~Matthew~
-

Review 6th Anniversary REVIEW: 70161 Tremor Track Infiltration
LuxorV posted a topic in LEGO Action and Adventure Themes
70161_000 by LuxorV, on Flickr Being a fan of the old Agents theme, I could not pass getting at least an assay of this year's Ultra Agents sets. I started with the second smallest one, which I chose for its design, as well as the figs and parts. In fact, though the idea of a big fisted track vehicle is far from new in the cartoon-ish representation of technological villains of all times, the actual LEGO bricks version did convey the feeling nicely, and I was interested in seeing what building solutions where used to make the set. Let's see if building it and having it in my hands made it live up to the expectations. Theme: Ultra Agents Set name: Tremor Track Infiltration Set Number: 70161 Price: 19.99 $, 17.99 £, 19.99 Euro Pieces: 241 (+ 9 extras) Minifigures: 2 Year of release: 2014 Links: Peeron, Bricklink and Brickset The Box Front 70161_001 by LuxorV, on Flickr The box is rectangular and sports the new Ultra Agents futuristic/techno style, with a mix of greys and an overall light blue-ish aura. I particularly like the rulers on the right hand side, which suggest the idea we're seeing this through a pair of high tech binoculars or a survey camera of sorts. LEGO and Ultra Agents logos dominate the upper part of the front, along with the Ultra Agents (in this case Agent Fury) vs Tremor cartoon pic. The middle of the front has a shot of the set in action, with Tremor Track smashing through a wall (not my idea of stealthy 'infiltration', actually) and Agent Fury ramdomly shooting his gun, while the precious chip flies to what will probably be its destruction against the opposite wall. The age range and set number info complete this portion for the European version; I expect the North America version to have more writings as usual. In the lower left corner, an eye catching icon plus text informs us you can play an Ultra Agents game via a free app on your tablet. More on this later on. Back 70161_002 by LuxorV, on Flickr The back shows the set's play features: shooting missiles, smashing mechanism, rolling treads, randomly shooting Agents Fury's gun (honestly, did he attend shooting range training with the Storm Troopers?) and extracting the chip from its case. The rest of the back is very interesting as well: the lower right corner sports a detail fro the new 'almost spring loaded, but based on simple tension' guns, while the top shows an impossible-to-miss advertise for the Ultra Agents free interactive story app. Sides 70161_003 by LuxorV, on Flickr 70161_004 by LuxorV, on Flickr The upper side of the box shows Agent Fury and Tremor, while the usual mug-shot depicts the new gun at 1:1 size. The omnipresent app advertise is here, too. A lateral side bears the usual LEGO and theme logos, another app advert and a bracketed image of the mission goal, in this case the chip. Contents Inside 70161_011 by LuxorV, on Flickr Upon opening the box, we find an instructions booklet, a sticker sheet, two rubber tracks and a bag of parts. As you can see, there is quite a number of Dark Tan parts to compliment the Grey and Black under-structure of the set. New pieces 70161_014 by LuxorV, on Flickr New parts included in this small set are: Minifig, Weapon Trigger for Gun, Blaster Mini, Technic, Axle 5 with Stop, Tile 1 x 1 with Dark Bluish Gray Square with Black Center and Lines Pattern (Ultra Chip), Minifig, Weapon Gun, Blaster Mini in White and most of the minifig parts (more on those later on). Re-coloured parts 70161_013 by LuxorV, on Flickr Re-coloured parts in this set include: Black Vehicle, Spoiler 2 x 4 with Handle, Dark Tan Plate 2 x 10, and Dark Tan Slope 33 3 x 2. Rare parts 70161_012 by LuxorV, on Flickr Parts collectors and MOCers will be interested in the following rare parts also: Flat Silver Light Cover with Internal Bar / Bionicle Barraki Eye (occurs in five sets), Light Bluish Gray Brick, Round 2 x 2 Truncated Cone (occurs only in four non-Star Wars sets), Dark Bluish Gray Technic, Steering Wheel Pilot's Yoke (first time in a non-Technic set), Dark Tan Dish 2 x 2 Inverted (Radar), Dark Tan Plate 1 x 6 (getting more common this year), Dark Tan Slope 30 1 x 2 x 2/3 (Usually in bigger or Collection sets), and Dark Tan Wedge, Plate 2 x 4. Spare parts 70161_016 by LuxorV, on Flickr The usual mix of spare parts includes a long antenna, a second chip tile, some techinc pins and a half pin, a few round 1x1 studs, and a second lever for the new gun. Minifigures 70161_017 by LuxorV, on Flickr Both minifigures are new in all parts except Agent Fury's headgear. The new design for the Agent suit is just great and, together with Tremor's armour, is what made me want this set most of all. I love the detail in the torso and legs. Tremor's armour is equally well designed and quite menacing with its dark red accents. 70161_018 by LuxorV, on Flickr The two minifigs sport back printing of the torso and heads. While Tremor gets angrier, Agent Fury grins, probably to taunt him. 70161_019 by LuxorV, on Flickr Here we can see the two warriors all geared up and almost ready for battle. Notice the new armour piece on Tremor. While it's one piece (I would have preferred a removable helmet), it surely is more protective than most other armours and has very good aesthetics. Furthermore, it blend nicely with the fist pieces to give this villain an even more menacing look. Finally, notice the two half-sphere bulges near Tremor's mouth: those seem to be microphones for some communication device built in the armour. What I find strange is the choice of the shield for Agent Fury: I suppose it would have to be made of Vibranium or similar materials to withstand Tremor's (or worse, Tremor's Track) punches! Instructions 70161_005 by LuxorV, on Flickr The instructions booklet is nicely thick, and fortunately not divided into part 1 and part 2 like other small sets these days. The cover shows the exact same composition of the front of the box, except for the age range and 'free app' text. 70161_006 by LuxorV, on Flickr The background uses a blue-ish shade that does not distract the eye nor prevents colour or parts' recognition. As you can see, the rulers' theme is reproduced here, too. 70161_007 by LuxorV, on Flickr 70161_008 by LuxorV, on Flickr 70161_009 by LuxorV, on Flickr The last pages sport the usual plethora of adds, both for the Ultra Agents theme and App. . 70161_010 by LuxorV, on Flickr The parts count covers two pages. Again, you can notice the dominance of Black and Grey-s as well as some Dark Tan, with sparse brighter colours' accents. Building Start 70161_026 by LuxorV, on Flickr We start off by building the secure case for the chip. The design is not totally new, since the other similar structures have been used in a variety of themes over the years. Nonetheless, it's a nice little addition to the set and can help increase the playability. 70161_027 by LuxorV, on Flickr The case opens by pivoting the front part and reveals the chip for Tremor to steal. Now for the main model 70161_022 by LuxorV, on Flickr Tremor's Track itself starts with a bunch of technic beams and pins connected to few bricks and plates to provide a building surface for the upper part of the model. Notice the big steering wheel in the back: it is proportioned for the huge iron fist things on Tremor's hands, and it boosts the cartoon-ish feel of this set. 70161_023 by LuxorV, on Flickr Here you can see the start of the fisting mechanism in place. All revolves around the tan technic axle serving as a 'trigger' for the (yet to be built) big arms. 70161_024 by LuxorV, on Flickr Only the truncated cone part in the back controls the mechanism: the one in front is there for aesthetics only. 70161_025 by LuxorV, on Flickr The tracks complete this model. I like the use of the radar dome pieces as hub caps, and the whole set is very well proportioned, I'd say. Finished set 70161_028 by LuxorV, on Flickr The shot of the complete set helps us have a better idea of the relative proportions: if Tremor were to use the vehicle fists on either Agent Fury or the chip's case, I doubt he'll have more then a few shards to collect! Bird-eye 70161_030 by LuxorV, on Flickr The big vehicle looks pretty compact and well designed, without useless details and full of interesting solutions in the use of space. What I found odd at first was the presence of the antenna. Then again, I reflected and came to the decision that the antenna must be connected with Tremor's armour (remember the communication devices?) and allows him to control the track even when he's not operating it directly (something similar to the Goblin's control over his glider). Back 70161_031 by LuxorV, on Flickr I'm always intrigued by the way LEGO designers put peculiar details in their models. Take this Tremor Track, for example: Tremor is a know villain, riding a tank-like vehicle with giant fists, which will never pass un-noticed in the streets, nonetheless, LEGO designers put a full set of braking lights on this track, so that Tremor won't be bothered by the Police for not complying with the traffic laws. Ready, aim, punch! 70161_032 by LuxorV, on Flickr A side shot to show the reach of the mechanical fists. They would indeed make a big hole in any LEGO City structure unfortunate enough to be on Tremor's way! Final comments Overall, this is a nice set for its value. The figs are great and the part selection includes some interesting bits. Design & Colour scheme – 9/10 (TLG designers did their best and made a great job in creating the colour scheme for this set; what I dislike, though it is a minor annoyance and probably could not be done differently, is the extensive use of Technic beams in the central part of the vehicle.) Minifig – 10/10 (As with most of these year figs the Ultra Agents figs have a design and a level of detail that are just great.) Parts – 8/10 (A lot of common parts, but some interesting bits are in the mix nonetheless.) Playability – 9/10 (The chip safe case, the track and the weapons grant for hours of play by children.) Build – 8/10 (Nothing too complex, but some efficient solutions are used.) Price – 10/10 (20 Euros for 241 pieces plus spare parts is good, especially if you throw in two splendid minifigures.) Overall: 9/10 Very good As always, questions, comments, and pic requests welcome! If you like my reviews, and would like to learn how it's done, please consider joining the Reviewers Academy: -
I have been waiting for pics or instructions to surface online if this model, as well as, the Batmobile and The Ghost. Earlier today, I came across a time-lapse video build of Rockets Warbird and built it in LDD. Uploaded to Brickshelf, feel free use and build it, when modded. Should be right, this model is 141 pieces, when you include the 4 pieces to build Rocket, that gives you the 145 pieces stated on the box. Let me know if you find The Ghost or The Batmobile. Thanks, Jamie
-
REVIEW 60033: Arctic Ice Crawler Details: Series: City / Arctic Release year: 2014 Quantity of bricks: 108szt. Quantity of minifigures: 1 Quantity of bags with bricks: 2 bags (1 big + 1 small) + 2 tracks chains Bricklist: BrickLink Proce: ~15Euro Brickset BrickLink Summer 2014, over 30 degree heat outside, and you need to incorporate into the skin of the Arctic explorer, where it is also 30 degrees, but less than 0, and review the latest edition of the Lego City - Arctic. It's the reactivation of the same subject from the beginning of the millennium. There already appeared snow creepers, scooters and base. I wonder what was the "response from the market"? I'm trying to understand what was the spark for that decision, why Lego decided to return to the monotonous Arctic topic? 2014 Arctic gives us also a banch of snow vehicles and main base. What precisely incldes whole set ? 60032: Arctic Snowmobile 60033: Arctic Ice Crawler 60034: Arctic Helicrane 60035: Arctic Outpost 60036: Arctic Base Camp 60062: Arctic Icebreaker 60064: Arctic Supply Plane Yes, I remember about 30310 but I do not treat it as a part of whole set. I do not like polybags, at all. Sorry. :-/ Today's set is the second largest, but the least on my personal list of Arctic sets, which I would like to have in my collection. And how in the details presents 60033? Box: A small rectangle measuring approximately 20cm x 10cm. Leading blue colors are of course, a spin-off series Arctic City, white and blue as arctic white and orange and blue and shades of gray as the main colors of bricks. Tempted to say that the color has not been drastically altered from the sets of the 2000 ... FRONT & REAR TOP & BOTTOM RIGHT & LEFT Instruction and additionals: Small 40to page booklet, which describes the 36 steps of the submission of the model. On the last pages advertising the latest sets: Arctic and trains. inAnd ... big bag of parts (without number) and smaller, cha tracks and a template with labels. Minifigure(s): ... but the quality of minifigs, vehicles and proportions of the models stand on a much better level. Good example is the ice crawler's driver. The body has printed a lot of details: 2 x Arctic logos, zippers, pockets, fur and a transmitter? Complemented well as refined pants and blue hood. Bricks: Not much new stuff here, which is a strong argument. From my point of view, only these two things, listed below, I treat as "new". Black Tread Small (20 tread 'links') Light Bluish Gray Plate, Modified 2 x 4 with Pins Work in progress: Finished set: Last two pics made with 60032, which I bought for my daughter. BENEFITS: + track chains – had carried out a car with this element. You get the feeling that this is how the original works. Lightly tick. Cool! + nice and I think a good return to the topic that seemed to be so far now, as the Arctic land, + minifig, + set of colors, + set skillfully reflects, or at least gives you feeling, how work machines on research expeditions, + playability, + relatively not much stickers, but I think that the Arctic logo could be printed as it was done in 60032 set, WEAKNESSES: - price – in extreme cases, you can buy twice time bigger set from Great Vehicles series,, - distance between axes could be a little bit bigger..., - ... that's the main reason, IMO, why ice crawler looks less in comparison with a similar vehicle from 60036, Summary: Ice Crawler, strikingly reminds me of my first sets bought over 25 years ago. Subject simple model also, lack of additional interest in a set (only vehicle), a small box, over a hundred parts and as a result a lot of joy and fun that fits in your hand. Vehicle that is worth noting, was built based on existing blocks. Great for a small gift or a gift from a fan of Lego and of course must have in your collection !
-
I recreated the SDCC 1966 Batmobile from the one picture that is available, and than extended it to it's proper size. The included figs are the ones from the Juniors set. I have no clue what the real back looks like, so I guessed... if anyone has it could they please take a shot of the back of the model? Thanks in advance! I'm 99% sure Batman and Robin will fit... the cape won't allow me to put them in their spots in LDD. LDD file: http://www.mocpages....1406164535m.lxf What do you think?
-

Review: 70135 Sir Fangar's Saber Tooth Walker
TheOneVeyronian posted a topic in LEGO Action and Adventure Themes
NOTE: I've just noticed that the title states the number of Cragger's Fire Striker and not Sir Fangar's Saber Tooth Walker, can someone change it to 70143 please? Hello, and welcome to another of my pictorial reviews! For this review, I decided to pick set 70143 Sir Fangar's Saber Tooth Walker (or Sabre-Tooth, whatever your preference ) (Brickset entry | BrickLink entry). The set retails for £34.99 (UK) or $39.99 (US), and contains 415 pieces. But is this set cool or does it send chills down your spine? Read on and make up your own mind Would you prefer to just let the pictures do the talking? Brickshelf gallery First up, the box. It has the same fire-themed banner as all the other Chima Ice/Fire sets, contrasting with Sir Fangar's icy mugshot in the corner and the generally cool colours of the background. Gorzan breaks out of an icy prison while Stealthor rides a cool chopper. The star of the set however just stands there while Sir Fangar (I'll refer to him as just Fangar for the rest of the review) fires flick missiles at Gorzan from the walker's enormous flanks. The back fo the box shows the various functions of the set, as well as a nice action shot of a trapped Gorzan while Fangar and Stealthor get away with the CHI. Funnily enough, they show the moving jaw as a feature but not the more obvious moving legs. Other features include the chopper trike storage and deployment and the obligatory flick missiles. Three Minifigures accompany this mid-sized set: Gorzan in his new fiery garb, Stealthor and Sir Fangar. None of them are exclusive to this set, Stealthor also appears in the Flying Phoenix Fire Temple, and Gorzan and Fangar both appear in the limited retail set Sir Fangar's Ice Fortress, but this is the cheapest way to obtain all three minifigures, including Fangar with his full bad guy garb (a version of Fangar without the cape or armour also appears in the Speedorz set Fire vs Ice). Fangar: This is likely the reason that many would pick up this set, so you can obtain a fully equipped (armour, cape) Fangar, leader of the Sabertooth Tiger tribe. This is an extremely detailed figure, with Fangar boasting copper and grey body armour printing, including a beautiful sabertooth tiger head pattern with the Chi orb mount in it's mouth. Unfortunattely it seems like my torso and legs don't match up exactly with each other, but I can just about live with that. Unlike many of his cronies, Fangar doesn't show a great deal of decay printing, most of it is on his head. His head features a lot of scarring and it looks like the Sabertooths discovered how to use copper plates to patch themselves up. The copper patch isn't reprinted on the headgear so it does make his right eye look a little odd, but I personally like that. The trans-light blue armour lets you enjoy the printing while still bulking out the minifigure. Fangar wields an enormous fang blade of sorts, which uses a white lightsaber hilt, a relatively rare part. The cape is the same as 2013 Cragger's, but cut from white fabric, a new colour for this cape. Stealthor: I've already talked in extensive detail about this Minifigure, so rather than repeat myself I refer you to my description on my Flying Phoenix Fire Temple review. Stealthor gets a new weapon here, a sort of CHI-powered ice gun which utilises a brand new paw piece. Gorzan: The protagonist of the set gets an update from his previous Outlands version, sporting not only some new clothes but also a new headgear expression, which no doubt adds some variety. His headgear gets a more neutral expression this time around compared to the traditional open mouth headgear, with a more concentrated / determined expression. The torso and legs receive some gold and dark red armour plating pattern, with the torso getting some Phoenix patterns presumably to show the Gorilla's alliance with the Phoenixes. It's a beautiful but generic print, I just wish that Gorzan got some gorilla motif kneepads (like how Cragger and Laval got their tribe motif kneepads on their fire suit versions), this would have helped Gorzan get some more individuality and connection to his tribe.Gorzan has a very elaborate fire hammer which makes use of the new fire piece. This does make the hammer much taller than Gorzan himself though, but I suppose more leverage means more damage, right? New parts and recolours: Plenty of wonderful new parts and recolours are present in the set, presumably to try and justify the price tag in part I guess! New parts include 16768, 15090, 15091 and 16770, as well as a multitude of unique recolours. Trans-Light Blue recolours include 32348 and 48169, and Dark Orange recolours include 98585, 13547, 93606, 47456, 43723, 43722 and 2450. Brickset's inventory obtained from LEGO.com lists all the parts present. Instructions: Clear and easy to follow, and follow a similar format to all recent sets. Dark Brown is diffrentiated from Black by white borders around Black parts. Here's the obligatory random instruction image: The build is decent, with Technic mixed in with system to keep it interesting, although the legs and armour flanks are fairly repetitive. A competent builder can have this built in about half an hour to 45 minutes. There are 4 bags and also a DSS with a few difficult to apply stickers, they are mostly either small stickers going on large parts or stickers that apply to awkward edges such as the angled, sloped edge of the 6x2 wedge shell, so be aware of that. Bag 1 builds the Minifigures, a small patch of land with the lovely icecage piece and the Sabertooth chopper trike. Stealthor's weapon can also attach onto the front of the trike, which you'll see a bit later. So here's the contents of Bag 1 (all pictures exclude spares): Bag 2 builds the body of the Sabertooth Walker. The gears are part of the chopper trike launcher mechanism. Looking promising so far: Bag 3 adds the legs. This is the most repetitive part of the build. The trans-light blue liftarms look really nice here Bag 4 builds the head and shoulder armour where the flick fire missiles are mounted. And it's finished! The finished model: The piece of land. This literally uses just 3 parts, yet it does what it's supposed to. Gorzan models his icy prison for us: The icecage piece is open at the back. Probably not it's best view to be honest... The Chopper Trike. Here I've attached Stealthor's weapon to the front. The Trike is simple but I really like it, I think it's cool (I promise I'll stop the ice puns! ) Stealthor: "Hey, check out my cool ride!" The Sabertooth Walker. From the front, it's an imposing beast of a machine and by far it's best angle. It really does look menacing. Side view: Not really it's prettiest side to be honest. The front looks brilliantly executed, but as soon as you reach the rear section, it kind of looks lazily designed. You can see where the chopper trike mounts on the walker here, but to be honest, it's far too sparse around the belly area. It tries to emulate the curvy hips that big cats usually have, but since there's only Technic bricks here, it just looks half finished. Back view: Marginally a better view than the side view, but still looks a bit unfinished here too: The Walker exhibits some asymmetry, with cogs on one side and this Technic liftarm I'm pointing to on the other side. Pulling this liftarm down releases the trike. Unfortunately this function does not always go smoothly, you are supposed to pull the lever down and the trike will slide out of the bottom of the Walker and roll along the floor, but more often than not the trike will get wedged on the Walker upon exit, or not roll off the platform smoothly so that the trike sticks after the front wheel touches the ground. I did take a picture of it, but my camera decided not to save it unfortunately. Here are a couple of shots of the Saber Tooth Walker without the trike on the back. Without it, the sparseness seems to be exaggerated even more and the Walker's back goes very flat. The Walker's legs are very flexible and sturdy and allow for some quite cool and threatening poses. But this leaves me wishing that the head had some movement as well, as the huge, static head limits the posing possibility. Fangar has to stand to pilot the Walker. His ice leg better be of good quality And finally, a shot of the contents of the entire set: So, in summary: I wanted to fall in love with this set, I love saber tooth tigers, but somehow this set just left me feeling a little cold. The Minifigures are amazing and the design of the front is beautiful, but all of that is let down by the sparse rear end and flawed trike launching mechanism. The platform the trike stands on also tends to droop under the trike's small weight despite the gears trying desperately to provide enough friction to make the platform stay, and this results in unintentional trike launches without you doing anything at all. It has lots of exclusive and rare recolours in decent quantity, so it's great for the parts aficionados. Now for the ratings: Set design / asethetics: 6/10 - I might have even been a bit generous here, but a beautifully designed front end coupled with a lazily designed rear end and flawed mechanism does not make for a top-notch model. Even an attempt to hide the gears or Technic frame would have been welcomed. Parts: 8/10 - Trans-light blue liftarms and a whole host of new parts to add to the Dark orange library? Plus 11 of the trans-light blue Hero Factory claws? Yes please. Minifigs: 9.5/10 - Almost can't be faulted. Gorzan's lack of individuality on his fire suit is my only niggle. Playability: 5/10 - It's fun to pose the limbs, but lack of moving head may be frustrating. The flawed mechanism may also frustrate. I would have also liked a little vehicle for Gorzan, the odds seem to be stacked heavily against him Value for money - 6.5/10: It's a sizeable model despite it being quite spartan at the back. The minifigs and exclusive recolours help soften the blow a little. Overall: 35/50 - I would avoid this set at full price - wait for a sale. If you want a caped Fangar and fire suit Gorzan, you may want to consider the Ice Fortress instead of this. Not completely recommended at full price, but if you value minifigs and parts well over asethetics and playability, go for it Thanks for reading my review. I wouldn't mind a mod adding a poll for me, but for now, may you share your thoughts on the set in writing EDIT: Changed location of pictures from Flickr to Brickshelf. -
Review: 70146 Flying Phoenix Fire Temple
TheOneVeyronian posted a topic in LEGO Action and Adventure Themes
Hello all, and I hope it's okay to post this here. I am contributing my 1st review to Eurobricks, but I'm not new to review writing as I used to write set reviews for LEGO.com under the name "VeyronianHyperLady" and became a top 10 contributor over there. This review will be about the following set: 70146 Flying Phoenix Fire Temple, the flagship set from Chima's Fire vs. Ice wave of sets (Brickset entry | BrickLink entry). It retails for £89.99 (UK) or $119.99 (US), but does it deliver any bang for your buck? Read on and make up your own mind If you just want to look at the pictures, here's the Brickshelf gallery (it's a bit disorganised, but they're all there!) Firstly, the box. It sports the fiery banner at the top, like with the rest of the Ice/Fire Chima sets and features the beautiful artwork of the Phoenix Temple in it’s “Fire CHI Power Mode” as a phoenix flyer, while a sabertooth vehicle attacks the walls of the temple. I don’t understand why the vehicle can’t go through the obvious gap left by the temple and attack it from the inside . My box unfortunately came with a price sticker and was a bit water damaged from being left out in the rain by a courier , but it seems okay now. The back of the box shows all the functions of the set. Note that the Sabertooth vehicle can actually detach into two vehicles. The Minifigures are an immediate selling point to the set. Seven excellently detailed minifigures accompany the set, with six of them (counting Fluminox’s unique royal gown variant and Voom Voom’s trans-light blue heavy armour variant) being exclusive to this set, and the other being found in 2 other sets (at the time of writing). The set includes the Phoenixes Fluminox, Foltrax and Flinx, the tiger Tormak, the lioness Li’Ella, the Sabertooth Stealthor and the Vulture Voom Voom. Fluminox: Undoubtedly the star of the minifig selection, Fluminox, presumbaly king of the Phoenix tribe, appears here in his royal robes, using a printed slope instead of a pair of minifig legs (much like Ewald in this respect). The figure is printed with a beautifully intricate robe over feathers pattern, with golden fire motifs, a pendant, chains, dog-tags and a belt. Only the pendant is obscured by the armour Fluminox wears, which is a new mould cast with a little fire emblem by the front stud and some feathering detail on the shoulders. There are two studs at the back where the wings (new in orange) attach. The head itself is printed with a very similar pattern to the Eagle’s head pattern, with a stern face and a surprised face. The golden fire motifs continue onto the new phoenix helmet mould. All this combines to make a beautiful minifigure which will be absolutely essential for any Chima collection. Fluminox holds a Wingfurno, which a nice but rather uninteresting to look at weapon, but it does the job nicely. Flinx: Possibly the first Chima minifigure to have the short legs (corrected, it's the second, G'Loona was the first), Flinx is a small minifigure but still has plenty of detail, with a similar robes over feathers pattern, which the shoulder armour partly covers. Again his head is double sided, with a happy expression and a stern expression, with both sides conveying a rather youthful appearance. He uses the same headgear mould as Fluminox but with different printing. The youthful face, use of the small triple flames and the short legs suggest that he’s the baby of the Phoenix tribe, but this packs him with a lot of character. His weapon uses a new flame piece, like a lightsaber piece but with flame extensions down the middle and is marbled with trans-red and trans-yellow. Foltrax: Probably the least interesting of the Phoenixes, but still a nice and exclusive minifigure. Foltrax’s mix of red, dark red, orange, gold and dark bluish gray might not agree with everyone though, as Foltrax does look messy with all these colours. Unlike Flinx and Fluminox, Foltrax has an armour, fasteners and abs pattern, which is a very nice pattern sadly obscured by his heavy armour, however the armour is necessary for the wings to clip on. Foltrax’s head is quite similar to Fluminox’s, and could be easily mixed up, but luckily Foltrax and Fluminox come in different bags so, unless you mix all the bags up, putting the wrong head on the Phoenixes is very unlikely. His weapon is relatively standard fare, a Ninjago blade piece on a 4L bar, but does it’s job. Tormak: The first Tiger minifigure in Chima, whose headgear mould is the same as that of Li’Ella and 70141’s Lundor, which makes sense given that they are all based off the big cats. Tormak has some beautiful dark red/gold fire motif armour patterning, fur and muscle patterning on the torso, but this is covered by the heavy armour. Tormak’s head is double-sided, with a scowling face and an angry face, and his head is also printed with lots of tiger stripe patterning which, sadly, isn’t repeated to the same level of detail on the headpiece. The headpiece is strangely devoid of tiger stripe markings for the most part. I would say that Tormak suffers from lack of arm printing as well, he just doesn’t have as many stripes on him as a tiger should have. His weapon, a fire longbow of sorts, is perhaps one of the most elaborate weapons ever seen in an LEGO set, and looks very over the top, since it’s actually taller than Tormak itself. You have to tilt Tormak’s legs right back before he can even stand holding the weapon. The other problem with the headpiece is that, unlike many of the other Chima animal headpieces, it has a raised back. This wouldn’t be a problem if only Tormak’s head wasn’t double sided, since you can see the print of the reverse side show through, which is a shame. You can see how visible it is in this picture: Li’Ella: Finally, the Lion Tribe gets a female member added to the minifigure roster. Li’Ella has a dark red cloth print on her legs with the recurring gold flame motifs, and has some feminine upper armour printed on her torso, but again, this is covered by her shoulder armour. Again, she has a double sided head, one side with a smirk, one with a smile. The smirk is the face represented on her headpiece. If you look closely, her mouth is surrounded by lipstick. Not sure if this printing is necessary since she already sticks out as a female Lion amongst all the male Lions we already have, and, well, lipstick looks a bit strange on a lion I guess! Her weapon is pretty much recycled from the Eagle Tribe but with trans-orange round tiles on it instead. Stealthor: The only figure that isn’t a variant unique to this set, but still a nice figure nonetheless. This figure has some very intricate patterning depicting their partially decaying bodies. I suppose these ice zombies could have been in worse condition if they hadn’t been preserved in ice for 10,000 years (I don’t think calling them zombies is completely appropriate though, Stealthor looks much more intelligent and quick-witted than traditional zombies, but I suppose they’re already undead ). He sports some shoulder armour in trans-light blue, which I really like since you can still enjoy the printing in all it’s half decayed glory, which makes me wish the good guys had trans-orange armour (but maybe that was a Health and Safety nightmare for everyone? ). The patterning continues with the head, which is actually double sided unlike the Vultures. Stealthor’s two faces are both similar, one with narrow eyes, one with wider eyes. The head sculpt is different to that used on the Tiger and Lioness. The ice hand is Dark Azure in colour. Stealthor has an interesting weapon which uses two of the new claw pieces. Voom Voom: The other bad guy in the set. Once again, he has intricate printing depicting him wearing a tatty loincloth decoreated with bones, and showing the half-decaying body. He wears the heavy armour, which is trans-light blue so you can still see the printing. His head is just one-sided, with a cunning expression on his decaying face. I know vultures are scavengers, but it looks like Voom Voom scavenged himself at one point. The wings are new in Light Bluish Gray and he also has an ice leg. I do wish LEGO could have varied which leg is iced over on which figure though. Voom Voom wields a pair of ice axes. My only problem is why did they choose vultures if they were doing extinct prehistoric creatures thawed from the ice? Sabertooths and mammoths made sense, but vultures just didn’t as they’re still around? I guess I’m just being nitpicky because I studied ancient life as part of a degree at university New parts and recolours: There are a few new parts and recolours, including new parts 15092, 16770, 15107 and 16768, 13547, 43723, 43722 and 43719 in Dark Orange, 11091 in Dark Red, 11127 in Trans-Orange and Bionicle Zamor Spheres in both new marbled patterns (representing Fire and Ice), as well as a new 1x1 round tile print. Brickset’s inventory obtained from LEGO.com contains a full list of parts used in the set. Instructions: They are clear and well differentiated, though reddish brown and dark brown do look similar, but shouldn’t be a problem. Here's a random instruction image: The Build: The build itself is an entertaining 2 ½ or so hours without too much repetition, but do be aware that the build is seemingly more Technic than System, which if you didn’t know about it’s function, you’d think that it was a strange choice to build a temple out of Technic. If you don’t like stickers, be aware that this set contains over 20 of them to apply, and some of them aren’t easy to get straight. There was one tiny sticker that was especially bad, but more on that later. Unfortunately I didn’t take pictures of the build after each bag since I decided to review it after I built it all, so you’ll have to make do with my descriptions. Bag 1 builds Stealthor and Voom Voom, as well as the base of the sabertooth vehicle. You start the vehicle’s clawing mechanism here, but you don’t finish it until Bag 2. Bag 2 builds the claws for the clawing mechanism and assembles the detachable air vehicle. You then move onto Booklet 2 and bag 3, where you assemble Tormak, Li’Ella and Foltrax, as well as build the temple gates. Bag 4 extends on the temple gates, adding the two rather thin walls, and also assembles the “pool of fireballs”. Bag 5 builds Flinx and Fluminox and starts construction of the base of the center of the Phoenix Temple, including building the bomb dropping function. Onto Booklet 3, and bag 6 adds the Phoenix claws that also act as flaming torches, and finishes off the bomb dropping function. Bag 7 finishes off the centre of the phoenix and you can then see the mechanism that allows it to transform into a phoenix flyer. Bag 8 builds the walls of the temple/wings of the phoenix flyer. Bag 9 finishes the build off by adding the engines and shooter turrets to the ends of the walls built in Bag 8. The finished model: Here is the finished Saber-Tooth vehicle: Side-on view. Not it's best angle I don't think, but here you can see it's aggressive forward tilt. Back view. Front view. From this angle it really does look quite a beast of a machine. Activating the clawing function is easy, you just push a rod that sticks out of the back until it stops, then let go, then start all over again in a reciprocating motion. This is achieved by slope bricks mounted on a modified plate with axle hole, attached to the vehicle with frictionless pins, as well as a rubber band. The motion works very smoothly for the most part. Here you can see the detached air vehicle and what the base looks like without the top. The wings are built with hinges and can fold in and out, but I think I prefer the two attached. Note that these actually sit loosely on top of one another, so don't go rolling the vehicle over your ceiling Stealthor sits in his new toy. It's quite a snug fit. Note the canopy is double hinged. Now onto the temple: The complete temple is quite sizeable and works quite well as a temple, though the lack of entrance into the phoenix itself may be a bit puzzling. The bley stickered part in the centre is where you can load the zamor spheres for a function you can use in phoenix mode. Plan view: Here's the walls with the phoenix part detached. Note the trans-red circles - the phoenix slots into them when docked. The phoenix actually sits completely loose, so be careful when moving the temple as a unit. The wall section is also the most fragile part of the build, which doesn't help with transporting it. The Phoenix in Temple Mode, detached from the wall section, front view: Back view of the Temple Mode. The back central section is sparse and full of Technic, but with good reason. You can pick the temple up by the back and push the section where my thumb is to begin the transformation from temple to phoenix: The temple in Phoenix mode ("Fire CHI mode", but Phoenix mode is easier to say I think ), a front view: A plan view of the Phoenix in Phoenix mode: The Temple gains another entertaining function in Phoenix Mode. Push the pin where my thumb is in the picture and make the Phoenix drop Zamor spheres as bombs. Bottom of the Temple in Phoenix Mode. Not much to see here I suppose, but you can see the hole where the Zamors drop out when you push the pin in the previous picture. Here you can see the shooter turrets are not very moveable, but they are counterweighted. If there are no minifigs in them, they droop like in the picture, but they level out when a minifig is placed in command. A bit of a close up of the Phoenix, back in Temple mode. The sticker on the black tile is nigh-on impossible to position correctly Fluminox can stand in the head of the Phoenix quite well, though how on Earth is he supposed to pilot it if he's sitting so far away from the controls? As said earlier, the shooter turrets level out when a minifig is placed in them: This is the so-called "Pool of Fireballs", although simple, it looks very nice and compliments the Temple quite nicely when you position it in the middle. And finally, here's a shot of the whole set contents: So, in summary, this is a set that's worthy of being a flagship model in every way. It is a decent and interesting build if you don't mind building with a bit of Technic (I understand why this got a 9-14 age rating after I built it ), it really is excellent value for money, in the UK this is a whole £10 cheaper than the similarly sized 70010 The Lion CHI Temple, the Chima flagship set from last year, and boasts 1,301 parts compared to last year's Chima flagship set which only contained 1,258 parts, so on a price per piece basis, the Flying Phoenix Fire Temple is excellent value for money, especially if picked up on sale. I love all the interesting new recolours in the set, especially those marbled Zamor Spheres, and, best of all, surely it's the world's first swooshable temple? Young kids will need good strength to swoosh it, the phoenix part weighs about 650 grams, but no problem for AFOL's. It's best swooshed with one hand on the back, thumb by the bomb dropping mechanism. Now for the ratings: Set design/aesthetics: 9/10 - This set is very well designed, especially the phoenix. It's clever in construction and looks good whatever mode it's in. Points are only lost on how the saber-tooth's vehicle looks in two vehicle mode. Parts: 8/10 - Plenty of new and especially recoloured parts to keep new part aficionados like me happy, but for it to be a viable parts pack you'll have to deal with significant amounts of both System and Technic, which may put some people off. Minifigs: 9/10 - They're excellent as always, though I think Tormak's lack of stripes and the fact you can see his reverse head print at the back with his mask on is a little disappointing. Playability: 10/10 - it's fun to transform the temple into a phoenix and drop a few bombs on unsuspecting ice zombies. The addition of a substantial bad guy vehicle is also great. Value for money: 10/10 - A pleasing PPP ratio to me in the UK, and there is much fun to be had with this set. Worth every penny I paid for the set. Overall: 46/50 - an excellent set, definitely recommended if you have enough LEGO budget remaining, and even better if you find it on sale Thankyou very much for reading my review! Thoughts on the set are welcome since I can't add a poll quite yet EDIT: Changed picture location from Flickr to Brickshelf. -
Here's a topic I thought I would put in, just 'cause. World War Brick is the largest solely military LEGO convention in the world. Supposedly it is, that might not be true, but I'll believe them. It is in its third or fourth year, I believe, now, and it gets bigger every year. It is hosted in Minneapolis, Minnesota, at Brickmania Toyworks. Apart from Brickmania, other vendors come, such as GI Brick, Brickstuff, and others. Will Chapman from Brickarms is also there. Some of the activites besides shopping are looking at Weekend Pass holders' MOCs, looking at the Greater Midwest and Twin Cities LEGO Train Club displays, see Brickmania's dioramas and other builds (Including the new-for-this-year Battle of the Black Sea (Battle of Mogadishu (Black Hawk Down) diorama), or take part in the building of this year's mosaic. Last year it was the Iwo Jima Flag Raising, which turned out to be a resounding success. This year, they are doing the Cobra King picture. I could go on and on, but I have places to be, so I'll wrap this up. Weekend passes are still available for $60.00 for the complete devoters, but for the merely curious, you can buy a public ticket both in advance (it gets you in half an hour early) or at the door. You can buy them here: http://www.brickmania.com/brands/World-War-Brick.html and here ia the website for WWB itself: http://worldwarbrick.com/ I hope this sparks some interest!
-
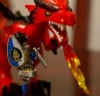
Hey guys, I was on Reddit the other day, and saw a post by a LEGO designer stating that there was an Exo-Force Easter egg in the MechDragon... I checked and sure enough, there was a sticker of the split Sentai Mountain on the side of the dragon! Did anyone notice this? I think that that is so cool, and hope to see more Easter eggs in the future! legozebra