Search the Community
Showing results for tags '12v'.
Found 106 results
-
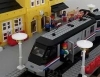
Hello everyone, My previous layout video got a lot of positive feedback here so I thought I'd post the newest one! Here it is. This is my largest layout yet, including 5 electric points, 3 signals, 1 decoupler, and 1 level crossing in addition to other supplemental sets and 3 train sets (7730, 7745, 7750). I'm pretty happy with how it turned out, and it even includes a night section that has the 7745 with lights in it. I hope you enjoy!
-
Hi, I have a question for maintaining 12v tracks and motors, The motor speed at the first run was so fast that passenger coaches were derailed at the corner but after 10~12 mins running, it has become slower and stops in the middle of the track. So I though I may need some lubrication work and cleaning rails properly. Is spraying grease like Super lube works for lubricating 12v motors? or would affect solder part or plastic? or is there any tips for lubricating 12v motors? Also, cleaning the conductor rail, would whiskey or alcohol spirit with cloth work? as black spot does not go away. Thank you.
-
-Mini.thumb.jpg.03594ed3626ab4a4b625a32af4d03d5f.jpg)
A Layout in Three Eras - 4.5v, 9v and 12v - Photo update!
Andy Glascott posted a topic in LEGO Train Tech
(Click to skip to the post with the latest photos) The Backstory: For years I've wanted to be able to display my 12v collection at shows/exhibitions/libraries or wherever, but the wiring is a challenge - I reckon on my last full layout there was 250 to 300 feet (75-90 metres) of the stuff, which on a static layout is one thing, but one built in modules for transport is a challenge. Three or four months ago I came up with a solution (more on that below) and the dreaming started. After much playing in Bluebrick, and nostalgic posts appearing here about older era trains, I settled on a plan. I still had a bunch of my old blue track from the 4.5v era, but no motors. Off we go to Bricklink then! The Layout So, here's the plan. Ten years ago I had a small portable layout on 4 modules, each 3x5 baseplates, and over the years have simply added more of these. Following my Bricklink spree, I now have 2 working 4.5v motors, so rebuilt the loco from set 183 and I have the loco from 7720 in progress. These 2 will feature on the 4.5v loop below, which is 3 of those modules. Next to the 4.5v loop will be the showpiece, the main 12v loops. 12v Lower by andyglascott, on Flickr And on the right of the layout will be the 9v loops. Unlike the other 2 eras, I will have 9v track left over, so this is likely to be expanded in due course, particularly as @michaelgale releases motors, power supply etc. 9v Loops by andyglascott, on Flickr Lastly, there will be another 12v loop, elevated, which will run across the back of all three eras. 12v Upper by andyglascott, on Flickr Putting all of those together looks like this (the white baseplates are roughly where the mountains, tunnels etc will be for the elevated sections. The green and grey sections are simply so I could keep track of where the 3x5 modules were to try and avoid having curves/points on more than one module. When it all comes together, in most likely a couple of years, I'll be able to run 6 trains at a time. Whole Layout by andyglascott, on Flickr The Beginning After all the planning, and clearing away of my last (incomplete) layout, I've finally started building the first module, part of the 4.5v loop. I decided to start here as this will be the quickest era to build, and to a large extent, each era can also be displayed as a stand-alone smaller layout. These three modules will be countryside/farmland, and the trains will reflect the farming side of it when they get built. Module 01 Pic 02 by andyglascott, on Flickr The 12v Wiring The solution that I've come up with is fairly simple, but does involve taking a drill to some baseplates.... At each of the 12v points or signals I'll drill a small hole through the baseplate and the wood for each module, thread the wire through and attach either the original Lego plugs or a quick connect/release plug/connector so that when the layout is set up I'll use already measured lengths of wire to go from that point to the control panels, which will be on their own module. This is going to be a heck of a journey, and build, I'll post updates from time to time, particularly at landmark moments such as completing an "era". I always said, growing up, I was keeping my Lego for my kids. It was really only an excuse, and I'm really glad I didn't sell my old blue track even though I didn't, for years, think I'd use it. Sadly my original 4.5v motors, battery boxes, lights and even signals are long gone, but I was only 7 or 8 when I got 7720.... -
Hello EB, I'd just like to share with you a new video I uploaded to YouTube yesterday, complete with 80s synthwave music, that is about a 12v train layout I made and features my 7750 I got recently along with a 7730 and 7745. I'm pretty happy with how it turned out! -Reker1000000
-

[MOC] The Milwaukee Road EP2 Bipolar E-2 - in 12V style
Paperinik77pk posted a topic in LEGO Train Tech
Hi all and Happy New Year!!! Since I'm waiting for H0 parts to arrive to continue my experiments, I am browsing the Internet a lot to get some inspiration. Searching for some American locomotives I found (again) the Bipolar, a locomotive which I like a lot...but I always end forgetting its name. I recall the GG1 in my mind...but the name Bipolar name simple does not fit into my 64kb of memory (38911 bytes free)! So, I thought it could be nice to try this big lady in 12v, just for fun. In this case, I built the E-2, the lattest rebuild of one of the Bipolar family, made in 1953. It's a massive thing, and the two motors will surely be helpful to move the locomotive and the Hiawatha train (I did not design the wagons, but for sure they would be...heavy!!!). As the original E2, the locomotive has asymmetric details on the two "big noses". The colors are WRONG - yellow should be orange, black should be dark gray, so I kept a 7740 paint scheme, well suited to the color range available in the 80s. As any high-end locomotive it has some expensive parts (all the windows). One note - the 2x2 windows can be also in old gray (from 7740), a bit cheaper option. The locomotive has 6 point of articulation, I think it could manage the R40 curves - my real life DB BR78 is less articulated, just to made an example. As you can see, the whole body seems a bit taller than normal 12v trains, but all in all, the real bigger details are the two pantographs. I don't think I'll ever build it in real bricks - for the only reason that I'm not so convinced to see it going around R40 curves. Maybe it could be a good shelf queen I hope you like this one! Ciao! Davide -
[MOC] Lego DRG V3201 - Diesel/Pneumatic Locomotive - in 12v style
Paperinik77pk posted a topic in LEGO Train Tech
Hi all, always starting from this inspiring discussion... ... @Reker1000000 introduced me to a very particular locomotive: "DB V3201 seems like it would be an interesting starting point for a locomotive to model in 12v style with the red motor..." The locomotive we're speaking about is the DRG V3201, one of the first experiments to upgrade from steam to Diesel engines. In this case, Diesel motors were available , but problem was related to transmitting their power to the wheels. Gears were too weak, Hydraulic transimission was still in development...so the idea was to replace steam with compressed air, therefore maintaining the "old" transmission system (including distribution) used by steamers. In short, it worked this way: DIESEL ENGINE --> COMPRESSOR --> RESERVOIR -->CYLINDERS --> COUPLING RODS --> WHEELS More or less what is seen in some Pneumatic locomotives made in Lego (great stuff!) with electric motors. Well, seems great, but there were many problems related to the heating of compressed air, its cooling (!) and cylinders lubrication - all for maintaining its efficiency. Here's an interesting link! http://www.douglas-self.com/MUSEUM/LOCOLOCO/diesair/diesair.htm All in all - a very complex hybrid system, with many gaps to be solved with engineering "patches". But it's a cool locomotive and making it in 12v style could really be a challenging task. First of all, it's the most asymmetric thing I've ever seen , second - it's a very tormented design - which cannot be captured fully in 12v style, due to lack of parts at the time. It's however a very peculiar locomotive (depicted also in a postal stamp!!!) and it's worth to be tried. Here it is, just out of the shed , helped by a small V60. In reality, this event could not happen, since the V3201 was scrapped many years before the launch of the little shunter, but since we can do whatever we like with our fantasy, I was more optimistic and imagined a restored V3201 ready for some hystorical train! The V3201 is based on the chassis of a BR78, which - luckily - is one of the 12v locomotives I've already tried to create. Therefore, chassis was already prepared and only needed to be adapted to the longer body. This big beast has a quite boxy body, which seems to be made soldering together some parts of cabins, cut from steam locomotives. The central part of the body is sticking a bit out from the overall shape, and this is due to the big submarine diesel and air reservoirs. The main charachteristics are the two big gray radiators, the small windows on the corridor side, and those big stairs. Stairs were a nice thing to replicate, even if these are not the same as in the prototype. I did not use the big train doors, since these did not allow me to recreate the stairs and handrails. In the real thing, the stairs go over the cylinders, so using the 12v standard ones was quite a mess. I replicated them with normal parts. and this was not a problem. I had however to "cut" the stairs in half, the upper one being fixed to the body, while the lower one being part of the bogie (and turning accordingly). With the 12v motor, this design needed to be somehow adapted. On a real 12v motor, the central hole can accept an half Technic pin. Using a normal Techic brick some plates and tiles solved the problem. The ladder is kept in place by the pin and "slides" together with the motor. Between the radiator and the cabin there's a small, virtually transparent door since it's made of a panel full of small holes. The body in reality should be 4-wide in that point. I tried fences, door fences, everything did not fit and SNOTting was quite impossible (for me at least), given the limited parts available. Even Marklin's model is solid in that point, so I concentrated more on having at least a grille pattern. Using the ladder part was not so nice, it was just confusing. I therefore tried the just seen @zephyr1934 technique (thanks to you and Katy!), to have some visible horizontal lines. I used 3794b parts (jumper) . It works also with normal plates, but this is way better. Doors features a possible, even if not used at the time, SNOT for the door hadle, using headlamps bricks. Here's a shot from above, showing the 7-wide central part of the locomotive. As you can see I played a lot with the jumpers parts. And here's the "blind side" of the locomotive there's not so much to say ,being pretty smooth! Apart big red wheels and red motor, 2x1x2 and 1x1x2 black windows are there, just to remember there's some 7730s and 7750s blood inside the veins of this "thing". Here is visible the big radiator... ...and here is visible the smaller one. Looking better at the central headlight you can see some "white stuff" between the bricks - it's the classic 12v light brick with the addition of a small diode. This old trick allows the headlight to be lighten up according to locomotive's direction. Radiator is made by 1x1 plates, trying to replicate the "pattern" of the real thing. I put here red lights in 7777 style, even if these should be white, according to prototype. A brief mention to the Shed - it's an old MOD - I do not sincerely remember if I already presented it here in Eurobricks. It's a 7777 build, converted to a more shed-looking thing. Since I like to replicate dioramas in 12v style, this could be a nice addition to the overall scene. I hope you like it! Thanks again to @Reker1000000 for his inspirational idea! Ciao, Davide -
[MOC - MOD] 7777 Idea book - Obscure unloading station locomotive - 12v
Paperinik77pk posted a topic in LEGO Train Tech
Hi all, during a pleasant discussion in this thread... ...a very interesting question was raised by @SDLgo9 member: The 7777 idea book pages mentioned here are those three pages showing the blue matter (!) unloading station and the famous auto-unloading wagons. These wagons are pulled by an obscure locomotive, which is never fully depicted. In fact - the front view is missing, and there's no clear view of the boiler. I've NEVER taken care of it, nor analyzed it too much. It really seems a 7730-based locomotive, but simplified in some details. There's a strange combination of "simple look" and now overpriced rare parts. So maybe it's simple - but it is a wanted effect? Analyzing the whole scenery depicted in the book - it's not a place for a fancy locomotive. There's work to do - wagons are fully loaded and heavy, so that unloading station surely needs a workhorse. And these workhorse is powerful, maybe not so good looking, but simple and solid, ready for its everyday duty. Here's a rear view, similar to the one in the Idea Book: It's a long locomotive and it's not using the classic train base (like 7810). It's pretty boxy and looks heavy. I had to take the scans from Brickfactory and to modify the photos to see a bit better. But which parts were used of the body is pretty unknown to me. So, we have the 2x2x1 black windows on the rear part - being a 7730 derivate - there are also doors, and at this point, the 1x2x1 small black windows. But it seems (to me) that these are not facing towards the front, and instead are used as small side windows. Side reservoirs are big, so fitting the two weight bricks was not a problem. The smoke stack is visible and there's not so much to say - but the boiler...is not completely visible. I added a square steam dome just for completeness. There's an headlight on top of boiler, and it seems there are also two headlights on the "nose". They are not fully visible, for this reason I think these are not placed on the corners of the chassis. Let's try: Simple and straight - the boiler is not round, but goes down to the chassis, same "steering wheel" as in the 7730. Headlights are a bit more inwards. All in all it's a simplified 7730 nose. Then, a more "Narrow Gauge" look - always with 7730 parts: There could be more styles, just removing the front steering wheel part and playing with slope parts. Suggestions are welcome!!! Davide -
Hi all, this time I propose a real build, it's not completely new - many of you surely has seen it in some of my digital renderings, but was never built. I finished it yesterday, when the red motor finally was repaired and the missing rare 2x2 black window arrived. To create this one, my third copy of 7810 was used as donor for the baseplate and black windows. So I decided to keep the 7810 number when I chose the stickers (the renderings have 7730 decals). Just to explain, all my MOC locomotives keep numbering of original Lego sets from which are derived in terms of parts. To celebrate its arrival, I used my small 12v test track. As you can see is a very simple build, standardized in 12v style adding the black side doors (absolutely not present in the prototype), and 5 2x2 black windows. The red motor was a must- I tried to use the black one - but it wasn't the same thing!!! This motor was not running anymore, so I bought a black one in bad aesthetic conditions as donor. I removed the electric motor from black shell, cleaned all inner parts, reinforced the red shell internally with some superglue (it had some cracks), changed axles (using the ones from black motor) and performed a test. Once the test was ok - I finally glued the two parts of the red shell. Even if the chassis is common to other locomotives, it seems very small. The inside is small aswell, and I only could fit a lever in 7750 style. You can see the 12v light brick and its cables. I bought some 12v light microbulbs - maybe I will succeed to light up also the rear headlight when going in reverse. Even if it has no weight bricks, it still has a decent pulling power and runs fine with small wagons. Now it needs its own set of cars. I hope you like it!!! Ciao, Davide
-
Two great trains are dueling on 12v gray track: the British Railways HST 125 vs the Deutsche Bahn BR403 "Donald Duck"! Two big countries with high expertise on trains,two different power sources (Diesel vs Electric), same speed (above 200km/h or 125mph). Who will win this Lego contest? None of them, since they both are built on the same Lego platform and shape - I created first the "Donald Duck" in Lufthansa colors and then I modified it a little to recall the HST125. So same power cars ,and same wagons, only with a different paint scheme . I've always focused on standard trains, and this is my first experiment with fast ones. After all , during "gray Era" we've seen a lot of steamers, diesels, electric trains...but only one example of fast train. So here's a shot of the DB403, with an applied sticker on front "window" to simulate double windscreens... ...and one of the "Screaming Valenta" - here the sticker is a bit different, but you can easily tell it is only a bigger one! Both are using parts available in the last years of "Gray Era" (so they could have been made starting from 1987). The HST could be a bit older than the 403 - since it's using the old style blue window in the cabin. I could also recreate a yellow sticker to cover the outer part of the trans-clear headlight, but I preferred to keep it as it is (just imagine the sticker detaching when the glue is old...I HATE that sensation ) Both could have working headlights, the DB403 can use a 12v light brick on top headlight. For the HST125 the problem is how to diffuse light from light brick to transparent slopes. But both trains could also leverage on 9V lights, which were already available at the time. The 9v Battery box fits easily in both bodies. Finally the 7745 has some internal competition!!! Hope you like these two! Ciao! Davide
-
So, I'm curious... Does anyone else have a stage of a build, whether it be a building, rolling stock or, as in my case, complete layout that they have a love-hate relationship with? We move house too often for our liking, so recently I've been building new layouts every 2 to 3 years, and being a 12v based layout it involves a lot of wiring (see below for a bit of it). Much as I love the end result, the wiring drives me nuts and I really slow down in my progress when I get to the point of needing to do it all. Anyone else got "pet peeves" so to speak that are part of the fun? 20200927_115339 by andyglascott, on Flickr
-
12v Level Crossing - lights not flashing, problem now solved.
Andy Glascott posted a topic in LEGO Train Tech
Hi all, another appeal to the collective EB mind, maybe particularly to my fellow 12v enthusiasts. I'm installing all the wiring and controls on my new layout, and the lights on the level crossing don't flash. The flashing is controlled by this piece, and I suspect it's just getting old.... (I probably bought it 35 years ago.) Have any other 12v fans had this issue? Is it solvable? I've tried the usual checks of reversing the plugs, connected a light directly to the unit on a single short wire etc, but they will only come on and stay on rather than flash. While I'd rather not open it, if it's possibly repairable I'm willing to try, because I don't need it to just have the lights on. Alternatively, is there a simple piece of electronics I could wire in between the control unit and the lights to add flash back in? (I have little to no soldering skills.) Thanks, Andy Ok, update already.... When I looked at this listing for a replacement the seller mentioned turning the unit upside-down. And the light flashes..... Any thoughts? Update 2 - The control buttons are a distance away from the 12v power pack, so connected via a wire. Switch the plugs on that around and the lights flash.... Feeling slightly dumb, but rather than remove the post I'll leave it up to hopefully help others out. -
Hi all, My croc arrived a couple of weeks ago and got built last week. I put one of the 12v Technic motors (image below) in it and improvised a working, albeit imperfect, power pickup for the 12v centre rail. When I apply power I can hear the motor is wanting to work, and when I lift the centre unit (I haven't attached the end units in tests yet) off the tracks and supply power directly to the motor, it works fine and the wheels turn. Put it on the tracks, with power directly from the 12v power supply and it won't move, so my guess is that the rather old motor just doesn't have the power to get this wonderful loco moving.... Any insights or suggestions would be welcome. Thanks, Andy
-
12 Volt Roundhouse full front view Back in April I presented some will received train MOCs in 12 Volt grey era style. Recently the Brick Train Awards caught my attention and this contest was a good reason to pick up on my 12 Volt Roundhouse project which started 2016/2017 but was never finished. So time was limited, the deadline came closer. But I made it. Now it's time to share the 12 Volt Roundhouse with you folks. I named the Roundhouse "Bamberg", the city I live in. And close to my place there is the ruin of the real Roundhouse. Nothing more to see there and the place is prohibited to visit. So my Roundhouse is just a phantasy model, like the 12 Volt grey era trains sets are also "phantasy", but pretty close to Deutsche Bundesbahn locomotives and waggons. The Roundhouse has 7 segments, one for each official steam engine of the Grey Era from 1980 - 1986 which are: 7710, 7715, 7722, 7727, 7730, 7750 and 7810. The side and back walls are build entirely with 1x2 and 1x1 plates in red and dark-red to model the characteristics of red brick walls. The segments are modular in a 3-1-3 configuration for easy transportation. The turntable is operated remote controlled using a Electric, Train 12V Remote Control 8 x 10 with 2 Circled Arrows Pattern which fits nicely with the more standard remote controls for signals and switches. An old 12 Volt Technic motor is integrated in the bottom of the turntable. The 2 cables are used to power the motor and the electric middle rail on the turntable. The cables are not placed well, the should go in the centre of the rotation point. Hmm, I need to think of a purist solution for this issue. If you build a turntable, the complete track level has to be elevated. So the complete layout (except the roundhouse and the turntable) is elevated by 2-3 layers of brick. This is really eating my basics and plates in old dark grey, dark tan and black. But it was worth it. Using an elevated brick build ground it was easy to hide all the cables for the good old 12 light posts and the power supply for the tracks in the Roundhouse. Finally some typical 1980's style vehicles and other accessory bring back the typical charm from this time. Trucks were only 4 studs wide ... long time ago. Enjoy the video and the pictures :-) Stay safe and healtyh and keep 12 Volt alive! Holger #7730 and #7727meet just outside the Roundhouse The blue workers are busy unloading the new #7750 train wheel from a #7720 platform waggon. A MOC diesel V36 engine brought in the valuable delivery. No social distancing required for LEGO blue work-men The backyard has an additional access by rail and by road. Can you spot the statue of the founder of the Roundhouse? Back door view through the Roundhouse. Can you identify the steamer on the turntable? My green Mallet steam engine on the turntable. #7750 (derailed, opps) is getting fresh coals. This graphic shows the wiring diagram. The 12 Volt trafo powers the turntable and the selected track. The V36 MOC engine has some trouble. The hood was lifted off so the blue mechanic man can fix this issue. It's getting late, but the blue workers are still busy. Not very secure to keep the lights on while weltering the mast? Top view of the Roundhouse at night. All pictures also in my Flickr album https://www.flickr.com/photos/holgermatthes/albums/72157715067356186
-
Hi all, I've started to use again the 3D printer after a big time it was unused (I had to re-align it and still has some work to do). Thinking about a model of @Evans (a large steamer in 12v style with old 12v medium size wheels - those of 7750 , but in black), I tried to recreate the original 12v medium wheels design and I also tried to go further, enlarging them to 37mm size. The new wheels feature 10 spokes as the original old wheels, angled at 36° each. I used Tinkercad since it is easy and more than sufficient for my projects. And this is the result ,printed both in black and red (red filament is new - I have to understand why there is black filament residual - I'm still a total noob on 3D printing ). I printed on a medium quality setting for the red ones. The black wheels were printed on draft setting. The filament I used is PLA - a medium cost one but it works fine. The red color is somewhat between the red one used for new Large wheels and the old red of the 80s. I think there are darker and lighter red filaments, but it's really difficult to tell if the printed result will be of the correct color (the raw filament color is quite the same as the original Lego wheels, but once printed...they are a bit brighter). I used a pair of normal red wheels (the ones used on wagons - like in 7720) I removed the original wheels, kept the "red axle" and used it with my 3d printed wheel. Then I locked again in place the red pin on the black wheel holder brick - and that's all. I'll post here all my experiments - there's a lot to improve! If you have any ideas or suggestions - feel free to comment! Ciao! Davide
-
Hi all, I gave another try to the new 12-wheeler chassis, and this time I could not resist to recreate another iconic locomotive. The real DB E03 is based on a CoCo wheel arrangement, so the 7740 locomotive was more accurate on this aspect. But I'm in the "Blue Era" , so I am a bit limited to the 4,5v/12v motor size and "rigidity". Therefore, my DB E03 is still a 12-wheeler, but in a BoBoBo-like arrangement. Don't tell anyone! This is my first DB E03 - I've never built one in other styles or sizes, apart the 7740. I chosed the first one produced since i liked that silver middle line separating the red and the yellow parts. It can be built also as a DB E103, removing the gray line in the middle of the body, adding a second line of lateral grilles, and changing the pantographs to the one-armed model (it was already used in the late 70s - so it fits the Blue Era). The correct wagons for this one could easily be the Rheingold ones, but in red/yellow color scheme. They should be a bit longer too. In this case, they would be also a lot heavier, I wonder if the 12v motor can pull such heavy things on highly-uneffective wheels lof the time. I hope you like it! Ciao! Davide
-

40 years of Grey Era LEGO trains ... celebrating with some 12V MOCs
HoMa posted a topic in LEGO Train Tech
In 1980 the golden (grey) age of LEGO trains started. The Grey Era was lounged with a firework of great sets like #7740 and #7750 and the train station #7822 and the entire rail system with remote controlled switches, signals and later level crossing and decoupling unit. After collecting the missing sets over the last years, I thought of building some MOCs in the classic grey era style, maybe using some newer colours and elements. But to keep the characteristics of the original sets. @Paperinik77pk already came up with a lot of extraordinary stuff for the grey and blue era. So I took the social isolation time this weekend, lowered the blinds and got the photo equipment ready for some shots. Mallet Steam Engine (inspired by #7750 and the Baureihe 99 … I just wanted to build a "large" 12V style steam engine without copying the great work of @Paperinik77pk or the large steam engine in #7777) It opens like #7750 Rear view: Full side view: With historic cars: I build 3 of these cars, inspired by Hofzug Kaiser Wilhelms II. The cars are longer then the classic 6x28 train base plate. I added a 2x6 plate at each end. This requires a special way to lengthen the couplers and buffers. The bogie plate can not be moved outer due the limitations of the train base plate. And see the simple solution to fix the minifigure shield which I use as logo of the train: V100 diesel engine (based on #7755 with shorter base and 5-wide body) V100 diesel engine and so called "Silberlinge", very typical local train in Germany in the 1970s/1980s: Trains like this were able to operate in both directions due to a steering post in the end car: Side view of the "Silberlinge": Classic 12V style interior in both cars: Small electric engine in medium/blue and hopper car #4536 in brown, ready for the 12 volt system: Small electric engine in green/red hopper cars #4536 in brown, ready for the 12 volt system: Green electric locomotive with a red 12 volt motor inspired by Baureihe E 44: Green electric locomotive inspired by Baureihe E44: Enjoy and stay healthy these days! Best regards, Holger -
Hi all! After the projects, it was time for some real building. I am in "12v phase" so I concentrated on the BR50 I draw during Christmas Holidays: Since there are many expensive parts, I used what I already had at home. I ordered the two front 1x1x2 windows and a pair of big wheels. Here's the final result: It is similar to che project, but it's quite different in some parts: - Front bogie was redesigned completely - while perfectly working from turning radius point of view, its overhang made the locomotive to hit the 12v switch remote control! Now the lower part is turning according to bogie, the buffer turns too. - Chassis is higher, in order to accomodate some details (by the way, the BR50 had small wheels so I needed to increase the space between the wheels and the body. - Flexible Pneumatic tubes instead of black "antennas" to reproduce side pipes (I found this solution more...7777-ish) - Cabin is half stud lower and has a longer roof to cover part of Tender. - Some details are different, and were thought directly "on the run" - Tender is a bit longer, the one I designed was wrongly shaped. Bogies worked fine with the central ladder, but I did not remember the motor has rubber bands on it (and they get stuck on the ladders). - The connection between the thender and the locomotive is using a very very vintage part from the 60s - 12v Motor is now in the rear part of the Tender, since the unpowered bogie was easier to modify in order to accomodate the fixed bar coupling. ...and now some photos: In general, it was built thanks to some incomplete spare sets: a 7715 (doors, two red buffers, boiler parts and some wheels) , a 7810 (two windows, red ladders and black parts) and a 7710 (black parts, some plates...). It was a real fun to build it!!! I hope you like it!!! Ciao! Davide
-
Hello All, So I've finally got my act together and started building my layout however due to space the Lego 12v points are my only option as the 9V/PF switches take to much room. However an electronic pair will set you back around £90-£110 with all the switch boxes etc. So my challenge was can I do it cheaper? The answer was Yes. My first design (first image) was to use the Lego servo motor as it turns 90 degrees however these are around £20, then you'd need a Sbrick or another way to control it. It works but it looks bulky. So as I use Ncontrol from 4D Brix, I like the interface, click options and Tom is really helpful. So after a quick chat he wrote some code for me to limit the movement to 90 degrees and I purchased a Monorail Switch. It is very simple, looks neat and above all works. You have to purchase the quad motor control module but the beauty is that this will do four switches. So if you have 4 switches you save £30 on the second pair. So your first pair will cost you £80 but the next pair will only cost £50. This is the cost Lego 12 Volt Points Pair @ £100 My Second Design @ £80 Lego 12volt points not motor > £20 2x 4D Brix Motors > £25 4x 1 Meter Cables > £5 4D Brix Quad Control > £30 The only downside is you lose the turning symbol but I can see that in the software so it doesn't bother me. Andy
-
Hi Lego train fans, I have recently bought a 7740 set and was told that there are two versions of green tray of early 12v trains sets' packaging. The early one has no side support in every corner of the green tray with relatively narrower top surface, whereas later version has thicker top surface and triangle support in each corner. In terms of tray's wall, I was told that early version is thinner and later versions. Any detail or knowledge train tech fans know about the difference of 12v train boxes packaging?
-
12v Half Straights (with geometry possibilities)
Unfinished_Projects posted a topic in LEGO Train Tech
Lego 12v Half Straights With my current addiction to old 12v trains I found myself looking to create more complex layouts. One piece I hadn't used yet was the (1) crossover piece in my collection. Using Bluebrick it became apparent that using only one crossing sometimes results in a half track offset, so I decided to cut 3 of my worst straight tracks in half. Note that I am not the first person to do this, but I have not found any documentation of it being done with blue era track, or many examples of geometry possibilities. To cut the conductors I used a handheld rotary tool with a cutoff wheel to get through the metal rails, and a thin hacksaw to go through the plastic. As you can see, I severely cracked one of my half straights by clamping it too hard in the vise. Oops! Cutting the rails is much easier, I simply marked the center and used the hacksaw to make the cut. As you might know, blue era conductive rails are slightly different than grey era rails. One of the changes between blue and grey era was the addition of mid rail sleepers in the grey era. While it seems like you can simply attach a 2x8 plate to the center of a blue era rail, there is actually a couple plastic supports (seen below in rendering) blocking where the studs would go. When creating a half straight out of blue era conductors, these supports much be removed. I used a handheld rotary tool with a sanding bit to carefully carve them away. I recreated the electrical connection tabs using rolled up aluminum foil. I'm sure I'll have to replace these whenever I change my layout, but its really not too difficult and requires very little aluminum foil. This is the finished product! Works perfectly! Here are some interesting geometry possibilities that are opened up with half straights on hand: *Bluebrick does not have a 12v half straight, so I used a 9v one in its place* Thanks for looking! If anyone else uses custom cut half straights (of any track type), feel free to post pictures of interesting layout possibilities! Unfinished_Projects -
So last week I needed to open up a 12v 80's era signal unit as the green LED was starting to fail and I wanted to see if I could repair the unit, as second hand ones are close to £20 delivered to me. First job, break out the scalpel and unseal the unit... This gives us the components - front , back and circuit board... The red LED was working fine... The green one not so... It's a simple circuit design with 2 LED's and one resistor to drop the voltage to 2.2v Sourced some replacement LED's from eBay which will work around the 2.2v area... And then proceeded to unsolder the old green LED and replace with the new one.. Then time for a test.... All was good so the unit was resealed and ready for further duty. I've never seen the insides of one of these units or even any pictures on the web, so here you go.. Jonathan
-
Last night I completed a refurbishment of a rather poorly 12v train motor. The contacts had worn giving intermittent working and the bushes were squealing like a pig so it was time to open up the case... First off made a jig to hold everything secure... I used my scalpel to cut into the case as shown on the red lines here... Then flipped the jig over and pushed down on the axles which released the two halves of the case leaving this in the jig... And the motor part in all its grotty glory.... Took the metal blocks out and started stripping down the axles and motor - +30 years of grime.... Also noticed that a wiring disc had become unsoldered - another cause of the rough running... The contacts were removed - you can see how uneven the wear has been... Got two bb53's from Bricklink specifically for their pickups... And split them open... The bb53 contacts have "nipples" on them which the motor contacts do not so these were filed flat... After that everything was cleaned with methylated spirits , the wiring plate resoldered, greased and reassembled.... Then glued and clamped.. And then after an hour taken for a test run.... https://i.imgur.com/CCPQZyD.mp4 I think the patient will live !!! Joff
-
12v blue era remote points voltage and disassembly?
Unfinished_Projects posted a topic in LEGO Train Tech
Hello, I bought some blue era remote points in rough shape, that need to be opened and repaired. Has anyone attempted this before? Is there any tips or tricks I should know about? Also, I do not own an original transformer, so I will be using a generic power supply for these. Will 12v DC work, or do I need higher voltage? Thanks, Unfinished_Projects -
Resurrection of some old 12v tracks (powering new trains)
Unfinished_Projects posted a topic in LEGO Train Tech
Hello, I'm creating this write-up to share my experience buying and operating a set of old 12v track in the US. I had been wanting some 12v track and motors since I was in middle school (and I'm in college right now, so yes my tastes in Lego have always been old and expensive haha) but hadn't found the right lot until about a week ago. I managed to score the following lot on ebay for a good price: It is a decent amount of stuff, but some key things are missing: motor (the blue one in picture is 4.5v and doesn't work), transformer, and the piece for connecting to the track. My goal was to have an operating train for as cheaply as possible. Hopefully these ideas can help someone else out who wants to make use of older track without spending a fortune. FOR PURISTS: I handled all of these missing components in an unorthodox way that includes modification of vintage parts, so consider yourself warned Motor: Instead of buying original 12v motors, which are only available for crazy amounts of money on bricklink, I chose to use @bricks n bolts method of picking up track power and using it to drive PF motors (https://www.eurobricks.com/forum/index.php?/forums/topic/63535-mod-7745-to-use-the-pf-motor-still-on-12v-track/ I know it was a little while ago, but thank you @bricks n bolts for sharing! ) The process of cutting down the pins was pretty straightforward. I used a dremel with a cutoff wheel to make the initial cut and a sanding wheel to finish things up. If anyone attempts to do this, try to keep the pin cool, as I melted the plastic a bit on one of my pick-ups. I also ended up cutting off the curved section of one pick-up, to accommodate for the magnet assembly. Connecting to track: To connect to the track, I simply soldered some wire to the little tabs on the bottom of the rail. The correct part for connecting to these blue rails isn't that expensive on bricklink...if you don't factor in overseas shipping. Transformer: Since I live in the US, using an original transformer would require a converter (I had no luck finding the 110v version on bricklink or ebay). I originally thought of using a model train transformer of some kind, but wasn't sure so I asked here on the train tech. @dr_spock suggested a cheap DC motor controller and a generic 12v DC wall adapter (Thanks! ). This ended up working perfectly, and was quite cheap. Only downside is no reverse, but I'm ok with that for how much I spent. Final Result: With everything together I swapped out one of the motors on my Powered Boxcar (https://www.eurobricks.com/forum/index.php?/forums/topic/169681-moc-powered-boxcar-power-functions/) with the completed pick-up bogie and turned on the speed controller. It worked perfectly! I now have a functioning 12v loop that powers my newer trains! I do however have to watch out that I don't over-power the PF stuff. I suppose I could have used a 9v power adapter, but I'm leaving room for a 7740 that I hope will join my collection if I find a good deal ^These last 2 are videos, you just have to click on them There's a few more pictures of this project here if interested: https://flic.kr/s/aHskR5KZX3 Thanks for looking! Unfinished_Projects -
Hello, I have 4.5v train motor (https://www.bricklink.com/v2/catalog/catalogitem.page?P=bb07pb01&name=Electric, Motor 4.5V Type A 12 x 4 x 4 with 4.5V stamped on front&category=[Electric, Motor]#T=C) that needs wheels. I have access to a 3D printer and 3D modeling software/knowledge. My question is, does anyone have dimensions for "wheel2a" ?(https://www.bricklink.com/v2/catalog/catalogitem.page?P=wheel2a&name=Train Wheel Spoked for Motor&category=[Wheel]#T=C) I would like to try to make something that goes into this motor and gives it a technic axle, or just recreate the wheel (either all plastic, or using purchased metal rod). Unfinished_Projects