BEAVeR
-
Content Count
1383 -
Joined
-
Last visited
Everything posted by BEAVeR
-
The Republic Gunship was probably the set I wanted most when I was a kid, and now this creation is probably what I want to build most right now! You did an amazing job recreating the heavy and powerful feeling of the ship. i think that's because you managed to accentuate how filled it is, with those beautiful curves near the bottom almost suggesting like the ship is sagging through because of all of the weight inside. At the same time you incorporate all of that masterfully in the rest of the model with hardly any seem in sight, indicating that even though the ship is loaded, it won't be failing any time soon. This is no accident as you did exactly the same thing with the front cannons, making sure the huge impact of them is properly absorbed through that wonderful ring, and with the great integration of the engines in the body instead of them just precariously balancing on the top of the ship. And I love how you angled the hind of the ship instead of doing it with slope bricks to keep it so smooth. Incredible how you concentrated on those curves and their integration to truly capture the spirit of the ship: that's a great eye you have! Not that you neglected the other aspects of the ship though: I love the texturing achieved with the half plate offsets, the great use of that Technic curved piece in the front and surprisingly accurate color patterns to give some subtle but very welcome variation to all of the smoothness. My favorite has to be the door panel in the back though. All of it makes for a creation that's spot on despite its modest size. Especially the front view looks like the real thing where your curves really get to shine! I don't think there are a lot of improvements possible on this model that has both the looks and the playability (I just love how neatly an seemingly strongly everything comes together in the LDD model!) with even the detail of having different controls in the different cockpits. I just think that the shape of the doors could be a bit more accurate by extending the hindmost part with a stud to the top. It looks like you have the space to do it and the model would be more accurate and interesting for it. And while I couldn't find a good reference picture of it so I can't say anything about accuracy, changing the smooth tube of the missiles to something with some more ridges like a Technic axle connector (which you could connect with a 1x1 round plate with bar on top) could give the missiles a more interesting texture so that it's more in tune with the other technical components with great textures like the back of the engines. And maybe replacing the cockpit pieces with something like part 84954 would allow you to embed the cockpits more as well just like the rest of the ship and make it stand out even more from the other iterations, but I fear that would be a lot of reworking and might destroy some of the loveliness of the current creation. So, brilliant job, and thinks for bringing the child in me back! Blogged!
-
Lego Star Wars Moc Imperial Raider Class Corvette
BEAVeR replied to insideLego's topic in LEGO Star Wars
Great creation, insideLego! Where most creations only capture the spirit of the source material, you also managed to capture the charm of a Lego set! It's wonderful that you capture the perfect balance such that your creation looks and feels like the very best sets out there. I love it how you incorporate many Lego tropes but put a small twist on them to make them work as an AFOL creation. For example, you leave a lot of studs exposed just like in the set, but I don't really mind it because you have plenty of smooth sections else where to create an interesting dynamic on the hull that looks intentional. Especially from a distance, they almost make it look like there's a small color variation in the grays, which is even more noticeable in the black and white picture you posted. You also throw some actual new colors in, just like the blue on the good old TIEs, but make it sand blue to keep the effect subtle enough. Even then, it's not random, just to add some variations. Because when you look closely at certain shots of the ship, it sure does look like some parts have this sand blue quality. So amazing work on incorporating that subtle variation so well! You also don't shy away from using big elements like the cylinders of the engines or the octogonal plate in the back, but you manage to incorporate them smoothly into the rest of the body (I just love the geometry this creates in the engine section!). Add some nice greebles and seamless angle work (great use of that hinge for securely attaching the central ridge of the hull by the way), and you get a creation that looks just like a Lego set but only better! As for suggestions, I love the use of the pentagonal tile for filling out the corners of the wings, but the sharp transition between the black wedge plate and that piece make it loose its effect a bit. I'm pretty sure there's a way to use different wedge plates to make that transition smoother. No worries if it makes the shape look a bit polygonal, as that's a feature of the original ship anyway! Also, I think the spring loaded shooters are a bit of a missed opportunity. I don't mind their inclusion just because of the Lego charm, but even in a lot of Lego sets they really get incorporated into the model instead of being put in full sight. However, I understand your choice, as on the original ships there actually are some boxlike structures on the hull that could perfectly be represented by the shooters, but I think you need to flesh it out more to make it look like a detail instead of just a spring loaded shooter. Some 1x4 panels alongside the shooters would be perfectly possible and give it something extra already that ties it to the rest of the model better. Or you could try something with cheese slopes, although you'd have to be careful not to make things too bulky. Yes, it are little things, but you don't expect that there would be big flaws with such an awesome creation! Blogged! -
Hi Spongebob456, and congratulations on starting on your MOCcing journey here on Eurobricks ! First of all, I love it that what you lack in amount of bricks, you make up by a nice concept. It's fun to have an interesting looking box that almost looks like a vault, that you can't wait to open to see what's inside. It gives an extra twist to what otherwise would just be an interior on a plate, but now makes you feel like you're peaking into the lives of some minifigs, so well done. Also, nice door: the door rails (I'm surprised they can hold the door in place!) offer some nice texture to the wall and make the transition between the wall and the door not too jarring. Maybe it would even be better if you would also have some relief next to the door to make an entire door frame around it to achieve that effect even more. Inside, I like the simple way you constructed the desk, although it might benefit from tiling and maybe a small slope to depict a monitor so that it really looks like an executive desk. The piece behind Thrawn looks interesting as well, although I can't quite tell because it's not very visible in the pictures. Finally, what impresses me is how you arranged the bricks in the walls by stacking them straight on top of each other instead of staggering them. That way, you're wall doesn't look like it's made of actual clay bricks, but of metal panels because you have those bigger surfaces that are separated by subtle seams. That effect is really nice! As for building advice, I'd try some sideways building (SNOT) on the floor (just build a wall and lay it flat on its side and find a way to attach it to the rest) to give it a smooth look, which will begin to make it look more professional. I'd make it another (preferably darker, so black would do) color for a bit of contrast to the walls, because otherwise everything will just blend together: it's important that the viewer immediately understands the general shape of what he's looking at. Talking about the viewer, let's talk photography. All in all, everything is nice and sharp which is already a good beginning, but next time try to get rid of the shadow you or your camera cast. Just try adding some other light sources at other angles or take your picture outside on a cloudy day for nice even lighting, even though you'd probably still need some light source in order to give it that artificial look. Also, try to adjust your exposure settings so that you don't have over exposed areas in your picture, like the clone helmet (actually, the reflections of that one look nicer) or Thrawn's outfit. Than there's nothing to distract people from enjoying your build. Good luck with your further MOCcing career! I'm curious to see where it will go! PS: It's always better to show pictures in your topic instead of linking to them, because it's easier to discuss them that way, and experience tells that people often simply don't take the trouble of clicking through. I see you're using Flick to host your pictures, which is a solid choice in the AFOL community. Embedding a picture of Flickr in your topic is really easy: just go to the photo you want, click on the curved arrow right next to the star you use to favorite pictures, select the "BBCode" tab, choose your size from the dropdown menu (never go above 1024px to stay conform the Site Guidelines, and for smaller builds it's generally better to pick something around 800px wide instead as I already did for you), copy the code from the box and simply paste it into your topic. Nothing will show up in the topic at first, but just hit the preview button to see how it will look. Try it by adding more pictures to your post above,and then you'll know everything you need to know to make your topics as good as possible!
-
It wasn't until I went to university and only came home in the weekends, I realized how much I love the sight of my hometown of Temse in Belgium. I always try to have a seat to the left of the train, near a big window, especially near sunset. Because when my train crosses the Temse Bridge over the Schelde river, the view is just magnificent and then I know I'm home. [MOC] Temse Skyline by Bert Van Raemdonck, on Flickr You can imagine that on reading the assignment of Rebrick's "Dream Skylines" competition, "Build a Skyline of somewhere close to your heart", I didn't hesitate for a moment on what to build. But I think that choice might have been the only easy part about this contest! Since the creation has to be in the style of the existing LEGO Architecture skylines, I had to come up with several ways to add enough detail and texture at the small scale, and at the same time had to adhere to the maximum size requirements that didn't allow for any overhang. Personally, I also wanted to create something that's completely buildable in real life with solid connections and only existing part/color combinations - because who knows, maybe one day my town will be interested to have one of these for real? - which caused me a lot of headaches. All of that made for a build time of nearly a month for this seemingly small creation (that still contains close to 800 bricks). After all that building, I managed to cram in most (though not everything) of what I wanted to represent. From left to right, you have the Boelwerf Crane, the Onze Lieve Vrouwe Church, the Old Town Hall and the Temse Bridge. If you're interested in more information about those individual buildings, just keep reading! [MOC] Temse Skyline - Onze Lieve Vrouwe Church by Bert Van Raemdonck, on Flickr The Onze Lieve Vrouwe Church is the defining building of the Temse skyline, and rightfully so. The original dates back to the 770's, erected by the holy Amelberga, the patron saint of the parish. It is believed that she fled her suitor, a powerful man, because she wanted to dedicate her life to God. And when she was cut of by the Schelde river, a giant sturgeon appeared from the water to lead her safely to the other side, where she erected the church out of gratitude. To this day, we have a yearly procession to celebrate her. Of course the church was rebuilt several times, and I depicted it as it appears today,the way I know her inside and out because this is the building where I go to mass and have gotten to know a lot of wonderful people. I love this building so much that I actually tried to build it several times before this contest. However, i always got stuck on the iconic but hard to capture shape of the clocktower. However, having to work at this small scale forced a certain size of the tower on me, which enabled me to have a more focused problem. When eventually I found out that the classic medieval helmet worked perfectly to capture the bell shape of the bottom part of the roof, and that's what really kicked of this entire creation. Since I couldn't connect anything to the helmet, I had to work with an external support, but luckily it doesn't get in the way of appreciating the creation too much. I also had a lot of variations for the rest of the tower, but in the end this version with the notches nicely corresponding to features on the actual building made it, also thanks to the input of my family on this issue! From there on, it was mostly a lot of complicated SNOT work to let the windows and the buttresses work, but it gave a nicely textured result. To top it all of, I included the statue of the Blessed Priest Poppe, who is also a central figure in our community. [MOC] Temse Skyline - Old Town Hall by Bert Van Raemdonck, on Flickr Up until a couple of years ago, this was the administrative heart of Temse, but now everything apart from some ceremonies has moved to the new administrative center in a modern building for which I didn't have enough space to include... Still, it's a beautiful building from the beginning of the twentieth century that actually stands on the place where once the home of my ancestors stood. One of the ceremonies being held here, is the memorial of two of my ancestors, who became famous after allegedly dying in each other's arms during the first World War, becoming a symbol for love between brothers. This year, it was exactly 100 years ago that happened, so there was a ceremony on this very fitting location, where my sister and I also read some poems one of the two brothers wrote. Truly a special experience! Building this also was a special experience if you can call it like that, because of all of the tricky SNOT fitted into a really tiny package. I'm really happy with how the roof turned out. And while it's a pity that the spires of the main tower have to be held in place by a rubber band, at least the official LEGO rubber band with the right size had the right color as well. [MOC] Temse Skyline - Boelwerf Crane by Bert Van Raemdonck, on Flickr I was born just half a year too late... If I would have been born sooner, I would have seen the Boelwerf working with my own eyes. It was a big shipyard along the Schelde river just outside of the town which was the economic heart of Temse for quite some time, with the biggest ship of the world at that time being build there. My grandfather was one of the employees there working among the docks, the cranes, the machine shops... Whenever I see pictures of those periods, I begin drooling and dreaming about that time that I sadly never knew. Because right now, where once the Boelwerf was, now a lot of new apartment buildings, houses, shops like my hairdresser and the new administrative building stand. The only thing that remembers the glory days is a beautiful and huge crane that never actually belonged to the Boelwerf but became an essential part of our skyline, and a couple of poles in the water and a hidden dry dock. Building this one actually went surprisingly easy when compared to the previous two buildings, and I'm pretty satisfied with how I managed to maintain the spindly look of the construction and the realistic angles of the supports, realized by putting technic pints over minifig antennas. The difficult part about this build actually was keeping it within the prescribed size limits of the build without overhang. That's why I had to sacrifice one of the three wrenches in the back, but luckily it isn't as noticeable. And nice to know: the crane can actually swivel around! [MOC] Temse Skyline - Back of the Box by Bert Van Raemdonck, on Flickr I really had a lot of fun making the renders for this creation, trying to match the box art from the official skyline sets as well as possible, and I'm very happy with the results that accomplish my goal. Just ask if you want to know more about the rendering process. This is also a place to discuss the final building: the Temse Bridge on the far right. Although it doesn't look like it from the build, this was with its 365 meter for a long time the longest bridge over water in Belgium, and also one of the prettiest, in my opinion! The original actually was designed by Gustave Eiffel (yes, thát Eiffel!), but that one was deliberately blown up during the second World War. In 2009, a second bridge next to it opened to allow for more traffic to pass because it was getting a bit problematic. That bridge is actually nine meters longer than the original one, so in Temse we have just one, but the two longest bridges over water in Belgium! Giving the bridge the skeletal look was impossible to do on this scale, but the bottom of the plates actually still gives a nice texture to it. I couldn't make it as long as I wanted, and I had to place it at an angle, just to stay within the size requirements, so in reality it is of course way longer. Also, the 2009 bridge didn't fit on even though I created a model for it. But then again, that bridge pales in comparison to the older one. In the end, I'm very pleased with the result, so it was worth all of the work. It gives me the same feeling as when I see the real skyline from the train on a Friday evening, the feeling of coming home. Which is really nice that I'm on a two month internship in South-Korea! Thanks for looking, and I hope you enjoy your home as much as I do! _________________ The digital file (LDD)
-
[Software] LDD2PovRay
BEAVeR replied to Superkalle's topic in Digital LEGO: Tools, Techniques, and Projects
When I used this software to render, I sometimes even had renders that failed when they got to the transparent parts. The only option I had then, was to take an LDD screenshot with the transparent parts, then color them solid (preferably in a bright color that doesn't appear elsewhere in the render), then render that, and then composite the two images together, maybe adding some more advanced transparency effects yourself. As long as the transparent pieces (and what's behind them) aren't the focal element, you could get away with it. If you can't afford this, you either have to take the long render times or switch rendering softwares as far as I know. -
[KEY TOPIC] Official Lego sets made in LDraw
BEAVeR replied to legolijntje's topic in Digital LEGO: Tools, Techniques, and Projects
Thank you very much, Philo! I've updated the model and the post to include the right part. I didn't re-render it though as that would take a lot of time for just a small change. -
Hinge Tool Moves Entire Model Instead Of The Door/Ramp I Want To Move
BEAVeR replied to Lapis Lazuli's topic in Digital LEGO: Tools, Techniques, and Projects
SylvainLS answered most of your questions already clealy, but allow me to ad a couple more remarks. In order to use the colors that you can't reach, the only option I can think of is to download a model from the internet which has those colors in it, copy a brick in the color you need and use the colorpicker (eyedroper) tool to select that piece so you can paint other bricks with that color. It's a workaround, but I have no idea how you could fix your display. Also note that you probably won't find the legacy colors when you're not in extended mode. Something else you could try, would be flipping the image on your screen to the side (I believe it's AltGr + left or right arrow key) since the color box will have more room at the botom then. It will be awkward though (resettin your monitor to the upright configuration happens with AltGr + up arrow). As for rotating tricky assemblies with floating parts, the only option is not to use the hinge tool. You simply have to figure out where you can connect the selection you want to rotate to an external piece like a peg. Then you rotate that external peg with some temporary construction. Then you select what you want to rotate and drag it so that it snaps with the external peg. Then your selection will have rotated to fit the connection, free floating parts thzt you selected included. Hope this helps to bring your epic looking model to life! -
[KEY TOPIC] Official Lego sets made in LDraw
BEAVeR replied to legolijntje's topic in Digital LEGO: Tools, Techniques, and Projects
10241 - Maersk Line Triple-E – Sculptures 2014 Download 10241 - Maersk Line Triple E.mpd (OMR compliant), built with LDCad 1.5 Known errors: Missing stickers Part 90395 (lifeboat) not available in LDraw, replaced by 30304 (binoculars) Unofficial parts used: Part 62885 (gun) Part 47404 (boat bow) -
[KEY TOPIC] Official Lego sets made in LDraw
BEAVeR replied to legolijntje's topic in Digital LEGO: Tools, Techniques, and Projects
10183 - Hobby Train (P model) – Factory 2007 - German Standard Electric Locomotive 2 Download 10183 - Hobby Train - 16.mpd (OMR compliant), built with LDCad 1.5 Known errors: None 10183 - Hobby Train (Q model) – Factory 2007 - Switcher Download 10183 - Hobby Train - 17.mpd (OMR compliant), built with LDCad 1.5 Known errors: None 10183 - Hobby Train (R model) – Factory 2007 - Tram 2 Download 10183 - Hobby Train - 18.mpd (OMR compliant), built with LDCad 1.5 Known errors: None 10183 - Hobby Train (S model) – Factory 2007 - Pig's Nose Train Download 10183 - Hobby Train - 19.mpd (OMR compliant), built with LDCad 1.5 Known errors: None 10183 - Hobby Train (T model) – Factory 2007 - Switcher 2 Download 10183 - Hobby Train - 20.mpd (OMR compliant), built with LDCad 1.5 Known errors: None These and all of the previous models can be found in my Brickshelf folder. _____________________ It's been a while since my last batch, but now we have 20 of the 30 models this set offers done. I love discovering all of the different designs and looking them up to give them a correct name, although I'm getting a little bit tired of building the wheel assemblies time after time again, each time just a little bit different than before... -
The rules say you can get creative when you don't own the Thrawn minifig. So using a blue minifig, possibly only shooting it from the back to hide the wrong decorations, would definitely be allowed!
-
Mecabricks + Blender Showcase
BEAVeR replied to Scrubs's topic in Digital LEGO: Tools, Techniques, and Projects
Awesome work! That denoiser function indeedseems like a lot of fun. Actually there already exist two programs to import LDraw models in Blender directly. The most recent one with the most features and best performance is ImportLDraw by Toby Nelson on github: https://github.com/TobyLobster/ImportLDraw It's easy to use and gices awesome results. See my Flickr for some examples, and also my entries in the official sets recreated in LDraw topic (the renders in that topic take about ten minutes to setup, so it can happen really fast) . I'd love to do a series on how to render Lego in Blender one day, but I don't have time to do that. As for rendering times, without the denoiser the renders for the official sets take less than ten minutes to render, but the resolution isn't very high and you can spot some noise. The renders on my Flickr take about four hours to render on average on my GPU. -
Tags, cover images... for the SoNE episodes
-
-
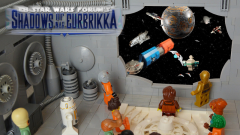
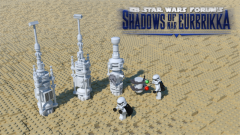
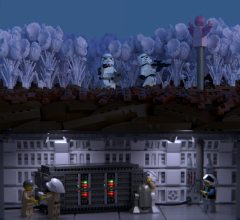
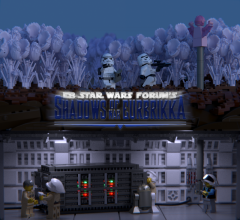
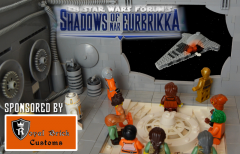
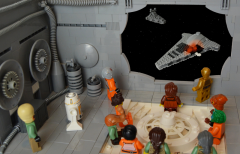
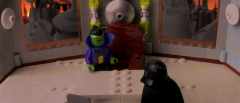
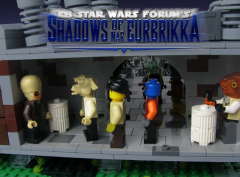
From the album: Shadows of Nar Eurbrikka
Creation by MKJoshA, background editing by LucasLaughing -
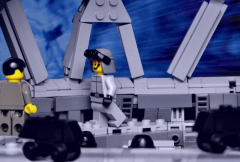
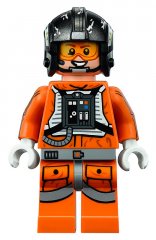
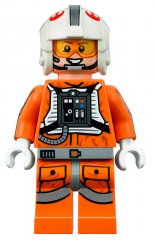
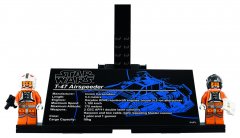
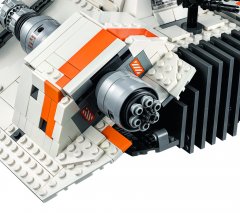
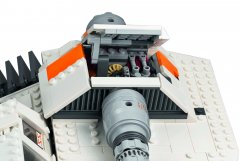
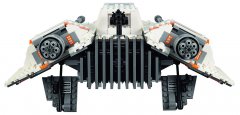
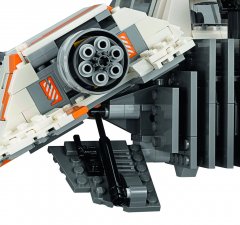
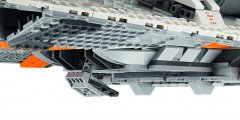
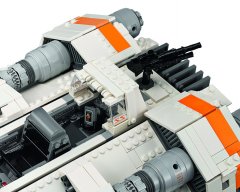
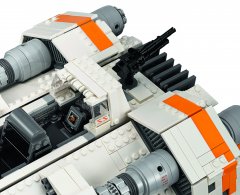
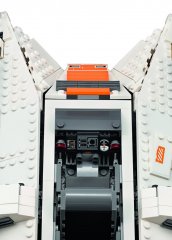
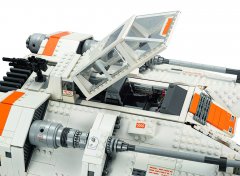
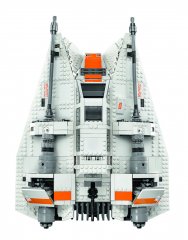
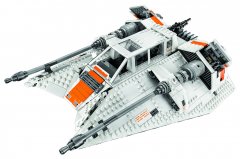
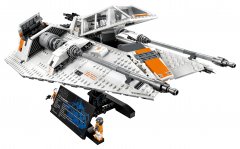
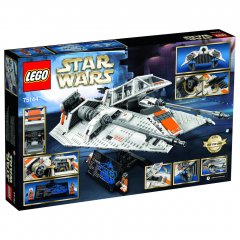
75144 Snowspeeder™ Ages 14+. 1,703 pieces. US $199.99 – CA $229.99 – DE 199.99€ – UK £169.99 – DK 1799.00 DKK *Euro pricing varies by country. Please visit shop.LEGO.com for regional pricing. Build the ultimate LEGO® Snowspeeder! Collect a true Star Wars classic: the T-47 Snowspeeder. This LEGO® interpretation of the iconic airspeeder that fans will remember from Star Wars: Episode V The Empire Strikes Back has all the details you’d expect, including opening airbrakes, rotating rear gun, and an opening cockpit with space for the included Rebel Snowspeeder Pilot and Rebel Snowspeeder Gunner minifigures. This model also comes with a display stand and fact plaque, so it can take pride of place in any LEGO Star Wars collection. Includes 2 minifigures: a Rebel Snowspeeder Pilot and a Rebel Snowspeeder Gunner. Features intricate, authentic detailing, opening airbrakes, rotating rear gun and an opening cockpit with space for the 2 included minifigures. Attach the Snowspeeder to the stand with fact plaque to display it. Includes 2 blaster pistols. Accessory elements include electrobinoculars, a Snowspeeder Pilot helmet and a Snowspeeder Gunner helmet. Snowspeeder on display stand measures over 8” (21cm) high, 15” (39cm) long and 11” (29cm) wide, and over 4” (11cm) high without stand. Available for sale directly through LEGO® beginning May 4, 2017 via shop.LEGO.com, LEGO® Stores or via phone: US Contact Center 1-800-453-4652 CA (English) Contact Center 1-800-453-4652 CA (French) Contact Center 1-877-518-5346 European Contact Center 00-800-5346-1111
-
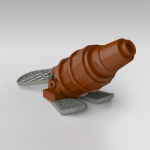
I love it! I have been planning/dreamin of building the twin pod cloud car myself, and now you've given me some extra ideas I'll take with me . I fancy how your creation really captures the feel of the vehicles. A lot of MOCs of this vehicle try to replicate the curvature of the original as closely as possible, but because this is only Lego, this can't be perfectly done and they often end up disrupting the flow of the ship. Then you might have a model that represents the shape well, but not the smoothness and the flow of the ship. Yours strikes just the right balance. I especially like the "rim" of the pods (almost reminds me of bumper cars!) With its pleasing shape. Great attention to detail by making this protrude in the back! However, in the front this protrusion is too big since the nose is too slender in my opinion. If you could separate those two wedge slopes by one stud and place a similar curve between them - possibly a bit more to the front to maintain the pointiness of the ship - this might be improved. The way you did the segmentation of the cockpit is great. If you could get the front window to slope, it might even be better, but still this is about the best representation I've seen of it. I just think it's weird you didn't recreate some details that aren't too hard to incorporate, like the little notch on the top of the cockpit, the detail on top of the engine or the laser barrel (I think a clip and a piece like the lipstick could do the trick, if you find something similar in the right color. But that's only what you notice from up close, and it hardly takes away from how attractive this model is. A great feat considering the limited amount of bricks in orznge indeed! I think you could go for red as well and have a model that doesn't need color adjustments, especially because I think the color of the original is somewhere in between. So a great model that wouldn't be out of place in the Lego catalog! Although you'd probzbly have to add some stud shooters here and there
-
Rendering Legos Using CAD
BEAVeR replied to savio's topic in Digital LEGO: Tools, Techniques, and Projects
I'm afraid that I can't give you any tips on how to model Lego hairpieces. The way Lego designs these is actually by sculpting them in clay and then digitizing this shape, I think.If your suite has a sculpt tool, that will be the one to go. You can aslo import an existing digital parts file. You can download individual parts from the LDraw part tracker, and you can convert them to e.g. .3ds with LeoCAD, and I think you can work with it from there on. Of course, this doesn't require you to model anything at all, but if the objective is just to render stuff, this will be the easiest methode. And if all else fails, just go for a geometrically straightforwadd hairpiece... -
Welcome back to the only forum where playing with laser pointers, adding food coloring to your milk, making pew-pew sounds, discussing daddy issues and musing about the nature of good and evil is the norm! Let this be your new homestead where we can keep our Rebels on the right track I'm looking forward to our continued cooperation! May the Force be with you. And now back to your work! Yes sir!
-
Official pictures of the 75144 Snowspeeder for the announcement topic.
-
-
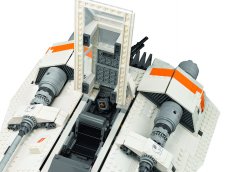
From the album: 75144 Snowspeeder
-
From the album: 75144 Snowspeeder
-
From the album: 75144 Snowspeeder
-

From the album: 75144 Snowspeeder
-
From the album: 75144 Snowspeeder
-
From the album: 75144 Snowspeeder
-
From the album: 75144 Snowspeeder