

rde
-
Posts
22 -
Joined
-
Last visited
Content Type
Profiles
Forums
Gallery
Posts posted by rde
-
-
-
-
On 12/24/2023 at 10:33 PM, Guyinaplaguemask said:
When? Not to be a bother, but it's been several months.
Hi, yes, good things seem to take time. About five months now.
We are basically done, just some minor stuff that needs our attention.
The good news is a testbuild is being built right now, and it is looking fantasic!
Stay tuned! 🤘
-
On 10/2/2023 at 6:13 AM, JFfy0218 said:
I can't wait for someone to fix these wings so I can fix them.
Oh, its coming..😁🥳
-
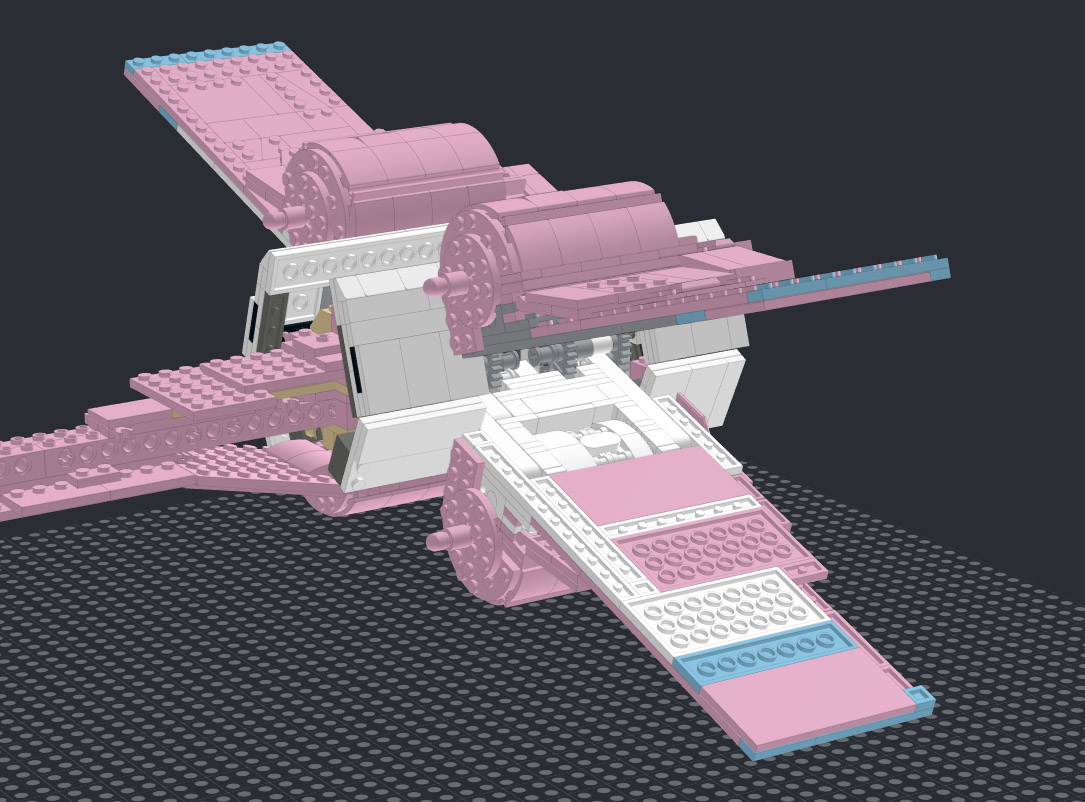
Long time since any updates! Here we go!
We are working very hard on that S-FOIL MOD which has gone thru a lot of changes at this point.. it's getting there (looks great), @Aeroeza has done some fantastic MOD's on those wings as well! Just beautiful! I am sure he has done like 10-15 versions at this point, crazy! (Wish I could post some renders but I wont, I'll let him do that himself.. ).
).
It's like ping pong over here between me and @Aeroeza which is super fun! Always something new to do (phew).. so with that said let's hope we are done before Christmas.. .

Anyways, here is a small tease for you all.. :)
(please note, stock vanilla s-foil is in all of these renders but I promise the finished result will be beautiful! Stay tuned!).
Updated tip, looks good!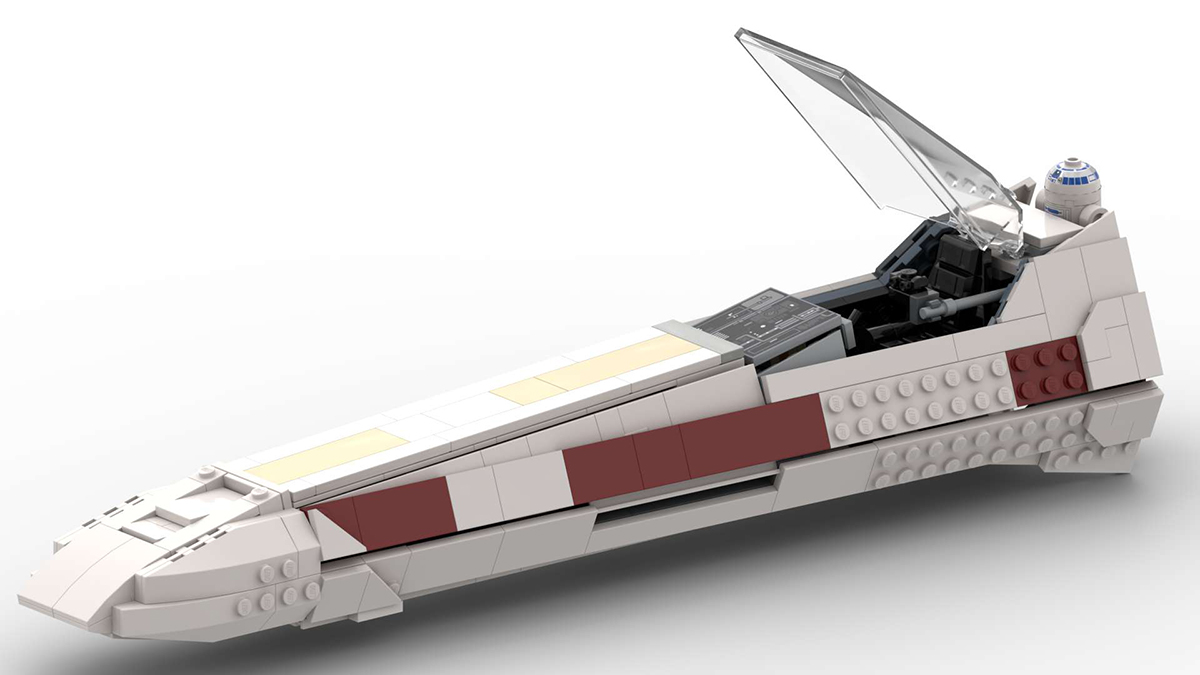
Some greebling, v1.2, this might change quite a bit as we all have various ideas. :)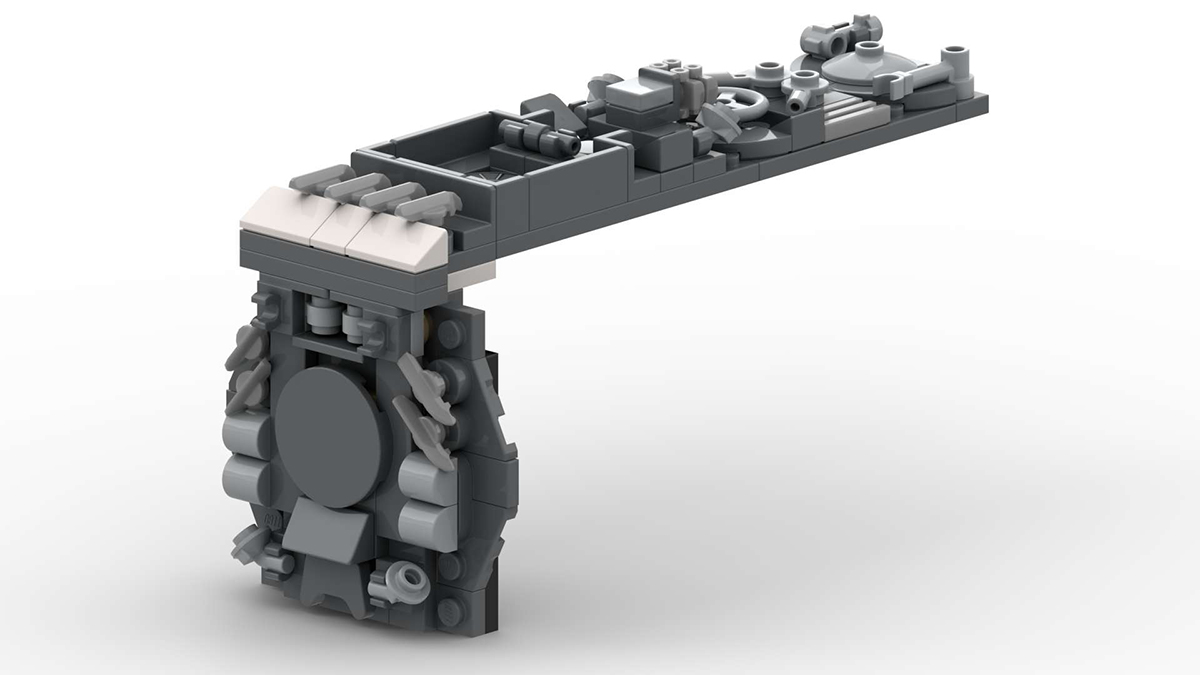
Swooooosh!


That's about it, hope to have more updates real soon! -
1 hour ago, Krazeh said:
Looks really good. Do you have a studio file for the mod which you wouldn't mind sharing?
S-foil? Sure, when its done! Need to attach wings, modify panels etc. And.. then attach it all.. @Aeroeza is probably on it and doing some magic!
-
Alright, S-FOIL mod v6: Fixed some errors in the build, added correct bricks/pins, also removed those nasty grills.. blah... switched to tiles instead! Looks cleaner..
 I am happy with this version.. hmm..
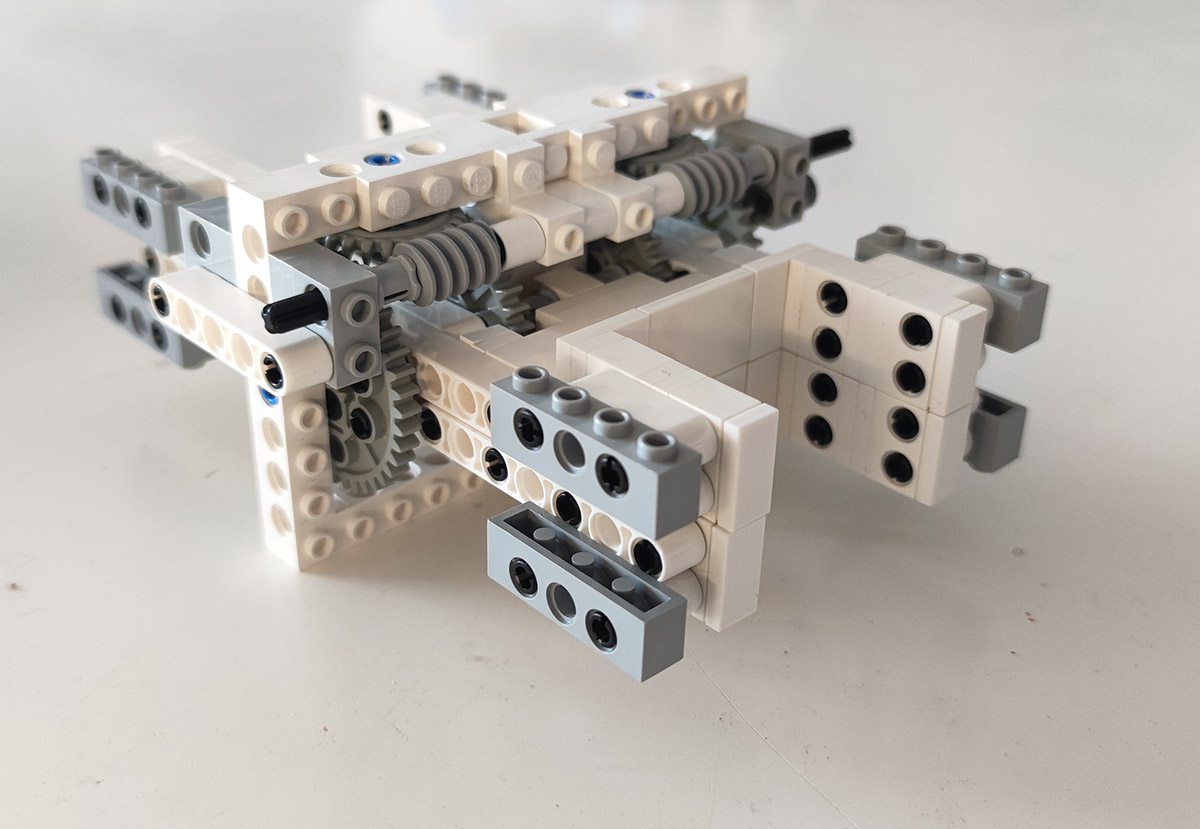

-
Ok, right.. so here is a working S-FOIL MOD (v5), it's was a bit fiddly, BUT i am happy to say it WORKS.
That's about it for now. I will go back into my cave and build V3.4 of @Aeroeza MOD.
edit: there is a tiny error, four 1x1 bricks needs to be swapped out to 1x1 technic bricks with holes.. and correct pins needs to be added.. this will go fast.., v6 on it's way.. -
Fantastic MODs @mcphatty , looks really good! 🤘
Me and @Aeroeza kind of stumbled into each other, apparently we were both working on the same s-foil MOD (which was originally found on reddit, made by a very cool and helpful guy named San), who In turn helped me a lot with his s-foil MOD as he only posted like 15 photos of it.. lots of emails back and forth, phew!
Meanwhile @Aeroeza just like a wizard drew it all up in studio with nothing but photos to look at which in itself is most impressive!
Here is a quick render of my version. Will test build it today if all parts arrive.
And @Aeroeza has been awesome sending me his studio files as well (need to build his epic v3 today, parts should arrive, finally!). Here is a quick print screen with some various mods he has done. I just added some panels which I am not happy with at the moment, had no time to make changes as kid was going to bed and wife wasnt too happy. 😆
Going to be great in the end! 🤘
-
As a photographer with too much gear and scanners, here are some stickers for future renders! Enjoy..
Stud.io file can be downloaded here. -
3 hours ago, Aeroeza said:
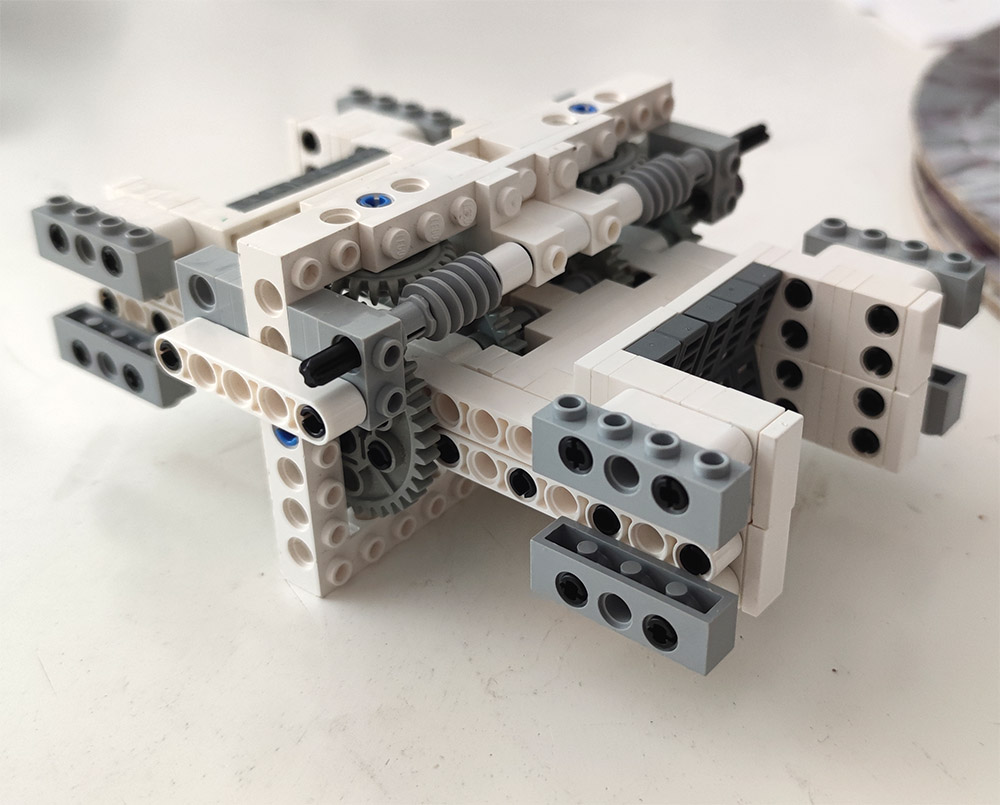
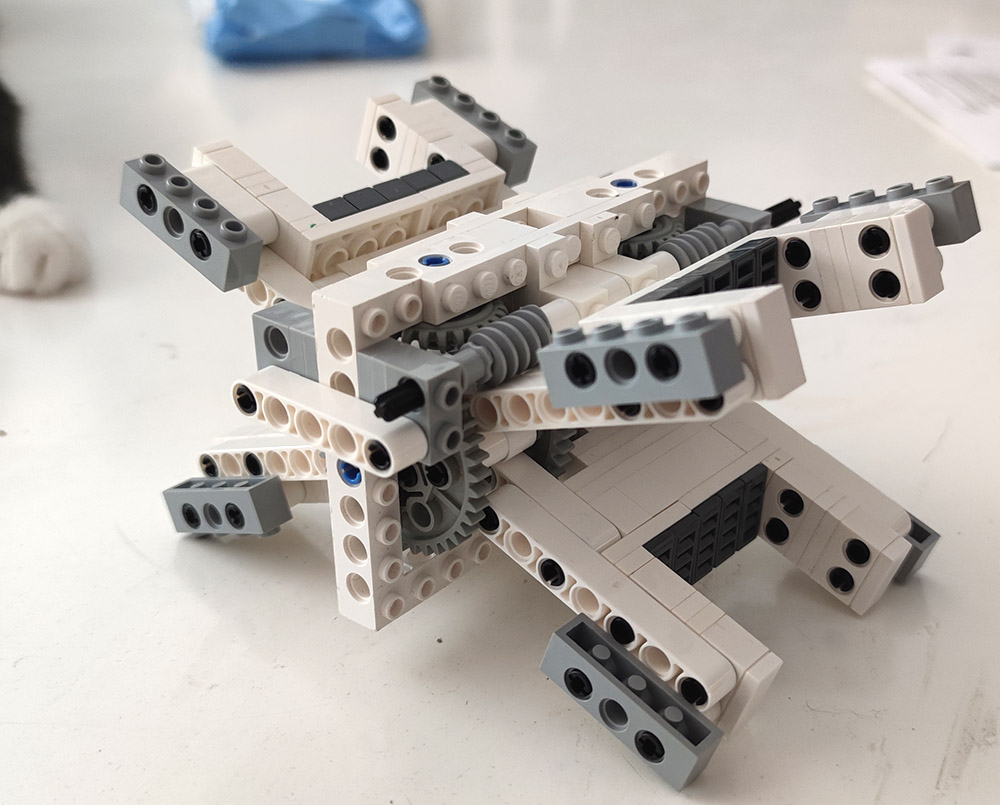
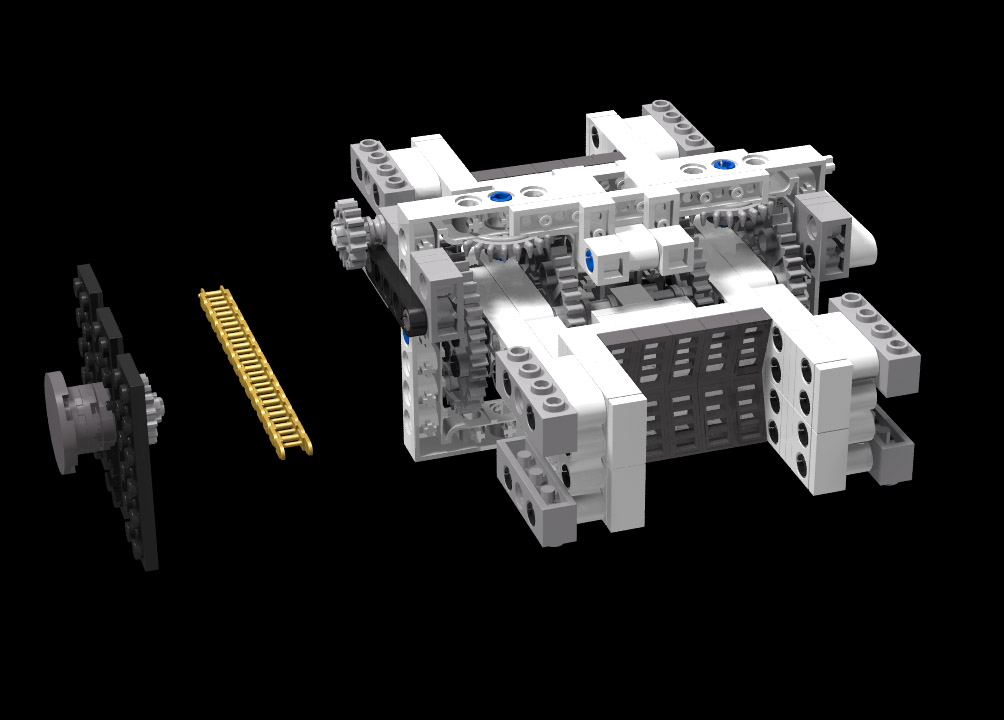
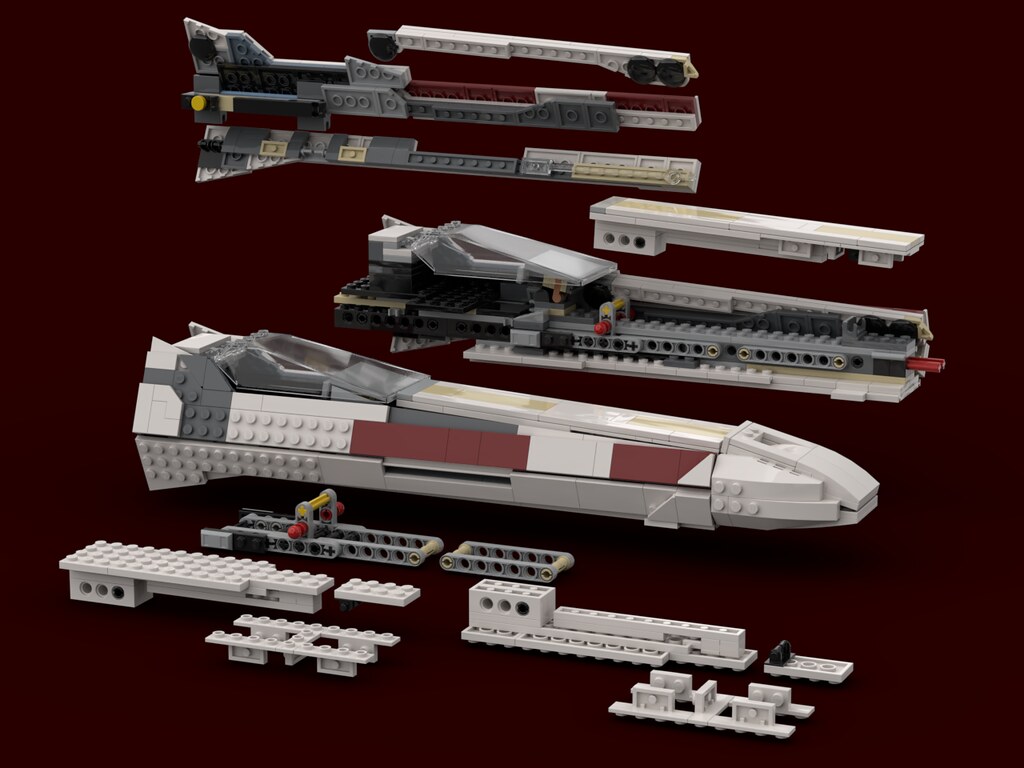
Done! And built in the real world!! Version 3.
It is over engineered but the aim was for strength & stability. Technic Liftarms attach the nose plate at four points. The brackets aren't a stable base for the nose tiles & needed vertical support from opposing jumper plates, an underpinning 2 x 16 plate & below this & also 3 1 x 2 slopes. The combination of these supports resolves the brackets stability issues & allows for significant stresses to be applied to the overall structure. The side panels sloping toward the nose tip pretty much worked as per my original Studio play.

Fantastic work, that is beautiful! I will MOD mine tonight when the kid is sleeping. :)
-
Holy cow, this is seriously amazing! Need to visit rebrickable.. ,
Good job!!!
-
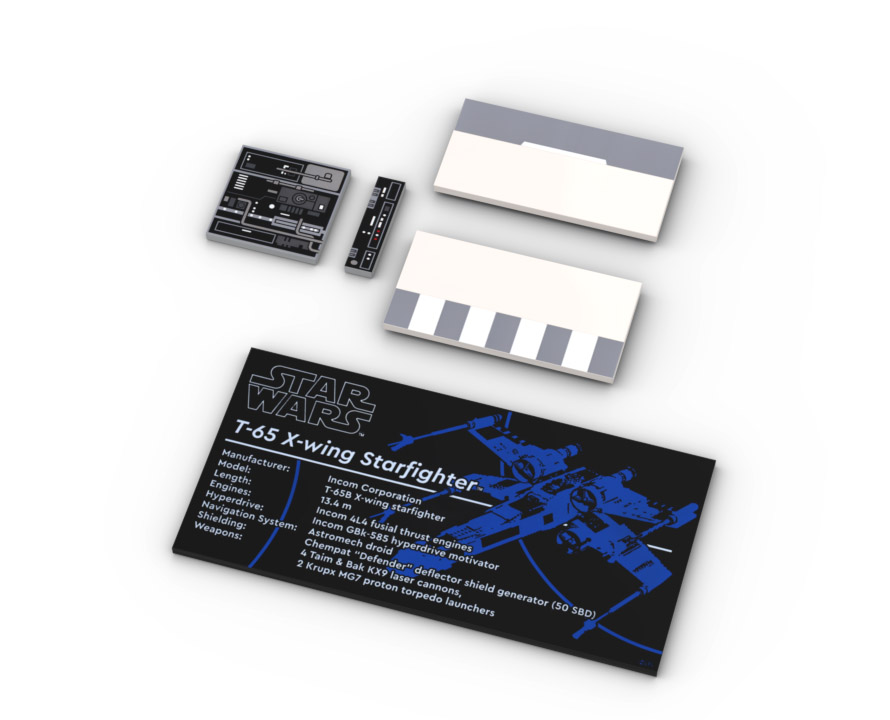
Chrome trooper and the X-Wing UCS

-
Testing a post!
-
On 2/1/2022 at 2:09 PM, gololo said:
Good afternoon,
I found this topic recently and I wanted to have my own R5-D4 at home.
I made it out of the new R2-D2. I took the design in this original post and modified it a bit.
I have my own LXF file if anyone is interested.
Also, I have made the sticker from a template I found in the forum. I have the Photoshop (PSD) file in case anyone is interested as well.
Any comments are welcome. I'm not particularly happy with the "neck" and I'm thinking of a redesign when I have the time.
Here's how it looks:

This is beautiful! I"ve been thinking about doing the exact same thing and now I really want to! Amazing!
Would love the LXF file and PSD, if you dont mind sharing. All the best from Sweden!
-
On 7/6/2023 at 8:23 AM, Aeroeza said:
Gotta say I love this X-Wing… Having built the first two versions, I was happy to see TLG address many of the inaccuracies of the past & at the same time engineer something very different. Kudos to Henrik! But, ideally, there's a few changes I'd like to make to this UCS beyond a small MOD here & there, the S-Foil system being one of them - those wings ideally shouldn't droop when closed & that gap between them is problematic. It would be great to display this set without those features being so apparent & McPhatty's new stand, incorporating the landing gear, goes a long way to solving this problem. An inspired solution! And, once you've seen those renders with that top plate tilted slightly downward toward the nose tip, well, you can't un-see it. This set needs a new nose section!
ChemicalWorld & JabbaTheHatt have collected together some great tweaks to the set but the nose section is a bit of a rebuild. So, in the spirit of giving it a crack myself & putting a few ideas out there, here's my tinkering in Studio thus far...
Version 1

1. Uses two vertical 1 x 4, thin Technic Liftarm to mount the tilted top nose panel at an angle of 3.4 degrees. This still incorporates the Technic Pins with Tow Balls to continue providing some lateral support to the side panels.
2. Given the loss of the original upper technic beam structure, a series of horizontal liftarms, connected both forward & rear of the two vertical liftarm mounts are integrated with the lower technic beams. Two layers of plates complete the reinforcement & still provide plenty of room for however you may want to build support for the tilted nose plate. It’s probably overengineering but this solution fits snugly & still allows for the light grey ingot bars to add their worth to the job of the red tow balls.
3. The lower side panel has had the transparent 12L bar shifted half a stud back via the use of a 1 x 2 jumper plate, allowing for the nose cone/tip to fit just that little bit closer on its two red 4L axles.
4. The upper side panel has been divided into two sections. The lower section here still uses the tan wedge to slot into the nose cone. It also provides a channel for the topmost side panel to slide into. Hinge plates & a 1 x 3 double jumper plate have been used to lift & align this topmost side panel with the tilted top nose panel, closing the gap between them almost perfectly into an overall hexagonal form.
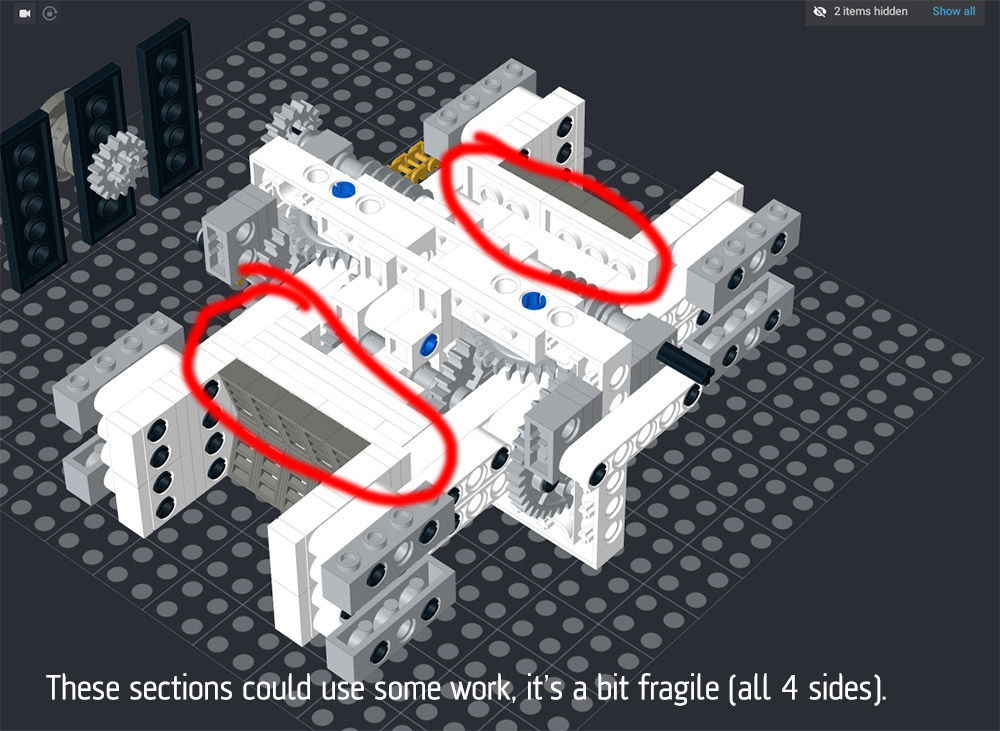
5. The only way I could get the top nose panel to fit so snugly to the side panels & still provide all the room required for the internal structure to fit was to use both 1 x 2 - 1 x 2 inverted & 1 x 2 - 1 x 4 brackets. These provide a bed of studs for the tiles rather than using studs provided by a layer of plates. Even a single layer of plates is simply too thick to use here. It’s worth noting that I’ve also been very careful to make sure Studio hasn’t tricked me with any hidden collisions or strange connections.
What I don’t like about the result is that the top nose panel is raised almost one plate above the base of the canopy piece. It’s a small complaint but ideally this component should be in line with the canopy for a nice, clean profile. Also, the use of brackets, although critical to the success of the MOD, are awkward to connect with a good amount of clutch power to all the supporting plates, hinge & technic bricks which form the rest of the component. I’ve yet to test it, but I suspect you would need to handle the top nose panel with care. At least it does tilt nicely with closely fitted parallel side panels to match. In addition, the whole nose section, with all that liftarm support, shouldn’t sag over time or separate from the rear of the model when moved about.
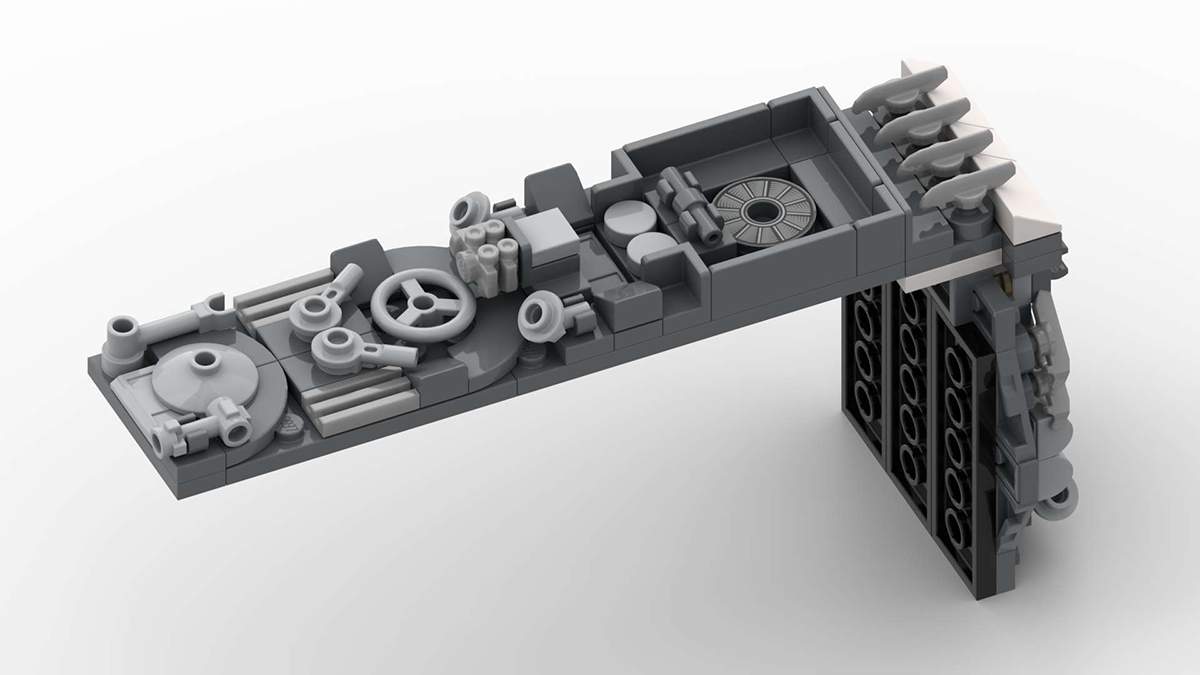
Version 2
1. Retains a similar technic support structure but uses two 1 x 3, thin Technic Liftarms to mount the top nose panel instead. This lowers it to be in line with the base of the canopy for that clean side profile I prefer.
2. As an alternative approach, the tan wedges can instead be incorporated into the upper side panel. This should better hold this panel in place than the design used in Version 1. So long as the clutch power of the hinge plates is enough, then the channel which the upper side panel slots into should also lock the other side panels in place as the tan wedges slide into the nose tip to form the X Wing’s hexagonal front profile.
3. Unfortunately the upper side panel must also be lowered as the thickness of the top nose panel is now too great, even with the use of brackets. The jumper plate is removed & a straightforward connection to the hinge is made. Only tiles one stud in width are required here rather than the two studs in width used for Version 1. The upper side panel is lowered by half a stud, remaining nicely parallel to the top nose panel but more of a gap is revealed by the side tiles at the corner of the hexagon where the two panels meet. It is still most certainly an improvement over the original build but doesn’t look quite as elegant as Version 1.
4. More gap means fewer brackets required. The top nose panel can now provide more clutch power & greater stability all-round via the use of larger plates. Only a single hinge brick has been used, an approach worth exploring for Version 1 too.
I'd also like to give a shout out to Hypodorious on r/Lego Reddit whose MODs for this set are really next level. Go check their work out folks!
Wow! That is fantastic work! I love it! Looks very very clean and neat! Would you mind sharing stud.io? Thanks 🎈
-
-
This absolutely beautiful, well done!
-
Set 7130, Snowspeeder from 1999. 🎈
-
Would love some pics for this.
-
Would you share stud.io for x-wing? I have a few MODs of my own i wish to implement, thanks 🤘
-
On 5/10/2023 at 10:57 AM, R0Sch said:
Here's the Studio file for the Yoda Fountain for anyone wanting to rebrick it 6471930.io and the wanted list 6471930.xml

I used this image to get the part list right, but the torso is the old one from Yoda since the latest one is not in available in Studio library. The BL wanted list is correct though.
P.S. Please don't sell these on ebay.That is awesome, thank you!
 ).
).

 I am happy with this version.. hmm..


[MOD/MOC] GotB’s UCS X-Wing Starfighter 75355 with Landing Gear & Light FX
in LEGO Star Wars
Posted
Quick photo of the final build.