
Out of Sight
-
Content Count
229 -
Joined
-
Last visited
Everything posted by Out of Sight
-
8043 - The Bucket that Never Was
Out of Sight replied to LennyRhys's topic in LEGO Technic, Mindstorms, Model Team and Scale Modeling
I was thinking vacum forming, like some R/C car body modelers do, using vacum formed lexan/polycarbonate. But I don't think it'll do well since the bucket has some fine detailing and sharp creases, not to mention the trimmings afterwards. Anyway good luck with the casting process, it would be great if the finished product has a matte black finish, much like the original 10 x 18 bucket, however I do notice that it's made of a rather flexible plastic, similar to ABS plastic found on real car bumpers. -
Great idea on that lift jack...love it. That flatbed truck is also an eyecandy, but it wouldn't hurt adding a GQ Patrol or 75 series Cruiser ute perhaps ...these are quite common sight on the Outback.
-
Love that swopping rear waistline below the c-pillar, and front bumper design, reminiscent of late 60's - early 70's dodge...Dodge Coronet cruiser comes to mind. May I suggest instead of the 1x1 cheese slope, you could try 1 x 2 curved slope for a smoother rear waistline profile. Great design anyhow :thumbup: , might try making my own, I'm thinking mid 90s Caprice
-
Ahh, thanks for correcting that out
-
DAF is (Van Doorne's Automobiel Fabriek N.V.) an automobile manufacturer of Dutch origin. CF is the type of the truck itself. I think this nice MOC represents this truck very well. love the orange color
-
8043 - The Bucket that Never Was
Out of Sight replied to LennyRhys's topic in LEGO Technic, Mindstorms, Model Team and Scale Modeling
I'm always drawn any time a thread is mentioning 8043, by far I still think one of the best flagship model, since all the functions are fully remote operated, much like the previous 8275 and the latest 42030. I've been considering cutting and narrowing the bucket, but seeing this mod of yours, I might just save some tears on Lego purists for cutting an element LOL. Anyway have you tried attaching this bucket on the model itself and working the bucket through its pace. I'm wondering how rigid this bucket is to withstand normal playing. I'm using a high discharged nimh batteries instead of alkalines, so they can deliver some amps and torque for the M motor. Looking by your work, seems like you have some considerable skills in plastic modeling, do you by any chance have previous experience in plastic model kits? Great work! -
[MOC] Hummer H2
Out of Sight replied to Fanylover's topic in LEGO Technic, Mindstorms, Model Team and Scale Modeling
Fantastic model, instantly recognizable as a H2. I especially love off-road vehicle models, yours is no exception. I wonder if we could see the iconic G-wagon some time in the future, preferably the 'obscene' 6x6 G63. Considering your talents, it should be a walk in the park.. -
Light upgrades for TMNT Movie van #79115
Out of Sight replied to Out of Sight's topic in LEGO Licensed
Thank you for all the kind words! I really appreciate it. Very true, however on the last scene of the bigscreen movie, when the van made its first appearance, Donnie was actually driving the van, he was mentioning all the gimmicks in the van, while shortly after Mike accidently triggered the rooftop missile -
Hi guys, just want to show you some upgrades that I did on the TMNT 2014 Movie set #79115 Turtle van takedown which I acquired last week. It's not much or even considered an MOC, but nevertheless an effective one to further enhanced playability, especially if you're on limited budget like me. Being a a big fan of TMNT, I already owned most Lego TMNT Nick cartoon sets (thanks to my7 y/o daughter and her persuasive demands for them), I welcomed this strange, disfigured 2014 "Michael Bay" turtles...despite the critics, I like them, the 2014 movie adds different and unique gesture of TMNT we all know and love from the 80's The title is pretty much self explanatory with main objectives as follows : - Enhanced interior details - carries all four turtles AND their weapons. As much as I love the intimidating Lego version of the van, which obviously is HUGE , resembling a 'tanked up' Winnebago and not to scale as compared to the movie (much smaller 60's Ford Econoline), I felt that the stock interior seriously lacks detail, and wastes so much space considering this is a pretty hefty 8 wide vehicle. I was mainly dissapointed that we can't simply put all four turtles on board, in van which is named after these awesome foursome...major flaw in my opinion. So I went into my parts inventory and made some alterations! I added some details in the driver's compartment, printed slope which represents center dash consoles, probably to control the weapon ,and audio systems LOL, a security club to represent the auto transmission shifter, and printed 1x2 tiles, representing the center function buttons to select Power/Eco/Winter mode, and perhaps the opening function of the side doors. And a fire extinguisher, God knows what the turtles might set up on fire accidently LOL On the rear I added a pizza tray for the "99 cheese pizza", for Mike to devour, with Raph next making digital compilation for their upcoming new hip hop album, and song playlist for April! I made use of many 1 x 2 stud jumpers to allow them to sit side by side For safety reasons, they must store their weapon on board (imagine flying katanas and sai's during sudden braking...could be lethal), so I made a weapon rack to securely place them. A simple detachable rack with an iphone dock...the phone itself commands the locking mechanism, so the weapons will only be released by punching the right security codes! LOL. The red/green round tiles is the indicator for the weapon status. Red is LOCK..duh.. None of the parts are touching despite the seemingly cramped space, so all bricks and figs are properly place on the studs, the roof and side closes properly and flushed. And most importantly all these mods left the original exterior design..which I like..intact Thanks for viewing this meager modification of mine guys, pardon the low quality photos! All comments are appreciated.
-
Do you lubricate your Technic gear trains?
Out of Sight posted a topic in LEGO Technic, Mindstorms, Model Team and Scale Modeling
During my experience running R/C model cars or anything which involves gear train, there's always some kind of lubrication on them. I don't see Lego stating anything about lubricating gear trains and shafts..but shouldn't there be? I also noticed that some member, like Rien on his 11.1v PF also does this. Subject : Technic #8043 Oil : 100 Silicone oil (I used light 30wt radio control shock oil for better capillary action). Silicone is clear, so it will leave a thin unnoticable clean film on the gears and very safe for plastic. Method : Small 5mm wide paintbrush, tiny dab of oil on certain gears,cycle the motor few times so the oil spreads to other gears. Don't over do it, you'll end up with a mess. Tiny amount should suffice and will retain the Lego 'cleanliness'. A lubricated gears will leave a slight sheen, nothing more. Results: I can raise the boom at full extension with a rechargeable 7.2v batts slightly faster than a non lubricated gear trains on 9v fresh alkalines, so that around 20% in friction reduction! The instant high pitched spooling sound of the M motors indicates this, they're literally shouting "Hooraaayyy!" Battery life is also noticably longer. I think all PF equipped models should be lubricated, especially on highly loaded M motors such as the #8043 set. Pardon me, maybe some of you had thought about this, but since I'm new member here, I'd like to share my 'newfound' joy in my Technic set. -
1:8 Scale Classic American Hot Rod
Out of Sight replied to drdesignz's topic in LEGO Technic, Mindstorms, Model Team and Scale Modeling
WOW, I'd just fainted for a sec there... :thumbup: Very nice AND functional. This model would be right at home on any of ZZ Top's music vids I prefer the ones with the black wheels though, either with the axle 'spinners' for the hub or personally a dish to simulate the wheelcaps found on more traditional hotrod. -
Pneumatic questions...
Out of Sight posted a topic in LEGO Technic, Mindstorms, Model Team and Scale Modeling
Having to fiddle around the last 1 month with my Unimog (which also marks the first month of my life being with a Lego pneumatic system )..I'm thinking of creating a lifting crane with a telescopic boom, while also improving working and rotation range, therefore the pneumatic actuators will be subjected to serious leverage when the crane is fully extended. Main objective : more powerful lifting capability on the main boom while maintaing the original design as much as possible, of the 8110's crane. If I were to retain the stock 8110 setup, single pump, no air tanks running a single M motor...which of these options gives better lifting power? 1. Adding another pneumatic actuator on the main boom 2. Running two pumps at once (i don't know if a single M motor is able to do this)while still having a single actuators on the main boom. There are maybe other options, you guys are welcomed to make suggestion. Thanks guys -
Pneumatic questions...
Out of Sight replied to Out of Sight's topic in LEGO Technic, Mindstorms, Model Team and Scale Modeling
@allanp Thanks for clearing this out. So I guess i'd better be off running one M motor using two actuators, but with the two pumps running at opposite 180 deg ofset so each 1/2 cycle pumps air as opposed to running just one pump (1 cycle 1 pump). In theory I should get the same movement speed with twice the strength when the pumps are pumping those two pneumatic actuators that I'll be installing later, is that correct? EDIT : Allanp, is there a specific way to connect the air hose from the two pumps, or do i simply just add a T joints from the two hoses of the outlet from the pumps into one hose leading to the output switch? @SNIPE Yes I did experiment with the lift points.. to get better rotation range of the main boom, which the stock crane design lacks . But the range works like a gear ratio, since the pneumatic actuator travels at a fixed distance, therefore increasing rotational range ( moving the lift points closer to the pivot points of the boom) means greater leverage, therefore I need more force. As you can see I have better rotational range of the boom compared to the original 8110 crane design, but I can barely lift anything heavier than 100 grams when the crane is fully extended. The other reason is I plan to extend the main boom few studs longer so i can reach and drop the load on the logging trailer that I'd be moc-ing later on. -
8110 - Unimog - MODs and Improvements
Out of Sight replied to tripletschiee's topic in LEGO Technic, Mindstorms, Model Team and Scale Modeling
@Tim Perfect...the only suggestion I can give you is a rounded front fender to make it more accurate to the real thing, maybe using tubings like the supercar sets. If Lego prolongs its licensing with Mercedes Benz..I'd like to see the UGH series 4000 Mog in future flagship sets. -
Pneumatic questions...
Out of Sight replied to Out of Sight's topic in LEGO Technic, Mindstorms, Model Team and Scale Modeling
Thanks guys. I see...since I flunked physics class during my high school years..(well not flunked just not too bright), I understand that running double pneumatic actuators (let's call it 'PA')will increase the lifting capability but since the pump is running at constant speed/same debit of air , the PA will move twice as slow, although actually that's OK since I will need a slower more precise movement. How about running two pumps at once using two M motors,on just a single PA? In theory I'll be pumping twice as much debit of air therefore increasing pressure hence better lifting capability? Although I'm worried that the movement will hideously fast and uncontrollable. -
8110 - Unimog - MODs and Improvements
Out of Sight replied to tripletschiee's topic in LEGO Technic, Mindstorms, Model Team and Scale Modeling
Idk if my post is appropriate for this thread, but the description does say 'improvements'. If not please remove my post. Anyway seeing all these wonderful high cost MOCs, I'd like give a simple,quick and cheap improvements without breaking the bank or having your wife screaming on top of her lungs becoz you just screwed up the your housing loan :laugh: after all not everyone has a liberty of deep financing their Lego projects..well at least not right after you forged out substantial amount of cash to purchase this beast. Crappy Indonesian import taxes means the 8110s are sold well in excess of 200 euros! Main focus: utilise mostly stock available parts, increase the working range of the original grappler crane. I'm always having trouble having to drop even a small load in the rear portion of the truck bed as the main boom can't be lifted high enough. My solution: I reposition the pneumatic actuator like so. To do this you need to place the bent 7-3 liftarm outside the main assembly. The shaft is attached 1 stud closer to the rotation point of the main boom, therefore increasing rotational range, but also increasing leverage so you lose some weight lifting capability. Doesn't mater to me since my heaviest load is merely 20 grams of my daughter's Duplo bricks I also tinkered a bit with the linkage on grappler boom to get better retraction capability. Results speaks for themselves. I can touch the ground or lift the main boom almost vertically and easily drop decent sized load on the rear part of the bed. The only extra parts needed were 2x 6L axles and 2L..well alright you got me..and the expensive black wheels and sprockets for looks only! Other than better range, I see the actuator hoses on the main boom has much clearance without being 'pinched' against the bent liftarm as in the original design, therefore smoother and more controllable boom movement. Sorry for blurry pics, I took these with my phone..I want to depict the Mog in its natural environment, my backyard... -
Faulty pneumatic actuator on 8110's grappler claws?
Out of Sight posted a topic in LEGO Technic, Mindstorms, Model Team and Scale Modeling
Guys, I had recently finished building my 8110 Unimog. I have a problem with the smaller pneumatic actuator (4625540) which opens/closes the grapple claw. The problem is each time I flick the switch to close it FULLY (both claws touching each other in closed position with actuator fully extended), it won't open again unless I build up some good pressure on the air lines, flick the switch quickly to send all the pressure. I'd checked for blocked air hoses or leaky ones,binding pivot joins on the grapple claws, and even swapped the switch to make sure that the switch isn't faulty. Everything is fine. I inspected the actuator itself, i noticed that when fully extended, it's notably stiff to retract back as if the seals are binding inside(air hoses detached to avoid pressure build up inside the cylinder), . However when not fully extended the actuator performs well. It only binds towards the extension's end point. I checked also for bent shafts, nope everything looks fine. I tried adding some 100% silicone oil on the shaft, to no avail. I'm thinking of contacting Lego CS for a replacment part, but before that I need to be sure,do I have a faulty actuator? Thanks guys -
Faulty pneumatic actuator on 8110's grappler claws?
Out of Sight replied to Out of Sight's topic in LEGO Technic, Mindstorms, Model Team and Scale Modeling
Aha..so I'm not alone here But as been said, it's probably the characteristic of the ram. Yeah the distance from the switch could also be the cause as well. I'm currently taking of the mini actuator and cycling it back and forth slowly with my hands just to see if i can 'loosen' it up a little. -
Faulty pneumatic actuator on 8110's grappler claws?
Out of Sight replied to Out of Sight's topic in LEGO Technic, Mindstorms, Model Team and Scale Modeling
Thanks guys for your response. Yes I checked the inlet and outlet...but I'm only seeing through tiny holes ..should there be anything I must be aware of? Visually there doesn't seem to be anything blocking though. This is actually my first time owning a pneumatic set, so I haven't got any other mini pneumatic cylinder to compare it to. But I did request a replacement part from Lego. If it turns out that I have a faulty cylinder, than I can only hope that the new one is smoother. -
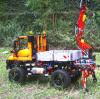
My 9397 Log Truck
Out of Sight replied to technicfan's topic in LEGO Technic, Mindstorms, Model Team and Scale Modeling
Very nice mod... Can the trailer be folded and carried by the tractor like the ones in the pic you posted? -
Third Party Tires for Lego Technic Rims
Out of Sight replied to efferman's topic in LEGO Technic, Mindstorms, Model Team and Scale Modeling
Do you guys use the inner foam? I borrowed a friend's brand new 1.9 scale crawler tire (Proline Flat Iron) just to see how the tires hold up against the weight of the heavy Unimog..the tires just sag and 'deflate' under the weight of the truck even with the foams inside. While 'deflated' tires are preferable on scale crawler for better traction, it just doesn't look good for show purposes. Any ideas of how to harden up the foams on these tires to better cope with the weight ? I use to be in RC hobbying too..on RC buggies we can select different foam stiffness, such as Proline's V3 Closed cell inserts, while we can also 'tune' it to soften it up a bit by making holes in the foam, but I haven't heard someone actually able to stiffen the foam other than buying a stiffer after market inserts. But to my knowledge these crawler tires only comes with very soft regular and memory foams. Just some tips for you Lego crawler guys, try adding wheel weights inside the rims for better much improved traction and lowered COG . you can try double taping leadweights (actual car wheel balancing lead weights). 80 grams on each tires should see some traction improvements, at the expense of a much heavier steering. -
8043 Excavator problem
Out of Sight replied to DarkShadow73's topic in LEGO Technic, Mindstorms, Model Team and Scale Modeling
What kind of batteries are u using? Alkalines are useless since they have a low discharge rates (despite higher voltage which will plummet LOW once serious current is extracted from them). I own the revised 8043 with the new LA's, I've only used high discharge rechargeable NiMH batteries for cameras which yield more consistent torque, haven't had single issue since Dec 2010 Changeover smoothly. BUT, I did have temporary issue with the changeover 'springing back' to neutral once the lever reaches its full travel. Here are few things you could try: 1. Electric motor usually "springs back" due to its magnetic pole..disassemble just the rear end, plug the motor out and turn it slightly and reattach. test it first 2. Appy a dab of silicone oil on the tan ribbed sleeves and the red driving rings, idk what parts number it is. This will aid the red driving rings to 'skip' between the ridges easier..hence less stress on the motor. I kinda disagree swapping to frictionless pins, since the friction pins add as 'brakes' so the it won't shift to neutral easily. -
Guys, pardon me if this topic had been brought up previously. My folks will be visiting London, UK next week, I was wondering if you guys could give me some pointers. I personally haven't been to London so I'm pretty much clueless..LOL. I need some infos on stores which carries comprehensive line up of Lego sets/themes. Thanks guys!
-
Good LEGO stores in London, any recommendations?
Out of Sight replied to Out of Sight's topic in Community
Thanks guys I appreciate your help. Yeah, I did a little search of my own through Google, and found out that some stores do carry rather hefty price tags. . -
The narrowed and pointed front grill reminds me of the 50's Edsel... I like the overall clean design. Edsel The distinctive characteristic of a classic 40-50's car designs is the way they mimic aerofoil and the way the cars seem to be 'flowing in motion through the air'. You should add some tail fins, longer boot and tuck the wheels flush with the fender if possible,lean, wide and low and make it as aerodinamically outrageous as possible To prove my point 51 Buick LaSabre