
miguev
-
Content Count
449 -
Joined
-
Last visited
Posts posted by miguev
-
-
They did the same last year, is this something we can expect to happen every year in late October?
Migros around me don't have much, so I'm hoping to get my 42043 30% off from Toys'R'us in their Thanks Giving sale, since it looks like they are into that :)
I got my 9398 cheap (35% off) from Coop right after Xmas, fount it as a lonely leftover in the local InterDiscount. Saw it and decided it had my name on it :D
-
I was also curious as to what was used. After a bit of searching I could gather that it's a two piece extension arm connected to a curved helmet cam extension. Neither of these help to stabilize it by the looks of it. For that a gimbal would be necessary.
Exactly, I used a Gimbal. The on-board camera footage is from the same day that I did not use the Gimbal, because I didn't yet know how to attach it to the extension pole.
The footage from that unstabilized pole was mostly useless, so what you see was recorded with a Feiyu G3 Ultra 3-Axis Gimbal attached to a GoPro 3-Way Grip, Arm, Tripod.
Attachment was made in a pretty ugly "Apollo 13 mailbox" approach, in lack of proper accessories.
-
Oook! Oook! Eeeeeek!!!
-
Finally, I’m done. It took a while, that’s what “soon” means when you’ve got small children 0:)
I’ve updated the initial post with the final video and a few notes.
Can a moderator please replace [WIP] with [MOC] in this thread’s title? I hope you don’t mind the bump here, I don’t see how this update would deserve a new topic.
I intend to record a Jedi Build of this too, and post it on rebrickable.com ... eventually, hopefully this year :)
-
You don't want it at the front either.
But I think multi-axle trailers are hard anyway, because the steering depends on the angle between trailer and truck. In reality this is probably done electronically, and, I think, this has a reason, because it's not as simple as with a fixed-body truck.
Thanks (Milan & Erik) for clarifying, I was confused.
-
Lego rubber connectors are also good for fixing, but do not protect 100% of the flight the camera out of the case .. Therefore, I decided to collect as more rigid structure.
Sariel's "LEGO method" holds the camera surprisingly well, even on fairly bumpy rides. I used this recently on my trophy truck and it only fell once: when the whole car drop off a 50 cm. cliff. Even held strong after hitting a tree or light post

-
I don't have experience with many-axles steering, but I can't help thinking your setup will make up for a larger turning radius than if you'd leave the 5th axle fixed and made the 6th axle steerin the same angle as the 4rd, but in the opposite direction. Wouldn't that give you a smaller turning radius for better maneuverability?
-
Great improvement! Any chance of seeing this in action?
While you're at it, do you thinking suspension could be made softer?
-
I'd worry a bit that there are no rubber pieces anywhere, i.e. vibrations could ruin the video easier than if you'd use 2L rubber liftarms or tyres or something else rubbery and soft.
-
I noticed that the 2nd front axle has to carry alot of weight so actually it needs those hard springs there, the 1st axle is way too stiff though..
So i've tried another setting, keep the rear 3 axles as they are. and only swap the first axle with a pair of soft springs. It works like a dream :) smooth ride and it does not lean forward. if you tilt it from side to side it still returns to the middle because of the hard springs on the 2nd axle. Try it out, it works :)
What happens if you put hard spring shocks in the 4rd axle? With and without the bed full of heavy stuff :)
-
I just hope we'll see more 2H flagships that are not construction machinery, we've got plenty of that in the last few years, no?
42009, 42030, 42043, ... not sure 8110 and 8258 count as "construction", but to me they kinda-nearly are. I'm hoping for more groundbreaking things like 9398 :)
-
I'd super-love to see LEGO making a torsen or limited-slip diff.
-
I just an interesting compromise could be to have soft spring on axles 1 & 3 and hard spring on 2 & 4. The idea is that load capacity is more even along the truck, but when hitting bumps the softer springs would make for a more comfortable ride. That is, for a little GoPro riding the truck. Any one up for trying this out? I won't get my truck until January...
-
Probably none. Toys'R'us has 15% off but that's still more expensive than online shops liked hawk.ch or galaxus.ch
-
Even a bit more expensive in Switzerland, with 15% off: CHF 229 == EUR 216. Anyway prices in Toys'R'us in Switzerland seem a bit random, a few weeks ago 42009 was a good deal more expensive than 42030.
Other shops have slightly better prices: hawk.ch and galaxus.ch are generally good.
-
Congrats on this epic build, truly impressive. Looking forward to your next WIP thread!
-
Absolutely brilliant! All realistic functions in such a small scale, and all of the implemented in surprising ways. At least I was surprised, specially with the tail rotor variable pitch mechanism.
-
Great model, seems pretty fast for the size and weight. Would you explain why this drive train? It's already a bit complex to see how it works, but what really puzzles me is why it works!
Good photography as well, I like this one in particular

But above all, how comes it didn't seem to suffer from driving through water?
-
How about some night street photography for the Dark Ride?

-
Impressive model! I was puzzled about the back until I realized it's one huge STAMP
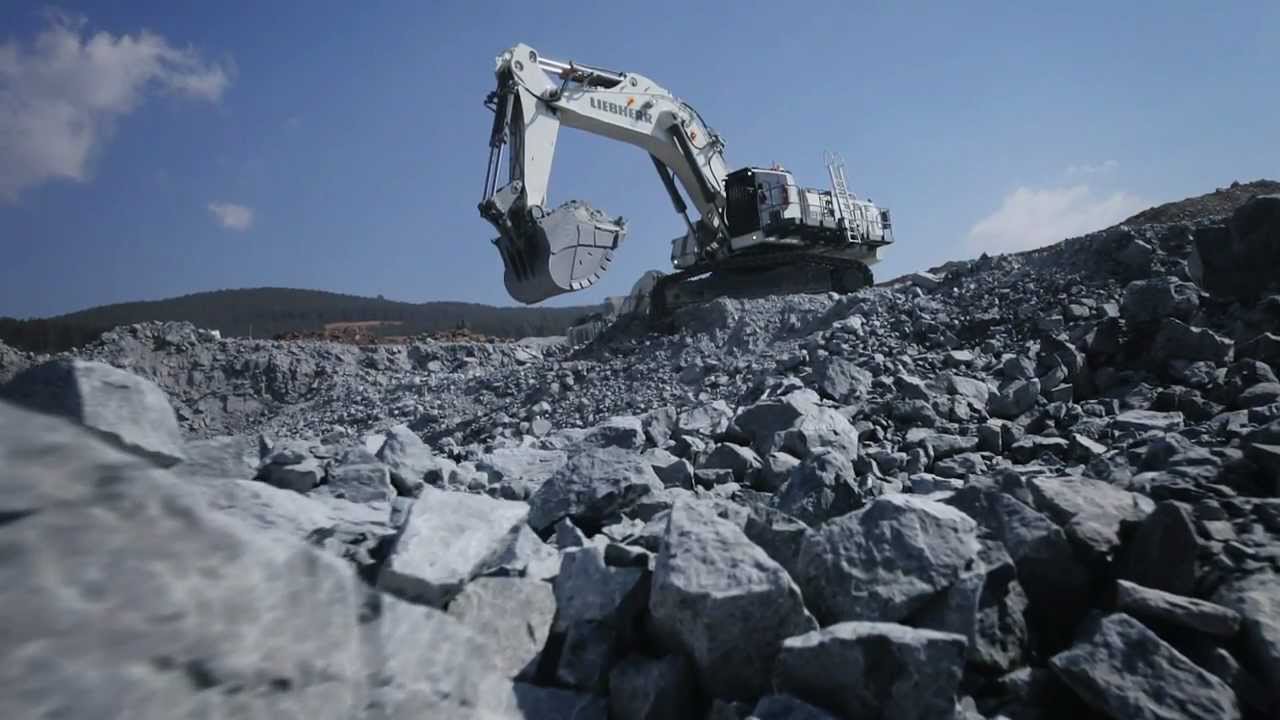
As for the dimensions, I think the model is quite fair. The arm is short and the bucket... I guess it's the only LEGO bucket for this scale.
Now, if only you'd shoot your models outside... like this, or this, or this... and your truck would look great like this too

-
This is nice but this is the wrong topic, this topic is for photography not cinematography ;)
Maybe. Photography is a very important part of cinematography. But I reckon it'd be great if we have a "Technic Cinematography" or "Filming Technic" thread where people can show off their best pieces of footage and share their tips and experiences, or generally discuss filming beyond its photography aspect.
I don't think I have any footage worthy of that, but a few builders around here could get such a thread started. I can't help thinking of Mahj and his
-
Fantastic, looks like we have a winner
-
Tried some more outdoors. It seemed harder than indoors. What are the best time and conditions to take outdoor photos of LEGO?
I'm sure there'll be more comments and you already got a few good answers :)
Generally the "magic hour" around dawn and dusk when you have soft light (there are actually two but most people never see the first one). Direct light gives harsh shadows and huge contrast between light and shadow, often more than the camera can resolve. So you either shoot HDR or use reflectors (either works, but are a hassle).
Golden / magic hours when the sun is very low, sometimes even when it's behind the horizon. I'd say this is when it's a bit harder to get the light where you want it, but as soon as you get it the shot will very likely look great.
Time and conditions - it's personal choice, as i think. Cloudy = softer shadows, sunny = harder shadows. Your photos looks overexposed a little, you can try smaller aperture size, or lower shutter speed.
Softer or harder shadows are indeed a personal choice, I think they influence a lot the impression they give, e.g. softer shadows make it look milder, harder shadows make it look wilder, like #169's crawler.
Then there's the compromise of how easy it is to get the light right, and to get a great looking shot. My impressions is that softer and harder shadows are complete opposites:
- with softer shadows, it's much easier to get the light (or maybe I mean contrast) right, but shots are more likely to look boring
- with harder shadows, it's much harder to get the light right, but if you get it then shots are more likely to look great
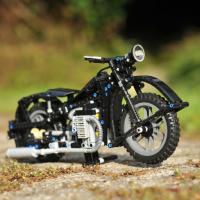
The last motorcycle is very nice... The advantage of telephoto lens... Nice blurred BG and flat image... :)
It looks great, I like the backlight a lot. Should try that with my 8051 some day...
-
Fantastic! We need more buses and you're doing great ones, specially at this scale. I love the door mechanism, the way the doors open and get in feels pretty real.
.jpg)
[MOCS] Toyota Land Cruiser FJ 40 Series
in LEGO Technic, Mindstorms, Model Team and Scale Modeling
Posted
Great little movie! I love how you went out to the great outdoors around to you film this, can't get enough of it :)
On the topic of instructions, did you already / will you publish details for the improved front axle in the blue one (at 1:58)?