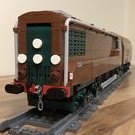
Hod Carrier

[OcTRAINber MOC] LMS Articulated Railcar (1938)

Recommended Posts

@Shiva Thank you for the positive feedback.

Time is running out fast and I'm pushing hard to get everything finished in time to get my submission in on time, but I can see the end is in sight and I'm still just about on target.

Work has been progressing with the rebuilt railcar in its guise as a maintenance train, but it is generating a growing "snagging list" of minor build problems that I probably won't have time to deal with before the deadline. I have completed one car and am well on the way to finishing the second.

52452224694_c7ea2251fa.jpg

52452399125_e56b5d9dce.jpg

Although the rebuild was purely for practical purposes rather than aesthetics, I have retained as much of the body profile as I reasonably can from the original version. Even though it's no longer much of "a looker", I quite like the way that it carries the dark green livery. It may be only a maintenance train, but I think it looks quite classy.

52452399160_37dc984c6c.jpg

52451951586_a12156cc72.jpg

I've also been making good progress on the power coach. Unlike the original version I have used a Technic motor for power rather than the train motor. Partly this is because this version doesn't need such a high turn of speed, but mostly because that's all that will fit.

52451951571_d1166fd660.jpg

Hmm. Not sure what this is all about (ahem).

I've still got to push myself to make sure that everything gets done in time. The power coach still needs finishing off and the wire wagon built, but neither of these things should take too long. The "snagging list" that I mentioned is something that I shall have to simply park and come back to later due to the time constraints. There's some minor flexing to be dealt with and there something weird about the way the roof sections fit onto the body that means that in some places it sits flat but in others it shows a gap. I've checked all the clearances for the parts and they look fine, but there's something going on that I really haven't got the time to investigate fully. As a result, I'm just building this version "as is".

Share this post


Link to post
Share on other sites

I am pleased to present my entry for OcTRAINber 2022 in the "Other Locomotive" category. My model is of the LMS Articulated Railcar in both its original and rebuilt forms.

In 1938, Britain's London Midland & Scottish Railway (LMS) unveiled a radical new diesel railcar built at its Derby carriage works. Three coaches long, the railcar was intended to be an experimental train to help the company assess the relative operational costs of diesel against steam operation as well as to gauge the use of railcars on secondary routes.

LMS_Diesel_Multiple_Unit_80000%E2%80%938

During the inter-war years most of the major rail companies in Britain were experimenting with diesel railcars. Most of these were single coach trains such as the GWR diesel railcars with the option of adding a trailer coach if the need for more accommodation ever arose. However, this LMS streamlined 3 car articulated railcar was quite unlike anything before, being a multi-car multi-engine fully self-contained train.

Painted in bright red and cream with a silver roof, the shape put a lot of people in mind of the record-breaking German "Flying Hamburger" diesel train, mainly due to the streamlined cabs and lower bodyside fairings which gave it a futuristic appearance.

The train was powered by six 125hp Leyland diesel engines, two per car, each powering one axle each through a hydraulic transmission. Weighing just 74 tons the train was intended to reach 75mph but actually hit 82mph on an early test run. After initial tests the train was allocated to the Oxford to Cambridge route where it ran a limited passenger service before being moved to the London St Pancras to Nottingham route. Early experience showed that the train suffered with overheating due to the lower paneling restricting the airflow to the radiators. Remedies were sought, but in the end the lower panels were simply removed.

The outbreak of the Second World War saw the operation of the railways change to address the national need and many modernisation programs were simply shelved. This railcar was no exception. It was withdrawn from service at the outbreak of war and stored for the duration of hostilities.

With the end of hostilities in 1945, the railways were in a poor state and the railway companies not in any position to restart any experimental schemes that had been underway prior to the war. The main priority was rebuilding and re-establishing a peacetime economy. Nationalisation and the creation of British Railways followed soon after in order to deal with the backlog of maintenance and to make good bomb damage to the infrastructure and losses in locomotives and rolling stock.

It would seem that the newly nationalised railway had no interest in developing the LMS railcar any further, but it still remained as an asset. It was decided to convert the railcar for use as an overhead line maintenance train on the Manchester South Junction & Altrincham route, which had been electrified before the war. The advantage of using a diesel railcar rather than a steam hauled maintenance train for this purpose should be obvious.

52404346158_164a8f9d03.jpg

It would seem that the railcar saw little use as a maintenance train and was moved from depot to depot before finally ending up at Longsight in Manchester. Here it fell into a state of dereliction and was finally disposed of in 1967.

My own interest in this train is down to various reasons. What first drew my attention was simply due to the way it looked. Along with the original AEC railcars built for the GWR it looks outstanding, especially when compared to other railcars of the era. But as my job is to drive this train's modern descendants, it impressed me with its modern technology. It contains features that are still familiar to me in my work, such as a door interlock circuit that prevents the train being driven away with the doors open as well as stopping them from being opened while the train is on the move, and automatic engine shutdown in the event of low oil or coolant.

As a consequence of all these factors I had bookmarked this train in my mind as a possible future build. I like to pick unusual trains that maybe people have not heard of before and to bring them to wider attention, and this was a perfect candidate. Knowing what happened to the train once it re-emerged after the war made it perfect for this year's theme and gave me the push to try and build it.

And here is the fruit of my labours.

52460439969_9918bd8b37.jpg

52459652987_3be55f8f0e.jpg

52460622525_9d63bec1f5.jpg

The two versions of the railcar side-by-side contrasting the stylish looks of the passenger railcar with the extremely practical features of the maintenance train.

The original version of the railcar is distinguished by its curvy body profile and streamlined cabs. In order for this train to be suitable for the contest I would have to work out how to recreate these features. The vast majority of my LEGO train builds to date have been conventional in their design and build, but this was going to push me quite a long way out of my comfort zone.

52459652767_a8158016e5.jpg

A lot of time was spent on trying to come up with a form of parts that would work but, after quite a lot of trial and error, I arrived at a shape that I was happy with. I had never really used "Clip SNOT" techniques to such a degree so it was a bit of a voyage into the unknown.

52332496450_09fe877755.jpg

52332232781_b3db539b1c.jpg

52459701417_55870e0c98.jpg

The coach bodies are built of a number of sub-assemblies that are attached to the chassis.

52440074170_cd8bd11956.jpg

This version of the railcar also uses a form of close-coupling to improve the look and movement of the model. It was a bit of a "bend to fit" solution, not having been envisaged for use on an articulated model like this one and not being entirely suitable for such use, but overall it works well enough. The coupling gap has had to be extended a fraction to permit the train to take R40 curves, but it can manage these successfully.

52460622450_4784465540.jpg

52460175486_3b3212dfe0.jpg

Where possible, the model has full interiors.

52404346128_29a056ae1b.jpg

Although I wanted to use the LEGO Train Motor to provide drive, I was unhappy about using one in the conventional manner. These make for very large bogies, especially on a 7-wide model, and I was not prepared to compromise on the looks of the train. Consequently, I mounted the motor on its side inside the car body and used a conventional Technic-style bogie to take the power down to the wheels.

52440139493_dbd59b0c27.jpg

Although there are not a huge number of sources for the original version of the railcar, the design of the second version of the railcar was hampered by an almost total absence of information. Whenever I found any mention of this train, reference was always made back to a single magazine article from December 1949.

When I finally tracked the article down, I discovered that both the explanation and accompanying photos did not provide me with very much to go on. Although I could see the basic form of the rebuilt train the details remained incredibly sketchy. Even a trip to the British Library to see an original copy of the article provided very little additional information. Layout of equipment, door and window arrangements and even the livery that the train wore would have to be guessed at. I decided that I could either worry about this or just press on and try to make the best of what I had. Naturally I chose the latter.

52460622565_eae82f2079.jpg

I have taken the decision to use dark green lined with tan on the basis that the photos showed a lined livery, and this is the colour scheme that passenger railcars at the time would have carried. Other discernable features were the rollers over each cab to protect them from cables being run out (or in), battery boxes and the ladders that were stowed underneath the solebar on each car. I have also included other detailing below the floor, but all of it is conjectural on the basis that I have no pictorial sources for them.

52443644512_32113f1ea1.jpg

The structure of the rebuilt railcar differs from the original version in that it uses fewer "Clip SNOT" techniques and a few more conventional ones. Although some techniques are common to both, the two builds are individual and quite different.

Although the railcar lost its centre car during the rebuild, it gained a wire wagon. This was based on the chassis of a former Midland Railway coach which would have originally been built sometime around the end of the Victorian era. As with the rest of the rebuilt railcar, there is very little information to go on with this design, so I have simply opted for what I think it could have looked like and just given it three cable drum stands.

52459652742_f8e70f9c07.jpg

This model contains a couple of bonus features that reflect real details of the actual train which are worth a look.

As part of the rebuild process, the bodywork was cut back from the inner ends of the cars to give a couple of open working platforms which could be extended if needed to aid access to parts of the overhead line under maintenance. This part of the train was equipped side panels that could be extended as well as an elevated section of roof.

52459652897_206df0d4ff.jpg

52460707313_82b4f3a1f7.jpg

On the real train these would have been hand-cranked, but for the model the elevated section uses a scissor jack driven by a Technic M Motor linked to a linear actuator inside the car.

Two months ago, way back at the start of the contest, I joked that I was going to come out swinging this year and really embrace the "quality over quantity" message after just playing for laughs in the previous edition of OcTRAINber. I thought it might have been hubris to have said as much and wondered whether or not my mouth was signing cheques that my abilities couldn't match.

To come up with these two builds I have really had to work hard and push myself to try and master new techniques in pursuit of accuracy. It's been hard work and not always very enjoyable at times and I have come very close to hurling one or other of these builds across the room in frustration. But I'm glad that I pushed through and persisted with them, because I now have two very satisfying models that I can sit back and enjoy.

Although I consider them to be finished from the perspective of the contest, I am still looking at them as works in progress. There are one or two issues that are still outstanding, either from a structural or operational perspective. However, the overall look of the two should remain unchanged and, in that respect, I am happy and proud to be able to present them.

More photos and narrative can be found in my Flickr OcTRAINber album.

Edited by Hod Carrier

Share this post


Link to post
Share on other sites

I simply say: first-class work, and clearly "quality before quantity". Whereby you have built just not little! I can also understand very well the many work of you in the last two months, something you build not on the side. That is already "almost" a full-time job.

By the way, I find your prototype very interesting: without background knowledge, one would never assume that the two vehicles have the same origin.

And the second plus point: the many explanations about the construction technique wiht lego, that looks mega exciting!

Thanks for the worthy contribution to the OcTRAINber and good luck! I see a favorite here!

Thomas

Share this post


Link to post
Share on other sites

@Ts__ Thank you for your very generous praise. I always find myself getting immersed in the story of the prototype and like to share what I have learned as well as sharing any techniques that I've used. The techniques I've used in these models may be familiar to many builders, but I have learned so much by seeing the techniques other people have shared and I always like to think that there might be someone still gaining experience who will find it helpful to see how I've achieved certain aspects of my builds.

I know exactly what you mean about it being almost a full-time job. OcTRAINber always absorbs a lot of my time at this time of year, but I think that this year has put a really heavy demand on entrants. The need to design not one but two models to competition standard, even if only digitally, has meant that we've all had to work so much harder than in previous years.

@Shiva Thank you.

@XG BC I did!! I really did!! :head_back:  Thank you so much.

Share this post


Link to post
Share on other sites

Fantastic work! Your building technique to create the curved end and the body profile is outstanding. That and the full interiors you were able to incorporate. I agree with all the comments above and especially appreciate the history of these trains and the bits you provided from your own experience.

Dave

Share this post


Link to post
Share on other sites

As Ts_ said, even seeing them side by side you wouldn't guess that one is a modification of the other.

I've followed your posts through the development/ build and it's just spectaculair. The techniques for getting the body shape and the close-coupling, the fact you managed to get an interior in one and working scissor lift in the other...

Each of these is a great model and together with the story behind makes it a very impressive project.

Share this post


Link to post
Share on other sites

@Duq That’s very generous of you to say. Thank you for the wonderful feedback.

I’ve really got to thank BMR for giving me the push to build this railcar, as without this theme I probably wouldn’t have tackled it. 

Share this post


Link to post
Share on other sites

Exceptional model! :wub_drool:
I enjoyed learning about the story behind this transformation.
The red & white train has so many curved parts that it seems impossible to be made with Lego bricks. :excited:
Very good as always! :thumbup::thumbup:

Share this post


Link to post
Share on other sites

Wow, what a great project! Thank you for sharing all the historical details and building techniques used.


Share this post


Link to post
Share on other sites
2 hours ago, Darkkostas25 said:

I bow before you, Master 
You did marvellous work with them!

Thank you. But please, no bowing is necessary. I’m not a master. The techniques I’ve used are in the reach of everyone. 

Share this post


Link to post
Share on other sites
1 hour ago, Hod Carrier said:

Thank you. But please, no bowing is necessary. I’m not a master. The techniques I’ve used are in the reach of everyone. 

shure...the snot solutions you did there...i am out.

Share this post


Link to post
Share on other sites

These two models are spectacular ones, with a lot of research behind them. A lot of aesthetic and functional solutions all together! :pir-love:

Those curved frontends, lower sides and central articulation really capture my curiosity and surely are matter of study for me!!!

Great job, as always. :wub:

Ciao!

Davide

Share this post


Link to post
Share on other sites

@Hod Carrier HUGE CONGRATULATIONS!!!

I’ve been watching this thread very closely throughout its development, and have been impressed from the beginning.  Being a Brit myself, I’m always intrigued by any unusual locomotive, and this in both its forms is I think a prime example of this.  You’ve designed it perfectly at the right scale, with an amazing amount of detail, using very interesting angles and ideas - I fully agree with the judging panel at BMR that you are a very well deserved winner.  Huge congrats again, and thank you for such an informative and interesting story to go along with it.

Very jealous of your prize as well - these two will look amazing going through those R104 switches…

Best,

Vilhelm22

Share this post


Link to post
Share on other sites

Thank you everyone for the support and amazing feedback throughout the design and build process. I haven't always enjoyed every stage of this build, but I have learned a lot that I can take forward into future projects. It's never certain how the judging will go, and there was a lot of really good competition.

Now I'm going to have to think of a layout to make best use of these switches. :look: :laugh:

Share this post


Link to post
Share on other sites

Create an account or sign in to comment

You need to be a member in order to leave a comment

Create an account

Sign up for a new account in our community. It's easy!

Register a new account

Sign in

Already have an account? Sign in here.

Sign In Now

  • Recently Browsing   0 members

    No registered users viewing this page.