Recommended Posts

17 hours ago, amorti said:

My tyres and buggy motor are here now!

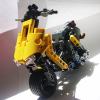
I've done a quick trial in the house - just enough to terrify the dog. A few revisions came out of the trial, mostly turning the bent beam in the swingarm the other way around as that bottom corner was getting in the way of it self-righting, which has added strength and improved ground clearance; and remounting the rigid hoses and flex axles, mostly to allow more solid mounting of the "radiator cowls" which happen to hide the ugly frame bracing, and maybe add a little more strength now they're not mounted on a flex hose.

Looks like this now:

800x600.png   

stud.io file updated - I can't quite believe there are only 226 parts in this thing. Even then, two are PF plugs and if you rationalised a few pins, removed the headlight and 2L pin connectors on the forks, removed the seat pad, put the 21/22 panels on the tail one stud forward, etc... I reckon you could get right around 200.

It really is awesome to see it self-right and just shoot off! Now I just have to look forward to the weekend, and the chance to drive it outside. Cheers, @piterx :pir-huzzah1:

Hey dude thats awesome to hear!  Shoot a video of it i wanna see it :) i love your design it looks better than mine :D

Share this post


Link to post
Share on other sites

I've just been playing with this. It's awesome!

Lessons from a first run outside:

I think the scrambler tyres might have been better, as the street tyres don't much want to hook up, to get it to self right.

I'm really glad I reinforced the forks, as you crash a lot and the front end would grenade without that.

Use 8L axles with stop on the front spindle and through the bottom triple clamp, use a 10L axle through the buwizz instead of a 9, and make any "outside" half bushes on it yellow ones as you'll never find grey ones.

Edit: Since you need an axle with stop the extra width is unavoidable, so crank handles are ideal, and help make the front end even more rigid as they tie that axle hole in the fork into the top triple clamp.

Fast%20moto-2.png 

Edited by amorti

Share this post


Link to post
Share on other sites

Edit: Apologies for the upright filming and wind noise. Turns out mrs amorti isn't Spielberg. Still, you get the idea! 

This was normal (7.2v) but as we know, you can turn it up to 11 with ludicrous mode.

Edited by amorti

Share this post


Link to post
Share on other sites
42 minutes ago, amorti said:

Edit: Apologies for the upright filming and wind noise. Turns out mrs amorti isn't Spielberg. Still, you get the idea! 

This was normal (7.2v) but as we know, you can turn it up to 11 with ludicrous mode.

I was wondering if the video was slowed down or if you just had some crazy good handling on it, turns out you are a really good pilot lol

Share this post


Link to post
Share on other sites
4 minutes ago, piterx said:

I was wondering if the video was slowed down or if you just had some crazy good handling on it, turns out you are a really good pilot lol

Way back in the early days of overpowered Japanese bikes like the Z900, it was common practice to brace the neck to stop speed weaves. You could go a lot faster if the two wheels are kept in line.

7f74b912025e41e9b0b4c016e3b98ca7.jpg

I think that is all this bike needed, too. Notice in the video, the headshakes are basically gone?

Share this post


Link to post
Share on other sites

I picked this model up again yesterday and, well, a project is never really finished, right? Although, maybe barring colour choices, I think this one is now.

I improved the chassis further by moving the servo one stud forwards and mounting the swing arm one stud further forwards. Benefits:

  • The servo is hung from the frame only on pins not axles, so it's stiffer
  • The swing arm in turn is hung from the servo, so it's stiffer.
  • In a theoretical way, a longer swing arm within the same wheelbase should also mean more stability.
  • Deducted a couple of parts and the remaining part are smaller=lighter. Does mean you can't use the long panels on the belly pan any more, but I don't mind it.
  • Allowed a simplification of the support for the rear of the buwizz

I also figured out to put studs on the fuel tank using a half-pin with bar. It's a little more secure, plus now you could add a 1x1 round tile here and brand your bike if you wanted.

Here is a render of mine just as it sits:

640x480.png

And in red:

640x480.png

640x480.png

As it sits there are 221 pieces including the two dummy PF plugs. A Buwizz costs 130€, servos now cost 70€+ from an EU seller, and RC motors 45€+ ( maybe they got cheaper because of the Buwizz motor or other Chinese equivalents?) so you're at some 250€ for the electrical parts, but other than that only the tyres are rare, and you can also use the 81.6mm scrambler tyres and according to renders it looks 100% fine.

Just in case anyone is thinking about building it in another colour, the red parts are also all available in yellow, orange, black, white, DBG, and lime. Maybe good to know for any Kawasaki fans out there!

Thanks again to @piterx, and always happy to hear suggestions or criticisms from the community.

PS: Would anyone be interested in instructions for this? I never made any before, but it's a modest part count and I have it in Stud.io, so I could have a go.

Edited by amorti

Share this post


Link to post
Share on other sites

i'm so in love with the design changes you've done to it :) <3

On 8/1/2021 at 12:54 PM, amorti said:

I picked this model up again yesterday and, well, a project is never really finished, right? Although, maybe barring colour choices, I think this one is now.

yeah in my video i was using scrambler tyres and they worked perfectly :)
I love the way you made the whole frame stronger, ill rebuild it one of these days as soon as i got time 

Edited by Milan
Removed quoted block of pictures and text.

Share this post


Link to post
Share on other sites

With many thanks to Christoph, here is some AWESOME on-board footage. 


Yes his version has been made using non-Lego parts and a MouldKing 7.2v battery, please see past that. He also modified it (by filing some plastic off the buggy motor!) to use 94mm tyres and used metal for the tip-over protection, which sometimes is too rigid and digs in.

Share this post


Link to post
Share on other sites
45 minutes ago, Teo LEGO Technic said:

I've never seen a bike that actually balances in LEGO before, the battery box being moved by the servo motor is brilliant :thumbup:

This wasn't the first one ever, but it's the first one I knew about. I was amazed when I saw this video. In the description @Green Gecko gives his source for some of the ideas, which indeed there are some YouTube videos available.

It does have some compromises that the bike in this thread doesn't: no rear suspension, steering by separate weight brick, steering neck by part 2904 which is quite wobbly.

Green Gecko claims 25-30 km/h top speed.
Using the no-load numbers from Philo's bible, an M motor gets 405rpm at 9v so 504 at 11.2v, it's geared 3x faster for 1,512rpm at the 100.6mm tyre = 28.7km/h, so the claim seems realistic.

This bike should get 1240 * 11.2/9 = 1543rpm straight to the 81.6mm tyre = 23.7 km/h.

However I think as you get near the top speed, especially if you're not driving on a billiard table, GG's bike is going to get twitchy due to the looseness in the steering and no rear suspension. It would be quite interesting to race them.

Edited by amorti

Share this post


Link to post
Share on other sites

It would be awesome for real racing them :D
I believe the smaller wheel on my one gives it a bit more acceleration than top speed
My next one is even lighter and faster than my previous scrambler and having a shorter lenght is way more manouverable. After the 15th of august I'll go shoot a video of it and post it :)
Hopefully more people will find bikes interesting!

Edited by piterx

Share this post


Link to post
Share on other sites
On 8/13/2021 at 1:06 AM, piterx said:

It would be awesome for real racing them :D

Comparison-Fastest-vs-Green.jpg

Fastest Street Bike & Green Gecko's Fast RC Motorcycle

Still in the planning for this summer...

Other participants:

Comparison-Cafe-Green-Fastest-Superbike.


@amorti's Café-Racer (Active Steering)

GreenGecko's Fast RC Motorcycle

@piterx's Fast Street Bike & RC Superbike

Comparison-Chopper-Baja.jpg

My Chopper Design (WIP, not 100% functional yet)

@piterx's Baja Bike

Comparison-Superbike-Series-1.jpg

Comparison-Superbike-Series-2.jpg

My RC Superbike series with different Bodies... (FireBlade, Panigale, H2R Buwizz-tuned, H2R black/chrome).


Meassurements will be done with SkyRC's GPS probe "GSM020". Hope to have this ready by Q3/22

Share this post


Link to post
Share on other sites

There may be a 1:5 bike with proper counter steering, ready to join the party by then :)

Share this post


Link to post
Share on other sites
6 minutes ago, amorti said:

There may be a 1:5 bike with proper counter steering, ready to join the party by then :)

Just found the mentioned general RC Bike topic and posted the planned speed-comparison with pictures there..


Share this post


Link to post
Share on other sites

Create an account or sign in to comment

You need to be a member in order to leave a comment

Create an account

Sign up for a new account in our community. It's easy!

Register a new account

Sign in

Already have an account? Sign in here.

Sign In Now

  • Recently Browsing   0 members

    No registered users viewing this page.