Recommended Posts

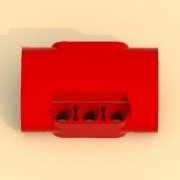
Just wondering, was the part Kick Scooter Body Item No: 36273  ever incorporated into the ldd custom updates? Can´t seem to find it.


Share this post


Link to post
Share on other sites

No trace of it in my ldraw.xml file, so I’d say no.  Studio has an ugly .dat for it, no indication where it came from.

Share this post


Link to post
Share on other sites
On 5/1/2023 at 5:14 AM, Yangster said:

Hi @StephanI ran into a few small problems with some of the LDD parts

I'll look into these. Consider them fixed for the next update.

Share this post


Link to post
Share on other sites
On 4/25/2023 at 4:31 AM, Stephan said:

It is on my list, but there is no proper 3D model yet. Perhaps it is in the new Unity update.

No as far as I know. :(

Share this post


Link to post
Share on other sites
3 hours ago, M2m said:

No as far as I know. :(

Yeah, I'm a bit disappointed with the newest Unity update, barely no new (useful) parts added...

Share this post


Link to post
Share on other sites

Hi @Stephan Thanks for all you work!

found a couple more collision issues. Please see below.

part 32607

6RgbFu0.png

part 24866 and part 32606 can be inside of each other when placed on a through hole piece such as 32607 or 85861

AlzfFEJ.png

Edited by Yangster

Share this post


Link to post
Share on other sites
On 5/21/2023 at 5:01 PM, Yangster said:

part 32607

Yeah, I thought about fixing this one, but since it is often placed under a 45° angle between multiple parts, adding colission data might make using this part very difficult.

On 5/21/2023 at 5:01 PM, Yangster said:

32606

I believe this flower is missing colission data.

Edited by Stephan

Share this post


Link to post
Share on other sites

Well I'm getting a new laptop

Windows 11. So hope I'll be able to install and still use LDD on it. 
Might need a step my step guide when I get my new Laptop setup

Share this post


Link to post
Share on other sites
7 hours ago, Takanuinuva said:

Well I'm getting a new laptop

Windows 11. So hope I'll be able to install and still use LDD on it. 
Might need a step my step guide when I get my new Laptop setup

You can try using the new perfect method I posted earlier to install LDD on Windows properly linked below, the trick is to download both the installers for “LDD Version 4.3.11” and “LDD Version 4.3.12”, extract the files of “LDD Version 4.3.11” using “7-Zip”, then install “LDD Version 4.3.12” successfully without the Flash Player Glitch but manually replace the main LDD files with those from the “LDD Version 4.3.11”. This new method will properly register LDD as a programme on the System Registry and add back the missing Start Menu Folders plus you can create a Desktop Shortcut for easy access, while also including the latest correct official LDD files from “LDD Version 4.3.11” to achieve a perfect installation. Once LDD is installed perfectly the only thing left to do is install the latest LDD update Package from here. Please refer to the post for drawbacks of the existing recommended methods and two detailed step-by-step guides, including how to keep your current LDD setup and migrate everything to the new installation (for example, when you have added custom content like Decorations or new Colours, Templates and settings can also be brought over). Hopefully, this new method will be helpful.


Share this post


Link to post
Share on other sites
On 5/7/2023 at 11:23 PM, badchriss said:

ever incorporated into the ldd custom updates

Rest assured that at some point it will be included. As of yet, there is no 3D model yet available. But it will surely come.

Share this post


Link to post
Share on other sites
On 1/12/2023 at 6:05 PM, suenkachun said:

Not sure if this has been posted elsewhere before, but I recently discovered a new way to install LDD fully on Windows 10/11. “LDD Version 4.3.11” is the correct Windows version to install but it includes the now permanent Flash Player Glitch. “LDD Version 4.3.12” was released to remove the Flash Player Glitch, but it has multiple issues such as the outdated Brick version.

The previous and current best method to install LDD as mentioned in this particular post is to download the “LDD Version 4.3.11” installer “setupldd-pc-4_3_11.exe”, use “7-Zip” to extract this once then further extract the “LDDSetup.exe” within which unlocks all of the main programme files of LDD; save these files somewhere on your PC and double-click the software executable “LDD.exe” to start using LDD, for convenience pin icon to Taskbar for easy access. However, drawbacks of this method include: LDD will not be properly registered on the System, you need to manually associate “.lxf” and “.lxfml” files with the software executable, the additional Start Menu Folder and Desktop Shortcut are not created, each time you open “LDD.exe” the Programme Window is not “Maximised” and you have to manually do this every single time (a personal annoyance for myself). The new method combines the installers for both “LDD Version 4.3.11” and “LDD Version 4.3.12” to achieve a perfect installation, as thanks to our current understanding of how LDD works it is perfectly fine to replace existing files. For new LDD users please use the following steps.

1. Download both the installers for “LDD Version 4.3.11” and “LDD Version 4.3.12” (“setupldd-pc-4_3_11.exe” and “setupldd-pc-4_3_12.exe”), please remember to open the “File Properties” of both files and unblock them before use as Windows might treat files as harmful ones from other computers once modified or downloaded.

2. Run “setupldd-pc-4_3_12.exe” to install “LDD Version 4.3.12” successfully, but with the “Add To Quick Access Ribbon” option unchecked as this feature is discontinued in Windows 10/11.

3. As mentioned above, use “7-Zip” to extract the “LDD Version 4.3.11” installer “setupldd-pc-4_3_11.exe” once then further extract the “LDDSetup.exe” within. Keep the now extracted folder “LDDSetup.exe” saved somewhere else.

4. Copy all files within the now extracted folder “LDDSetup.exe”, then navigate to “C:\Program Files (x86)\LEGO Company\LEGO Digital Designer” and paste, always selecting “Replace All” and not deleting anything. By doing this, you have successfully installed “LDD Version 4.3.12” but manually replaced all files with “LDD Version 4.3.11”.

5. Personslly, I then set up all LDD Start Menu Folder and Desktop Shortcut files by setting “Maximised” Programme Window as default and turning on “Run As Adimnistrator”, both in the “File Properties” of each individual file.

6. Run LDD via the Desktop Shortcut and still pin to Taskbar if you want to, this will officially generate the following two folders: “LEGO Creations” in “C:\Users\username\Documents\” and the Database folder “LEGO Company” in “C:\Users\username\AppData\Roaming”. Follow the instructions in partner topic “[KEY TOPIC] LDD New Parts” to install the latest (unofficial) LDD Update and you are good to go!

If any existing Windows LDD users wish to reinstall LDD (to register programme and add back missing files) on their existing PC (like what I did) or want to migrate your existing LDD to a new Windows PC, please use the following steps.

1. Locate the following two folders on your current Windows PC: “LEGO Creations” in “C:\Users\username\Documents\” and the Database files “LEGO Company” in “C:\Users\username\AppData\Roaming”, then copy and paste them onto an external source (Hard Drive) which essential backs them up. If you are reinstalling on the same PC then please remove LDD completely after the two backups.

2. Reepat all six steps above for new LDD users to successfully install LDD on either the same PC or new PC except for the installing recent (unofficial) LDD Update bit. Once complete first copy and paste the backup of the entire “LEGO Creations” folder to “C:\Users\username\Documents\”, always selecting “Replace All” and not deleting anything. Next, navigate to “C:\Users\username\AppData\Roaming” and delete the original Database folder “LEGO Company” since the contents within have now been extracted to enable recent (unofficial) LDD Updates to be installed. Paste the backup of the Database folder “LEGO Company” right here which completes the new installation process. You will now have a fully installed “LDD Version 4.3.11” with the latest (unofficial) Updates plus all of your previous work retained. The final step is to reassociate “.lxf” and “.lxfml” files with the now properly registered LDD instead of the software executable (file thumbnails will be updated once complete), then you are good to go!

Whether you are trying LDD for the first time, returning to LDD after a break or previously installed LDD not using the full method due to the Glitch, I’m hoping that this information will be useful in some way. Thanks for stopping by!

So I did all 6 steps and no lego folder generated in my appdata roaming folder

Edit: Nvm turns out I was in the wrong roaming folder

Edited by Takanuinuva
Fixed

Share this post


Link to post
Share on other sites

Yes! After my vacation I have planned one! There are some parts I want to include so it might take a few days longer ;)

Share this post


Link to post
Share on other sites
On 6/29/2023 at 1:25 PM, Stephan said:

Yes! After my vacation I have planned one! There are some parts I want to include so it might take a few days longer ;)

Kewl, thank you!

Share this post


Link to post
Share on other sites

Would it be possible to make arches 3307 and 3308 decorable? I'll create and share the textures for these two (one used in Dragon Masters, one in Orient Expedition) if you can make the model decorable

Edit: The fork of Brick Studio (Brick Editor) actually works on my PC so I've managed to do it myself! Let me know if you want the resources to add to the official release

Edited by Qahne

Share this post


Link to post
Share on other sites

I don't know if this really matters, but the ring of the new 78258 "2L bar" has been made 1 precise plate thick. In reality it's slightly less than that (I don't know the exact metrics though, it's a tiny difference), making that pesky ring even more annoying in the LDD than it already is in reality.
But perhaps it really is 1 plate thick due to a slight flange towards the bar, I don't know.

What's more annoying is that there are various moulds for the classic 2x2 round brick, with different depth at which the axle cross starts. But only one version in the LDD in which that same 2L bar gets blocked pretty early, while I the most common mould allows for the ring to go fully inside the brick.
Fortunately we can substiture for part 92947 (round brick with side notches), for which the cross is deeper, and that doesn't actually block (at all, lol) the ring.


Share this post


Link to post
Share on other sites

Just noticed some random missing collision data in one of my old custom projects. Hopefully, this can be corrected easily and thanks in advance.

800x410.png

As shown above, Part 4599 Tap Ø4.9/6.4 is placed right next to a Hinge (either Brick 3080+3831 or Plate 73983, example above is two 73983 stacked upon each other above a pair of regular Plates) with the Tap at 90 degrees but the Hinge rotated. The top Tube section of the Tap seems to be missing some collision data so it can currently collide with the circle part of the Hinge between the two Plates/Bricks. I will update my project by rotating the Tap slightly downwards in case this does get fixed which will remove the specific Taps from the project file by then.

P.S., is there a chance of including the Tap variant without the front hole in the top Tube section? I cannot remember which is more recent so it might be beneficial to include the other one too.

Share this post


Link to post
Share on other sites
On 6/29/2023 at 7:25 PM, Stephan said:

Yes! After my vacation I have planned one! There are some parts I want to include so it might take a few days longer ;)

could be possible if in the next update could upgrade also all new colors?
thanks :)

Share this post


Link to post
Share on other sites
13 hours ago, leonema said:

could be possible if in the next update could upgrade also all new colors?
thanks :)

The newest Transparent Black will be there. All other colors are already available. 

Share this post


Link to post
Share on other sites


7 hours ago, Stephan said:

The newest Transparent Black will be there. All other colors are already available. 

uhm, i have only those in the pic
image.png

so for example haven't the vibrant yellow
6388037.jpg
and the coral pink
6305455.jpg

is there a way to add/show all colors into the palette?

Edited by leonema

Share this post


Link to post
Share on other sites
1 hour ago, leonema said:

uhm, i have only those in the pic

The latest Colour files should already be included in the latest update packages, so please check whether you have installed everything properly. The four Colour-related files can be located using the post on this topic below, when installing an update from here please check whether these files have been replaced too, all recently added Colours should show up if everything is done correctly. P.S., for “localizedStrings.loc” the German (DE) version has also been updated so all names in German now fully match the regular English (EN) version.


Share this post


Link to post
Share on other sites
45 minutes ago, suenkachun said:

The latest Colour files should already be included in the latest update packages, so please check whether you have installed everything properly. The four Colour-related files can be located using the post on this topic below, when installing an update from here please check whether these files have been replaced too, all recently added Colours should show up if everything is done correctly. P.S., for “localizedStrings.loc” the German (DE) version has also been updated so all names in German now fully match the regular English (EN) version.


i'll check everything right now

as always i extracted everything from the rar and pasted in C:\Users\User\AppData\Roaming\LEGO Company\LEGO Digital Designer folder

same result :/

i could get the colors from the xml file
but of course would be great if could have all colors already in the palette...


...wonder what's wrong!?!

Edited by leonema

Share this post


Link to post
Share on other sites
14 minutes ago, leonema said:

i'll check everything right now

as always i extracted everything from the rar and pasted in C:\Users\User\AppData\Roaming\LEGO Company\LEGO Digital Designer folder

same result :/
 

what's wrong?

Let me dig out some location paths below and please also check whether you have placed all files in their correct locations.

There are three files to extract from the C:\Users\User\AppData\Roaming\LEGO Company\LEGO Digital Designer: “db” and two flies under the “Palettes” folder “LDD.lif” and “LDDExtended.lif”. To successfully add all four Colour files these must be extracted first. For details on extraction please refer to the first post of the partner topic [KEY TOPIC] LDD New Parts.

Once extraction is complete, check for the following files and folders related to colours.

Under the “db” folder (C:\Users\User\AppData\Roaming\LEGO Company\LEGO Digital Designer\db):

“MaterialNames” folder (C:\Users\User\AppData\Roaming\LEGO Company\LEGO Digital Designer\db\MaterialNames): This folder contains English and German names for the included colour, the two “localizedStrings.loc” files are best accessed using “Notepad++”.

“CurrentMaterials” file (C:\Users\User\AppData\Roaming\LEGO Company\LEGO Digital Designer\db\CurrentMaterials.xml): This file lists all current colours that are in LDD.
“Materials” file (C:\Users\User\AppData\Roaming\LEGO Company\LEGO Digital Designer\db\Materials.xml): This file contains all colour RGB values.

Under the “Palettes” folder (C:\Users\User\AppData\Roaming\LEGO Company\LEGO Digital Designer\Palettes):

Locate the “MaterialSelector.xml” file under the “LDDExtended” folder (C:\Users\User\AppData\Roaming\LEGO Company\LEGO Digital Designer\Palettes\LDDExtended\MaterialSelector.xml), this file enables all colours in LDD Extended Mode.

Finally, paste the “2020NewPreColoredParts” folder under the “Palettes” folder (C:\Users\User\AppData\Roaming\LEGO Company\LEGO Digital Designer\Palettes), giving you access to all new pre-coloured multi-coloured and printed new parts.

I guess you may have missed extracting some of the required files, thus the missing colours. Therefore, please complete the extraction process of the three files before pasting and replacing all new files in their exact locations. Please also check other details of the first post of the partner topic [KEY TOPIC] LDD New Parts for the exact location of other relevant folders and files I have not mentioned above, in case some of those were not pasted correctly too.

Share this post


Link to post
Share on other sites
4 minutes ago, suenkachun said:

Let me dig out some location paths below and please also check whether you have placed all files in their correct locations.

There are three files to extract from the C:\Users\User\AppData\Roaming\LEGO Company\LEGO Digital Designer: “db” and two flies under the “Palettes” folder “LDD.lif” and “LDDExtended.lif”. To successfully add all four Colour files these must be extracted first. For details on extraction please refer to the first post of the partner topic [KEY TOPIC] LDD New Parts.

Once extraction is complete, check for the following files and folders related to colours.

Under the “db” folder (C:\Users\User\AppData\Roaming\LEGO Company\LEGO Digital Designer\db):

“MaterialNames” folder (C:\Users\User\AppData\Roaming\LEGO Company\LEGO Digital Designer\db\MaterialNames): This folder contains English and German names for the included colour, the two “localizedStrings.loc” files are best accessed using “Notepad++”.

“CurrentMaterials” file (C:\Users\User\AppData\Roaming\LEGO Company\LEGO Digital Designer\db\CurrentMaterials.xml): This file lists all current colours that are in LDD.
“Materials” file (C:\Users\User\AppData\Roaming\LEGO Company\LEGO Digital Designer\db\Materials.xml): This file contains all colour RGB values.

Under the “Palettes” folder (C:\Users\User\AppData\Roaming\LEGO Company\LEGO Digital Designer\Palettes):

Locate the “MaterialSelector.xml” file under the “LDDExtended” folder (C:\Users\User\AppData\Roaming\LEGO Company\LEGO Digital Designer\Palettes\LDDExtended\MaterialSelector.xml), this file enables all colours in LDD Extended Mode.

Finally, paste the “2020NewPreColoredParts” folder under the “Palettes” folder (C:\Users\User\AppData\Roaming\LEGO Company\LEGO Digital Designer\Palettes), giving you access to all new pre-coloured multi-coloured and printed new parts.

I guess you may have missed extracting some of the required files, thus the missing colours. Therefore, please complete the extraction process of the three files before pasting and replacing all new files in their exact locations. Please also check other details of the first post of the partner topic [KEY TOPIC] LDD New Parts for the exact location of other relevant folders and files I have not mentioned above, in case some of those were not pasted correctly too.

all files are in their correct locations and are all from the rar file which date of 24/08/2022

that's why can't understand why i can't see all the colors in the palette :(

Share this post


Link to post
Share on other sites

Create an account or sign in to comment

You need to be a member in order to leave a comment

Create an account

Sign up for a new account in our community. It's easy!

Register a new account

Sign in

Already have an account? Sign in here.

Sign In Now

  • Recently Browsing   0 members

    No registered users viewing this page.