Recommended Posts

Progress report:

Main boom extended by two sections, jib built, and jib masts started. The join between the main boom, and jib was probably the hardest bit.

25275323461_043d1a1da3_b.jpg

The two grey Technic beams are temporary until I build a winch for them. My first set came with one spare of the long grey support things with a barrel join at each, so I was expecting the second set too as well......turns out it didn't so I'm one short at the moment. Did anyone else set come with an extra one of these?

24737759734_0c88bdd096_b.jpg

Still to do:

Rebuild the main boom's mast

Build a counter weight, and hopefully build a third winch into it somewhere.

Build the pulley system between the jib boom.

Look at extending/widening the tracks slightly

If anyone has any ideas/suggestions would love to hear them. Also are there any cheap sets that contain one of those grey long tension supports with the barrel joins at each end? (I have two yellow ones)

Share this post


Link to post
Share on other sites

Progress is slowing a bit as I'm finding myself running out of bits etc, made my first ever Bricklink order today, but struggling to find enough 1x16 beam link thingies.

Got the gear box for winch built, it's a big mess, and will probably make some of you cry, but it mostly works (haven't figured out where to place the lever to operate the clutch/forward/reverse bit yet):

25316426272_35658f078c_b.jpg

24808076843_bcebed79a5_b.jpg

25316426142_d3843e4542_b.jpg

Also started some bodywork around the back bit (batteries are in there as counter weight for the moment), as before, all the strings of blue and grey link arms are temporary while I wait for more 1x16 links, and to find some where that sells string that will work:

25434765165_0a3cba6c7d_b.jpg

24804194374_67443676fe_b.jpg

Share this post


Link to post
Share on other sites

Really love the clarity and vibrance of your photos :thumbup:

Cheers, it helps having a camera that can shoot at pretty much any ISO and still look good. When it's all done I'll probably try do either some environmental or studio type shots.

Share this post


Link to post
Share on other sites

Hello all,

This my first post here but I've been reading the forum for quite some time.

To improve the playability of the 42042 I've replaced the gripper with dual bucket design from the Arocs and added pneumatics to it. A M-motor is drive the pneumatic pump.

For the dual bucket design is I choose a stronger cylinder.

The pneumatic hoses could look nicer and the M-Motor is visible, but I prefer the design over the one with a motor added directly to the gripper.

And it works flawless.

Cheers, Roland

24844450384_9587700454_c.jpgLego technic 42042 with the pneumatic bucket by Roland Schneider, auf Flickr

25448876976_2f3bc12720_c.jpgLego technic 42042 with the pneumatic bucket by Roland Schneider, auf Flickr

24848291483_32ee8f56b6_c.jpgLego technic 42042 with the pneumatic bucket by Roland Schneider, auf Flickr

25475017855_a42bee4222_c.jpgLego technic 42042 with the pneumatic bucket by Roland Schneider, auf Flickr

Share this post


Link to post
Share on other sites

Hello all,

This my first post here but I've been reading the forum for quite some time.

To improve the playability of the 42042 I've replaced the gripper with dual bucket design from the Arocs and added pneumatics to it. A M-motor is drive the pneumatic pump.

For the dual bucket design is I choose a stronger cylinder.

The pneumatic hoses could look nicer and the M-Motor is visible, but I prefer the design over the one with a motor added directly to the gripper.

And it works flawless.

Cheers, Roland

Lego technic 42042 with the pneumatic bucket by Roland Schneider, auf Flickr

Lego technic 42042 with the pneumatic bucket by Roland Schneider, auf Flickr

Lego technic 42042 with the pneumatic bucket by Roland Schneider, auf Flickr

Lego technic 42042 with the pneumatic bucket by Roland Schneider, auf Flickr

Love this mod if you dont mind me asking where did you get you pneumatic hoses from? Been looking for some for some time now.

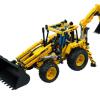
Hey guys, This is my first Technic set, and I think it's started a new addiction. I've also never modded, or created my own set before; however I'm looking at buying a second one of these to make some improvements with. Also, sorry in advance, not sure the correct anme for Technic parts :P

A couple small improvements I've made by sacrificing the small (seems strange saying that) yellow wrecking ball crane from the LEGO city set:

Changed the angle of the mast slightly to allow the boom to come up to a higher angle, also removed the 3rd "Wheel" on the winch mechanism as it's kind of redundant. Probably going to get rid of the black ball tie of point, and just tie it straight to the winch beam:

Added an extra pulley set to the main winch, to increase thew winch lift capacity. The pulleys had to much friction, so I changed the three wide pin things to the + profile rod things:

Same on the "hook", also changed the 3 wide pins, to a bit that has one wide pin, and two wide + profile. I need to build a hook at some point :

Used to only lift two of those containers before change this, probably could lift a 4th as well if I had one:

My plans if I where to get a second set would be to increase the main boom by two sections, and build a small luffing jib. Then add the second battery box behind the current one as counterweight, and hopefully extend the body work by the same length. Change the boom lifting pulley to be a floating mast with the pulley moving the mast instead (as shown by Duke).

Vassel, on your luffing jib, have you added another pulley to move the the angle, or is it manually operated?

Where can one get bricks and instructions to build these Maersk Containers?

Edited by Jim
Removed images from quote

Share this post


Link to post
Share on other sites

Love this mod if you dont mind me asking where did you get you pneumatic hoses from? Been looking for some for some time now.

Where can one get bricks and instructions to build these Maersk Containers?

Hi Kumar,

Welcome to EB. When you quote a post, please remove the images from the quote.

Only quote an image when it's useful.

Thanks and have fun!

Share this post


Link to post
Share on other sites

Love this mod if you dont mind me asking where did you get you pneumatic hoses from? Been looking for some for some time now.

Where can one get bricks and instructions to build these Maersk Containers?

They are from the Maersk Train Set, released a few years ago. I've seen some on Ebay but they tend to be pretty expensive. I've been thinking about trying to make some more myself, I could try list the parts from the instruction booklet if you like?

Share this post


Link to post
Share on other sites

I'm not really into crawler cranes, but all these mods - including Riley-NZL's - make it a good MOC project. I will try to get my hands on one first half of this year if the price is right.

Edited by emielroumen

Share this post


Link to post
Share on other sites

Still a few parts to arrive to tidy off the last bits, namely the 16x1 link beams, but I got some thread today so was able to rig up the luffing jib and hook:

At full height, 125cm high and about 35cm reach from the centre of the tracks:

25425198701_6198b91999_b.jpg

Boom still up, but with Jib out, 90cm high and 60cm reach:

24891258843_9454d50714_b.jpg

And at full reach, this reach could be extended, but I'm still using the orginal lego string for moving the boom, 75cm high and 90cm reach:

25222356460_9c67b7279d_b.jpg

Last things to do is replace the grey and blue 1x15 lift arms with the 1x16 grey link beams, and work out a tidy solution for counter weight. Also going to tidy up the main boom's mast using some 5x11 Frames

Edited by Riley-NZL

Share this post


Link to post
Share on other sites

I'll just ask here since it's related to the set:

I've built a second version of this, with the undercarriage and motor/gearbox setup ready so far, which I intend to turn into an excavator more or less based on Hitachi EX1900.

1205403018_EX_1900-6_01-616x411.jpg

I'm not too experienced with gearboxes and transmissions, so I'm wondering if anyone has any tips on the routing of the axles from the gearbox and forward to the boom and lifting cylinders, which will be placed where the crane arm is on the 42042.

I've ditched the crawler drive, so with the one driving ring connected to the turntable, I have the other 3 free to run the cylinders in the arm, which will be based on the 8043.

I have 2 cylinders set up for lifting the boom, which I'm looking to run from one of the driving rings. I have also mirrored the gearbox, leaving the 2 original left driving rings on the right, which are free for the stick and bucket cylinders.

This might be a confusing mess of an explanation. If anyone who could potentially give me tips, wants a pic or two to make it easier, I guess I could try to upload some.

I haven't tried that yet though, so this whole thing could take some time :laugh:

Thanks in advance, any help appreciated! :blush:

Edited by Error404

Share this post


Link to post
Share on other sites

I have already posted this.... and I am not trying to be redundant..... but the following applies here, In order to make this video:

it involved playing with 42042 a lot. As you can see, I build the main boom larger. Added two sections. Easy enough right? yea..... but what I discovered is that at 722 grams 42042 could not lift 8288. But it holds it just fine (and more) with the proper counter weight. And... the pulley set-up is strong enough.... as well as the motor. Then what is the real problem? any guesses?

If lifting capacity is NOT restricted by the motor or the pulley system......then what is it?

Clutch gear? How do you know the motor/pulley is not the restriction? I can't see in your video if you have modified the boom lifting winch at all, but I found as stock this is a week point. The weakest point as stock, is easily that it doesn't have enough counter weight, which you seem to have addressed.

So..... I had some time this morning to test out my hypothesis. I was right. The mechanical advantage offered by the pulleys is enough to lift heavy things...... IF the clutch gears are removed. Again.... the lifting power of the model is restricted by the clutch gears, not by the lack of mechanical advantage from the pulleys or lack of power from the L motor. Here is a video both of it lifting over 800 grams and also a little tutorial how it is done. It is a really easy fix, took my ten minutes. Also, no damage to the motor whatsoever.

And.... just to add....there was no slipping of gears. None at all. Motor was fine. I do quite a bit with Lego in terms of pushing the limits, and IMO this little lift in no way pushed the limit to make the gears slip, closer to stalling the motor but still quite a bit away from even that happening......

Share this post


Link to post
Share on other sites

I'll just ask here since it's related to the set:

I've built a second version of this, with the undercarriage and motor/gearbox setup ready so far, which I intend to turn into an excavator more or less based on Hitachi EX1900.

I'm not too experienced with gearboxes and transmissions, so I'm wondering if anyone has any tips on the routing of the axles from the gearbox and forward to the boom and lifting cylinders, which will be placed where the crane arm is on the 42042.

I've ditched the crawler drive, so with the one driving ring connected to the turntable, I have the other 3 free to run the cylinders in the arm, which will be based on the 8043.

I have 2 cylinders set up for lifting the boom, which I'm looking to run from one of the driving rings. I have also mirrored the gearbox, leaving the 2 original left driving rings on the right, which are free for the stick and bucket cylinders.

This might be a confusing mess of an explanation. If anyone who could potentially give me tips, wants a pic or two to make it easier, I guess I could try to upload some.

I haven't tried that yet though, so this whole thing could take some time :laugh:

Thanks in advance, any help appreciated! :blush:

I would look at how the track driving axle is sent forward and use a similar system, it may also be possible to change one of the axles that the red selector gears are running on, for a longer axle that sicks out the front of the gearbox?

So..... I had some time this morning to test out my hypothesis. I was right. The mechanical advantage offered by the pulleys is enough to lift heavy things...... IF the clutch gears are removed. Again.... the lifting power of the model is restricted by the clutch gears, not by the lack of mechanical advantage from the pulleys or lack of power from the L motor. Here is a video both of it lifting over 800 grams and also a little tutorial how it is done. It is a really easy fix, took my ten minutes. Also, no damage to the motor whatsoever.

And.... just to add....there was no slipping of gears. None at all. Motor was fine. I do quite a bit with Lego in terms of pushing the limits, and IMO this little lift in no way pushed the limit to make the gears slip, closer to stalling the motor but still quite a bit away from even that happening......

Good to know, if you where really worried and still wanted the clutch gear, you could do what it looks like they have on the Bucket Wheel excavator set, and have two clutch on the axles, and the main shaft out of the motor have two driving gears, thus the load is split between the two clutch gears.

Edited by Riley-NZL

Share this post


Link to post
Share on other sites

I would look at how the track driving axle is sent forward and use a similar system, it may also be possible to change one of the axles that the red selector gears are running on, for a longer axle that sicks out the front of the gearbox?

I've been looking at that. I am more of a fan of moving axles sideways with gears than using U-joints, really, but I'll see which method works the best when that time comes.

I replaced some of the axles with longer ones when I built the gearbox, so I already have the axles from the 3 remaining driving rings sticking out in front of the gearbox.

When I built the gearbox, I also moved the whole thing 2 studs up, primarily to fit the battery box under the gearbox instead of behind it.

I also moved the L-motor 2 studs up, but it's kinda in the way now, so I think I'll try move it back down.

Share this post


Link to post
Share on other sites

Made some improvements to the main boom design, the original designs gives up strength for modularity. Only every second "square" in the boom had a diagonal liftarm, meaning every second second "square" was weak, and the alternating squares strong. This was cuasing a fair bit of bend:

25170190319_b74912374c_b.jpg

Changing the design and adding diagonal lift arms the whole way up made it much stronger; the downside being you can't easily add/remove sections:

25170190129_56915b59f4_b.jpg

So how many of this set do you think I would need to purchase to make something like this (dual booms/Jibs/Masts the whole way up):

25242355680_1e3f425761_b.jpg

My guess is 12-14 sets :P Although the Bucket Wheel Excavator set might be better for parts, and then it could be in yellow :P

Share this post


Link to post
Share on other sites

Really big crane you've modded there, looks cool. Mine's just the standard 42042, but I wouldn't have anywhere to put it even if I wanted to make it as tall as yours :laugh:

Share this post


Link to post
Share on other sites

So how many of this set do you think I would need to purchase to make

Too many - you'd end up with a lot of spare track, battery boxes and assorted bits. If you're in Europe better to order from Lego spare parts hotline, or for the rest of us bricklink from someone in Europe. For my road train I bought several copies of 8043 for the motors and LAs (cheapest way to get them), plus some 8258 when they went on discount (for wheels and red parts), but the bulk of it came from Bricklink. Especially for stuff like bulk long liftarms, there's no way to beat the Bricklink price by buying sets in Australia (where I am) or NZ. Even buying sets cheap in EU via Bricklink or online shops/Amazon, you can't do it.

Edited by Moz

Share this post


Link to post
Share on other sites

Too many - you'd end up with a lot of spare track, battery boxes and assorted bits. If you're in Europe better to order from Lego spare parts hotline, or for the rest of us bricklink from someone in Europe. For my road train I bought several copies of 8043 for the motors and LAs (cheapest way to get them), plus some 8258 when they went on discount (for wheels and red parts), but the bulk of it came from Bricklink. Especially for stuff like bulk long liftarms, there's no way to beat the Bricklink price by buying sets in Australia (where I am) or NZ. Even buying sets cheap in EU via Bricklink or online shops/Amazon, you can't do it.

I've found the NZ Bricklink sites to be pretty light on parts, the store I bought my 1x16 links from bought one of these sets just so they could sell me them (was very nice of them). Are there any Australian stores you could recommend with a good inventory of Technic parts?

Share this post


Link to post
Share on other sites

Agreed. If you are serious about building a very very large crane, I would definitely NOT buy tons of sets. You will waste a lot of money. Having built recently a very large crane:

1455971265m_SPLASH.jpg

I can tell you BL is the way to go. A couple of other pointers..... you will needs TONS of pins. Try to use the blue 3l pins as much as possible, they are not much more money but much stronger. Not just longer but thicker as well. ALso, look at the pricing and availability of 13L and 11L liftarms compared to 15L liftarms. Obsviously you will needs tons of them..... but the cost effectiveness of using 11 or 13 over 15 is sometimes many fold. For example, 11L in white are about a third of the cost of 15L on BL (average) --- and the difference that you get out of all that is only a few studs. I don't think you get much if any more strength, so 11L, for the white masts above were used instead of 15L. For main booms and luffing fly jibs..... 15 L are not much more expensive than 11 or 13L, is I used 15L. If you truly decide to build the large crane, do a little homework, think of an acceptable counterweight, etc.... because these are all things that will come into play building a large crawler crane.....

Edited by nerdsforprez

Share this post


Link to post
Share on other sites

Create an account or sign in to comment

You need to be a member in order to leave a comment

Create an account

Sign up for a new account in our community. It's easy!

Register a new account

Sign in

Already have an account? Sign in here.

Sign In Now

  • Recently Browsing   0 members

    No registered users viewing this page.