Alasdair Ryan Posted September 27, 2011 Posted September 27, 2011 next update should be more ascetics, which is not my strong suite . tim I am sure you will manage just fine,the front grill will be the easy part so mayby leave this to last. Quote
dhc6twinotter Posted September 27, 2011 Posted September 27, 2011 Cool, looking forward to the updates. It's looking good! Quote
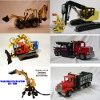
timslegos Posted October 5, 2011 Author Posted October 5, 2011 hello Got some more photos!! I have made a lot of minor improvements to the frame and also started building the cab. So far i only have a rough outline of the cab. What do you guys think? Is it to big? I found a clever way of encasing the IR receivers, serving as a stepping spot into the cab. The black parts on the fender will be replaced when place a bricklink order. One of my favorite details is the fact that the whole machine can lift itself off the ground, something seen in the real world all the time. The empty space under the hood will be filled with the smaller AAA battery box. With all the changes in the chassis, there is significantly less bend in the turntable. I am very happy with the reach of the read arm, it can reach as long as the whole chassis! Finally, a detail shot of the rear end of the machine. Hope you like it!! Please give me some feedback! tim Quote
dhc6twinotter Posted October 5, 2011 Posted October 5, 2011 It's looking good! I like the fact that it can pick itself up. Nice seat too! Quote
Alasdair Ryan Posted October 5, 2011 Posted October 5, 2011 Your doing a good job 2 or 3 things need tweaked. Your rear arm is still sagging but not as much as last time Your front grill is to big you need to make this smaller oh and the seat needs changed but dont worry about this now. Quote
timslegos Posted October 5, 2011 Author Posted October 5, 2011 Your doing a good job 2 or 3 things need tweaked. Your rear arm is still sagging but not as much as last time Your front grill is to big you need to make this smaller oh and the seat needs changed but dont worry about this now. Thanks for the advice! Ya i was thinking that the grill didn't look right, but i wasn't sure what was wrong with it. Whats wrong with my seat haha? tim Quote
Alasdair Ryan Posted October 6, 2011 Posted October 6, 2011 (edited) Whats wrong with my seat haha? tim I would slide off the side of it if i went over a bump ( it also looks like a booster seat the kind for kids) some of you may recognize the seats. Edited October 6, 2011 by Alasdair Ryan Quote
timslegos Posted October 6, 2011 Author Posted October 6, 2011 I would slide off the side of it if i went over a bump ( it also looks like a booster seat the kind for kids) haha yes i see your point. Well the chair was originally going to be rotatable, so i tried to make it as small as possible. But now that there isn't enough space for it to rotate, i think i can add arm rests. tim Quote
timslegos Posted October 9, 2011 Author Posted October 9, 2011 Hello, I think this might be the last progress update until the MOC is finished, so here goes! First a comparison between the first stage and the current stage, quite the transition. As you can see, i have almost finished the front grill. i think the grill looks a lot better now! As for Alasdair Ryan's suggestion for the seat, i have added armrests so the driver wont fall off the chair going over bumps. The photo also shows what both of the manual switches control, one for the outriggers and the other for lights. The top is also done. It looks plain to me, any suggestions? I personally love this photo, it shows just how huge this machine is!!!!!! Finally, a shot from the front of the backhoe, showing off the front hood and front grill. Hope you like it!! tim Quote
Alasdair Ryan Posted October 10, 2011 Posted October 10, 2011 (edited) Looks great do you plane to take it to the 'paint shop' mayby some tiles could go on the top of the roof. Edited October 24, 2011 by Alasdair Ryan Quote
timslegos Posted October 10, 2011 Author Posted October 10, 2011 Ya i was thinking that to. Unfortunately i don't have the money right now to make an order of more yellow parts so it will have to wait. Do you like the seat ? tim Quote
Alasdair Ryan Posted October 10, 2011 Posted October 10, 2011 (edited) Yes liking the seat you could mount a turntable under the yellow plates to give a rotating seat. Edited October 10, 2011 by Alasdair Ryan Quote
timslegos Posted October 10, 2011 Author Posted October 10, 2011 Yes liking the seat you could mount a turntable under the yellow plates to give a rotating seat. I tried doing this but unfortunately there wasn't enough room for the chair to swing around. tim Quote
Alasdair Ryan Posted October 10, 2011 Posted October 10, 2011 (edited) Sorry i ment the whole thing (what the seat and the switches are mounted onto) A wee doodle Edited October 10, 2011 by Alasdair Ryan Quote
trekman Posted October 10, 2011 Posted October 10, 2011 Sorry to be so critical at this stage, but as a part-time JCB 3cx operator, I wouldn't fancy using your machine! Your seat is too high. Unless you are planning to use it in some sort of "JCB dancing diggers" show, you won't need the headrest either. I would also express concern about the steps, as they are too low and will compromise your ground clearance on a site. The front loader has the wrong sort of bend in the arm, but I do know that these are sometimes compromises that have to happen to make the backhoe steer well. The roof does need some work. For a current JCB 3cx might I suggest some of those curved cheese slopes 1 x 4, I think. Put these on their side, down the length of the roof pinned with studded pins to a yellow studless beam and you will be laughing. PS Increase the overall scale, put in an extending dipper, and sliding back actor, and you really will have AFOLs drooling! You are a brave builder, as I am slow to tackle this. Quote
timslegos Posted October 10, 2011 Author Posted October 10, 2011 Sorry to be so critical at this stage, but as a part-time JCB 3cx operator, I wouldn't fancy using your machine! Your seat is too high. Unless you are planning to use it in some sort of "JCB dancing diggers" show, you won't need the headrest either. I would also express concern about the steps, as they are too low and will compromise your ground clearance on a site. The front loader has the wrong sort of bend in the arm, but I do know that these are sometimes compromises that have to happen to make the backhoe steer well. The roof does need some work. For a current JCB 3cx might I suggest some of those curved cheese slopes 1 x 4, I think. Put these on their side, down the length of the roof pinned with studded pins to a yellow studless beam and you will be laughing. PS Increase the overall scale, put in an extending dipper, and sliding back actor, and you really will have AFOLs drooling! You are a brave builder, as I am slow to tackle this. Wow thanks for the advice The front loader has the wrong sort of bend in the arm, but I do know that these are sometimes compromises that have to happen to make the backhoe steer well. Please explain!! I was having a really hard time making the bend look right. Do you have any suggestions? PS Increase the overall scale Yes i would love to increase the scale, but i do not have power-puller wheels, which would be necessary to replace the back wheels. put in an extending dipper, and sliding back actor, and you really will have AFOLs drooling! I think that part is a little unreasonable . I appreciate the advice and i will definitively move the steps up a little tim Quote
trekman Posted October 10, 2011 Posted October 10, 2011 Wow thanks for the advice Please explain!! I was having a really hard time making the bend look right. Do you have any suggestions? Yes i would love to increase the scale, but i do not have power-puller wheels, which would be necessary to replace the back wheels. I think that part is a little unreasonable . I appreciate the advice and i will definitively move the steps up a little tim Tim, don't worry about the scale, or the extending dipper, these are things that you can do when the scale is bigger and then you have more room to play with. Above is a shot of a side-on 3cx. Note: 1. The steps do not come any lower than the centre of the front axle. 2. The main pivot point of the loader arm is almost at the top of the bonnet, just below the windscreen. This allows for a near straight loader arm. Yours is slightly low, but you could live with it. 3. The front bucket is approx 1/2 front tyre width away from the front tyre. This you might be able to fix. 4. Your loader arm geometry is different to a 3cx, and this is where the compromises creep in. You are working with a defined length of actuator, and you have to work this in to create a reasonable range of motion, not to mention lifting the front wheels. If you want to fix this, you might end up with wheel rub against the arm. It is a case of what is more important. Keep up the good work. Quote
timslegos Posted October 10, 2011 Author Posted October 10, 2011 Tim, don't worry about the scale, or the extending dipper, these are things that you can do when the scale is bigger and then you have more room to play with. Above is a shot of a side-on 3cx. Note: 1. The steps do not come any lower than the centre of the front axle. 2. The main pivot point of the loader arm is almost at the top of the bonnet, just below the windscreen. This allows for a near straight loader arm. Yours is slightly low, but you could live with it. 3. The front bucket is approx 1/2 front tyre width away from the front tyre. This you might be able to fix. 4. Your loader arm geometry is different to a 3cx, and this is where the compromises creep in. You are working with a defined length of actuator, and you have to work this in to create a reasonable range of motion, not to mention lifting the front wheels. If you want to fix this, you might end up with wheel rub against the arm. It is a case of what is more important. Keep up the good work. Thank you very much for clearing that up . When i have time this week i will definitely look at making some of the changes you have suggested. tim Quote
timslegos Posted October 23, 2011 Author Posted October 23, 2011 Hello i got another update! So i added more details and added an extendable rear dipper! Unfortunately the arm is manual, but its definitely better than before. First is the details added to the roof. Are they realistic? Here is the arm folded up. It isnt done yet and some colors need to be changed but the overall idea is pretty complete. Here is the arm unextended: And here it is extended: Does it look good? It is completely manual, but it adds a nice touch. tim Quote
Alasdair Ryan Posted October 24, 2011 Posted October 24, 2011 Nice to see more progress you need to fix the dipper mounting ,also me thinks that the bucket is too far down the arm,is that the bucket closed fully if so you need to improve this . The roof looks good,have you tried me seat swivel idea? Quote
timslegos Posted October 24, 2011 Author Posted October 24, 2011 Nice to see more progress you need to fix the dipper mounting ,also me thinks that the bucket is too far down the arm,is that the bucket closed fully if so you need to improve this . The roof looks good,have you tried me seat swivel idea? Thanks for the feedback. I have not tried the swivel idea because there is not enough room in the cabin . tim Quote
Alasdair Ryan Posted October 24, 2011 Posted October 24, 2011 Thanks for the feedback. I have not tried the swivel idea because there is not enough room in the cabin . tim Oh man sorry about that,you will just what to make a bigger version when your done with this one. Quote
dhc6twinotter Posted October 24, 2011 Posted October 24, 2011 Looks great! I like the extending dipperstick. Quote
timslegos Posted October 24, 2011 Author Posted October 24, 2011 Looks great! I like the extending dipperstick. Thanks! I don't think it is nearly as excellent as your extending dipper . tim Quote
Recommended Posts
Join the conversation
You can post now and register later. If you have an account, sign in now to post with your account.