Mr Jos Posted July 17, 2022 Posted July 17, 2022 (edited) TL;DR: Video at the end. A long desired function for my warehouse was a HMI (Human Machine Interface) / GUI (Graphical User Interface) to control my warehouse with a better visibility than the EV3 non-backlight black/white screen with only 5 input buttons. When talking with Anton and Ste7an at TU Delft I came to the decision, to try their equipment to make my GUI. The LMS-ESP32 from Antonsmindstorms is connected to an input port of the master EV3 brick. The communication is done by their UARTremote between the ESP and EV3, with a custom cable. Power comes from my 10V 5A adaptar that already permanently charges my 5 EV3 bricks in this setup. The ILI9341 2,8" touchscreen I use has some problems (dead pixel/lines), currently awaiting delivery of 2 new screens to test if it's my setup or just a bad screen. A second thing I wanted was more visibilty for people looking at this MOC, about what was happening. For this I liked the NeoPixels from Antonsmindstorms. They come in strips of 6LEDs that can be separated in 2x3 LEDs. I used a total of 36x3 for my 60 warehouse positions. Each strip of 3 shows with the left LED the front storage state (full=red, empty=green, full+pickup request=red/white blinking, empty+dropoff request=green/white blinking), and the middle LED the backside storage for that rack. The right LED is not used and turned off. In this video they burn at 5% capacity, and it's enough, they are real eye blinding if used on 100%. Both strings of NeoPixels are connected to an IO port of the ESP. To show the state of the warehouse a strip of 6 LEDs is used to show the working. They burn at 40% when on. From top to bottom; White: Machine is starting/ending a part of the installation (Selected on the frontpage of the GUI with red/green buttons). Red: Machine is not working, no parts in manual/automatic mode or critical error (like Emergency Stop has been pushed). Orange: Less critical error, some parts of the machine will continue working but problems need to be solved for full operation (These errors scroll at the top of every screen, and can be seen on the error page). Green: Machine is in manual/automatic mode (partially/completely). Blue: Reset required to restart the installation. The current GUI has these pages; Startpage; For starting/stopping parts of the machine. Crane Input mode Manual / Automatic / Off Crane Output mode Manual / Automatic / Off Robot used Yes / No (If not, pallets are directly taken to the input chain conveyor to be taken in again) Conveyors On / Off (If turned off, the boxes will not move on the chain / roll conveyors, until turned on) Scrolling current errors at the top To the right; Current + older errors of the installation. With the refresh error button only current errors will remain in the error list. Double clicking an error gives more information about that specific error. Work in progress: Will add more error codes and potentially add buttons to directly solve them from the HMI. Screen downward; 3 tabs to control the flow of the pallets. At page 1 - Request box. A full list with all pallets stored IN the warehouse is shown here, and can be selected manually which one needs to be taken out. If the request has been send to the master EV3 it can be cancelled untill the order is send to the crane, then it will lock the request on screen. If automatic output is selected and no more manual requests are left over, it will randomly select and lock a pallet. At page 2 - Store box to. An array of checkboxes show every single storage position of the warehouse in order. The first 5x6 array is the backside of the warehouse, the lower 5x6 is the front 30 storage positions. Manual or automatic selection can be done and is shown with locked check on screen if the request has turned to an order. At page 3 - Robot storage. A full list with all pallets put down near the robot for Pick&Place. Manual or automatic selection can be done and is shown with locked check on screen if the request has turned to an order. Then there is to the right one more page now with Conveyor overview. It should show the state of every conveyor full/empty, but currently does not work correctly. Name of the items will be shown if there is enough place. It needs a background to better show what it is. With the dropdown menu I can show other screens here. The location of every pallet is stored with a WMS (Warehouse Management System). During operation after every move a .txt file gets updated that is saved on the EV3 master. On startup all data is loaded in the online WMS. Future plans for the GUI; Adding an operator panel for the 6DOF (6Degrees of Freedom robot arm). To adjust some calibration and pickup/dropoff positions with the touchscreen. Adding a page to change the parameters of machine parts, like if the height of the telescopic fork is not 100% correct (it has only 1mm margin to position correctly for picking up a pallet). Adding speed control for the crane/robot Adding error solving like when it sees an error in homing the telescopic fork that takes to long, after a visual check you could say it looks good and can continue. ... many more, if I can think it could be fun, I will add it (if it's possible). This is already stretching the capabilities of a 'Toy'. A few extra photo's / renders /programming of this MOC, I plan to go this year to 2/3 more events to show it to a bigger public. Enough talking, here is the video: Please leave a comment with what you think about this. What ideas you have to expand it / make it more public friendly. Or just ask a question! Huge thanks to Anton (Anton's Mindstorms Hacks) and Ste7an making it possible for me to make this GUI with their tools they have / time they invest in helping! And thanks at @Pybricks for having this easy to program MicroPython to make these kind of MOC's! Edited July 17, 2022 by Mr Jos Fixing typo Quote
GerritvdG Posted July 18, 2022 Posted July 18, 2022 Cool, you keep improving this MOC. Let me know if you are going to attend an exhibition near Utrecht, I would be happy to visit and admire your creation. About this thread, I personally like it more if all the content around a MOC is grouped into one thread, just my opinion… Quote
Mr Jos Posted July 18, 2022 Author Posted July 18, 2022 10 minutes ago, GerritvdG said: Cool, you keep improving this MOC. Let me know if you are going to attend an exhibition near Utrecht, I would be happy to visit and admire your creation. About this thread, I personally like it more if all the content around a MOC is grouped into one thread, just my opinion… The planned events for me this year are (smaller ones to start and not so far from home); 'Brick Event' at '9900 Eeklo, Belgium' date '1+2 October'. (Confirmed) Good that I make this list now, thought I already registred for the others, seems I didn't; 'Bricks for All Wetteren' at '9230 Wetteren, Belgium' date '3+4 September' (One I don't know yet if I can go, not subscribed) 'Brick Mania Harelbeke' at '8530 Harelbeke, Belgium' date '22+23 October'. (Subscribed, not confirmed yet) 'Name unknown' at '8500 Kortrijk, Belgium' date '28-30 December' (Not subscribed, but confirmed I would go) If all goes well at these small events I might consider bigger/more events with my MOC's (and further away). About the new thread, as this is completely about the new setup and a big change, I made it as a new topic, so it doesn't get lost as a comment. But if an admin thinks it's better in 1 topic, feel free to merge the topics. I did not plan to update the old one anymore as that's about the Lego build (that is finished), all GUI updates will be here and feedback if it worked good at an event or not. Quote
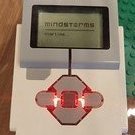
Mr Jos Posted July 18, 2022 Author Posted July 18, 2022 Finally learned how to get .png onto the screen. Now this will bring my GUI to a whole other level... Also just finished my last connection to be able to break down the MOC fast and rebuild at events. Warehouse racks and conveyors can now be separated very easy in 20seconds. Just the NeoPixel data/5V line and the bottom rail where the stacker crane drives on need to be opened up. Quote
fotoopa Posted July 19, 2022 Posted July 19, 2022 Wonderful realization! I always make the neopixel led with small connections too. That way you can even make extension cables. The HMI interface is definitely a nice addition. I also see your possible planning for your events. Kortrijk and Harelbeke are very close for me. I would love to come and visit you. Frans. Quote
Mr Jos Posted July 19, 2022 Author Posted July 19, 2022 (edited) 10 hours ago, fotoopa said: Wonderful realization! I always make the neopixel led with small connections too. That way you can even make extension cables. The HMI interface is definitely a nice addition. I also see your possible planning for your events. Kortrijk and Harelbeke are very close for me. I would love to come and visit you. Frans. Thank you! And for your help checking the NeoPixel timing, that the ESP32 sends the timing perfect. I will try with the newer firmware later if it eliminates (some) of the ghosting. Do you have an example of your small connectors to the NeoPixels? I don't have much space to add connectors/cables, as I want to keep them out of sight as much as possible. And that's pretty hard with a warehouse rack that is only 1 stud wide everywhere! Hiding 6 cables (+connectors) behind 8mm isn't that easy. Edited July 19, 2022 by Mr Jos Quote
fotoopa Posted July 20, 2022 Posted July 20, 2022 I use the "econ connect female header BLG1x3 at 2.54mm pitch" Connector, width is 8.15mm, thickness 2.54mm. The male pin connector are the regular pin headers at 2.54mm pitch. Disadvantage: they don't have a latch you have to be careful on the correct polarity connection. I also use the 3x0.14mm color servo cables for that. Quote
Mr Jos Posted July 28, 2022 Author Posted July 28, 2022 (edited) I'm having a programming issue I can't seem to solve. [Issue has been solved in next post.] I have a 'touchscreen roller' that holds the storage location value as a string(text). But it's a number between 1 and 127. I can write a new name on the touchscreen, select with the roller the desired location to change the WMS as there has been manually a box added to the warehouse it did not know of yet. By a press of the button it should overwrite the WMS location with this new name. The location is the problem, my function takes it as an integer, but the roller output is a string. I've tried many things to change this 'text' to a 'number'. It should be possible I think? In this example "101" was selected by the roller, I can print the number (as text), but converting it to an integer keeps giving errors. It's one of the last things to add to my warehouse, I already have for the following finished the programming + testing; Selection in what mode the warehouse needs to startup (The master brick needs to wait for all bricks to be connected, so it needs to know if the robot will not start homing due to issues for example). Also a debug mode where it won't connect to any other brick, just for quick testing of new programation. The scrolling bar at the top is with current errors, the error page shows all errors that have been there since last press on the button 'refresh errors', so you can see what has gone wrong. I already added many possible issues, some of them need manual confirmation to restart that part of the machine. Each error triggers the orange light on the tower lamp so it's visual somethings needs your attention. Double clicking an error gives a popup with more information and potential ways to solve it. As can be seen with the next error. If the stacker crane tried to drive to a rack position, but the checks done determine that it's not positioned correctly it will give this error. The error will go away when 'Try again' is pushed, if the fault remains it will pop back up in the list and the tower light will go on again. (Ideally I would have a horn sound an alarm, but the EV3 is already doing to many tasks). A list where all stored boxes are shown by their name (and the rack location where they are). By clicking the checkbox near it, the stacker crane will take this pallet out of the warehouse to the robot arm. A page where all rack locations are visually showing which one is occupied or free. The free ones can be selected to manually choose where next pallets will go (very usefull to show longer driving/lifting). When this is compared to the actual rack, all the stored boxes can be found at the same positions, and visually shown by a red LED. An overview where boxes are outside the racks. Checkboxes show if there is a pallet at a conveyor/stacker crane/robot/storage near the robot. Manual control to adjust the speed of different parts of the installation (selected by the menu at the left top). Scissorlift will move slower up/down if speed is lowered. The height adjusts the up position by 1mm every step, for finetuning when the robot makes a pickup. The stacker crane will drive/lift slower and extend the fork slower, this is fun to watch it work more in slow motion. Instead of the fast maximum speeds I tried to make every machine work at. Last bit I did was reinforcing the corner transfer lifting system. It was suffering high degradation due to high forces bending the 90° angle brackets. I added 4 axles to hold these flat, now it runs like new. Edited July 28, 2022 by Mr Jos Typo Quote
Mr Jos Posted July 28, 2022 Author Posted July 28, 2022 I should do this more, everytime I ask somewhere how it can be solved, I find the answer. I've been searching for a few hours before and failed. I printed the length of the string, and somehow "101" is 4 characters, "52" is 3, "0" is 2. So I needed to delete the last character to be able to convert it to an integer. Now I can finally add new boxes to any position (in or outside the rack). Just a little more programming for the communication to the master EV3 so he also knows about this new box. Next step, deleting a WMS position and I can finally start with a new Lego chapter to be added to this MOC. Quote
PassengerJet Posted July 28, 2022 Posted July 28, 2022 This is so inspirational :) If I had your skills I would build a gravity-based energy storage warehouse like what Energy Vault is planning in Switzerland Quote
Mr Jos Posted August 4, 2022 Author Posted August 4, 2022 (edited) For anyone interested, I tried cleaning the 6 micropython programs running this warehouse, added annotations everywhere (But I did get bored with it for the 2 last ones, left robot brick because it's so difficult with all the math involved, and it has been to long ago. And the ESP program as it's not done in Visual Studio code but Thonny IDE). All 6 can be found here: Mr-Jos-Technic/Lego-EV3-Warehouse: MicroPython programs for my EV3 / ESP powered LEGO warehouse (github.com) I'm curious if anyone else already made large programs like these for Lego, and if anyone sees 'mistakes', as to how I could have done parts more effecient. I learned to program from reading online these sites. Python Lists (w3schools.com) for learning all basics for MicroPython ev3devices – EV3 Devices — ev3-micropython 2.0.0 documentation (pybricks.com) for learning how to control all the EV3 motors/sensors etc (Thanks @Pybricks!) Huge thanks to them for having these free learning platforms. One of the last things I learned was about dictionaries, and it has helped to make the programs so much cleaner (less variables) and easy to program. Now I'm back working on the 3D gantry robot, I hooked the Power Function motor to my 12V laptop supply I already use to constantly charge the EV3 batteries, so I don't need to use AA batteries in the battery box. Trying to get this MOC to work more reliable so I can take it with me to events, and maybe integrate it in this MOC, if it does, I'll post it here. EDIT: With these programs now online, and the full warehouse in 3D for free on Rebrickable, in theory anyone could now remake this! /EDIT Edited August 4, 2022 by Mr Jos Typo Quote
Recommended Posts
Join the conversation
You can post now and register later. If you have an account, sign in now to post with your account.