Hinckley Posted June 29, 2007 Posted June 29, 2007 aaaah, very smart. That's a great idea. I think your first idea is more practical for space and layout, however. The torsos can remain small for the generator and it's very easy to add a link to download the actual torso for a label. Also, you wouldn't want the picture with the arms for the custom torso. EDIT: Oh, now I see there are no arms in the second option. I confused myself for a minute there... :-/ Hey awesome, I'll play around with it this weekend and we can talk about it later! Yay! I have a project... X-D EDIT #2: Hey woody, I can squeeze a menu in there for separate countries, great idea. Do you mean vertical sliders? Quote
woody64 Posted June 29, 2007 Author Posted June 29, 2007 EDIT #2: Hey woody, I can squeeze a menu in there for separate countries, great idea. Do you mean vertical sliders? a) Maybe that's caused by me screen resolution, but I do get horizontal sliders for each of the 3 frames. b) I've changed the layout to use the original stickers during the last 2 days. The torso is no built from a torso without a sticker and the sticker image is placed on top. c) I also plan a change to use a transparent torso and a color chooser for filling the torso. The same can be done for the legs which minimizes the space needed for this items but on th other hand gives a lot more oportunities. I've already taken a look on some color chooser. And I think there should also be the possibility to add the original lego color set. Quote
woody64 Posted June 30, 2007 Author Posted June 30, 2007 (edited) I've adopted the template: http://members.cheese.at/woody/minifig-gen...nifig-gen3.html also I've added the rest of my existing torso libs. There's now an index added at the beginning to navigate also to other countries. The main idea behind is that this library can reside on any external host. For example norrington can build his torsos in an similar way. What's needed afterwards is only one link for loading the starting html file for one library (which then can also lie outside of the main server and can be changed and maintained by the owner) For this starting link we only need one menu in the main template for navigation. bonaparte: download the torso ... The same as provided in the original can be done. Mounting the figure in a seperate windows which can be "stored as" by the browser. If you only want to download the torso then you have to click on the context menu for the torso image. There you can view it and store it. Edited June 30, 2007 by woody64 Quote
Hinckley Posted June 30, 2007 Posted June 30, 2007 Looks great! Did you use the imbedded frames? If you need any more help, let me know... Quote
El Bucanero Posted June 30, 2007 Posted June 30, 2007 That looks very very promising! Definitly worth adding to CP. You've done a mighty fine job! Will you also try to include shoulder pads? I would like that even more! I suppose you will also inlcude the decals of other designers in this? Mr Tiber Quote
Hinckley Posted June 30, 2007 Posted June 30, 2007 I added the download link like you suggested, bonaparte. Obviously the link should download the actual torso for printing a decal, but this is all I have right now. I only linked the first two. Woody, if you want to add that to your version, just right-click the page anywhere and choose view source. Or you can just add a text link that opens the torso label in a new window. If you need I can e-mail you the html. Great job, by the way. It really looks awesome. Updated Example Quote
woody64 Posted July 1, 2007 Author Posted July 1, 2007 Mr.Tiber: Will you also try to include shoulder pads? I would like that even more! Not considered yet. Can you give me an example ... I suppose you will also inlcude the decals of other designers in this? Therefore help would be needed to incorporate all the other decals ... hinckley Did you use the imbedded frames? I've added my logic to your template ... If you need any more help, let me know... Yeah .... here's a list of needed things a) more heads a1) there are some custom heads but not all of them look really good. Maybe you can make some better designs b) more torsos c) more legs d) a menu for loading the starting tree into each library e) and even other parts of the library ... Andreas Quote
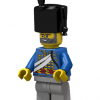
El Bucanero Posted July 1, 2007 Posted July 1, 2007 (edited) Mr.Tiber:Not considered yet. Can you give me an example ... I meant like adding torsos to the TORSO part with epaulettes (or however you write it) on top of them. Bassicly, you would take a torso, like this: But then the same with epaulettes on the shoulders. See what I mean? Therefore help would be needed to incorporate all the other decals ... I'm quite sure there are some people here willing to help ;-) . Mr Tiber Edited July 1, 2007 by Mr Tiber Quote
Hinckley Posted July 1, 2007 Posted July 1, 2007 hinckleyI've added my logic to your template ... X-D Yay! Good. I'm glad we were able to work together on this. Where can I find the custom heads and torsos? I can dowload the and resize and send them to you... Mr Tiber Correct me if I'm wrong Woody, but the method we are using doesn't make adding the shoulder dealies :-|| very plausible. We are stacking imbedded frames that can't overlap. If we jsutified the whole thing to the left, we could use a layer to add shoulder dealies... What do you think Woody? Quote
woody64 Posted July 1, 2007 Author Posted July 1, 2007 X-D Yay! Good. I'm glad we were able to work together on this. Where can I find the custom heads and torsos? I can dowload the and resize and send them to you...Mr Tiber Correct me if I'm wrong Woody, but the method we are using doesn't make adding the shoulder dealies :-|| very plausible. We are stacking imbedded frames that can't overlap. If we jsutified the whole thing to the left, we could use a layer to add shoulder dealies... What do you think Woody? The custom heads are the last 4 on the original one. lancer - quite ok - I think dragoon helmet - can be improved infantry shako - ok grenadier shako - a lot improveable ... there can be a lot of custom's added based on the discussion/pictures you find in the shako thread shoulder epaulettes: should work withnthe same technique as the decal and the torso. I will take a look on it later ... Quote
Eurobricks Emperor Bonaparte Posted July 1, 2007 Eurobricks Emperor Posted July 1, 2007 Guys, I just returned from 2 days at the Ardennes and I'm surprised with your progress. I'm not a website developer, so I just look at the results and I think this is becoming something very special! Quote
Hinckley Posted July 1, 2007 Posted July 1, 2007 The custom heads are the last 4 on the original one.lancer - quite ok - I think dragoon helmet - can be improved infantry shako - ok grenadier shako - a lot improveable ... there can be a lot of custom's added based on the discussion/pictures you find in the shako thread What? Okay, I'll venture into the pirate forum. I love Pirate LEGO but I've always found the EB Forum a little intimidating. Or maybe I'm just too lazy to look through all the sub-forums...But what do you mean by last four on the original one? shoulder epaulettes: should work withnthe same technique as the decal and the torso. I will take a look on it later ... But, the epaulettes overlap the torso's shoulders. We can't use the same technique unless we have options for every torso with every color epaulettes. And that is a lot of options... If we are going to do more faces, we will need to address how to overlap all the hats with the faces anyway. Do you think we can use layers if we justify the completed figure to the left and keep the options menus centered? Quote
woody64 Posted July 2, 2007 Author Posted July 2, 2007 But, the epaulettes overlap the torso's shoulders. We can't use the same technique unless we have options for every torso with every color epaulettes. And that is a lot of options... If we are going to do more faces, we will need to address how to overlap all the hats with the faces anyway. Do you think we can use layers if we justify the completed figure to the left and keep the options menus centered? I've already checked the technique with epaulettes. And it works. With the same mechanism we can also address faces ... shako: lancer: helmet: grenadier Quote
Hinckley Posted July 2, 2007 Posted July 2, 2007 Awesome, you are a web designing stud! Just curious, how did you deal with the overlap? Or maybe there is no overlap, I haven't seen the files. I will help by compiling whatever torsos and heads I can find. Do we want to do multi-colored legs, ie. blue hips, black legs, etc. Should I just match the new files to the current files in terms of dimensions and background colors or does that change with the epaulettes and the hats being separate. Let me know and I will start cranking out some .jpgs Quote
woody64 Posted July 2, 2007 Author Posted July 2, 2007 (edited) Awesome, you are a web designing stud! Just curious, how did you deal with the overlap? Or maybe there is no overlap, I haven't seen the files. I will help by compiling whatever torsos and heads I can find. Do we want to do multi-colored legs, ie. blue hips, black legs, etc. Should I just match the new files to the current files in terms of dimensions and background colors or does that change with the epaulettes and the hats being separate. Let me know and I will start cranking out some .jpgs I've stored the epaulette changes on the server and you can take a look on it. The image itself is rather ugly. So for that we need an exchange very soon ... (SOLVED) For legs, we should use only legs with one colour (original lego colours). If somethings else will be needed for the future we can use the same technique as for the torsos ... All dimensions remain as they were the overlapping is only done with two images beside overlapped via css margin-left .. I don't know where the original images came from, maybe bricklink was a source ... Thanks for your help ... andreas Edited July 2, 2007 by woody64 Quote
Hinckley Posted July 2, 2007 Posted July 2, 2007 I've stored the epaulette changes on the server and you can take a look on it.The image itself is rather ugly. So for that we need an exchange very soon ... (SOLVED) For legs, we should use only legs with one colour (original lego colours). If somethings else will be needed for the future we can use the same technique as for the torsos ... All dimensions remain as they were the overlapping is only done with two images beside overlapped via css margin-left .. I don't know where the original images came from, maybe bricklink was a source ... Thanks for your help ... andreas Thanks for letting me help. It's not always easy to have two designers working on one project. You are a gentleman and a scholar and a stud! By the way, what kind of file do you want the pictures, gif jpg png? EDIT: Now that I'm done gushing with compliments, I discovered a little glitch. When I visit the generator the epaulettes are off center. I viewed the source but can't tell how you're adding them. Is it a layer? Guys, I just returned from 2 days at the Ardennes and I'm surprised with your progress. I'm not a website developer, so I just look at the results and I think this is becoming something very special! Not now, dynamite. We're talking. X-D ;-) Just kidding. To tell you the truth, I gave woody one tiny idea that he ran with. Most of what you see now is his doing. I'm just consulting, by which I mean asking annoying questions and converting jpgs. Thank you for letting me help and pulling me into the project. I like helping. :-$ Quote
woody64 Posted July 2, 2007 Author Posted July 2, 2007 (edited) EDIT: Now that I'm done gushing with compliments, I discovered a little glitch. When I visit the generator the epaulettes are off center. I viewed the source but can't tell how you're adding them. Is it a layer? Please try oncemore. I've changed the image maybe you have taken a look on the old one. If you take a look at the source of the html you will find two images: One image is repositioned via css parameter "margin-left: -90px". That moves the 2nd image directly over the other. Not a big magic but it works for the torso and the decal and also for the epaulette. And will also work for other faces if neded. By the way: Loading the torso is ready. I didn't follow your attempt since I don't want to change all the decal sides. But you can load the torso in a seperate window now. Andrea UUPPS: I've noticed the problem. It's a different behaviour between IE and Firefox. Now it will become complicated .. Yesterday when I've checked it it was OK ??? Edited July 2, 2007 by woody64 Quote
Hinckley Posted July 2, 2007 Posted July 2, 2007 If you take a look at the source of the html you will find two images:One image is repositioned via css parameter "margin-left: -90px". That moves the 2nd image directly over the other. The problem with x and y is that everyone uses a different screen resolution, so 90 pixels from the left edge of your screen is not 90 pixels from the edge of mine. That is the problem with using that method, my suggestion would be to justify the whole figure to the left edge, because 0 is 0 no matter what screen resolution you use... EDIT: Hmmm... now the legs and head don't line up. I've been looking over the source in text editor, I'm moving it to dreamweaver so we can reference line numbers. I will see if I can identify where the problem is... When downloading the torsos, I think an end-user will need the actual file. The .gif won't print well on decal paper. Is this what you had in mind or am I misunderstanding? Quote
woody64 Posted July 2, 2007 Author Posted July 2, 2007 (edited) The problem with x and y is that everyone uses a different screen resolution, so 90 pixels from the left edge of your screen is not 90 pixels from the edge of mine. That is the problem with using that method, my suggestion would be to justify the whole figure to the left edge, because 0 is 0 no matter what screen resolution you use... To my point of view firefox behaves correctly. When drwaing an image which is 90px then the delta from the next drawing position is -90px to start with the same x-position (no matter of the screen position). But I think that needs some investigations ... There's now a new minifig-gen3-ie.html which should work with the IE. Unfortunately the loadTorso does not ... :-/ :'-( *n* .... Always the same with IE .... Edited July 2, 2007 by woody64 Quote
Hinckley Posted July 2, 2007 Posted July 2, 2007 To my point of view firefox behaves correctly. When drwaing an image which is 90px then the delta from the next drawing position is -90px to start with the same x-position (no matter of the screen position).But I think that needs some investigations ... true true! But, the table containing the minifig parts is centered. The epaulettes always show up at -90, but the center of the screen changes depending on the screen resolution. Even in firefox, if you minimize the screen, the epaulettes should float -90 from x while the table stays centered. I may be wrong. Maybe it's a totally different problem. Quote
woody64 Posted July 2, 2007 Author Posted July 2, 2007 (edited) I think I have reached a major point now and we can discuss what's missing or wrong: - IE and Firefox: Currently 2 versions available (minifig-gen-ie.html and minifig-gen.html). Solution to have one is deferred ... SOLVED: generated minifigs can now be shown with both browsers OPEN: two different entry point: minifig-gen3 and minifig-gen3-ie - Download of Torsos: Currently the gif is given. If a png is preferred it should be no big problem - Download the Minifig: Can be done via Create-Minifig - Epaulets: Code and example available only waiting for further images. - Other Libraries: Waiting for other contributions. - Heads, Torsos, Legs: Waiting for contributions Andreas Edited July 4, 2007 by woody64 Quote
Fordo Posted July 5, 2007 Posted July 5, 2007 Wow this is really great stuff Woody, you've really put a lot of effort into it nice work! Quote
woody64 Posted July 7, 2007 Author Posted July 7, 2007 Added additional menu for navigation and incorporation of foreign libraries: New (easy) Javascript Format to specify a library of torsos. - Loading the libarry - Showing the library Possibility to specifiy a torso via http address and to pin it on a minifig. Added Mosana's minor countries: Sweden, Brunswick, ... Added Mr. Tibers's torsos. Two major problem which have to be solved: - none of the existing torsos use transparent as background colour. Therefore pinning it on the torso show's the background of the decal instead the colour of the torso. - loading the library should show it immedeatly. An extra step "Show the library is required". That's an javascript problem I have to solve ... andreas Quote
El Bucanero Posted July 7, 2007 Posted July 7, 2007 (edited) Thank's for adding my torsos! Now I can see how the look on minifigs! But there are some problems... First: Not all of them are mine, these: The Spanish one (can't upload, because it's .bmp) And this one: ( by Mosana and some are not included: French Fusilier Napoleon Bonaparte And now I'm thinking about Monsieur Bonaparte, have you already tried to add navy blue to the torsos? Second: If I put a decal on a fig, the gray around the decal is still there.. I see you also included shoulder pads! Looks quite good! *y* Apart from those little problems the only thing I can say about this generator is that it looks fine! It only doesn't work properly on IE, but I have firefox... Mr Tiber Edited July 7, 2007 by Mr Tiber Quote
woody64 Posted July 7, 2007 Author Posted July 7, 2007 (edited) ...Second: If I put a decal on a fig, the gray around the decal is still there.. I see you also included shoulder pads! Looks quite good! *y* Apart from those little problems the only thing I can say about this generator is that it looks fine! It only doesn't work properly on IE, but I have firefox... ... Yes. "The grey is still there" is a common problem. You can get rid of it when you change the grey in your decals to transparent. On Linux I do it with convert. There should also be some possibilities on Windows ... There's an minifig-gen3-ie for the Internet explorer. Do you use that as starting point ??? Andreas Edited July 7, 2007 by woody64 Quote
Recommended Posts
Join the conversation
You can post now and register later. If you have an account, sign in now to post with your account.