Search the Community
Showing results for tags 'train'.
Found 774 results
-

[MOC] LEGO 15 Class Malayan Railway Narrow Gauge Shunter
LEGOTrainBuilderSG posted a topic in LEGO Train Tech
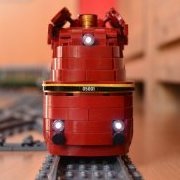
Hey everyone, am back with my latest MOC of the Malayan Railway 15 Class Shunter. Built in 1948 by English Electric at the Vulcan Foundry, the 15 Class has many characteristics of similar machines being designed and built in the UK such as BR08 shunter. The 15 Class shunter was Malayan Railway's (KTMB) first diesel locomotive used specifically for shunting freight and passenger coaches. The LEGO 15 Class shunter is 8-studs wide and runs on the TrixBrix 4-wide tracks to match the narrow gauge scale of the real life locomotive. The model is powered by 1x L motor and controlled by the standard Power Function IR. As for batteries, the model uses an adapter to connect the rectangular batteries to the IR because the standard LEGO PF battery box does not fit in there. The shunter runs on Big Ben Bricks Medium sized wheels. Coupling rods and front ladder are from TrainedBricks. The front section was especially tough to replicate as it is sloping ever so gently towards the front and the sides. Also, this is one of my entries for the Brick Train Awards 2021 for the 'Best Other LEGO Locomotive'. Here's a video of the 15 Class shunting at 'shunter' speed. -
Hello, here is my project of the week, a plank wagon, which can be styled in different colors. Have much fun!!
-
Nexus Force / LEGO Universe - 2-8-4 + Diesel streamlined space trains MOCs
Murdoch17 posted a topic in LEGO Train Tech
These two trains comprise my space-train fleet for the Nexus Force, one streamlined passenger train, and one generic freight train. You can see more the Nexus Force stuff in this thread here in the Space sub-forum. It features a modular base, trucks, crawlers, and several spaceships, along with the mini-figures. (human or otherwise!) The Moonlighter train is owned by the Nexus Force, and is a retro-futuristic stream-liner mix of old-school steam technology, but with hyper-modern safety features designed specifically for use by Nexus Force personnel as a very high-speed, high-security ground transport between the northern-most city of St. Nicklaus and north-pole-hugging outpost of Ice Station Odyssey, around 500 miles away. (this all takes places on the ice-bound planet of Beta Polaris, which orbits what we here call the North Star, far away from Earth.) Thus this makes it a space train! Unlike the slower Earth trains, the Moonlighter type of space-train is super-streamlined, and can go up to speeds of up to 110 MPH (135 is the loco's top possible speed) on it's special track, with super-elevated curves and long straight-away's over hundreds of miles, all while using Positive Train Control (PTC) on the the mostly double-track mainline, where all vehicle crossings are flyovers and switches virtually non-existent once out of St. Nicklaus city limits. This train runs along with nine other identical versions of this train (10 total trains in all) on the route with up to seven in running order on the route and at least two in the maintenance shed / in emergency backup storage at any one time. They are numbered 200 through 210. The Nexus Force logo on the nose of the Moonlighter streamlined casing, (near the smokestack) and the rear of the observation car, while the engine's number (207) goes under the cab windows. The two forward tanks are for oil, and the rear tank is for water. The engine is equipped with a water scoop (like on the old New York Central steam locomotives) for refilling the water tank on the fly. There is a ladder from the tender-top deck to the coupler level behind the engine for access to the trailing passenger cars, and two ladders on either side of the steam loco for entry into the enclosed control cab. Three of these passenger cars go on the Moonlighter, with two before the dome car and one immediately after it. The recessed panels are the platform doors. One of these vista-dome cars goes in the middle of the train. (You may have noticed there are no exterior platform doors on this car. I decided not to add them because they didn't look good with the dome.) The rear observation car is currently missing it's rear curved windows, but it will have them when built IRL. The Nexus Force logo goes on the rear of this car, as previously mentioned above. After 45-ton locomotive 2011 has arranged a freight train in the Nexus force spaceport's yard, a electric main-line loco has arrived on scene to pull it's train to the some 500+ miles distant city of St. Nicklaus. This larger locomotive is numbered 99, and is running with a mobile armored cannon unit for the journey ahead, as it runs through some areas that could be ripe for an ambush by enemy forces, as you never know where the Maelstrom might have agents in deep cover or have planted ambushes alongside the line. A train was derailed and attacked last month in Avalanche Canyon by pirates, which is why the railroad is taking no more chances while it's position is being currently fortified all along the route. The other cars being pulled are: a flatcar carrying Commander Bob's 1960's sports car (going for it's yearly tune-up in town), a fully-loaded gasoline tanker, bathtub gondola with ice boulder load, and a bay-window caboose for the train's rear-end crew and a few more soldiers... just in case! This orange and white electric locomotive was inspired by the preliminary version of set 60198. (2018 Freight train) The inside is accessible via the removable roof sections. This model was inspired by this armored train MOC, that was itself inspired by the movie "Castle in the Sky" and it's armored train therein. The road vehicle model is partially inspired by Lola the car from the TV show Agents of Shield. (although this one doesn't fly) The sports car doesn't have great off-road capabilities, so it has to be trucked in on a flatcar to the remote space base. This fuel tanker is filled with gasoline or diesel fuel for use in the space base's land vehicles. Usually two or three tanker cars are sent into the base every couple weeks for refueled the on-base supply. This bathtub gondola is filled with ice boulders that have frozen ancient lifeforms trapped inside. The Nexus Force is sending them to a specialist laboratory off-world to have the DNA decoded and the beings themselves studied. Due to height clearance issues in St. Nicklaus city, regular-height cupola caboose types are forbidden. So, the bay window type is used instead. This moon base-like space base model is where the Moonlighter travels to, and was inspired by set 60036 (Arctic Base Camp), with a rooftop shield generator partially lifted from set 75098 (Assault on Hoth) and a sensor array inspired by set 76157 (Wonder Woman VS. Cheetah) The base consists of eight separate, interchangeable, modular sections, all of which have opening roof / wall sections for ease of access. These sections include (but are not limited too): a common bunk room, a spaceship control tower, a fusion generator, communications room, break room, and several more. As you can see, I joined the base to the rail-line with a short siding for freight deliveries, and for the servicing of steam locomotives on services such as the Moonlighter. -
Hello train fans. Here is my new weekly moc project: A remote controllable train signal ( can be also used synchron). Many greetings.
-
I've been building occasional Lego Architecture sets for a few years now, but the series now seems to be well-and-truly moribund. Just tourists traps and Skylines that don't appeal (although the Miami skyline on Ideas is rather nice). But I've always had a train interest too, and the Crocodile caught my attention last year, and I was hooked.I needed more than that to keep myself busy, and I had a collection of OO scale model railways that, in all honesty, were never going to see a layout, so I sold them and switched to Lego trains.I started with two City Train sets, 60197, at good prices, but they really needed a proper station to do them justice. Like many people I think that the Metro Station 4554 is one of the nicest that Lego has ever created. I completed this in Tan, and replaced the windows with panels, which give it a nice 1930s look. I needed another building for the other platform. Lego does Brutalism really well, and 7997 looks the part in Light Grey. The station buffet is long closed, a victim of economies. Together, parting up 4554 and 7997 are a really good lesson in learning the ins and outs of Bricklink and the waywardness of Lego parts colour availability. These are both nice stations, but I wanted something a but more grand and old fashioned. The Disney Train station 71044 is really the only large station that Lego has ever created (it keeps rejecting good stations on Ideas), and I managed to get just the building by itself for a very reasonable price from Ebay. Of course, platforms are needed too. Several Harry Potter stations combine nicely to create an attractive substantial set-up. Although the Disney station is large, it still gives the impression of a country town station rather than a major city terminus. The next step was a chance encounter with a book on the history of Lego sets. The Town Hall in 10184 looked too good to stay as a Town Hall: I could see a Neo-Gothic Victorian monument struggling to get out. St Pieces is the main central station on the layout in my head. Typical Victorian grandiosity (as per St Pancras). I followed the original 10184 plans to the letter and then extended outwards and upwards. My big lesson was not to design like this. It is much better to start with a concept and a blank slate rather than adapt someone else's design. For the record I will note that the 2x2x3 roof slope is HORRIBLE, that part doesn't have clutch, it has anti-clutch, and that roof exploded messily at every opportunity. All those joists in the loft are there for a reason. The desire to return to Brutalism was strong, showcasing just how nice a such a building can be when done well. Inspired by the Royal Festival Hall, Falmer House (University of Sussex) and the Crystal Palace Sports Centre, for Festival Gardens Station I particularly wanted to show the metal-framed windows that characterise these buildings, and I've always wanted to do a circular roof. Initially, I thought I had cursed myself by making the whole building an odd-number of studs wide but the Lego gods were merely testing my resolve: the circular roof went together with the main building like a dream and fitted perfectly. I just wish there were more inverted slopes available. I thought that Festival Gardens would be the last stop on my journey, but Art Nouveau has always been my first architectural love, and ideas started forming in my head about ways to make it possible. You've already seen Botanical Gardens, but here are a few photos again so you can see my full journey! So, that's my long MOC journey come to an end. I hope you enjoyed the results. I think that's exhausted my inspiration for now, but who knows what might pop into my head next! If any of these buildings generate particular interest I will start a separate thread for them with extra photos, I need the practice!
- 14 replies
-

Making good use of 1x3x3 windows: historic liveries?
Tube Map Central posted a topic in LEGO Train Tech
I am creating some old-style-looking electric multiple units, in minifigure scale, and the newish 1x3x3 window frame is perfect for these because it matches well the profile of a seated minifigure. Currently, this window frame is available in just three colours, Bricklink Tan (thank goodness) is a good historic railway colour, pairing nicely with reddish brown, dark red, dark blue and dark green. The other two colours - dark brown and Bricklink dark purple - are more of a challenge because older two-tone railway liveries usually had the mid-body (including windows) in a lighter colour than the lower body panels. So, can anyone point me towards old railway liveries for coaches that could make good use of these window frames? -
Hello, I built a turntable for my trains and shared the instruction on youtube. Part 1 and 2 are already onine, part 3 comes in a few days. Have much fun!! Andi
-
Hello again all, The Brick Train Awards are back for 2021! These are a virtual awards for LEGO train fans around the world, and are they are free to enter via bricktrainawards.com from 1st - 28th February 2021. If you followed them last year, you'll have seen the huge variety and a lot of brilliant LEGO models from railways, railroads and transport systems from around the world. Prizes We'll be announcing prizes shortly, courtesy of the very generous Trixbrix who have once again stepped in to support the awards, including the cost of shipping prizes and winner's bricks worldwide. Additional sponsors for individual regions may follow. 2020 winners If you missed them, winners from last year's Brick Train Awards are listed on the website here; there's a 15 minute announcement video of winners here. Entering the Brick Train Awards 2021 As before, the awards are free to enter. You can enter up to 3 models per category; this time, models must have been completed in the last 24 months (2 years). Digital models can be submitted in the first 11 categories below: Best steam loco Best diesel loco Best electric loco Best other loco Best passenger wagon Best freight wagon Best special wagon Best structure Best TFOL (teenage fan of LEGO) locomotive Best TFOL (teenage fan of LEGO) wagon Best TFOL (teenage fan of LEGO) display / structure The above awards are drawn at a regional level (best models in Asia, Americas, Europe and Australasia) before a global winner is picked from those. The two categories below are judged at a global level only (as there are relatively fewer entries for these): Best group display Best individual display Enter your models for free from 1st - 28th February 2021; see details at bricktrainawards.com/enter. We look forward to seeing what's submitted this year! Richard - Organiser, Brick Train Awards
- 27 replies
-
- lego
- lego trains
-
(and 5 more)
Tagged with:
-
Bought the Lego Train Projects book lately and startet to build the EMD FL9 locomotive. Made some pictures from the current status. Missing some minor detail pieces. I also made some changes to the front to some smother look. Sadly the roof can't easily be removed so I need to made some further changes and the whole build is not suited for a PU motor. Overall I like the color scheme of the locomotive .
-
I see that a lot of train MOC's use 7 stud wide bases, but how do you make an uneven base that fits in the center of a even number of studs on the track and wheelbase? Help please!
-
The NS1200 series entered service back in 1952 as part of the reconstruction of the country after the 2nd World War. Bought as part of the Marshall plan, these were designed by Baldwin/Westinghouse in co-operation with Heemaf. Of the 25 engines build 2 are still in active service today, and a third one being used as an engine by the National Rail Museum in Utrecht. The real engines are enormous compared to most other Dutch Engines. For this model I've chosen the colours used back in the 50s untill the 60s. The NS1202 is the roadnumber of the one at the Railway Museum with the same colours. NS1202 [Main] by Ervvin, on Flickr And the real deal, my model is 1:45 scale model. The engine is powered by a custom build Li-Ion battery, controlled through a PFx Brick. The train has working signals at the front and the back. The drivetrain consists of 2 PF XL-motors driving BBB M-wheels with a 1:1.667 ratio. NS1202 [3] by Ervvin, on Flickr I want to thank Pieter Post for helping with the photo's and some stickers, as well as Raised, Tijn__ and loads of others for helping me with some details and feedback. There are more pictures, inlcuding a whole lot of WIP pics in my Flickr album here: https://flic.kr/s/aHsmPwWwf1 A video of the engine running can be found here: youtu.be/43uboyz-Fp8
-
Hello everybody! As 2020 is coming to an end, I wanted to share my favourite MOC from this year with you. It's Harry's first journey to Hogwarts as a triptych, with each scene built into a RIBBA-frame (often used to display minifigures). Journey to Hogwarts Triptych by Aldar Beedo, auf Flickr The first scene shows Harry's 11th birthday, when he is visited by Hagrid who tells him that he is a wizard and that he will go to Hogwarts: Journey to Hogwarts Triptych by Aldar Beedo, auf Flickr The second scene shows platform 9 3/4 where Harry and Ron pass the barrier to gat to their train to Hogwarts: Journey to Hogwarts Triptych by Aldar Beedo, auf Flickr The third and last frame shows the first years students' boatride to Hogwarts: Journey to Hogwarts Triptych by Aldar Beedo, auf Flickr My favourite part was to recreate the Harry Potter logo with bricks as accurately as possible: Journey to Hogwarts Triptych by Aldar Beedo, auf Flickr I'm looking forward to your feedback! :)
- 7 replies
-
- harry potter
- moc
-
(and 5 more)
Tagged with:
-
Hi everyone! I´m really happy to present you again something! This is a minifig scaled model of a Stadler Kiss 2 train, in the colours of Westbahn. It contains 7216 bricks and it took 14 months to create it. Somewhere I wrote earlier, that if I don´t post, I don´t disappear, just my creations are getting more and more difficult. It takes a long time to figure out every small lines and details, etc. You know, it has to be perfect… It´s the case with my newest creation on the pictures. Maybe some of you have already heard, that I´m currently working in Austria. I started on the workplace in October, 2019. One of the first things which I realized in the new environment was the train of the company Westbahn. (I arrived by train to the city) This is a passenger train company, which offers trains between Vienna and Salzburg. They have a stop in my city as well. The train has a really cool painting. Four colours, which are looking nice near each other and a lot of lines, which mean a really great challenge to build. Of course using stickers was prohibited, as nowadays always. So I started to build the front in LDD in November, just one month later. When it was possible to see, that the model is similar to the real one, I started to buy the pieces to try the concept in real life. Of course it looked bad. But in comparison with my ICE (read the story again here) the process was much better. There was no break in the developing. I was always able to work happily on it and in Mai 2020, during the first Covid-lockdown the front car became almost ready (~2200 parts). After that I just copied the construction for the other end. It was boring and deadly. I´ve already had problems during the first car with special parts in special colours. But the copy-period was the worst. Parallel with it I started to buy pieces of course for the middle section. It was a bit easier, because it doesn´t have diagonal lines. And a few days ago I was ready! Unfortunately Westbahn sold these trains to DB, but one of them stayed. The other trains of Westbahn are similar to this one, but they have small differences at doors and at painting. But I wanted to take the “Big Brother” picture with the correct train. It was very time-consuming to hunt it, so I decided, that I write to the company and ask it, when will be the train at my train station. It´s not the first time, that I´m trying to do similar pictures, and the owner, or the company have never helped. But Westbahn yes! They were very kind and helpful. They sent me, when the train comes. Despite of it I had to visit the train station three times, because I didn´t like first two pictures! So I would like to say a huge thanks to Westbahn here again! Btw the train has motors, so it will hopefully functional in the future! If I get the Sbrick and the cables, I test it and if it will be possible to take it to an exhibition where there is a long train track, I make a video, I promise! Thanks for watching the pictures and reading the story! Hope, you like the train, too! :)
-
Hello everybody, parallel to my train "LMS Class 5 The Jacobite" I also built a famous railway bridge in Scotland. Ok, not the" Firth of Forth Railroad Bridge "... And not the bridge over the Tay ... It should of course be a bridge that the train "The Jacobite" actually crosses. I myself was there in 2005 and was able to photograph the bridge "The Glenfinnan Viaduct" with the train "The Jacobite" and I was a fan of Scotland, the bridge, "The Jacobite" and of course whiskey for a long time. The "Glenfinnan Viaduct" was built in 1897/1898 and has a curved track design as a special feature. Of course, this doesn't make it easier to recreate it with Lego bricks. The next problem is size. The Lego R40 curve is too narrow for most of my trains and the bridge wouldn't really work either. Then it would only be 4 curves long and only one locomotive would fit on it. So I used the R104 curve from Trixbrix as the rail. This means that the bridge has 8 curve segments and 1 Lego straight at the beginning and end. The arc describes a 90 ° curve. In order to be able to show the bridge at exhibitions and to integrate it into routes, it had to be built transportable. A modular construction was unfortunately not really possible for me, only the area with "The Glenfinnan Monument" is modular. I transport the bridge itself in a specially made wooden box and this box also serves as a height-adjustable table at exhibitions. For the Lego implementation I first tried to build an arch from Lego bricks. Then the pillars down, then the foundations, then the landscape. Just like you build a bridge: from top to bottom ;-) There was no digital planning, the model was created through trial and error, various new buildings and many stone orders. My children's Lego Duplo bricks that are no longer used are built into the substructure and covered with a Lego 2x4 wall. Construction began after Christmas and dragged on until summer. In August 2020 the time had finally come. Despite the Corona crisis, it was possible that a meeting of Lego railway fans could be held in Schkeuditz near Leipzig, Germany. And I was there ;-) There were hygiene requirements and no visitors were allowed, so that only we Lego train fans had 4 days to play with. A huge track was built and my bridge was integrated at the beginning of a single-track branch line. At home in the living room my bridge looked huge, on site in Schkeuditz it was rather tiny and there were concerns that not all models would fit ... But it worked for most models, even an ICE could pass. Only a huge American diesel locomotive got stuck. But it was just a branch line ... But what is a bridge without a train? The railway line between Fort William and Mallaig is still in operation and in summer the steam train "The Jacobite" runs as a tourist attraction over this railway line with the famous bridge. I had shown the train "The Jacobite" of an LMS Class 5 locomotive and 6 classic British passenger cars of the BR Mk. I series here at Eurobricks. And hasn't the bridge become even better known through a series of fantasy films? Many may only know the bridge from the Harry Potter films. And so it made sense to change my design of the LMS Class 5 to a Hogwarts Express train. I hadn't seen any of the films until last year. My first impression of the Hogwarts Express comes from the book title of the jewelry edition from the first volume. This is how a Hogwarts Express had to look to me. Later on in the films I was disappointed: the locomotive looks way too good and has nothing at all like a magic train. So it was clear: "my" Hogwarts Express should look something like on the book title: I hope I was able to entertain you a bit and you had fun reading and looking at the pictures. Enjoy, Thomas
- 12 replies
-
Hi all, this time I propose a real build, it's not completely new - many of you surely has seen it in some of my digital renderings, but was never built. I finished it yesterday, when the red motor finally was repaired and the missing rare 2x2 black window arrived. To create this one, my third copy of 7810 was used as donor for the baseplate and black windows. So I decided to keep the 7810 number when I chose the stickers (the renderings have 7730 decals). Just to explain, all my MOC locomotives keep numbering of original Lego sets from which are derived in terms of parts. To celebrate its arrival, I used my small 12v test track. As you can see is a very simple build, standardized in 12v style adding the black side doors (absolutely not present in the prototype), and 5 2x2 black windows. The red motor was a must- I tried to use the black one - but it wasn't the same thing!!! This motor was not running anymore, so I bought a black one in bad aesthetic conditions as donor. I removed the electric motor from black shell, cleaned all inner parts, reinforced the red shell internally with some superglue (it had some cracks), changed axles (using the ones from black motor) and performed a test. Once the test was ok - I finally glued the two parts of the red shell. Even if the chassis is common to other locomotives, it seems very small. The inside is small aswell, and I only could fit a lever in 7750 style. You can see the 12v light brick and its cables. I bought some 12v light microbulbs - maybe I will succeed to light up also the rear headlight when going in reverse. Even if it has no weight bricks, it still has a decent pulling power and runs fine with small wagons. Now it needs its own set of cars. I hope you like it!!! Ciao, Davide
- 15 replies
-
- br98.3
- glaskasten
- (and 6 more)
-
[C-model] 42106 - Pullback Vehicles
Tomik posted a topic in LEGO Technic, Mindstorms, Model Team and Scale Modeling
Few months have gone since I built my last alternative model from set 42106 and I got desire to build another one. The first model was Pullback Racer that I built for TC18 contest - more about it is here. Then I built Pullback Plane - more about it is here. And finally now I've built Pullback Helicopter. I planned to build it even before plane but I rejected it because I didn't see the way how to connect both rotor blades with pullback motor and landing gear. Set 42106 contains only 5 bevel gears and I usually use 6 for helicopter (three pairs). Later I find solution for problem with missing gear - I saved one bevel gear by connecting axle for tail rotor blade to another pair of bevel gears that transmit motion from horizontal axle to vertical. The only con of this solution is low possition of axle for tail rotor - see picture of mechanism. The last issue, I had to solve, was possition of center of gravity - it was too close to tail so helicopter made wheelies. I prevent them by adding structure under tail rotor blade. Do you think it was all for now? No, it wasn't. I've got one more idea, much crazier idea - I wanna build Pullback Steam Engine! I focused more to functionality than its look so proportions are not correct but it really works. Pullback motor is connected to rear axle and it drives also middle axle thanks to piston-rods. Front axle with small wheels works just like stabilizer (I had to move driven axles too far to rear behind center of gravity and whole vehicle would fall on its front without small wheels). Finally I added optional flame on chimney (smoke would be better but I didn't find any in donor set). I plan to make video of steam engine in action but it will not be anytime soon. Any comments and criticism are welcomed.- 30 replies
-
- train
- helicopter
-
(and 4 more)
Tagged with:
-
Hello to the community. The last weeks, I had finally a bit more time for LEGO, so I started a new small digital project: (digital) modern redesign of the classic LEGO Set 4554 Central Station (also known as Metro Station) from the LEGO Trains Theme from 1991. These have been my first steps in the Lego Train Theme, maybe you like the result. ;-) Picture 1: 4554 Central Station Revisited Picture 2: 4554 Central Station Revisited I also created some building instructions for the train station. You can download them (PDF File, 125 pages, for free, no registration) under the below URL: http://afol.lu/afol52/filebase/index.php?file/55-lego-4554-central-station-revisited/ Ok, this is now a bit offtopic, but may I ask you however, as a sort of recompensation, to vote for my LEGO Ideas Project Queen Elizabeth II and share my project idea in social media. You can vote for my project here: https://bit.ly/legoqueenelizabeth . I would really appreciate. Happy Building, stay safe and keep healthy. :-)
-
I've had the Disney train set since it came out, and recently I've been trying to improve it. From other threads I've read, I'm not the only one. My current project is reconfiguring the engine and tender so the tender has more of a resemblance to the C.K. Holliday, which requires moving the motor to the driving wheels. This is my first time altering a Lego set, and I was hoping for some tips/ideas for the rolling stock. My goal is to have two open gondola cars, three cattle cars, and the caboose. Just like the picture below. From some of the other threads I've seen, there's a lot of really neat changes, and I'd be excited to get some feedback. Thanks!
- 1 reply
-
- disney
- disneyland
-
(and 2 more)
Tagged with:
-

Harry Potter Hogwarts Express Locomotive and Carriage MOC by dunkandeggbricks
dunkandegg posted a topic in LEGO Train Tech
Hello everyone!! I hope I'm right in making this a new topic - and that it should be in train tech and not in licensed. I've been working for a while on my own Hogwarts Express MOC. I know I'm not the first person to do this and I bow before many people who've done superb jobs - but here's my take on it! I've linked the two YouTube videos I've made about the locomotive and the carriage so feel free to have a watch. Or if not, there are a few photos which show what I've made. I'm very happy to answer any questions, as well as pointing people in the direction of my inspirations if they're looking for some themselves. Lego Hogwarts Express Moc by Will Norris, on Flickr Lego Hogwarts Express Moc by Will Norris, on Flickr Lego Hogwarts Express Moc by Will Norris, on Flickr Lego Hogwarts Express Moc by Will Norris, on Flickr Lego Hogwarts Express Moc by Will Norris, on Flickr Lego Hogwarts Express Moc by Will Norris, on Flickr Lego Hogwarts Express Moc by Will Norris, on Flickr Lego Hogwarts Express Moc by Will Norris, on Flickr Lego Hogwarts Express Moc by Will Norris, on Flickr Lego Hogwarts Express Moc by Will Norris, on Flickr- 15 replies
-
- harry potter
- hogwarts express
-
(and 4 more)
Tagged with:
-
The past 1,5 years I've been busy building an 80's town with most of the iconic classic town sets and all 12V grey era train sets. I started with buying sets that I didn't have yet, deyellowing all white and grey (including train tracks) parts which took longer than expected:I wasn't done when the summer of 2019 became autumn and by that time the sun wasn't strong enough (if the sun was visible anyway) so I built a de-yellowing device. I've used a total of 40 liters of peroxide solution to de-yellow most parts. After that I could start building the layout and town. The town consists of the most iconic classic town sets and three train loops from the 12V grey era. All 12V trains are running on these loops, including a locomotive from the 7777 train ideas book and a 12V crocodile MOC. There are 19 remote controls for points, signs, decouplers and a level crossing. Further more I have used over 120 original 12V light bricks for lighting. These two combined results in a total wire length of around 350 meters. Enjoy! :D
- 19 replies
-
- classic town
- train
-
(and 2 more)
Tagged with:
-
Hello there, First time poster here, thought I would share a build to get some advice and feedback from others. If anybody here happens to be one of my 6 followers on instagram (that which I highly doubt, as one of those followers happens to be myself as well), you would know that I have been working on a GE 44-Ton locomotive of the Greater Winnipeg Water District. A really cool short line (I believe is what they are called) railway with a very cool, although controversial, history. The 44-ton being such a small loco, I was having trouble nailing the details I wanted to get. Along with part colour availability that had left me frustrated. Also I couldn't even imagine getting power functions in this thing its so small (most likely necessitating a powered freight car to run a train with the 44-ton at its head). Anywho reading the new Brick Model Rail Roader article on scaling I took away quite a few things. Most importantly that since we have the luxury of modeling with Lego, we can come back to stuff and modify it at anytime we desire! I therefore decided to take a break with the GWWD short line project and do something a bit bigger allowing me a greater canvas to experiment with detailing and also put some power in it. I am definitely not shelving the 44-ton switcher, just need some time away from it to get a fresh outlook and maybe learn some building techniques before going back. So on to the actual post! A MLW RS-18 in Canadian Pacific colour scheme. I was looking for a new project (see lengthy preambule) and found a few threads on here. First thought was to make an RS-23 locomotive as the GWWD has quite a few in its roster included two in CP action red paint as spare parts for their working ones. Looking at the forum I saw SteamSewnEmpire's thread about an RS-23 and loved it! Somehow though I stumbled upon SteamSewnEmpire's RS-18 loco and though: wow that is a sweet locomotive! Looking at prototypical photos online of the RS-18 I decided let's do it why not! So here it is, first WIP photo. Will be posting more angles once I get a better handle on how to put pictures in a post. Any and all feedback is more than welcomed! cheers! And lastly here is a photo of the prototype locomotive. The one I am modeling is the top left, numbered: 8786
-
I was thinking recently about some ideas for the roller coaster track that TLG does. I do not own any of the track, but I have a feeling that TLG could make a new airport shuttle set using the Roller coaster track. The trains could be four studs with and be what’s called AGT, or Automated Guideway Transit, which is common in many airports. Although the Automated Guideway Transit set does not have to be specifically for an airport as the Miami Metromover in Miami, Florida, is an Automated Guideway Transit system. The ability to take tight curves could also benefit the sets as being easier to implement into existing LEGO cities since the roller coaster track is not as wide as regular track. the system could also be an elevated cable car like the one they have in Las Vegas at one of the hotel areas using the chains to pull the vehicles along level straight track. This provides some interesting possibilities for a series of transit based sets that I would like to see, and maybe even buy.
-
- train
- peoplemover
-
(and 2 more)
Tagged with:
-
Hello everybody, my last construction project took me to Scotland. The Jacobite Steam Train still operates between Fort Willam and Maillag. Various steam locomotives are used for this train, e.g. the LNER class B1 No. 61264, the LNER class K1 No. 62005 (when I visited in 2005) or the LMS Class 5 "Black Five" No. 45231. They all serve as wagons of British Railroads Mk. I coaches. The classic British steam train passenger car par excellence. As a locomotive I chose the LMS Class 5 "45231". This promised a challenge as a Lego model: a conical boiler and angled cylinders. Exciting. The locomotive has 2 Lego PU motors as a drive. 1x in the locomotive on 2 of the 3 large main axles (BigBen XL wheels), 1x in the tender on 2 of the 3 tender axles (BigBen M wheels). Each engine has its own HUB. The locomotive is controlled via the Lego PU remote control. However, since the motors have to be operated with different power due to the different wheel diameters, a tablet / mobile phone with the Lego PowerUp APP is interposed between the remote control and the locomotive. The APP accepts the travel commands from the remote control and forwards them to the two HUBs in the locomotive. The lighting of the locomotive consists of self-soldered LEDs, connected to the Power UP HUB in the locomotive. A normal Lego Led for PowerUP is installed in the tender. The entire lighting is controlled via the handheld remote control and the APP. Forward travel: steady light at the front, optionally flashing light or off at the rear Reverse: front flashing light or off, rear continuous light The flashing is realized via the APP. Built from Lego parts with the following third-party parts: - BigBen wheels S, M, XL in new dark red - Linkage from the 3D printer - Lighting partly self-made - Self-made lettering / decoration But only a locomotive is no train.... The classic: British Railroads Mk. I passenger car. Built in the 50s in very large numbers and in many variants, these cars are still in use today on tourist trains and in collections / museums. The color "new dark red" was attractive and difficult at the same time. There aren't many windows and if you do you can't pay for them ... So I first looked for a solution for the windows: buildable, affordable and based on the model. In particular, the 4 small windows above are the mark I also found the variety of variants impressive and couldn't really decide which one to build. So I build all ;-) The cars are all built according to the same basic scheme and yet completely different. There are some with an open compartment (e.g. FO - First open) and some with individual compartments (e.g. SK - Second Corridor). I have 1st and 2nd class. 1st class has dark blue upholstery and a side table with a lamp. The 2nd class is more simply equipped. It was very interesting during the construction: the left / right sides of the car are often very different. E.g. In the case of the corridor cars, the doors are on the corridor side in line with a compartment door. In this way, in the event of war, the wounded could be pushed into the compartment on couches through the outer door. The bogies were of course important to me again: Model type Commonwealth: All cars are again equipped with ball bearings. The reason is simple: the cars are long and heavy, and weigh around 900-950 grams. Most cars can drive Lego R40 curves, only the two very long ones cannot. Since my locomotive also needs R104, I prefer to use the cars on large radii. The roof of all cars can be partially removed to insert figures. With the corridor car you need little fingers ^^ BR Mk. I 3093 Florence FO (First Open): An open 1st class car. 1st class cars typically had maiden names as proper names: BR Mk. I 4951 SO (Standard Open): An open 2nd class car with an open-plan compartment. In terms of construction, this car is longer for me than most of the others, this has to do with the spaces between the windows. All of the cars have the correct number of windows, but the wall between windows in 2nd class cars was smaller than in 1st class cars. It's hard to do with Lego. So I decided to use the length differences. BR Mk. I 1840 RMB (Restaurant Mini Buffet): A restaurant car with a small bar / kitchen for coffee / tea / snacks. In the fan area is the bar. To the left of the middle door is a small storage room. BR Mk. I 13320 FK (First Corridor) Anna: A 1st class carriage with a corridor and 7 individual compartments with 6 seats each. Ok, only 2 Lego figures per compartment because of excess width ... BR Mk. I 99035 BSK (Brake Second Corridor): A 2nd class carriage with a corridor and a brake / attendant compartment. It also serves as a luggage cart. This car belongs at the end of the train. In the case of "runaway" wagons (the wagons were torn off from the locomotive), the train attendant was able to recognize the situation via periscopes (the angles on the roof) and brake the wagons. This is why this car has the rear end for me. This is implemented as a flashing light and can be switched on inside. BR Mk. I 21266 CK (Composite Corridor): A corridor car with 1st and 2nd class. The car transitions are designed the same for all cars: The aim was: the smallest possible gaps when cornering: This is what the car transition looks like in an R104 curve: Enjoy: Thomas
-
Hey guys! I have a new MOC to share. This was a commissioned build that will be turned into a full kit for bricktraindepot.com. Will be doing additional full kits for Nickel Plate #765 and Pere Marquette #1225 as well. Pre-orders for all three kits will open on September 1st! If you purchase the C&O kit, $100 will be donated to Kentucky Steam to help with the restoration of #2716. Anyways, about the engine. The Chesapeake and Ohio Railway's K-4 class were a group of ninety 2-8-4 steam locomotives purchased during and shortly after World War II. Unlike many other railroads in the United States, the C&O chose to nickname this class "Kanawha", after the river in West Virginia, rather than "Berkshire", after the region in New England. During the 1940s, the C&O K-4's were being built to haul heavy freight services and were used mostly for high speed freight and passenger services throughout the north-eastern regions of the United States and part of Ontario, Canada by the Pere Marquette Railway. C&O Class K-4s were one of the few recognizable 2-8-4 (Berkshires) classes in North America along with the Pere Marquette Class N (road numbers 1201-1239), and Nickel Plate Road Class S (road numbers 715-779). Both the PM Class N and NKP Class S were manufactured by the Lima Locomotive Works in Lima, Ohio. NKP 779 was the last standard-gauge Berkshire to be built in the world, and the last steam locomotive built by Lima Locomotive Works. My model features 2x L motors in the boiler with custom battery box in the tender and all specialty wire custom finished, 3D printed XL drivers, BrickTracks wheel in roller bearings, custom side rods by TrainedBricks, and decals by OkBrickWorks. I've finished the physical build and have been doing testing while waiting for OKBrickWorks to print my decals and wheels. Hope you enjoy the renders for now. More pictures will be coming soon! Left Front by Jeffinslaw, on Flickr Right Front by Jeffinslaw, on Flickr Getting close! by Jeffinslaw, on Flickr Additionally, be on the lookout for other train cars from BTD such as the AAR 50 ton hopper in C&O livery as well as an update to our TOFC to include a C&O flat car and some Railway Express Agency trailers. Let me know that you guys think! -Jeffinslaw
-
So I was designing the the whole NS/NMBS Beneluxtrein, a service that ran from Amsterdam to Brussels. Here is the final HLE 25 Design. The driving cab is already built. I made some fixes with the HLE 25 engine. All bogies are aligned and the cab has a better design. The only big problem is that I don't know if the standard PU or PF is able to pull all these heavy coaches. I noticed my 7939 locomotive had some problems pulling and pushing the coach w/ driving cab alone. If you have ideas to improve the locomotive feel free to tell!

