Search the Community
Showing results for tags 'technic'.
Found 1584 results
-
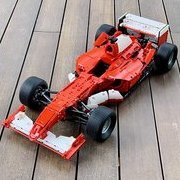
[MOC] Ferrari F40 1:10 Redux
lnteknik posted a topic in LEGO Technic, Mindstorms, Model Team and Scale Modeling
Ferrari F40The most iconic supercar from the edgy eighties. The last hardcore beast signed off on by Enzo. The absolutely definitive Ferrari. The legendFunctions- Working steering wheel- 5+R dogleg gearbox- Fake V8 working engine- Independent double wishbone suspension at all 4 wheels- Openable doors, front and rear clamshell- Manually operated pop-up headlights Design and InspirationThis creation is inspired by the fantastic work of @jorgeopesi from 7-8 years ago, reborn with contemporary Lego Technic pieces. I kept the gear shift mechanism of the original, and changed the gearbox to a modified version of @Rudivdk's 5+R manual transmission. Some exterior solutions also take reference from jorge's version, but everything else from steering, suspension setup to engine, body panels etc are my own designs. It's not a mod by any means, but hopefully a worthy remake. With the evolution of LEGO parts palette over the years, I have also managed to add more details to the model, such as: - cooling slots under the rear spoiler - exhaust manifold and a see-through rear grille - detailed interior and more representative racing bucket seats - detailed engine bay with all the bells and whistles (intercoolers, airboxes, etc) - as well as, the iconic line that runs across the entire car - also worth mentioning is the 3-piece rod hidden in the rear bumper that supports the rear clamshell when it's opened. Construction The car was originally built with parts from set 8145, 8070, and additional parts from my parts bin. However, 2x 42125 is also a great base, which provides 70% of the parts. The missing 30% is listed here. When making instructions, I have also tried to substitute expensive parts such as Red 14L soft axles, or Red 1x6 thin liftarms with more affordable solutions. The wheels used in the instruction are also from set 42125 to save cost, but if you want to use standard technic 56mm D wheels - part 15038, just need to use 7L liftarms instead of 6L as the rear wishbones. These wheels will stick out a bit and provide a slight rake, giving the car a more aggressive look. The wheels used in photos are third party/non-lego parts. They are great (provide a good offset between the front and rear wheel covers, making the rear wheels look "deeper") but perhaps not for the purists. You can send me a private message if you want to know where I get those wheels from, but note that I'm in no way affiliated with the seller. Neither can I guarantee the quality of the product nor seller's trustworthiness, so tread at your own risk. Instruction hereThe instructions booklet is 666-page long and contains 828 steps (talk about "Manifest" if you watch that show :D). You will find 11 modules and 10 assembly stages in between to combine the modules to form the final model. You can follow the instructions in the chronological order of the pages, or skip around, build all the modules first (in whichever order you like) and then follow the assembly steps, just like how real cars are built in the factory. Either way should bring you a enjoyable building experience. Thank you for reading this far. I hope you enjoy the write-up. Look forward to hearing your thoughts More pics here (bricksafe) Sneak peeks of my upcoming creations -
I've designed the below GBC called Rainbow Wave. It has 38 Lego colors and about 1150 moving parts. It is powered by a single motor, with each of the colored pistons sitting on an 8-tooth gear. Each piston’s gear is exactly 1 tooth offset from its neighbors making one wave 8 colors. The GBC is level so the balls are moved by the waving surface. Free building instruction for version 2 and parts list is available on Rebrickable with a thank you @Courbet for the improvements and creating the digital model! https://rebrickable.com/mocs/MOC-7456/Berthil/rainbow-wave-gbc-v2/
-
 Hi everyone! I have a big question. from the 7th of may to the 15th of may (26th of february to the 6th of march was the old date) we will do our next "phaenoBRICKS" exhibition. We, means the "Steineland Harz + Heide" RLUG which is a part of the "Stein Hanse", a big LUG in the Northern Germany. The phaeno (www.phaeno.de) is a very famous science-museum and we are glad und proud to have the possibility to do our LEGO(R)-exhibition in it again. The last one was in the year 2020, one week before the great pandemic had forced us to stop holding exhibitions. It was a great success, over 13K people visited the phaenoBRICKs on it´s playtime. Now I started planing for 2022 and here is the reason I came to you. The phaeno is a museum to do experiments, learn physics, mechanics, chemistry .. and many more. The perfect area to present a nice GBC-project. The last time we only had a small circle with only about 20 GBC-elements. This time I hope to make it larger und bigger. It fits perfect to the phaneo, how you can imagine. I hope .. no it will be great, if it were possible to find and build a community here in this forum that would have the time and desire to carry out this project together with us. I am sure, the phaeno will support you and us, with paying the hotel and getting here for example. The details we can clear up personally later. At first I would be happy to hear from you, we all are very dear and nice AFOLs with familiar atmosphere. We always try to accomodate international guests, last year from France and Austria, next year from Denmark and France again. It would be nice to create a recurring GBC-attraction at the phaenoBRICKS. Greetings from Wolfsburg! llap Olli picture from: https://de.wikipedia.org/wiki/Phæno Von Richard Bartz - Eigenes Werk, CC BY-SA 3.0, https://commons.wikimedia.org/w/index.php?curid=25934991
 -

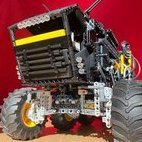
6x4 tractor unit inspired by Scania
functionalTechnic posted a topic in LEGO Technic, Mindstorms, Model Team and Scale Modeling
Hi guys Recently, I finished another model. It is a tractor unit inspired by Scania S-Series trucks. It has 6x4 drive and suspended axles. The front axle is suspended with normal LEGO hard shock absorbers. The rear axles have rubber suspension which imitates air-suspension as used in real trucks. The suspension at the rear axles is a bit hard but chassis is in return flat. The fifth wheel as a self-locking mechanism so that you can couple a trailer easily. To open the fifth wheel a small linear actuator is used. For steering a PU L motor sits directly on the front axle. For propulsion I used two PU XL motors. But check the pictures and video: Instruction at Rebrickable: https://rebrickable.com/mocs/MOC-86508/FT-creations/6x4-tractor-unit-inspired-by-scania/#details -

42132 - Chopper
Ngoc Nguyen posted a topic in LEGO Technic, Mindstorms, Model Team and Scale Modeling
https://www.jb-spielwaren.de/lego-42132-chopper/a-42132/ 162 elements, 9.99 EUR with B model. Go erm nuts? -

[MOD] 'Rusty Bucket' buggy
SilenWin posted a topic in LEGO Technic, Mindstorms, Model Team and Scale Modeling
Greetings, ladies and gentlemen! I'm glad to introduce you a modification of @Didumos69 Greyhound buggy Yeah, "Mad Max" inspired vehicle again First idea was just "increase durability and add some crawler abilities", but result exceed all my expectations. Adding planetary gear reduction 4:1 to all wheels increase offroad capabilities to sky high (keeping in mind perfectly working suspension of original) And final step - I decide to prepare for summer offroad Lego event in Moscow and for future festival, so I reworked exterior in postapocalyptic style. Other photos Here is LDD model of front hub with planetary gear reduction I used in my modification. Rear hub is done similarly, except for black connectors to suspension arms and without U-joint. Bonus: video from "King of the Hammers" race event in Moscow and photo from "Summer Brick" Lego festival in Taganrog, Russia Thanks to @Didumos69 for his amazing buggy and instructions, and also to @Shurik & @VerSen for cool photos! Hope you like this rusty piece of metal! -
Another simple modular building which uses my old idea of spinning gimbals. Video demonstration: Instructions are available on Rebrickable. Thank you for your attention!
-
[MOC] The Snow Racer
mic8per_ posted a topic in LEGO Technic, Mindstorms, Model Team and Scale Modeling
Skid steer off road vehicle. The PF elements are fully protected from snow, and it actually works on harder snow. Driven by two PF L-motors, one motor per side. As a power source can be used BuWizz or any other 4-port battery box (not in the parts list). Building instructions+parts list: https://reb.li/m/95837 -
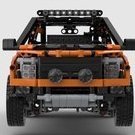
Hello everyone, let me introduce my latest creation. Ever since I get 42093 corvette I had an idea to disassemble it and use all this parts to create something playable and offroad capable. This 1:15 model of legendary F-150 truck was made with Power Functions elements and Sbrick for future truck trial competion or just for indoor fun (because of the weight (1250 g) I think this is not very competitive truck). It was a long project for me because of time constraints so I had started it before LEGO release their bigger one. This model has 4WD transmission with 2 L-motors driving each axle separetly (driving ratio - 3,5:1), servo motor for steering. Front suspension is independent double wishbone, rear is live axle with panara link. The model has openable doors, sunroof, hood and tailgate. Instructions in pdf were made in Stud io (my first experience with this software so it took a long time). Link for instructions: https://reb.li/m/93403 Also I created some additional color options with available parts. I hope to add instructions for those and the video with the orignal orange one later.
-

[MOC][MOD] Unimog U 4023/U 5023
gvo25 posted a topic in LEGO Technic, Mindstorms, Model Team and Scale Modeling
Hello all, With the possible release of lego technic mercedes Zetros, I decided to rebuild my Technic unimog U400 into an unimog U4023. I could do this thanks to the recently aquired Claas Tractor Tyres and the abundant parts of the Liebherr - I find the Liebherr a fantastic set for parts - I modified the cab and I will integrate 2 control+ L motors and 1 XL control+ motor for drive. First I started with the cab, the chassis I'll do next The cab is build on the same base of the U400 cab The cab is not 100% true to the original, lack of various grilles, the front wheel arches are not integrated in the cabin, the air intake etc, but I find it a great start if i can say so myself. The cab features lockable doors Here is a foto of the cab on the original U400 unimog chassis with Claas Tyres. So the next project is to rebuild the chassis with the control+ motors and I also plan to rebuild the front bumper to match the U4023 bumper. Hope you liked it so far -
Hi guys, after several years of silence and other distractions i finally finished a new build. It's an AMG GT3 racecar in the colors of the Octan corporation. The only thing missing i guess is some sponsor decals from octan. The features are: - Drive and steering with powerfunctions (2 L motors, 1 servo) - Independent suspension on all wheels - Fake V8 engine - Working steeringwheel - Chassis is detachable from bodywork - openable bonnet/hood and doors Lately i'm a little bit into simracing and love to watch GT3 racing, so i decided to build my favorite car from this category of racecars. My availability of parts decided the colorscheme. I hope you like it. Enjoy building and have a nice time everyone. Rolf
-

[MOC] Lifted Truck (with 3 Steering Modes)
JLiu15 posted a topic in LEGO Technic, Mindstorms, Model Team and Scale Modeling
Model of a lifted pickup truck combining Control+ and Robot Inventor electronics. Features 4x4 drive, 3 steering modes, a V6 piston engine, and full suspension. Functions/features: 4x4 drive Steering with 3 modes (normal, 4WD, crab) V6 piston engine Full suspension Opening hood Opening tailgate This MOC originally started as a side project back in the summer as I was waiting for parts to arrive for my New Flyer XD60 articulated bus model. I was initially gonna use the C+ L motors for steering and power it with the Control+ hub instead of the Robot Inventor one, but found that the Medium Angular Motors from the Robot Inventor set took less overall space in the axles if I place the rack sideways. So for the front and rear axles (which are identical to each other), I put the steering motor on top which drives a rack placed on its side, and used heavy duty differentials and planetary hubs. This gave the model plenty of torque, even without any additional gearing down in the chassis. At the heart of the chassis sits two C+ XL motors for drive and a Robot Inventor hub above them. Thanks to the abundance of pin holes on the Robot Inventor hub, I was able to use it as a structural element. The sides of the hub are covered by panels, as a teal hub on a red/black model would be an eyesore. The top of the hub is covered as well to conceal the screen lights, and to power on/connect the hub I installed levers that hit the power/Bluetooth buttons. They sit just below the cab/bed, and are pretty well hidden/out of sight. The front and rear ends of the chassis were reinforced well enough to withstand the force exerted on the shock absorbers, and the front also has a V6 fake engine driven by a C+ L motor. I had to rework the suspension a few times to make it work well and not be too soft or too hard, but I still feel like it could've been done a little better. Initially I was undecided on the bodywork for this model - I was debating between a car-like body (like the 41999), a cab-over truck, and a pickup truck. I eventually went with a pick-up truck, and initially used rims from the Land Rover. I decided to make the model in a red/black scheme, as I had a lot of black panels lying around but also wanted to give it some color. I feel like the bodywork could've been designed better overall, as the entire building process became pretty discouraging and I just wanted to get it finished. As I was working on the bodywork I just felt like the Land Rover rims weren't the best choice for a lifted truck, so in the end I went with the Technic Racing Medium rims in LBG for a more old-school look. Overall, this is a creation I'm not too happy with. Building around the Robot Inventor hub was quite a challenge as I had to cover it completely to conceal the teal and the screen lights. This also meant the charging port is not accessible on the finished model. The looks of the model also aren't the best. I feel like using a single color for the bodywork would've been better without the red/black color break between the cab and the bed, but unfortunately I don't have that many red flat panels and didn't want to use liftarm stacking. The model has plenty of torque and can easily climb over obstacles, but it also suffers from being top-heavy. Programming the control profile was pretty straightforward though, and the 3 steering modes worked well. After building this model, I feel like while the Robot Inventor hub is a good alternative to the Control+ hub (more ports, lower height, more pin holes, etc), it just feels harder to use in Technic builds, as the teal doesn't blend well with most colors IMO (which could be solved by using the yellow SPIKE Prime version of the hub as it's a more common color for Technic builds, but would cost a lot of money) and the screen lights need to be concealed in most situations. It's obvious the Robot Inventor hub is designed with robots in mind and not Technic builds, so in the future, I plan on sticking to Control+ hubs unless it's absolutely necessary to use the Robot Inventor one (e.g. a space constraint). Photos: Video: -

[MOC]◄Hummer H1 1992►[2021]
Michael217 posted a topic in LEGO Technic, Mindstorms, Model Team and Scale Modeling
Welcome to my garage LEGO!!! Hello! My name is Michael. I'm a Builder from Russia, I love muscle cars! Hummer H1 1992 Hello everyone! So I have completed my next project, the merger of technology and system! This time I have collected a living legend of Hummer H1! Description: - Drive - 2L motors - Steering - Servo - Power Supply - Small BB - Independent suspension - The steering wheel turns with the wheels - Open the doors, hood... - Well-designed interior and space under the hood - About 2000 parts Instagram: https://www.instagram.com/lego_muscle_garage/ Join my group in VK: https://vk.com/legomusclegarage All photos on the link: https://bricksafe.com/pages/Michael217/hummer-h1-1992 Enjoy your viewing! Rate, comment! Thanks!) -
[MOC] BuWizz Baja Truck
Teo LEGO Technic posted a topic in LEGO Technic, Mindstorms, Model Team and Scale Modeling
Hey guys! I present my new model, a BuWizz 2.0 powered Baja Truck! It features: Independent double wishbone front suspension, with servo steering and positive caster for better return-to-center Live axle rear suspension, powered by a buggy motor and BuWizz 2.0 My goal with this truck was to make a small, lightweight truck with excellent offroad capabilities and smooth suspension travel, while also giving it a realistic look with the least number of pieces. Overall I'm quite satisfied with the result! Here's a video: And more photos: More photos can be found on the BrickSafe page: https://bricksafe.com/pages/Teo_LEGO_Technic/baja-truck Hope you guys enjoyed! -Teo -
.thumb.png.116032e930e483fb4ebbfdc62183bd34.png) Hot Trot - RC Trial Pickup w/ Diagonal AWD I would like to present to you my shot at a 42129 B model. About the name 'Hot Trot': On a very uneven surface, a vehicle typically moves its weight from one diagonal pair of wheels to the other as it proceeds from bump to bump. Hence the word 'Trot' in the name of this model. It refers to a horse proceeding at a moderate pace, lifting each diagonal pair of legs alternately. Instructions are on Rebrickable. Diagonal AWD With Diagonal AWD I mean: 1) having two separate drive trains with equal torque that 2) keep a vehicle going on a very uneven surface while 3) preserving the advantage of having a distribution optimal for cornering. We all know the downside of a classic 4WD setup with three open differentials; as soon as one wheel loses grip, all power will flow to that wheel, causing the vehicle to lose traction. One way to deal with that is to add differential locks like in the Zetros. Another approach that is commonly seen in LEGO Technic builds is to have separate drive trains for front and rear wheels like in the 42099 X-treme Offroader, in which case you need a slipping front wheel and a slipping rear wheel to completely lose traction. This approach however, has two downsides: There is no open distribution of torque between front and rear wheels, which is not optimal for cornering, because the front wheels are not free to average to a higher speed than the rear wheels. On a very uneven surface, for instance in diagonal tests, where wheels start losing contact with the surface, it's likely to have a front and (diagonally opposite) rear wheel loose traction. But what if we would separate the drivetrains diagonally: A drivetrain with a differential between the left front (LF) wheel and the right rear (RR) wheel, and a drivetrain with a differential between the right front (RF) wheel and the left rear (LR) wheel? The resulting 'Diagonal AWD' would serve two major benefits: While cornering, the LF and RR wheels will average to a speed that is almost equal to the average speed of the RF and LR wheels. So not having an open distribution between two diagonally arranged drivetrains is much less of a problem than with separate drivetrains for the front and rear axles. On a very uneven surface, where wheels start losing contact with the surface, the wheels that still have contact are typically lined up diagonally. With Diagonal AWD, the vehicle will still have traction, even without additional differential locking. The vehicle will only lose traction when two wheels at one end or at one side will lose grip. Drive trains I wanted to have the motors at the same level as the rest of the drivetrain to keep the center of gravity low. I came up with a fairly flat setup with longitudinally placed motors, a differential at the heart of each drive train and bevel gears to make the 90 degree angles towards the wheels. Each motor drives a 16t clutch gear locked to the differential using a 'floating' driving ring. After some trial and error the best option to properly brace the bevel gears that make the 90 degree angles to the wheels, turned out to be a symmetrical setup with the motors rotating in opposite directions. Because of these opposite directions, using a clutch gear to make the drivetrains cross in a completely flat layout, was not an option. The clutch gear would rotate in opposite direction compared to the axle it's attached to, which would give loads of friction, particularly in motorized models. But luckily, the Zetros has exactly the right gears to make the drivetrains cross independently. The biggest challenge was to prevent the gears that make the 90 degree angles from slipping. I've experimented a lot, but no matter how strong I braced the bevel gears, I could always make them slip with my bare hands, using 24t gears to put force on the axles. So the goal was to make sure the gears can at least handle the power provided by the motors without slipping, even when one drivetrain gets completely blocked. I eventually succeeded, but it has cost me long hours of tinkering and trial and error. I created completely locked up structures for the bevel gears, using the 4 available 5x7 frames and 8 of the 11 beams with alternating holes. These structures are also tailored to fit the main structure well and to provide form-locked mounting points for the suspension arms. The two assemblies are extremely hard to build, because you can only insert the gears and axles after the structure has been put together. Suspension I incorporated independent double wishbone suspension with the springs arranged in a pushrod style. The springs have been mounted such that they compress by approximately 33% under the vehicle's own weight. This gives a very nice road holding, because the springs can both expand and compress while taking bumps. I managed to optimize the spring setup for max suspension travel, which is about 3L, which fitted my objectives perfectly. The suspension travel shouldn't rule out the chances of having a wheel coming loose from the surface, because that's when the Diagonal AWD kicks in. It seemed obvious to use the new longer male half of the CV-joints for the rear axles, so the rear axles use 8L suspension arms. The suspension arms of the front axles are shorter, because I had to build the gear-rack assembly around the drivetrain axles and wanted the steering links to have the same length as the suspension arms to avoid bump steering. The steering setup has an Ackermann geometry. The steering links have been reinforced such that they never detach from the gear-rack assembly and the gear-rack assembly itself has been braced in a way that rules out unintended transversal movement. The 2 phone handsets came in handy for this purpose. Chassis and bodywork The main structure is as stiff as I could possibly make it. I even used the motors as structural elements to add to rigidity. I wanted to rule out flex as much as possible, because I wanted to demonstrate how responsive the suspension is and because a flexible chassis would reduce the chances of the Diagonal AWD kicking in. Apart from the extensions necessary to mount the springs, the main structure is just 5L tall. On top of this main structure I've build a strong structure for the cabin of the vehicle. The bodywork does not have any features like openable doors or whatever. People that know me, know that I'm mainly interested in drivetrains and suspension. The bodywork is robust however and I did pay attention to the interior this time. You can lift it by the roof and I also made it very easy to remove the battery box. Powered Up Profile Because I don't use the medium motor, and because I have the large PU motors running in opposite directions, I could not use the Control+ app to operate this model. However a default profile in the Powered UP app could be easily tweaked to what this model needs: Finally I want to mention that I started using Energizer Ultimate Lithium Mignon batteries for my MOCs. They are strong, long-lasting and most importantly; they are at least 20% lighter than alkaline batteries. Photos
Hot Trot - RC Trial Pickup w/ Diagonal AWD I would like to present to you my shot at a 42129 B model. About the name 'Hot Trot': On a very uneven surface, a vehicle typically moves its weight from one diagonal pair of wheels to the other as it proceeds from bump to bump. Hence the word 'Trot' in the name of this model. It refers to a horse proceeding at a moderate pace, lifting each diagonal pair of legs alternately. Instructions are on Rebrickable. Diagonal AWD With Diagonal AWD I mean: 1) having two separate drive trains with equal torque that 2) keep a vehicle going on a very uneven surface while 3) preserving the advantage of having a distribution optimal for cornering. We all know the downside of a classic 4WD setup with three open differentials; as soon as one wheel loses grip, all power will flow to that wheel, causing the vehicle to lose traction. One way to deal with that is to add differential locks like in the Zetros. Another approach that is commonly seen in LEGO Technic builds is to have separate drive trains for front and rear wheels like in the 42099 X-treme Offroader, in which case you need a slipping front wheel and a slipping rear wheel to completely lose traction. This approach however, has two downsides: There is no open distribution of torque between front and rear wheels, which is not optimal for cornering, because the front wheels are not free to average to a higher speed than the rear wheels. On a very uneven surface, for instance in diagonal tests, where wheels start losing contact with the surface, it's likely to have a front and (diagonally opposite) rear wheel loose traction. But what if we would separate the drivetrains diagonally: A drivetrain with a differential between the left front (LF) wheel and the right rear (RR) wheel, and a drivetrain with a differential between the right front (RF) wheel and the left rear (LR) wheel? The resulting 'Diagonal AWD' would serve two major benefits: While cornering, the LF and RR wheels will average to a speed that is almost equal to the average speed of the RF and LR wheels. So not having an open distribution between two diagonally arranged drivetrains is much less of a problem than with separate drivetrains for the front and rear axles. On a very uneven surface, where wheels start losing contact with the surface, the wheels that still have contact are typically lined up diagonally. With Diagonal AWD, the vehicle will still have traction, even without additional differential locking. The vehicle will only lose traction when two wheels at one end or at one side will lose grip. Drive trains I wanted to have the motors at the same level as the rest of the drivetrain to keep the center of gravity low. I came up with a fairly flat setup with longitudinally placed motors, a differential at the heart of each drive train and bevel gears to make the 90 degree angles towards the wheels. Each motor drives a 16t clutch gear locked to the differential using a 'floating' driving ring. After some trial and error the best option to properly brace the bevel gears that make the 90 degree angles to the wheels, turned out to be a symmetrical setup with the motors rotating in opposite directions. Because of these opposite directions, using a clutch gear to make the drivetrains cross in a completely flat layout, was not an option. The clutch gear would rotate in opposite direction compared to the axle it's attached to, which would give loads of friction, particularly in motorized models. But luckily, the Zetros has exactly the right gears to make the drivetrains cross independently. The biggest challenge was to prevent the gears that make the 90 degree angles from slipping. I've experimented a lot, but no matter how strong I braced the bevel gears, I could always make them slip with my bare hands, using 24t gears to put force on the axles. So the goal was to make sure the gears can at least handle the power provided by the motors without slipping, even when one drivetrain gets completely blocked. I eventually succeeded, but it has cost me long hours of tinkering and trial and error. I created completely locked up structures for the bevel gears, using the 4 available 5x7 frames and 8 of the 11 beams with alternating holes. These structures are also tailored to fit the main structure well and to provide form-locked mounting points for the suspension arms. The two assemblies are extremely hard to build, because you can only insert the gears and axles after the structure has been put together. Suspension I incorporated independent double wishbone suspension with the springs arranged in a pushrod style. The springs have been mounted such that they compress by approximately 33% under the vehicle's own weight. This gives a very nice road holding, because the springs can both expand and compress while taking bumps. I managed to optimize the spring setup for max suspension travel, which is about 3L, which fitted my objectives perfectly. The suspension travel shouldn't rule out the chances of having a wheel coming loose from the surface, because that's when the Diagonal AWD kicks in. It seemed obvious to use the new longer male half of the CV-joints for the rear axles, so the rear axles use 8L suspension arms. The suspension arms of the front axles are shorter, because I had to build the gear-rack assembly around the drivetrain axles and wanted the steering links to have the same length as the suspension arms to avoid bump steering. The steering setup has an Ackermann geometry. The steering links have been reinforced such that they never detach from the gear-rack assembly and the gear-rack assembly itself has been braced in a way that rules out unintended transversal movement. The 2 phone handsets came in handy for this purpose. Chassis and bodywork The main structure is as stiff as I could possibly make it. I even used the motors as structural elements to add to rigidity. I wanted to rule out flex as much as possible, because I wanted to demonstrate how responsive the suspension is and because a flexible chassis would reduce the chances of the Diagonal AWD kicking in. Apart from the extensions necessary to mount the springs, the main structure is just 5L tall. On top of this main structure I've build a strong structure for the cabin of the vehicle. The bodywork does not have any features like openable doors or whatever. People that know me, know that I'm mainly interested in drivetrains and suspension. The bodywork is robust however and I did pay attention to the interior this time. You can lift it by the roof and I also made it very easy to remove the battery box. Powered Up Profile Because I don't use the medium motor, and because I have the large PU motors running in opposite directions, I could not use the Control+ app to operate this model. However a default profile in the Powered UP app could be easily tweaked to what this model needs: Finally I want to mention that I started using Energizer Ultimate Lithium Mignon batteries for my MOCs. They are strong, long-lasting and most importantly; they are at least 20% lighter than alkaline batteries. Photos -

[MOC] Lego Technic Tugboat
makushima posted a topic in LEGO Technic, Mindstorms, Model Team and Scale Modeling
Lego Technic Tugboat Lego Technic MOC - Technic Tugboat by makushima Lego Technic MOC - Technic Tugboat by makushima -

[MOD] Motorized Ferrari 488 GTE 42125 set
KirTech LAB posted a topic in LEGO Technic, Mindstorms, Model Team and Scale Modeling
Hi! It's time to upgrade one more shelf model (the previous one was the Batmobile https://www.eurobricks.com/forum/index.php?/forums/topic/180543-mod-motorized-batmobile-76139/&tab=comments#comment-3302360). Ferrari 42125 has a lot of free space, so I've inserted four buggy-motors and a few BuWizz receivers. The chassis is very simple, I've removed suspension, V8, driver seat and steering wheel :) And the bodywork is the same as in the original LEGO set. Here is the result: Thanks for watching :) -

[MOC] Full Lego Technic locomotive - in 1:22,5 scale
Paperinik77pk posted a topic in LEGO Train Tech
Hi all, these days I'm working a lot with Lego Technic, since I've bought some parts to experiment a bit this new world. I'm used to build old Lego Technic from the 80's and 90's...but these new sets are very very complex, and require a lot of time to figure out where and how to put a certain part. So , back to the Stud.io I started designing again...and came out with this thing: It's similar to old steam trams, to the GE 2/2 and HGE 2/2 locomotives, to some service railway cars...to the alternate 7720 model. Oh, well...it's a box and it's similar to all those boxy things! Dimensions are 13/14 stu...holes, units? for width and 25 for body lenght. Both buffers add an additional 6 studs to overall lenght. I'd say it is a small 1:22,5 locomotive, like my old yellow shunter with PuP. Since I'm still not so much able to recreate details such as doors and ladders...I simply avoided them. Pantograph is designed to use a rubber band for the moment - it could be nice to make it foldable with some gears! At least the body is self-consistent and can easily be removed. The battery is fixed on the central upper part of the body, right in the middle to increase weight on all 4 traction wheels. Rods are somewhat triangular and quite strange, but they're strong! Other kinds of rod arrangements can be done. Using a normal gear transmission could also avoid rods at all. The boxy body gives me the internal space to experiment for transmissions and motors. This chassis probably will change a zillion of times like the one of my XXL locomotives. In the picture above, you can see the possibility to have the double gauge solution (left axle is L-Gauge and right axle is configured for 45mm G-Gauge track). The gear you can see in the middle of left axle shows the possibility to implement a cog railway system using Lego flexible track. I sincerely do not know if the 45mm cog tracks could work with a Lego gear - so let's limit the cog solution to original Lego track It can become also a fancy Tram locomotive, like the "Gamba De Legn" ("Wooden Leg") used in Milan for many, many years. But for this one - I'm still struggling to create a proper, working engine. I've seen few full Technic locomotives, but it's really fun to build them! I hope you like it!!! Ciao, Davide -
[WIP] New Flyer XD60 Articulated Bus
JLiu15 posted a topic in LEGO Technic, Mindstorms, Model Team and Scale Modeling
Hey guys, here is a long-anticipated project of mine that I'm finally starting. It is a model of NJ Transit's 2020 New Flyer XD60 articulated bus. My model will be fully motorized, with remote-controlled drive, steering, and opening doors. It'll be either controlled by the PF IR system or by SBrick. The model will be propelled by a PF XL motor, which is already in place. The power source is a PF 8878 battery sitting in the very rear of the chassis. So far I have the rear portion of the chassis built - just missing most of the seats. I've already been building the model digitally on Stud.io for about a month, mostly working on the chassis, so this part should be done relatively soon. However, this is not taking into consideration any potential issues that may arise as I build the chassis in real life. I also have prototypes for the doors' and bellows' mechanisms ready (not pictured), and they seem to work pretty well. So overall, it'll just be a matter of putting these mechanisms together into a coherent chassis. Aesthetics wise, my model will mostly be about the outside appearance, which means I'll focus much more on the bodywork than the interior details-wise. However, the seating layout will still be identical to the original bus, with a total of 59 seats. This is definitely a project I'm really looking forward to. It'll be the first time I model a particular real-life vehicle. I'm a huge fan of NJ Transit's buses and buses in general, and these artics IMO are some of the best buses they've ordered in recent years. And because I'm doing a digital build while simultaneously building in real life, I plan on publishing instructions for this MOC when it's finished. Photo: -
Aloha! If you're willing, I'm in need of some help. So I took notice on the UCS Star Destroyer of how the underside of the stern has a bend to its technic frame. Is there any way to fix this or did I miss a step in building? Heres the link to the image. https://www.flickr.com/photos/190338748@N06/51079892257/in/dateposted-public/
-

42081 - Volvo Autonomous Loader
dimaks13 posted a topic in LEGO Technic, Mindstorms, Model Team and Scale Modeling
-
 REVIEW - 42052 - HEAVY LIFT HELICOPTER INTRODUCTION Helicopters, planes...basically everything airborne is +1 for me. The 9396 - Helicopter is one of my favorite models. I own three copies, which says it all. the news about a new helicopter made me very excited. The news about twin rotors made me even more excited. Although I must admit I was hoping for a Chinook style tandem rotor, instead of a double rotor where one is positioned on top of the other. This set does come with a Chinook style B-model, so maybe that will be worth building. One thing I immediately like better than the 9396 is the color scheme. I love the bright orange-white combination. This set seems to have a huge number of panels, which is not to everyone's liking. Let's find out what's going on underneath that smooth surface! Note: All images can be clicked for hi-res versions. SET INFORMATION Number: 42052 Title: Heavy Lift Helicopter Theme: Technic Released: 2016 Part Count: 1042 Box Weight: 1831 gr Box Dimensions: 57,0 cm x 37,3 cm x 8,0 cm Set Price (MSRP): € 119,99 Price per Part: € 0,115 Links: Brickset, Bricklink THE BOX The box is fairly big, which indicates a pretty big model. Unfortunately the box was damaged. Some cracks and dents, but luckily it wasn't ripped apart, like my Mercedes box. I'm not sure if TLG sends out the sets the same way when they sell via S&H, because I would be slightly disappointed to receive my sets like this. Update: I've seen more complaints about wrecked and/or damaged boxes, so there's room for improvement in the shipping department. The front of the box shows the helicopter lifting it's load. The model is 60 cm long and 53 cm wide. It also shows the contra-rotating rotors. As you can see an M-motor and battery box are included, so there are some powered functions. BACK The back of the box shows which functions are powered. We will deal with the functions later. It also shows the Chinook style B-model, which has motorised functions too. Looking at the front of the B-model I am not very tempted to build it. It looks like a flying guinea-pig CONTENT OF THE BOX The box contains: Sealed instruction booklet with stickers 6 Helicopter Blades 1 Sealed M-Motor 1 Battery Box 2 Soft Axles 10 Unnumbered Bags SEALED INSTRUCTIONS WITH STICKERS The stickers are sealed with the instruction booklet, like we are getting used to with bigger sets. I've said it before, but TLG deserves a big thumbs-up for this! The sticker sheet is still in perfect shape! HELICOPTER BLADES This set contains six of the Large Technic Rotor Blades, first released in the 9396 - Helicopter in 2012. PF BATTERY BOX AND M-MOTOR SOFT AXLES Two Soft Axles, or Flex Axles, are delivered unbagged. 19L? Who knows! More on these later BAGS Ten bags containing the rest of the, mostly white, parts. HIGHLIGHTED PARTS This chapter describes new and interesting parts. Not sure if it's a trend, but like the 24 Hours Race Car this set also has an abundance of panels. I've counted 51 of 'em (not counting the engine covers). It does have two new panels, introduced in most of the 1H 2016 sets. As from today this set officially contains the most Technic Panels. One more than the 42025 - Cargo Plane. 42052 - 51 panels 42025 - 50 panels 42039 - 47 panels BLUE 5x3 BENT PANELS These new Bent Panels seem to be very suited to make fenders/wheel arches and seats. AXLE AND PIN HOLE The axle counterpart of the Pin and Pin Hole. YELLOW 5L AXLE From what I can tell at the moment, the yellow 6L Axle is unique to this set. I made a mistake here. It's actually a yellow 5L axle instead of 6L. RED 6L AXLE Like the yellow 6L axle, the red 5L Axle seems to be unique to this set. This will obviously change over the course of time, but for now it's the only set containing them. I made a mistake here. It's actually a red 6L axle instead of 5L. 19L SOFT AXLES Finally, the black 19L Soft Axles! A lot of people will be glad to see these being used again. Only released in the 8450 - The Mission in 1999, this part has become very rare. DRUM TIPPER Of course these are no Cement Mixer Drum Tippers (60018 - Cement Mixer, 7990 - Cement Mixer). These are Helicopter Engine Covers, and quite good looking ones. They seem to be more versatile then you'd imagine, since they already appeared in 4 other sets. GREEN 3x11 PANEL Two green 3x11 Panels, not to be confused with bright green, used in the 42039. This is the same green as the 42008 - Service Truck from 2013. ORANGE PANELS A collection of 13 orange panels. WHITE PANELS A collection of 34 white panels. WHITE 5x11 TAPERED PANEL PLATE Introduced last year in the Fire Plane, this is a relatively new panel. 2x4 PERPENDICULAR BENT PIN CONNECTOR This 2x4 Perpendicular Bent Pin Connector was introduced in 2013 and it's one of those parts flying under the radar. You won't be needing this every day, but who knows when it might come in handy. PART LIST The set consists of 1042, shown below. THE BUILD Upon opening the booklet with building instructions, I noticed the color of the pages has slightly changed. The pages are lighter blue than we're used to. Probably to increase the contrast and make the difference between the darker colors better visible. This new color is used in every booklet of the new sets. The build setup is a bit different than we're used to. Usually you start by building one side, followed by adding things inside and finished by closing up the model. This time you start by building the fuselage, after which you continue with the gear box and rotors. ROTORS The image below shows the mechanism for the contra-rotating rotors. Actually I made a mistake here. I switched the two turntables. Luckily it didn't take me long to find out. At the top you can see an Axle Connector with Axle Hole which is connected to an axle going through the turntables. This axle is only connected to one of the turntables (obviously). The first set of rotors is connected to one of the turntables, while the other is connected to the axle going through the turntable. This is demonstrated in the video below. GEARBOX Here you can see the setup of the gearbox. A basic setup with a single layer of gears (more or less). You can see the 3L Driving Ring on both sides of the model, used to switch between the different functions. CARGO BAY DOORS I found the mechanism to open the bottom cargo bay doors to be very intriguing. Here you can see three stages of moving the H-Frame down. The video below demonstrates the gearbox and the mechanism for the cargo bay doors. This video shows the gearbox mounted on the fuselage, and the contra-rotating rotors. CARGO CONTAINER The cargo container wraps up the build. FINISHED MODEL Leaving the other building steps for you to discover, we skip right to the finished model. There's always a lot of debate about panels and closing a Technic model with them. I personally love a finished look with panels. Looking at the image below, I can only compliment the designer with his accomplishment. The helicopter looks fantastic! The design itself is fantastic and the color scheme is really spot on. This helicopter looks even better than the 9396 - Helicopter, which I will compare later in this review. The Drum Tipper parts used as engine covers is very well done. You would almost think they are designed to be used in this helicopter. SIDE REAR VIEW In this picture you can clearly see the rear cargo bay door/ramp and the landing gear. The tail rudders are operated manually, which is slightly disappointing. The solution in the 42025 - Cargo Plane was much better. The landing gear is pretty clever though. Very simple, but it works like a charm, using nothing more than gravity. SIDE VIEW The side view shows how well the helicopter has been designed. The panels align very well and the model is almost entirely closed. This is a matter of personal preference, but I absolutely love it. BOTTOM VIEW Yup, there it is...the battery box. You can also see the mechanism to operate the tail wing. I find this to be a weak spot of the model. The lever is positioned very close to the wing itself, which feels a bit useless. It would have been great to operate the wing with the orange Bionicle Tooth located near the tail gate. You can clearly see which panels are used for cargo bay doors. Two 3x11 panels are used as bottom cargo bay doors, and a 5x11 is used as the back cargo bay door (ramp). Both are operated by the Power Functions motor (see features and functions). FRONT VIEW REAR VIEW ADDITIONAL IMAGES Here are two additional images from different angles. PARTS LEFT It's interesting too see TLG provided an extra 19L Soft Axle. It appears to be used in the B-model, but it somehow feels like an added bonus, since this part is wanted by a lot of builders. The 6L"]http://alpha.brickli..."color":11}"]6L Rigid Hose[/url], which is also used in the B-model, is extra too. Since the instruction booklet tells us we are only supposed to get a single 19L Soft Axle, I am not sure whether it's used in the B-model (it looks that way though). FEATURES AND FUNCTIONS This set has the following features: Contra-rotating rotors (Power Functions) Opening bottom cargo bay doors (Power Functions) Opening rear cargo bay door/ramp (Power Functions) Operating the winch Operating tail wing (Manual) Operating tail rudders (Manual) Landing gear Castering nose wheel The following video demonstrated all of the functions/features. I have added an IR receiver and I am using a PF remote to operate the powered functions. As you can see all the functions work very smooth. The powered functions work pretty fast, so there's no waiting for ages before the cargo doors open up. The winch is the slowest of them all, but that makes sense. As you could read in the review, I don't really like the manual tail wind and rudder functions. I know a designer needs to make concessions, but wasn't it possible to operate the tail wing with the orange bionicle tooth. The castering nose wheel does work properly, and so does the landing gear. Both very simple, but they do their job. SUMMARY Like I said at the beginning of my review, I am fan of flying machines. And to be honest, I am an even bigger fan of helicopters than planes or jets. This might influence my judgement. I am also a big fan of white, orange and grey, so that's another plus. And I happen to like models finished with panels. Do you see where this is going?! I absolutely love this model. The 9396 - Helicopter was one of my favorite models, but I like this one even better. The closed design is something I like a lot, as long as the model is packing some functions too. Panels alone don't cut it. Well, this set has some cool features under those panels. The mechanism for the contra-rotating rotors is pretty nifty. So are the bottom cargo bay doors. The things I like the least is are the tail wing and tail rudders. The tail wing is operated manually, but it's a simple lever positioned very closely to the actual wing. And the rudders are operated by simply moving the rudders themselves. As with the Mercedes I am not a big fan of operating a model by using the switch on the battery box. It confuses me, and you can't easily reach it. I understand TLG can't throw in a remote and IR receiver each time they supply a PF motor, but it's probably one of the modifications most AFOLs will immediately apply. That being said, I absolutely recommend getting this fantastic model! SCORE Okay, so how do I grade this set? 9 DESIGN Absolutely magnificent. 8 BUILDING EXPERIENCE Great build with some clever techniques. 8 FEATURES Great functions, but rudder and tail controls need improvement. 8 PLAYABILITY Lots of things to operate, but would work better with a remote control. 9 PARTS Contains lots of new parts and loads of white panels. 9 VALUE FOR MONEY Worth every penny. Will buy another one. 8,5 ABSOLUTE EYECATCHER BONUS COMPARISON I will end this review with a comparison between the "new" and "old" helicopter. As you can see my 9396 has a yellow and black color scheme, instead of the original yellow and red, but it will give you a clear picture on how these two compare. More pictures can be found on my Flickr page. Thanks for reading and I hope you enjoyed it.
 -
[MOC] RC Mars Rover with 11+ functions
teetertater posted a topic in LEGO Technic, Mindstorms, Model Team and Scale Modeling
This is a project MOC I've been working on during my evenings and weekends for about 5 months. I really tried to cram in all the features I thought would be cool. The rover weighs just short of 3kg, has 11 motors, over 4 meters of pneumatic hose. It's controlled with two remote controls. Getting all those features with limited parts and tight space constraints was a huge challenge Main Functions: 4W Drive, Steering Switch between crab and 4-wheel steering "Solar Panel" unfold/fold Crane up/down, left/right, extension/retraction, "pincer" Cargo bay door open/close Pneumatic airlock Fully RC Other small stuff: Rotating satelite dish Detailed cabin Independent suspension on all wheels Two servos each control two pneumatic functions Design process I started with the chassis, and moved on from there. Driving and steering worked a lot better before it put on all the weight! I had to plan ahead for everything I wanted to add and how it would fit together, which got really complicated so I had to start drawing out the connections. I basically had one drawing for how the modules physically fit together, one for the pneumatics connections, and one for the electronics. Even things like the lengths of the cables would determine which battery I could hook them up to, and every single battery connection and remote control button is in use. I used a few clever tricks to give motors more than one function. For example, each pneumatic pump is also a switch, depending on the direction it spins, using a design I borrowed from youtube. Each servo motor controls two switches each, because by design it was possible to make functions opposites of each other. The pneumatics engage in order of easiest to most difficult, so there are some rubber bands to set the order of activation. E.g. the up/down motion of the crane is paired with the storage lid. Improvements There are a lot of possible improvements that could be made, but I'm eager to move on to the next project and I'm happy enough with it already. Here's what I would change: Less functions overall. My line of thought when I started this project was "ooh I'll make everything with pneumatics because they're cool, and make it all remote control, and add crab steering because why not, and etc etc". But then it really dragged on forever. Next time I'll keep it small and simpler. Especially now that I've ticked most of my idea boxes No / fewer remote-control pneumatics switches. I did it, it's possible, but it takes up a lot of space and often doesn't work so well More robust steering (and no crab steering). The crab steering takes up like a third of the space and adds a ton of weight, and doesn't work very well. After trying it myself, I'm even more impressed by Madoca's shaman If a vehicle, all wheel drive For something so heavy and high torque like this, i'll definitely keep each driveline on separate batteries. Having two drivelines (left and right) improved the performance a lot, but since I needed every single battery output I moved all motors to the same battery, which killed performance I'll probably avoid exteriors and paneling — I'm not that great at it and it just adds weight Inspiration The idea and inspiration came from Eurobricks mars mission contest (ZeroBricks, Samolot, Kubic5), Simon stallenhag's artwork, and image searches for mars rover concept art I'll take more (and higher quality) pics of it as I take it apart, just need to wait for a free day with good lighting! Happy to answer any questions! Thanks for reading -

[MOC] Forklift - 8460 alternate
The01 posted a topic in LEGO Technic, Mindstorms, Model Team and Scale Modeling
Hello, here is a new MOC - a Forklift. It is an alternate build of the 8460 - Pneumatic Crane Truck / Mobile Crane. It is kept in the typical studful technic building style, like the 8460 - crane. Its features are: Fork moving up and down Tilting of the fork (pneumatic) I'm very new here, please ask me questions and give me suggestions how to improve my posts, thank you! Here is a video: And some more photos: Even more photos! Instructions! Thank you for reading! I hope you like it. -
-kpia.thumb.png.a265cddff9575859eea3a4d2aad663c2.png)
MOC RC Hägglunds BV 206 ATV
Technic BOOM posted a topic in LEGO Technic, Mindstorms, Model Team and Scale Modeling
Please suport my project on Lego Ideas. https://ideas.lego.com/projects/bc17ae38-b3e7-4cb2-b804-401e0bcc7aef Power functions: 3x L-motor 1x IR Receiver 1x IR Remote Control 1x AAA Battery Box 1x Control Switch 1x Extension Wire Description All openable doors. Model have fake motor V6. Color: Black and Yellow Number of Pieces: 800-100 Thank you very much for your support! Military version: Hägglunds BV 206s