Search the Community
Showing results for tags 'LDD'.
Found 891 results
-
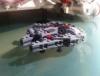
Hello Folks, i was so disappointed by the official Lego B-Wing. I really like this underestimated spaceship.In my opinion LEGO did a gerat job to capture all the details of the asymetric design in the UCS model. But 75050 isn't the UCS version . The main differences lies in the shape of the wings. They are so thin and looks cheap in comparison to USC. This was the reason to modifiy my B-Wing and I would like to share these changes Here we go... LDD-File (lxf) Original vs. modified Modified version: rendered using Bluerender(0005) and SunFlow MOD and the real guy... B-Wing_75050_Modified_V17_LarsInteractive.lxf
-
I've had the itch to build but haven't had the time/money/effort to build in actual bricks lately. Thank goodness for LDD - Keeping my creativity alive! Blacktron 3 Torgos Dropship - Holds 12 Blacktron troopers in the belly and is piloted by a crew of three. Has some cannons for added "pew pews" and should be VTOL but it's not. I hope you like it!
-

LDD 4.3.12 update could be possible??
CorvusA posted a topic in Digital LEGO: Tools, Techniques, and Projects
Hi, In theory, should be coming a new update for LDD, no?? Someone knows something about that? -
Ever since I got my 21309 Saturn V, I thought it would be cool to have a model of the launch tower to go with it. Well, it may be a long time before I get a chance at building this model for real, but I have completed the digital design! If anyone is interested, an LDD file is available from my bricksafe page: https://www.bricksafe.com/pages/NathanR/real-space/apollo-lut Original first post: Ever since I got my 21309 Saturn V, I thought it would be cool to have a model of the launch tower to go with it. I'm clearly not the only one because a similar model recently reached 10k votes on Lego Ideas - however, I'm impatient and so I decided to start building my own. I've been working in LDD due to a lack of physical bricks, and the first (very rough) sketch model is complete: The Saturn V rocket was launched from the Mobile Launch Platform (MLP, nothing to do with ponies...), a two story structure on which the rocket was constructed and fuelled. It measured 169x135 feet, or 56x46 studs at 1:110 scale, and also carried a 380 ft tall launch umbilical tower (LUT). The tower featured nine arms that provided electricity and other services to various parts of the rocket, and swung away just a fraction of a second before it blasted off. The rocket did not stand on the engine nozzles, but was instead suspended over a single exhaust vent measuring 45x45 feet. This should be 15x15 studs but I've gone with 14x14 studs for ease of building: I'm particularly proud of the design of the hold down arms: These four clamps held the rocket down until all five engines were confirmed to be running at full power, at which point they retracted behind heat-proof shields and allowed the Saturn V to soar skywards. Three additional holddown arms were located around the pad and have yet to be modelled. I'll add details once I have the core structure sorted. The base of the MLP uses 1x4x6 door frames like the version that was on Lego Ideas - an inspired choice which I've temporarily copied here (I'm actively trying to avoid looking at the Ideas model so I don't copy it), but I'm toying with 1x1x5 bricks to represent the support columns instead. I could really use some help and advice with this model though. How do I make it structurally sound? The MLP is a glorified box with a hole in it, but I've never built anything this big before and I'm not sure how to link together the baseplates. I had a few ideas for some internal supports: Do you think these would be strong enough? Should the outer wall be thicker? Should I criss-cross the entire hollow space with brick beams? How do I strike a good balance between strength and low parts count? You can view larger pictures and find the LDD file on bricksafe. If there's interest I'll make instructions available when the model is complete. Any advice or constructive feedback would be much appreciated!!
-

Understanding LDD's LXFML Schema
Gnac posted a topic in Digital LEGO: Tools, Techniques, and Projects
For a while now, I have been itching to know just how LXFML files work. Although there is official documentation to explain the purpose of the <nodes>, information which details the attributes of these nodes is scarce. The most useful thing to understand would be the "transformation" attribute of the <Bone> nodes, which appears to contain data about the position and orientation of each <brick>. However, before we can even begin to try to understand the comma-seperated values here, we need to understand the LDD grid, how the application displays it to you, the user, and how it relates to the 3D Cartesian Co-ordinate System. Take a look at this image here! This is what I have learned about the LDD grid from doing a series of tests on an instance of part 3039, placed in the very centre of the LDD grid. I planned 32 test cases which resulted in all the basic positions for a brick that I could think of, and made a PHP script to read the LXFs, extract their values, and display them in a comparison table. The X, Y and Z movement values are pretty obvious, but the rotation values less so. 10 tests are pending (because I think I really should have made sense of these values by now), and I see no sense in doing them until I have an "epiphany". Seriously, Just LOOK at the changed values (in red) on that table. Could there be some sort of bitwise combinations going on with fields 1-9? My brain is getting smashed in by plastic rocks here. -
Ever wondered what a large scale caravan would look like? Here, I've made one that has pretty awesome features! Here's the interior! First, there's the kitchen with a cupboard, drawers, microwave oven, 2-burner cooktop and a radio! 2-person bed with quilt! I still need to know how I could make a fridge/freezer that can store a lot of food! Luxurious Dining Suite with 2 upholstered chairs, coffee mugs & fruit bowl! Folding Entry Steps! The drawbar. Here, there's 2 gas bottles, jockey wheel, safety chains and even a security lock on the coupler! The sunshade on the kitchen window can be closed for travel! The shutters on the front & back can be opened & closed too! The entry door can also be opened! Waste Water Pipe Interchangeable Number Plates, depending on which Australian state you live in! (I live in South Australia!) Stabilizer Jacks Those new 'Flat Tile 1x1 Half Circle' (Part #24246) pieces make nice trailer lights! Number Plate Light Here's the food! Additional Features: Two Spare Wheels Removable Roof Opening Side Windows Outside Light Now if only there was going to be a car that could go perfectly with the caravan... Maybe a Holden Kingswood or Belmont Wagon! Thanks for reading!
-
In the 1960s, Northwestern University embarked on a construction frenzy. Skidmore, Owings & Merrill engineered the reclamation of 75-ish acres from Lake Michigan to roughly double the size of the university's campus in Evanston, Illinois. At the same time, Walter Netsch, an architect at SOM, was appointed to design several buildings, including University Library, for the new land. This is what he came up with. In plan, the design consists of a plaza oriented on an east-west axis, flanked by towers to the north, south, and east. Corridors on the west end of the library connect to the university's existing library, built in 1932-33. Netsch's concept, designed for the oncoming Digital Age, was that each of the three towers, organized around a central block, should house a different collection. Shelves in the stacks are arranged as spokes on a wheel so that a student should consult the computerized catalog in the center of the wheel to locate and obtain the desired material in minimum time with minimal hassle. It was, and perhaps still is, university policy that all buildings must be faced with limestone. Limestone is much too tasteful for Brutalist architecture, though, so University Library, and most of Netsch's other works on Northwestern's campus, are textured to make the limestone look like concrete. In the original plan, the central block from which the towers diverge was meant to be the entrance. Instead, Netsch's design was changed so the weird octagon thing became the entrance, because it is closer to the university's existing library. The central core still contains the elevators and bathrooms, but the intended entrance hall is now a cafe. Netsch raised the library's stacks on columns so that a person standing on the plaza, looking to the east, would have an uninterrupted view of Lake Michigan and the horizon. I'm sure it would have been a nice view, but Netsch's design was subverted in 1971 by the construction of another building immediately to the east of the library. I really don't like this building, but it was fun to design an architecture-type model based on it. All these images were rendered using Bluerender. Thanks for looking!
-
Before you read any further: I want to give massive credits to RenegadeClone (or his brother.. or both.. it's confusing) for coming up with this great MOC and leaving enough instructions for me to reconstruct the model. My version is 90-95% the same and I can only take credit for making the model and some small differences in detail (I'll get to those later). RenegadeClone's done a great job. You can find the original topic here. Having said that, things are easier to build when you have an LDD file. A small introduction I'm Krispy. I've been lurking here for a while, taking in ideas and techniques. Now that I've started building again, I figured it's good to share. I'm a big fan of Star Wars universe starfighters, but only the classic trilogy and the stuff after that. I love space sims and "Tie-Fighter" in particular; I've wasted half my childhood on that game . And now I've decided to collect Lego version of the starfighters from that universe. In minifig-scale. I was a little bummed out that TLG doesn't have a proper B-Wing set. Bummed out until I found RenegadeClone's MOC. The Model B-Wing v1.1 by Krispy's brick stuff, on Flickr There she is, rendered using LDD2PovRay. Total part count: 951. Ouch. There are small differences with the RenegadeClone's original; most concern the cockpit: The cockpit is all light bley; this meant using some different parts The rear cockpit section (with the curved slopes) is completely different in internal construction. The slopes are now attached using 3 stubs making the use of rubber bands unnecessary (I dislike rubber bands). The pilot now has a seat (in dark green!). Flying a B-Wing is tough enough without the physical discomfort.... or so they say. The internal structure of the main wing and the engines is different. I only knew the outside dimensions, so I had to reconstruct them on my own. Internally this B-Wing is probably rather different. Below you will find all the files you need to source the parts and make the model. The LDD model is made using LDD 4.3.5. The partslist spreadsheets was made using LDD Manager, but I've added some extra columns to keep track of the parts that you have ("Have" column) so you can see which bricks you still need. For those of you who don't do LDD, I've exported the instruction to html and put them in a zip; they should work on any browser. The Files The LDD file: v1.0 / v1.1 Partslist (v1.0): XLSX (office 2010) / ODS (openoffice) Building instructions in html (v1.0): link LDD file of the display stand: link If you want to figure it all out yourself, stop reading and start building. Below I've posted some notes on sourcing the parts and building the model that you may find useful though. Sourcing the parts Please note that there are a small number of rare-ish parts used in the model, so check if you have these or are able to order them before you start your Bricklink frenzy: Large hard plastic wheel in classic grey Wedge 4 x 4 (Slope 18 Corner) in light bley; you'll need 4 Most parts in sand blue 4L bar in dark grey/dark bley; dark grey shouldn't be too hard, but dark bley is rarer 8.5L Hose in classic grey Also note that if you need to source almost all parts (like me; my lego is older, so I only have classic grey), this beast will set you back considerably. It has almost 1000 parts. By my estimation I've spend somewhere between €100 and €120 on parts (about $125 to $140). It's not cheap. If you use LDD Manager to check if you can do other colours instead of sand blue, you will only find a small number of basic colours. This is due to this brick. If you want to know what your real options are, paint this brick black in the model. If you are having trouble sourcing sand blue parts (I'm looking at you fellow europeans), dark bley offers a good alternative though your model will look more like the UCS B-Wing that way. Building considerations It's possible to build this model using the LDD generated instructions. I've done so, proving they actually work, but they are a bit weird and unlogical. The LDD model has been grouped in to logical groups, so you might want to check those. As reference, I've rendered a picture showing these elements. Minifig-scale B-Wing v1.0 in parts by Krispy's brick stuff, on Flickr Below I will note some things you want to look out for. Engine covers by Krispy's brick stuff, on Flickr Build these engine covers seperate and add them to the model later (after step 180 or something). Engine (build this first) by Krispy's brick stuff, on Flickr That means you want to build this engine part first. Exhaust close-up by Krispy's brick stuff, on Flickr Note that the technics half pins do not go in all the way. That's not a bad thing though: you now have the option to add a 2x2 dish giving your exhaust the same look as the offical TLG sets (eg. the 9493 X-Wing). Technics tubing not in instructions by Krispy's brick stuff, on Flickr Note that this piece of pneumatic tubing is not on the LDD model. The holders are though; look at the completed model (all the way below) to see where it slots between the two torpedo launchers. Fix for curved plate problem by Krispy's brick stuff, on Flickr I had a problem with the narrow 1 stud wide cover plate for the rear of the main wing: it curved outwards (to the left in this picture) because a 1x12 plate I used wasn't straight!! Using this modification at the bottom of the assembly, I was able to hold it in place. Cockpit axle mount thingy in place by Krispy's brick stuff, on Flickr Notice that I used old school connectors with studs on the side. This means the model is a bit sturdier on top (also I have, like, tons of these parts). Cockpit section by Krispy's brick stuff, on Flickr Cockpit with seat. Notice that the headrest has two 1x1 dark bley plates instead of one in the LDD model. This depends on what helmet your minifig pilot is wearing. Build complete! by Krispy's brick stuff, on Flickr Build complete! It's big, it's heavy. If anyone has suggestions on a stand that works for this beast, I'm all ears. I hope you've enjoyed this little write-up. Good luck and happy building if you're going to attempt one... trust me, they are worth the effort: the build was definitely one of the most challenging I've done so far! update 13-01-2013: A stand I've updated the files section with a LDD model of the stand I came up with (see picture below). It's bulky, but sturdy and allows you to show off the model with open s-foils! Stand - front by Krispy's brick stuff, on Flickr update 19-01-2013: version 1.1 I've updated the model to 1.1. Grab the new model file from the files section above! What is different you may ask? Well, there's somewhat less studs on the outside of the model. Oh... and the lower part of the internal skeleton has been redone completely. It definitely feels more rigid now. Check out the differences below! Even if you don't want to update your model with loads of tiles, I would recommend redoing the skeleton. B-Wing v1.1 Skeleton update by Krispy's brick stuff, on Flickr
-

[MOC] Minifig Scale Clone Wars LAAT/i Republic Gunship
IcarusBuilds posted a topic in LEGO Star Wars
Hey everyone, today I bring you my take on a minifig scale LAAT/i or Republic Gunship. Firstly, this thing is complicated... I started working on this early last year, but took a break from it because trying to figure out how to translate the complex shape of this thing was driving my crazy. While there are a lot of really nice gunships out there, I really wanted to see if I could match the narrow profile of the front of the ship, as well as get the flare out to the back that it has. Needless to say, accomplishing that in Lego is not easy, but I think I came up with a decent solution. The entire upper part of the gunship actually tapers from 6 studs wide in the back, down to 4 in the front. The "floor" of the gunship also tapers, which is one of the most common things people seem to avoid in other MOCs, probably because it's a major pain to do and it messes with the door alignment. The doors utilize technic fig hands and mixel joints to achieve the sloping from the front to back of the gunship. The doors were a real challenge due to the angles, and my first go at it didn't have enough head room to allow for a fig to stand inside, so I had to take another go at it, but this version seems to hold up. As usual a pic with my Delta-7B for scale. And some other colour variants. I've also done some test building to make sure that this thing actually works, I was worried that with all the angles it would be extremely brittle, but it holds together better then I thought it would. Inspiration notes: Under wing supports as well as some frontal structure inspired by Caleb Ricks. Front nose roundness inspired by Maelven. Engine build inspired by Chef Aslopert. Engine cones inspired by Kit Bricksto. Flood/Search lights inspired by David Buchholz. -

1920's Village Post Office (76388 style MOD) - with Ford model AA mail delivery truck
Murdoch17 posted a topic in LEGO Town
I've been staring at Hogsmeade Village Visit (set 76388) for a while now (ever since pictures leaked!), trying to figure out how to fit it into my vintage city... I think I may have figured out how to do so now with the added rear halves and removed Winter snow parts. This model's front half was originally from the Honeydukes sweet shop portion of Hogsmeade Village Visit. I added a look-alike back to it, changed the color to red, and turned it into a small post office with inside details on both floors. I also added a truck I built in real life way back in 2011 - modeled after the official Winter Village Post Office truck from set 10222 - which is now back to being used for a postal truck. (I have determined said truck is styled like a Ford Model AA (wiki link) just based on the front end alone.) Yes, the model is missing nine parts not in LDD. This includes four each of parts 48208 and 48205, and one of 35563, all in black for the roof. Inside features are as such: - Ground floor has the public area, with pay counter and several boxes / crates waiting to be shipped. - Upstairs (even though there is no stairs!) is the sorting area with plenty of mail being gone through to be delivered to it's destination. Everyone may have heard of the Ford Model T and maybe it's successor, the Model A. But here is something you may not know: The Model T and later Model A both had trucks made from the basic principles of those cars. They were called the Model TT & Model AA, which is where this Lego model comes in, as it's based off a Ford Model AA truck. (or at least that's what I think it it is - the model was originally from set 10222, Winter Village Post Office.) The rear of the truck has two tail-lights and a license plate. MODEL NOTES: The building can only open 90 degrees due to interference from the roof and building footprint. (The post office will be built shortly after the Polar Express house, and then the heavily-modified 76388 tavern early next year.) Thoughts? -
[MOC] Minifig Scale Clone Wars Eta-2 Actis-class Interceptor
IcarusBuilds posted a topic in LEGO Star Wars
So I've been working on this on and off for the past 7 years. I wanted to have the Eta-2's to go along with my Delta-7B's. Initially my design was heavily based on Gunner's, which I had seen on this forum. The size was very close to minifig scale, and it served as a good starting point. However I ended up unsatisfied with my result. Four years later after having worked on my Ghost, I took another stab at it and started to make a bit more headway. I focused more and more on correcting my shaping and overall design. By the end of last year I had finalized a design that I was pretty happy with, the only drawback being the lack of 29119 & 29120 in yellow. Thankfully they came out with the introduction of the 76897 Audi. Earlier this month I took another look at my design, and while I did still like it, I felt it could use some final tweaks. And by simply changing the mandibles I found a new love for the design of this ship. So much so that I went ahead and updated my version for Ahsoka, and did up all the other versions from the movies. So here we go; My design progress. Anakin's Eta-2 from the Clone Wars, with s-foils open and closed. Some additional views. The cockpit interior and under the s-foils (showing the hole through the wing). The usual size comparison to my Delta-7B. Ahsoka's Eta-2 from the Clone Wars, with s-foils open and closed. Some additional views. And now the designs seen in Revenge of the Sith. Anakin's Yellow Eta-2. With a comparison to the new 2020 75281 Anakin's Jedi Interceptor. Anakin's Green Eta-2. Obi Wan's Red Eta-2. And finally Obi Wan's Blue Eta-2. As a final note, all of these are buildable except for Anakin's green Eta-2 (There are several pieces unavailable in Dark Green and some in Dark Bluish Grey). I have Ahsoka's test built in mostly the correct colours, I've placed a Bricklink order to get the pieces I need to finish both hers and Anakin's CW Eta-2. Once I have them completed I'll take some photos and add them here. As always, enjoy. -
After finishing up the in-the-brick Pegasus, I finally dusted off (virtually) the LDD design I had started on for a version of the Galactica scaled to it. All 100% my own work, this time! I originally designed the sidepods (based on the top half of the Pegasus ones) pretty quickly, but then got so hung-up on the curves and ribs for the engines that I got stuck in a rut and gave up on it. When I came back to it I started at the front and worked my way back. When I got to the engines I used some of the artistic license I had learned to apply to do the missing plating/ribs, and that allowed me to push through to the end result below. She currently weighs-in at a svelte-for-her-age 3087 bricks, and according to LDCad she's 65L x 11H x 25W in bricks (not technically long enough to be a real SHIP, but hey) or ~51cm long by 10cm high by 20cm wide. Pegasus is 54cm long x 13cm high x 26cm wide - and generally a lot bulkier - in comparison. I've still to design a stand, or sticker sheet (need some for the engine nozzles for sure - can't texture them out fully with Lego at this scale), but those can come as I gather the bricks. May need to build this one before I get to the @mortesv Nebulon... So here she is - the grand old lady herself: The pods slide in and out on rails, and kinda recess into the bodywork (as much as I could with Lego, anyway). They're a real PITA to move around in LDD... And here's a view of the underside and engines (the 4 technic 32530 pieces in the middle are placeholders for connecting the stand) with the pods retracted to show how they integrate with the main body: There's another underside shot (front perspective) plus my reference image in my Flickr album. I may go & fire up my old Mac to do a 360 render now... Any feedback, comments or suggestions are welcome!
-
 I've editing in a glow effect in Photoshop up until now, which works alright, but I'm not really satisfied with it. Selecting individual parts with the lasso tool is kind of a pain in the megablocks. I don't actually know anything about POVRay beyond what LDD to POV-Ray Converter lets me do, but I imagine maybe I could do something by mucking about with the "materials". That's a thing, right?
 -
Hi, folks. During last SHIPtember, Ryan Olsen created a SHIP based on Babylon 5 - the EAS Agamemnon. I stumbled across it at the time thanks to some Lego blogs, and at the end of the year decided to build one for myself. Credit for the original Lego design goes to Ryan, of course! I took his WIP pics (here) and final pics (here - awesome photography & Photoshopping!) and reverse-engineered it in LDD to understand how it all held together and what parts were required. Then I used Rebrickable to figure out what parts I needed. To build it, I used the "hide" tool in LDD - hide bricks in reverse order, then undo to play back the build as you follow along. Much more helpful than the absurd LDD-generated instructions... Here's the end result (Flickr album here) - my pics & lighting are not studio-quality, unlike Ryan's! The middle section rotates (manually) and stays put at any angle, so it's well balanced and the turntables provide enough friction to keep it stable. Stats-wise, it's about 95cm (~117 studs) long, 35cm tall and 15cm wide, using ~4700 bricks, weighing-in at just over 3.7kg (8.2lb). I made some guesses as to internal structure (e.g. the turntable connections in the rotating section) and the greebles on top & bottom are my own, but it's very close to Ryan's original design and some reference images of the original. Ryan was kind enough to share the image files he used for the stickers, so I was able to complete the model. I couldn't connect the front & rear side plating in LDD - as I learned here, the connections are just illegal as there's not enough clearance between the side plates and overhanging top & bottom plates in software - however, it obviously works in the brick. I converted the LDD to an LDraw file (using SylvainLS's updated parts mapper here) and used LDCad (which can ignore collisions) to place the plates in order to use POV-Ray to make the renders you can see in my album. I learned a lot doing that! Note that I made some tweaks in-the-brick but haven't re-done the LDraw file or any renders to reconcile the minor differences. It was a fun, frustrating at times, but very rewarding journey, and I'm really happy how it turned out. The SHIP looks awesome on display in my living room. Thanks for the inspiration, Ryan, and thanks to those on this site who helped with the digital stuff! Here's a 360 degree render: https://photos.app.goo.gl/caouE0BlHzarD6C42
-
Belisarius is a pirate boat that after a lot of journeys and adventures, in one of its trips and in its final quest for a long-lost treasure that was located in the abyss, it met a magical sea dragon. The dragon was the guard of the abyss that did not allow bad spirits to rise the surface. After a battle between the dragon and the ship not only was the dragon beaten but also it became the ship’s skeleton. All the sailors were transformed as well into it’s skeleton which also became part of the ship. So now, the ship took the role of the guard and protector until someone else had to win and take with its turn that role. The set includes florescent pieces so when you switch off the light you can see the skeleton, the mystique of the dragon and the darkness vanishes the black bricks of the ship which looks like its flying in the air. More Photos: (Submission has expired) https://ideas.lego.com/projects/d41fa54f-132a-4e85-8264-908b8133be97
-
[MOC] Minifig Scale Hyena-class Bomber & Vulture-class Starfighter
IcarusBuilds posted a topic in LEGO Star Wars
Hey everyone, hope everyone has been doing well. I've been busy working away at expanding my minifig scale MOC collection (Still only digitally atm). And thought I'd bring you something that I haven't really seen around anywhere. A minifig scale Hyena-class Bomber. This one was pretty tricky, but I think it came together rather well in the end. The official LEGO Hyena bomber was alright, but left a lot to be desired. The overall shaping of the ship was kind of off and the walking mode looked nothing like the source material. My goal was to get mine as close as I could and keep it in line with my other minifig scale builds. This was a little harder than I had anticipated, and I had to make one sacrifice right off the bat. There was no way that I could get the legs to physically retract the way they do on the actual ship, even more so at this scale. So unfortunately there is a small bit of "parts-forming" required between modes, but I made it as little as possible. I was able to get the wing mounts to extend out of the main body to allow upper leg movement though. The other thing that always made the model look wrong was using the head build method established by LEGO. While the stickers used to make up the "face" look nice, the overall head shape is left extremely flat. It took a week or so of playing with parts, but I was finally able to come up with a brick-built head design I was happy with. While it may not be perfect, for the most part has the general shaping of the actual Hyena bomber. I then utilized variations of the technique to build the other head-like shapes on the ship, including the targeting head below. I've also included a couple photos with some of my other MOCs for size comparison. Prior to working on the Hyena bomber, I had built a minifig scale Vulture droid, but was unhappy with the stock LEGO style head. However after figuring out the head for the Hyena bomber it wasn't too hard to down-scale to get a suitable head for it too. So since they are fairly similar I'm including the pictures of it here as well. Both ships were designed to use The Clone Wars colour schemes, although it could be debated that they Hyena should be sand blue rather than DBG, but given that practically none of the pieces come in that colour, there wasn't much choice. There are scenes from the show where it does look more grey that blue anyways. As always, hope you enjoy! I'll be back soon with my minifig scale ATT and DDT. -
Fictional four-stack ocean liner - RMS Allemann - LDD WIP (so far)
Murdoch17 posted a topic in Special LEGO Themes
This ship was designed to replace my original micro scale ocean liner from 2011. It's not intended to represent any real liner per say, though I was inspired a tiny bit by the Queen Mary (located out in Long Beach, CA) and a lot inspired by the Olympic / Titanic / Britannic sister-ships that were sadly scrapped / sunk by iceberg / mined in WW1. Here we see the RMS Allemann at sail at night in the mid-Atlantic sometime in the late 1920's. (this LDD picture was edited to give it a night-time feel. If only the portholes glowed!) The font of the ship (also called the "bow".) features three printed 1 x 6 tiles should spell out the name ALLEMANN on the left and right sides, and along with the stern. The light gray "hatches" at the fore and aft sections of the ship are for loading cargo into the various holds. Statistics: Ship Name: RMS Allemann Ship Type: "Gigantic" Class passenger Liner Owner: Red Star Line Ship Built: 1919 – 1921 Capacity: 400 Crew, 270 First class, 630 Second class, 1,000 Third class Lifeboats: 20 regular boats / 4 collapsible boats with 80 people per boat each (1,920 people total capacity) Builder: Strong & Steele Shipbuilders of London Propulsion: 24 Boilers, 2 turbines, 4 steel propellers Top Speed: 30 Knots Fuel: Diesel (originally Oil) The rear of the ship. (also called the "stern".) The raised portion of the deck is for the docking bridge when the ship is backing into port. The ship features a modular approach to it's construction, allowing for separation of bow and stern for storage ease... and in case I want to build a wrecked version in the future, I just disconnect the four Technic pins to remove the desired section from the rest of the vessel. Also, I thought about Gateway LUG holiday displays, which usually include light-up models in some form, usually modular buildings. These potential lights are now addable via the open bottom of the ship for a neat effect through the portholes. The pennant flag of the Red Star Line as originally used on the RMS Allemann. The RMS Allemann was first proposed in 1914, but World War One prevented it's construction by Strong & Steele Shipbuilders to start until 1919. The ship was modified from it's original proposed engine design to burn oil, and was completed in February 1921. The ship could hold 1,900 people total, with 400 being Crew, with 270 being First class, 630 in Second class, and 1,000 being the steerage, or Third class. The ship sailed it's maiden voyage in July 1921 from Southampton to New York City. The ship was English-owned, and as such, was immune to the new American anti-alcohol laws of Prohibition. The ship took off-peak season sailings (informally known as Liquor Cruises) around the Atlantic, returning to the American port of origin within a couple days. The ship managed to hold a steady service record, and remained relatively full-up until the Great Depression really took hold in 1931. The ship's owners, the Red Star Line, managed to stay financially afloat long enough to get the ship through the worst of the Depression, until the ship was requested by the English Navy as a troop ship in late 1939 for use in World War Two. The Allemann's fancy woodwork was put in storage and the ship was turned into a troop ship relatively quickly. The ship was strafed several times by enemy aircraft during the war, and narrowly missed being torpedoed in 1943, but it survived the war not too much worse for wear. When it was handed back over to Red Star Line, it was given a complete overhaul mechanically and electrically. The whole ship was rewired, and the oil burning engines converted to diesel. The Acadia's woodwork was painstakingly restored to it's original grandeur, and she was ready for for sailing by 1948, almost a year after being handed back to it's original owners. In the early '50's the ship began sailing luxury cruises to the Mediterranean from England and the United States, in addition to it's usual scheduled Atlantic crossings, and had it's third class re-designated as Tourist class. This was because the decline of the Atlantic immigrant traffic pattern was nearly complete. The ship began showing it's age by the late 1960's, when it's original glass dome began to leak badly. A handful of cracks in the reinforced glass caused the ship to be dry-docked, but before it could be fixed the huge dome collapsed in on itself, causing the grand staircase to be heavily damaged. Luckily, the accident happened in the middle of the night, and no one was on board at the time to get hurt by all that broken glass. The ships' dome was replaced, but only because the ship's owners knew of the ship's heritage and couldn't bear to see the old girl scrapped. (Not to mention it would have cost more to scrap the ship than fix the dome) By 1975, she was last four-stack ship in existence, and the owners were planning the grand lady's 55th Birthday for the next year. The Allemann celebrated July 1st, 1976 as her fifty-fifth birthday, and as part of the celebrations she was given to a preservation group dedicated to keeping the ship sailing as an "ambassador of history", as a peek into the way things were and how the men and women visiting and working on the Allemann went about their lives through each period of this ships stoic history. Many former passengers and crew detailed their experiences on the ship in writing or on film for the beginning of what later became known as The Allemann Living History Museum. Today, the ship features a feature-length film that chronicles the story of the ship and it's many passengers and crew through out the ships commercial and wartime lives. The film is shown in the Second Class movie theater, built into the ship in 1947 after World War Two, flowing seamlessly into the 1920's flavor of the ship. The ship still sails, making stops in New York and London (substituted for Southampton) at least twice a year. NOTES: The bow is either a bit too long or the stern too short, but I can't seem to fix that correctly to be "in scale". In fact, it's pretty much assured there is NO scale used with this ship, as I just built what looked good to me. The model will have to be bought sometime in Autumn of this year, as even though it has most of the parts from the 2011 ship inside it, (these have been removed the from the parts list to save money) it still will cost almost (US) $200 to purchase the remaining needed parts to have it done by the Christmas-time show later this year. Any thoughts, comments, suggestions, or complaints on this ship? -
This time, I decided to try building something that I have only ever seen one other MOC of. The J-1 Semi-Autonomous Proton Cannon. This thing has a very unique shape, and some fiddly limbs. I did a fair bit of physical brick building to figure out how I could do the legs, I'm happy with what I came up with. The legs can support a reasonable amount of weight, but overall I think this thing would need a stand to help support it. Anyways, here is what I came up with. A side view. The 3mm tubing is a little funky, but given how tricky is is to bend them in Stud.io I think it is a decent approximation. A comparison to 7869, and to my Delta-7b And action shot for fun.
-
[MOC] Minifig Scale Armored Assault Tank & Defoliator Deployment Tank
IcarusBuilds posted a topic in LEGO Star Wars
Hello everyone, as promised here are my AAT and DDT MOCs. AAT - Armored Assault Tank While LEGOs Clone Wars AAT is actually very close to minifig scale, many of the proportions just aren't quite right. I changed the front sections shape a fair bit, as the actual tank isn't quite so round. It sort of flattens out in the middle, I also added the scoop in the front. In cross-section images it shows that the front domed peace is actually also a hatch, so I added that functionality since it was already on a hinge. There is enough room in the turret for a full droid, even with the hatch closed, you just need to fold the head down. The rear hatch can also open, revealing the droid crew, 1 driver and 2 gunners. Also did a palette swap for the AAT Lok Durd rides around in. DDT - Defoliator Deployment Tank The DDT design-wise isn't too different from the AAT. Shaping the stabilizers wasn't the easiest, but I think they came out alright. The turret itself wasn't too difficult to design, but oddly enough getting the grated platform along the side proved rather annoying. I had to leave it for a while and come at it with different perspective. As always, hope you enjoy. -

Minecraft minifigure heads in LDD!
MatthewRC posted a topic in Digital LEGO: Tools, Techniques, and Projects
I'm not sure if anyone is aware of this, but there's Minecraft minifigure head decals in LEGO Digital Designer! Here are examples. I discovered this when I uninstalled LDD and reinstalled it earlier today. -
Hello. I wanted to ask a question. When I was running through the site I realized that my LDD has something wrong, I can't show it in a photo but, the place to choose the pieces, in LDD Extended there are 30 categories. Whill in someone's LDD here on the site I saw 37 categories, some of which are different from the ones I have. Does anyone know if this is an update you have to do or is it a LEGO addition that you have to download? Remembering that my LDD version is 4.3.11 Brick version: 777
-

Apply decorations and stickers to LDD models
NextLevel5523 posted a topic in Digital LEGO: Tools, Techniques, and Projects
Helo! I made a replica of the LEGO City 3181 model, which is an ordinary commercial airplane, but I found one however, I couldn't find any way to put the stickers that are used in the real model. -
I present to you the backbone of the Rebel Alliance – the GR-75 Rebel Transport: After having tweaked and tweaked my last MOC (Medical Frigate) and built a fleet of fighters and smaller ships for it, I wanted to build something bigger - but in the same scale. I chose the beautiful, organic looking 90-meters long, Rebel Transport. The Medical Frigate can be seen here: http://www.eurobrick...pic=129607&st=0 http://www.eurobrick...howtopic=131170 The Transport is the workhorse of the Rebel alliance, transporting equipment from base to base. The ship can house dozens of odd sized containers kept in place by strong magnetic locks. The Transport, like so many other Rebel ships, have a very organic and beat up look – getting this look right was the biggest challenge when designing the moc. The scale of the model is 1: 250 meaning it is built at 2 meters per stud. Thus the Transport is 45 studs long. Building the most detailed 45 stud version of the ship was my main goal. Based on pictures of the movie model I calculated the width and curvature of the ship – I fired up LDD and began building. What I ended up with was an 850+ brick model made up of 150+ brick types: The Transport takes flight! Front view. In this picture the curvature of the ship is very pronounced. To my luck the range of curved bricks fit perfectly with curvature of the ship. When placed along a central spine they further underline the lines the Transport has across the hull. Don’t mind the small hole in the front – one of the hinges is slightly too bent. Top view. I have mostly used white 1 x 4 curved slopes to get the proper shape. However, to get the dirty, rugged look of the ship, I have mixed in a number of different colors and other curved slopes. The Cargo. The GR-75 can carry a LOT of containers. Creating this part of the ship was kind of a chore but also very fun. At this scale I had just enough resolution to attempt recreating every single cargo container and detail from the studio model. I found a picture of the model showing the bottom up and began mapping every container pipe and greeble I could. I recreated it all with bricks of matching colors, pipes, taps and odd shaped pieces. The end result matches the haphazard stacking of the studio model – I’m glad I put the magnetic locks in place… :) Containers from the back. As with the Medical Frigate, one of the challenges was creating a sturdy non-interfering stand. With this ship one of the stands is placed in the middle of the containers. However I did not want to sacrifice even a single compartment so I found a workaround using transparent wall pieces. The slim piece is fitted snugly in between a number of containers and is just connected via two studs – but it seems to hold :) Container close up. They are all there :) Starboard profile view. This angle reveals the slight sloping of the hull towards the rear end of the ship. The curving effect was achieved by a number of plate hinges and four sections with slightly different angles. Port profile view. The profile views show the gap between the top and bottom hull plates. This gap has a jagged effect on the studio model – conveyed here by 1 x 1 and 1 x 2 plates. Side detail. Yes, there is actually detailing in the narrow gap between the hull plates. Again, the greebling is based on looking at the studio model – and on what was possible in such a small area :) Engine view. As always, one of my favorite parts of a ship. Getting all the engines to fit in there was a bit of a challenge. Rear view. As the Transport flies out of focus the uneven surface is again evident. The Transport has a very small command/deflector module - the little thing on top of the spine. To be in scale this module should actually be about half a stud smaller – even smaller than a B-wing cockpit section. However, the 2,5 stud test I did, did not look very good :) Lastly a scale comparison with the Medical Frigate – and the rest of the rebel fleet :) Thanks to all the supporters of the Medical Frigate project, you have helped make this model possible! Everyone can get the LDD for the Rebel Transport here: https://www.dropbox..../GR-75.lxf?dl=0 Enjoy and please comment!
-
[MOC] Demon-crewed Pirate Ship - "Hell Bent" (4195 /31109 MOD) with brick-built sails - WIP
Murdoch17 posted a topic in Pirate MOCs
This ship was heavily inspired by set 4195 (Queen Anne's Revenge) for the ship itself and set 31109 for the brick-built sails + pirate flag. The vessel is named the "Hell Bent", and is crewed by sailors-turned-demons, led by Captain Victor "Jawbone" Blucher. It will be built after the "Silver Crab" pirate ship is done. The vessel has eight cannons ready to fire at a moments notice. The rear of the ship has the nameplate on the stern, right below the custom brick-built pirate flag. The model has a removable steering area for access to the captain's quarters, which has a desk and chair with two wall lanterns nearby. Captain Victor (the figure on the right side) lost his lower jaw after a pistol shot at a vision of The Man Upstairs rebounded unto him, and was turned into a demon (along with his crew) by said entity for his crime against nature. He also gained an painful iron jawbone as an additional punishment, and so he could communicate with his crew verbally. The Hell Bent and it's crew have roamed the 7 seas for about 28 years now, only allowed to enter a port once every seven years for a week. Just like the legendary storm-tossed Flying Dutchman and it's infernal crew, this ship is a bad omen at sea for merchants, but strangely is considered a good one for pirates, since it was a pirate ship to begin with. Usually, if the ship is sighted by a merchant ship, the crewmate who saw it will then die and join the demon-crew's ranks, but for pirates, it is allowed to get closer to exchange news of the world via bags of mail / news clippings / etc. sent over in waterproofed bags. (In reality, I'm going to use Nexo Knights lava soldiers' heads and torsos for the crew and captain.) If you have any thoughts, questions, complaints, suggestions, or comments, please post them below! -
"Ah, there she is — the Ebon Hawk. My pride and joy; the fastest ship in the Outer Rim!" - Davik Kang. It's been a long time since I've made a Star Wars MOC - 12 years in fact, and my last effort was a rainbow-warrior Delta 7 built mostly from the old Clone Turbo Tank. I turned my attention to the Ebon Hawk, the Falcon's expy from the Knights of the Old Republic games. There have been some excellent versions of this ship over the years, notably @IRONDUCK's playset version, but I wanted to build something of a system "scale model": Here is the Hawk in comparison to the 7965 Millennium Falcon. The Falcon is officially 25.6-ish metres wide, and the Hawk is a little smaller at 22.5m. The ship's proportions were driven by the 4-wide cockpit: IRONDUCK's MOC and the official LEGO Falcons are all a bit chunky in order to fit an interior, but since I took a "scale model" approach, there is no room inside for minifigures. Structure takes the areas occupied by the bunks and cargo holds, leaving us with the central area and the hyperdrive room, which I captured on the Hawk's internal security camera: I pasted my model over a couple of frames from the end cutscene of KOTOR II: Lastly, whom would you pick to fly the Hawk: Atton, T3-M4, or Carth? Thanks for looking. Please see more renders on Flickr.